Table of Contents >> Show >> Hide
- Before You Start: The 20-Second Push-Up Setup (Works for All 4)
- Way #1: Wall Push-Ups (Your “First Push-Up” Without the Floor)
- Way #2: Incline Push-Ups (Counter, Bench, CouchPick a Sturdy MVP)
- Way #3: Knee Push-Ups (Done Right, Not Half-Done)
- Way #4: Negative (Eccentric) Push-Ups (The Secret Sauce for Your First Full Rep)
- How to Progress Without Guessing (A Simple “Earn It” Rule)
- A Beginner Push-Up Plan (10–15 Minutes, 3 Days/Week)
- Troubleshooting: Why Push-Ups Feel Bad (and How to Make Them Feel Better)
- Conclusion
- Bonus: Real Experiences People Have When Learning Push-Ups (About )
If push-ups currently feel like trying to bench-press the planet, you’re not brokenyou’re just at the beginning.
A push-up is basically a moving plank: your arms push, your chest and shoulders stabilize, your core holds the line,
and your glutes keep your hips from doing the limbo. That’s a lot of teamwork for one “simple” exercise.
The good news: push-ups are incredibly scalable. You don’t have to “fail dramatically on the floor” to get stronger.
Below are four smart ways to build the exact strength and control you needwithout ego reps, elbow drama, or wrist rage.
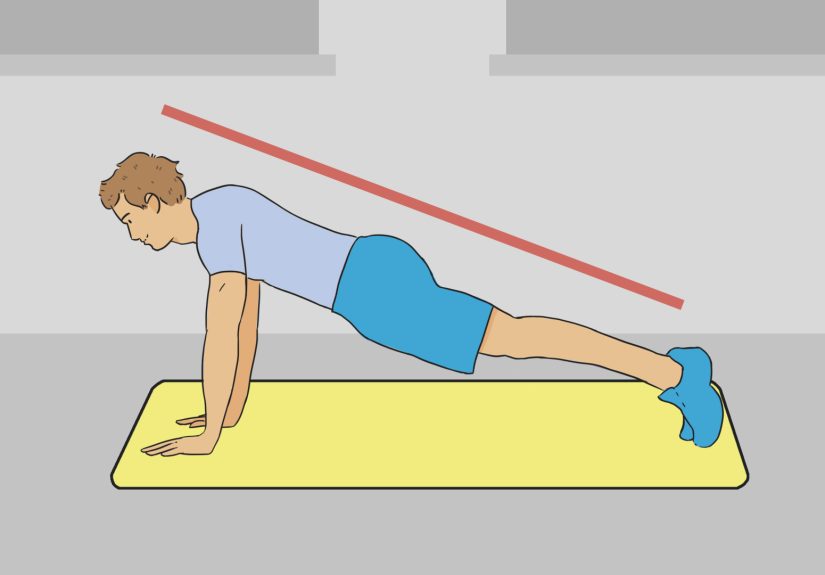
Before You Start: The 20-Second Push-Up Setup (Works for All 4)
Quick form checklist
- Hands under shoulders (or just a touch wider). Spread your fingers and press through your whole palm.
- Body in one line: head, shoulders, hipsno sagging, no piking.
- Elbows about 45° from your ribs (not flared like chicken wings).
- Brace your core like you’re about to cough or laugh at a terrible pun.
- Glutes on so your hips don’t steal the spotlight.
- Range of motion: lower under control, then press back up without bouncing.
If anything hurts in a sharp or “that’s not right” way, stop and adjustchange the angle, reduce the range,
or talk to a qualified clinician or trainer. Discomfort from effort is normal; joint pain is not a badge of honor.
Way #1: Wall Push-Ups (Your “First Push-Up” Without the Floor)
Wall push-ups are the gentlest on-ramp. You’re still practicing the same pushing pattern, but with much less bodyweight.
Think of it as push-up training wheelsexcept these training wheels build real strength.
How to do it
- Stand facing a wall. Place hands slightly wider than shoulder-width at about chest height.
- Step your feet back so your body forms a straight line from head to heels.
- Brace your core and glutes. Keep your gaze slightly down so your neck stays neutral.
- Bend elbows and lower your chest toward the wall under control.
- Press the wall away to return to the start. Exhale as you push.
Common mistakes (and quick fixes)
- Hips drifting forward: tighten glutes and bring ribs down (don’t “hang” on your low back).
- Elbows flaring wide: move hands a bit lower and “aim elbows toward your back pockets.”
- Tiny range of motion: step slightly closer and use a slower tempo to control the descent.
Make it harder
- Step your feet farther from the wall.
- Slow the lowering phase to 3–5 seconds.
- Move to an incline surface (next section) when wall reps feel smooth.
Starter dose: 2–3 sets of 6–12 reps, 2–4 days/week.
Way #2: Incline Push-Ups (Counter, Bench, CouchPick a Sturdy MVP)
Incline push-ups are often the best next step because you keep a full-body straight line like a standard push-up
just with less load. Higher surface = easier. Lower surface = harder. Your kitchen counter might become your
unexpected training partner (it won’t cheer, but it also won’t judge).
How to do it
- Place hands on a stable surface (wall, counter, sturdy table, bench).
- Walk feet back until your body is straight like a plank.
- Hands roughly under shoulders; grip the surface with your fingers for stability.
- Lower your chest toward the surface with control. Keep elbows at about 45°.
- Press back up, finishing tall through the upper back without shrugging.
Pick your starting incline
- Very easy: wall (already covered).
- Easy: high counter or sturdy dresser.
- Medium: couch arm, bench, or table edge.
- Hard: low step or sturdy box (closer to the floor).
Make it work for wrists and shoulders
- Wrist discomfort: try hands on dumbbell handles (as “parallettes”) or a push-up bar to keep wrists straighter.
- Shoulder discomfort: raise the incline and reduce range until you can keep a strong, stable shoulder position.
Starter dose: 3 sets of 6–10 reps, 2–3 days/week. When you can do 3×12 with clean form, lower the surface.
Way #3: Knee Push-Ups (Done Right, Not Half-Done)
Knee push-ups get a bad reputation because they’re often performed with a bent hip and a wobbly midsection.
But a well-done knee push-up teaches the pressing pattern and builds strengthespecially if you keep a straight line
from head to knees.
How to do it (the “straight-line” version)
- Start in a high plank, hands under shoulders.
- Drop knees to the floor and keep your hips forward so your body stays straight from head to knees.
- Brace core and glutes (yes, still).
- Lower chest toward the floor under control. Elbows track about 45°.
- Press back up without letting hips shoot back.
Fix the two most common problems
- Butt in the air: bring knees slightly back and push hips forward so you’re not doing a “kneeling pike.”
- Neck strain: look slightly ahead of your handsnot straight up, not tucked into a double chin contest.
If knee push-ups feel weird on your knees, place a folded towel or yoga mat under them.
If they still feel awkward, go back to incline push-upsthere’s no rule that says “knees must happen.”
Starter dose: 2–4 sets of 5–10 reps, 2–3 days/week.
Way #4: Negative (Eccentric) Push-Ups (The Secret Sauce for Your First Full Rep)
Want a surprisingly effective way to earn your first floor push-up? Train the lowering phase.
Most people can control more weight on the way down than they can press up. That controlled descent builds strength,
coordination, and confidence fastwithout turning every workout into an upper-body yard sale.
How to do a negative push-up
- Start at the top of a standard push-up (high plank), hands under shoulders.
- Brace core and glutes; keep your body as one solid line.
- Lower slowly for 3–5 seconds until your chest is close to the floor.
- At the bottom, place knees down and push back up (or reset by returning to the top position).
Progressions that actually work
- Beginner: 3-second lowers, then reset.
- Intermediate: 5-second lowers, pause 1 second near the bottom.
- Advanced: 5-second lowers + try pressing up from the floor for 1–2 reps per set.
Starter dose: 3–5 sets of 3–6 negatives, resting 60–90 seconds between sets.
How to Progress Without Guessing (A Simple “Earn It” Rule)
Here’s a practical progression rule that keeps you safe and moving forward:
When you can do 3 sets of 10–12 reps with clean form and a controlled lower,
level up to the next variation (or lower the incline).
Example progression ladder
- Wall push-ups
- High incline push-ups (counter)
- Medium incline (bench/couch arm)
- Knee push-ups (straight line)
- Negatives on the floor
- Full push-ups (even if it’s just 1 clean rep at first)
A Beginner Push-Up Plan (10–15 Minutes, 3 Days/Week)
Pick the variation that lets you keep great form. Quality beats quantity. Always.
Day A
- Incline or knee push-ups: 3 sets of 6–10 reps
- Plank (incline or floor): 3 sets of 20–40 seconds
- Optional finisher: 1 set of slow wall push-ups (8–12 reps) focusing on perfect elbow path
Day B
- Negative push-ups: 4 sets of 3–6 reps (3–5 second lowers)
- Scapular push-ups (from plank or incline): 2 sets of 8–12 reps
- Optional: light wrist mobility (gentle flexion/extension) for 1–2 minutes
Day C
- Incline push-ups (slightly harder than Day A): 3 sets of 5–8 reps
- Dead bug or heel taps: 2–3 sets of 8–12 per side (control your ribs and low back)
- Test set: one set to “technical fatigue” (stop when form breaks, not when your soul leaves your body)
Over 2–4 weeks, you’ll usually notice the same pattern: fewer “shaky reps,” stronger bracing, and more consistent depth.
That’s progress, even before your first full push-up.
Troubleshooting: Why Push-Ups Feel Bad (and How to Make Them Feel Better)
“My wrists hate this.”
- Raise the incline so less bodyweight loads the wrists.
- Use push-up handles or hold dumbbells as grips to keep wrists more neutral.
- Try gentle wrist mobility and gradually build tolerance instead of forcing it.
“My shoulders pinch.”
- Bring hands under shoulders and avoid elbows flaring straight out.
- Lower the difficulty (higher incline) and shorten range until you can keep strong shoulder control.
- Focus on “packing” shoulders: think down and away from ears, not shrugged up.
“My hips sag or pop up.”
- Make it easier (higher incline or knees) so your core can keep the plank line.
- Brace first, then movepush-ups are controlled, not chaotic.
- Shorten the set. Stop one rep earlier and keep your form clean.
“I’m not feeling it in my chestonly arms.”
- Slow your lowering phase and aim to bring your chest toward the surface, not your face.
- Keep elbows at ~45° to better share the load between chest, shoulders, and triceps.
- Use a slightly wider hand position (small changesdon’t go extreme).
Conclusion
If you can’t do push-ups right now, you’re in excellent company: most people start exactly there.
The fastest path isn’t brute forceit’s smart scaling.
Start with wall push-ups, move to incline, practice strong knee reps if they suit you, and sprinkle in negatives to build “full push-up” strength.
Your mission is simple: earn cleaner reps at a level you can control, then gradually increase the challenge.
In a few weeks, the floor push-up stops feeling like a boss fight and starts feeling like… well, still workbut your work.
Bonus: Real Experiences People Have When Learning Push-Ups (About )
When people begin push-up progressions, the first surprise is usually not the armsit’s everything else.
Beginners often say, “Why are my abs shaking?” because the push-up demands full-body tension. The tremble isn’t a sign you’re failing;
it’s your nervous system learning to coordinate muscles that haven’t had to cooperate this precisely in a long time.
That “newbie shake” tends to fade as your body gets better at bracing and staying aligned.
Another common experience: the wall push-up feels “too easy”… until you do it correctly.
The moment someone keeps their body in one straight line, lowers slowly, and stops letting their hips drift forward,
the wall suddenly becomes a legitimate training tool. People also notice confidence rising quickly here, because they can practice perfect reps
without the frustration of collapsing on the floor. In that early phase, consistency matters more than intensityshowing up three times a week
often beats one heroic workout followed by three days of soreness and excuses.
With incline push-ups, many learners report a specific breakthrough: “I finally feel my chest working.”
That usually happens when they slow down the lowering phase and keep elbows from flaring wide.
There’s also a practical win: incline push-ups fit real life. A kitchen counter, sturdy table, or park bench becomes a mini gym.
People who struggle to stick with training often succeed here because the barrier to entry is lowno special equipment,
no complicated routine, no “I have to go somewhere.” It’s just: hands on surface, brace, reps, done.
Knee push-ups create mixed feelings. Some people love them because they can move through a bigger range of motion quickly.
Others feel awkward and assume they’re “cheating.” The reframe that helps most is this: a knee push-up is not a lesser push-up;
it’s a different lever. When learners keep a straight line from head to knees (instead of hinging at the hips),
they usually report that the exercise suddenly feels harderbut also more productive. That’s the moment knee push-ups start building
the kind of strength that transfers.
Negatives are where people often experience the most dramatic change in confidence. At first, a 5-second descent feels like slow motion,
and the bottom position can be intimidating. But within a couple of weeks, many notice they can control the descent with less shaking,
touch closer to the floor, and maintain a cleaner plank line. Even before they can press up from the bottom,
they feel “stronger” because they’re no longer afraid of the movement. That mindset shift is huge.
Finally, when someone hits their first full push-up, it rarely looks like a set of ten. It’s usually one clean repmaybe twofollowed by a grin
and the realization that the process worked. The people who succeed long-term are typically the ones who celebrate that first rep,
then go right back to building: mixing full reps with incline reps, staying patient, and treating push-ups like a skill.
That’s the real experience of learning push-ups: small wins stacking into a big one.


