Table of Contents >> Show >> Hide
- What Does “Floating” Mean (And Why It Looks So Good)?
- Why Custom Metal + Mirror Is a Power Couple
- Designing Your Custom Metal Floating Mirror
- The Floating Part: Mounting Systems That Make It Look Effortless
- How a Custom Metal Floating Mirror Gets Made
- Installation Checklist (So Your Mirror Doesn’t Become a Sound Effect)
- Bathrooms: Humidity, Corrosion, and the “Black Edge” Problem
- Cleaning and Maintenance (Streak-Free and Frame-Friendly)
- Cost Drivers (Why Two Mirrors the Same Size Can Price Totally Differently)
- Custom Metal Floating Mirror Ideas (Steal These)
- Wrapping It Up: The Floating Mirror Formula
- Hands-On Experiences With Custom Metal Floating Mirrors (The Real Stuff)
A floating mirror is basically the design equivalent of a well-tailored suit: it looks effortless, but there’s a lot of structure doing the heavy lifting. Add a custom metal frame (or metal “reveal” details) and you get that crisp, architectural look that works in everything from a modern powder room to a moody entryway that screams, “Yes, I own at least one linen spray.”
In this guide, we’re going deep on what “floating” actually means, how custom metal frames are built and finished, the mounting systems that make the mirror look like it’s hovering, and the practical stuff nobody thinks about until they hear the dreaded sound of glass meeting tile. You’ll leave with a plan, a vocabulary, and the confidence to talk to a fabricator without accidentally ordering a mirror that requires a crane.
What Does “Floating” Mean (And Why It Looks So Good)?
“Floating” is not magic. It’s a shadow gap. The mirror (or its frame) sits slightly off the wall so you see a clean line of air around it. That negative space creates depth, makes the piece feel lighter, and adds a high-end, gallery-style finisheven if the rest of the room is still negotiating with that builder-grade light fixture.
Three common “floating” looks
- Hidden cleat float: The mirror hangs on a concealed cleat or Z-clip system so there’s no visible hardware. The piece sits close to the wall, but still reads as “lifted.”
- Standoff float: Metal standoffs (decorative spacers) hold the mirror or frame off the wall by 1/2″ to 2″+ for a bolder shadow line.
- Floating frame reveal: The mirror sits inside a metal frame with a deliberate setback so the reflective surface appears recessed, giving a “frame within a frame” depth effect.
Why Custom Metal + Mirror Is a Power Couple
Metal frames bring sharp lines, slim profiles, and durability. They also let you do finishes that look expensive even when your bathroom is the size of a carry-on suitcase.
Material options (and what they’re best at)
- Aluminum: Lightweight, great for large mirrors, naturally corrosion-resistant, and friendly for wall mounting because it won’t make your studs cry.
- Stainless steel: Strong, sleek, and excellent in humid spaces. Often chosen when you want a premium “forever” frame.
- Mild steel: Heavier and very rigidgreat for ultra-thin frame profilesbut needs a quality coating (like powder coat) to resist corrosion, especially in bathrooms.
Finish options that actually survive real life
A floating mirror gets touched. A lot. Think fingerprints, hair spray mist, toothpaste confettiplus humidity. That’s why most custom metal mirror frames lean on tough finishes such as powder coating (matte black is still having its moment) or plated/polished metal looks (with the right protective topcoat).
Designing Your Custom Metal Floating Mirror
Custom is where you can make the mirror look like it was always meant for that wallnot like it was panic-bought during a late-night “why is my bathroom so sad?” spiral.
Step 1: Size it like you meant it
For vanity mirrors, a safe, classic rule is to keep the mirror the same width as the vanity or slightly narrower. That keeps the whole setup balanced and avoids the “floating billboard” effect. Height depends on sightlines, lighting, and how tall the users are (and whether anyone in the home has strong feelings about seeing their whole hairstyle).
Step 2: Pick the shape that matches the room’s vibe
- Rectangle: Clean, modern, and works with nearly any vanity.
- Rounded rectangle: Same practicality, softer edges, fewer bruised shoulders in tight bathrooms.
- Oval/capsule: Great for vertical lift in smaller spaces.
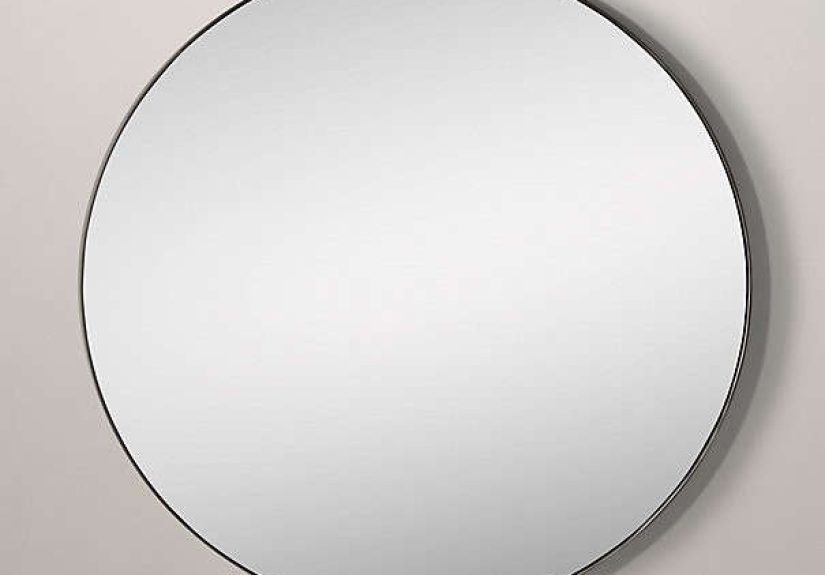
- Circle: A design statement; best when the room needs softness or a focal point.
- Custom arch: Instantly upscalelike your bathroom got promoted.
Step 3: Choose a frame profile (a.k.a. the part you’ll stare at daily)
Metal frames can be hairline thin or boldly chunky. A good starting point: 1/4″–1/2″ face width for minimalist interiors, 3/4″–1.5″ for a more intentional, architectural outline. Depth (how far the frame sticks out) matters even more for floating looksbecause depth creates shadow.
Step 4: Decide on mirror edge details
- Seamed edge: Cleaned and safestandard for framed mirrors.
- Polished edge: If the edge is visible (like a float reveal), polished looks crisp and premium.
- Beveled edge: More traditional; adds sparkle and a slightly “dressy” look.
Step 5: Consider safety upgrades (especially for big pieces)
If the mirror is large, in a high-traffic area, or in a commercial space, ask about safety backing. It’s a film applied to the back of the mirror to help hold fragments together if the glass breaks. It’s not a force field, but it can seriously reduce mess and risk.
The Floating Part: Mounting Systems That Make It Look Effortless
The cleanest floating mirrors usually rely on hidden hardware. Translation: you don’t want a visible wire doing the emotional labor of holding 60 pounds of glass.
1) French cleat / Z-clip systems (the MVP for hidden float)
A cleat system uses two interlocking pieces: one on the wall, one on the mirror/frame. You lift the mirror up, then drop it down so the pieces lock together by gravity. It’s strong, level-friendly, and easy to remove later for repaintingbecause you will repaint. We all do.
- Best for: Heavy mirrors, wide mirrors, and perfectly level installs.
- Float look: Subtle, modern “hover” with almost no visible hardware.
- Pro tip: Use multiple fasteners and hit studs when possible; if not, choose anchors rated for the load.
2) Mirror hangers and clip systems (simple and strong)
Mirror hangers or clip-based systems support the mirror at the bottom and secure it at the top. Some are designed so the hardware is barely visible or can be hidden behind a frame lip. This method is common for large frameless mirrors and commercial installs.
3) Standoffs (the bold, architectural float)
Standoffs create a more dramatic shadow gapgreat for modern spaces, signage-style aesthetics, or when you want the mirror to look like it’s intentionally “installed,” not just “hung.” They can mount through a frame, or through pre-drilled mirror holes (which must be planned and fabricated correctly).
- Best for: Contemporary looks, thick walls/solid backing, and a strong design statement.
- Watch out for: Misaligned holes and uneven wallsstandoffs are unforgiving.
4) Adhesives (use with caution, not confidence)
Yes, construction adhesives exist for mirrors, especially frameless bathroom mirrors. But “adhesive-only” is rarely the right answer for a custom floating metal-framed piece. Humidity, wall texture, and time can all work against you. When in doubt, combine appropriate mechanical fasteners with adhesives as a supplemental measurenot the whole plan.
How a Custom Metal Floating Mirror Gets Made
Knowing the process helps you order smarter (and avoid paying for a redo because you measured once… emotionally). Here’s what typically happens behind the scenes.
1) Measure, then measure like you don’t trust yourself
Pros measure wall width, available height, vanity size, lighting placement, and outlet/sconce obstructions. For standoff mounts, hole spacing is measured down to the millimeter. In older homes, they’ll also check wall flatness, because “square” is sometimes just a rumor.
2) Frame fabrication
The fabricator cuts metal stock (tube, angle, or flat bar), joins corners (welded or mechanically joined), then grinds and finishes seams depending on the look you want. A “seamless” welded frame takes more labor but looks like a single continuous piece.
3) Finish work
Powder coating is popular because it’s durable and consistent, and it handles moisture better than many DIY paint jobs. Brushed or polished metal finishes can look incredible but need proper sealing and maintenance expectations.
4) Mirror assembly + backing
The mirror is fitted into the frame with appropriate setting blocks, adhesives, or mechanical retention. For bathrooms and gyms, many shops recommend edge protection and optional safety backing to reduce risk and help protect the mirror’s backing from moisture creep.
Installation Checklist (So Your Mirror Doesn’t Become a Sound Effect)
Before you drill
- Confirm weight: Know the mirror’s total weight with the frame and hardware.
- Find studs: Studs simplify everything. If studs aren’t available, use heavy-duty anchors rated above your load.
- Level the reference line: A floating mirror makes crooked look extra crooked.
- Protect the edges: Don’t rest the mirror directly on tile or stone during install; use padding or blocks.
- Get a helper: Mirrors are awkward, not just heavy.
Mounting tips by system
French cleat / Z-clip: Keep the wall cleat perfectly level. Use multiple fasteners across the cleat length. Test-fit before committing.
Standoffs: Layout matters. Use a template. If the wall isn’t flat, use spacers designed for the system, not random washers from a mystery drawer.
Clips/hangers: Follow the manufacturer’s spacing guidance and ensure the bottom support is secure before setting the mirror.
Bathrooms: Humidity, Corrosion, and the “Black Edge” Problem
Mirrors in humid spaces can develop edge corrosion over timeoften seen as dark “creep” at the perimeter. A good frame design helps protect the edges, but ventilation matters too. If your bathroom fan sounds like a tired hamster, consider upgrading it. Your mirror will thank you by not turning into a sad, speckled antique.
Smart prevention moves
- Choose corrosion-resistant metals (or coatings designed for wet areas).
- Keep a slight air gap behind the mirror when possible to reduce trapped moisture.
- Wipe down condensation regularlyespecially along edges and frame corners.
- Seal or protect vulnerable joints (corners are where moisture likes to throw parties).
Cleaning and Maintenance (Streak-Free and Frame-Friendly)
For the mirror surface, use a light mist of cleaner and a microfiber cloth. Avoid soaking the edgesoverspray can work its way into seams and backing over time. For powder-coated metal frames, mild soap and water usually does the trick; skip abrasive pads unless you enjoy turning “matte” into “oops.”
Pro-level streak avoidance
- Dust first (you can’t “clean” grit; you can only smear it artistically).
- Use microfiber, not paper towels that shed lint like it’s their job.
- Don’t clean in direct sunlightfast evaporation equals streak city.
Cost Drivers (Why Two Mirrors the Same Size Can Price Totally Differently)
Custom pricing is less about “mirror” and more about “everything around the mirror.” Here are the common factors that move the number:
- Frame material: Stainless steel typically costs more than aluminum or mild steel.
- Finish: Specialty powder coats, hand-brushed metals, or multi-step patinas add labor.
- Thickness and reinforcement: Larger mirrors may need thicker glass or stronger backing systems.
- Mounting hardware: Hidden cleats and standoff systems vary widely in cost and complexity.
- Precision work: Corner seams, hole drilling, and perfect reveals are time-intensive.
Custom Metal Floating Mirror Ideas (Steal These)
1) Matte black thin frame + subtle cleat float
The modern classic. It works with white tile, warm wood, cool stone, and pretty much any faucet finish. If you want “high-end hotel” without the “why is everything white?” vibe, this is it.
2) Warm metal (brass tones) + recessed mirror reveal
Use a deeper frame profile so the mirror sits slightly back from the front edge. The reflective surface feels intentional and luxelike jewelry for the wall.
3) Standoff-mounted mirror in an entryway
A bold float gap looks architectural and makes a narrow hall feel bigger. Bonus: it’s a last-chance outfit check before you leave the house and remember you’re wearing two different socks.
4) Gym or studio mirror with safety backing
For large mirrors in active spaces, safety backing and robust mounting are a smart investment. You’re not planning for disasteryou’re planning for real life.
Wrapping It Up: The Floating Mirror Formula
A great custom metal floating mirror is equal parts design and engineering: pick corrosion-smart materials, choose a durable finish, plan the shadow gap, and use a mounting system that’s actually rated for the job. When you do it right, the mirror looks effortlesslike it’s hovering there purely out of confidence. Which is the exact energy most of us want before coffee.
Hands-On Experiences With Custom Metal Floating Mirrors (The Real Stuff)
Let’s talk about what it’s like to actually live with one of these mirrorsbecause design photos are liars. Not malicious liars. Just… selectively honest. The first time you see a custom metal floating mirror installed, you get that “wow” moment. The shadow line makes it look lighter than it is, and the metal frame snaps the whole wall into focus like an outfit finally has the right shoes. But the most surprising part is how much the mounting affects the experience day-to-day.
For example, the hidden cleat style is the quiet hero. It’s the version you don’t think aboutwhich is the highest compliment you can give hardware. One homeowner I worked with (who shall remain unnamed for legal reasons and because they’d absolutely text me “WHY ARE YOU TALKING ABOUT ME?”) insisted on an adhesive-only install because they didn’t want holes. Two months later, humidity plus time plus gravity started a slow-motion negotiation. We upgraded to a cleat system, and suddenly the mirror was rock solidand removable when they repainted, which they did, because the bathroom paint “felt too calm.” (Translation: they discovered a new shade of green at 11:47 p.m.)
Standoff-mounted floating mirrors are the drama queens in the best way. The bigger gap makes a statement, but it also reveals whether your wall is truly flat. In older homes, you find out quickly that “flat” is a charming myth passed down through generations. The fix is usually simplepurpose-made spacers, careful layout, and the patience to measure twice (or five times, if you’re the kind of person who re-checks whether the stove is off). When it’s done right, the mirror looks like a piece of architecture, not decor. When it’s slightly off, it will haunt you every morning while you brush your teeth.
Metal finishes have their own personality. Matte powder coat is forgiving: it hides fingerprints better and feels modern without trying too hard. Polished or brushed metal is stunning, but it’s honestmaybe too honest. It shows smudges, hair spray mist, and the occasional mystery streak that appears even when no one admits to touching it. The trick is to clean the mirror with a light mist and keep the overspray off the frame edges. Also: microfiber cloths are worth it. Paper towels can leave lint behind, and then you’ll be staring at a tiny fuzz constellation right in your line of sight, wondering how it got there and whether it has friends.
The biggest “I wish I knew this sooner” lesson? Plan the mirror like it’s a system, not an object. Ask about total weight, confirm wall type, and choose hardware that matches both. If the mirror is going in a bathroom, think about ventilation and edge protection. If it’s going in a hallway, think about bumps (kids, dogs, elbows, life). If it’s going in a commercial space, think about safety backing and maintenance. Do those things, and your custom metal floating mirror becomes one of those rare home upgrades that looks great, functions beautifully, and never becomes a story you tell at parties that starts with, “So anyway… it fell.”