Table of Contents >> Show >> Hide
- Why Use a Drop Cloth for a DIY Teepee?
- Materials You’ll Need
- Planning the Shape: What Makes It 4-Sided?
- Step 1: Wash, Dry, and Press the Drop Cloth
- Step 2: Cut the Four Main Panels
- Step 3: Finish the Door Opening
- Step 4: Sew the Panels Together
- Step 5: Create Pole Pockets
- Step 6: Prepare the Poles
- Step 7: Assemble the Teepee
- Step 8: Add a Floor Cushion and Simple Decor
- Safety Tips for a DIY Kids Teepee
- Common Mistakes to Avoid
- How to Clean and Store Your Drop Cloth Teepee
- Design Variations for Different Rooms
- Budget Breakdown
- of Real-Life Experience: What You Learn While Making a Drop Cloth Teepee
- Conclusion
If your living room currently contains a suspicious pile of blankets, couch cushions, and one dining chair being used as “structural engineering,” congratulations: you are ready for a DIY 4-sided drop cloth teepee. This simple indoor play tent gives kids a cozy reading nook, a pretend campsite, a quiet corner, and a dramatic place to announce that the floor is lava. Even better, it uses affordable materials, especially canvas painter’s drop cloth, which has that relaxed, neutral, slightly rustic look people pay boutique prices for.
A 4-sided drop cloth teepee is one of those rare DIY projects that looks impressive but does not require a professional workshop, a design degree, or emotional negotiations with complicated hardware. The basic idea is simple: four poles form the frame, canvas panels wrap around the sides, and a front opening turns the whole thing into a kid-friendly hideaway. You can sew it for a cleaner, longer-lasting finish, or adapt parts of the project with fabric glue, hemming tape, or ties if you prefer a lighter craft approach.
Note: This guide is written for a decorative indoor play teepee-style tent. It is not a sleep product, crib tent, or climbing structure. Always supervise young children, keep the teepee away from candles, heaters, fireplaces, and lamps that get hot, and avoid long loose cords or small detachable decorations.
Why Use a Drop Cloth for a DIY Teepee?
Canvas drop cloth is the secret ingredient that makes this project budget-friendly and surprisingly stylish. It is sturdy enough to hold its shape, softens after washing, and usually comes in a natural beige color that works with almost any room decor. Unlike bright character-print fabric, drop cloth has a calm, “I planned this room” look, even if the rest of the room contains rogue crayons and a stuffed animal committee meeting.
Painter’s drop cloth is also easy to customize. You can leave it plain for a minimalist playroom, stencil stars on the panels, add pom-pom trim, sew on fabric ties, or paint a border near the bottom. Because the fabric is neutral, even small details stand out. A few black triangles can make it look modern. A row of hand-painted dots can make it feel playful. A simple bunting garland can make it birthday-party ready without turning your home into a glitter emergency.
The biggest thing to know before cutting is that cotton canvas can shrink. Wash and dry the drop cloth before measuring your panels. This step feels boring, but it protects you from the classic DIY tragedy: building a perfect teepee, washing the cover later, and discovering it now fits a family of hamsters.
Materials You’ll Need
For a standard indoor 4-sided drop cloth teepee, plan on a finished height of about 5 feet and a base width of about 42 to 48 inches. That size is roomy for one or two small children, works well in a bedroom corner, and still folds down when you need your floor back.
Basic Supplies
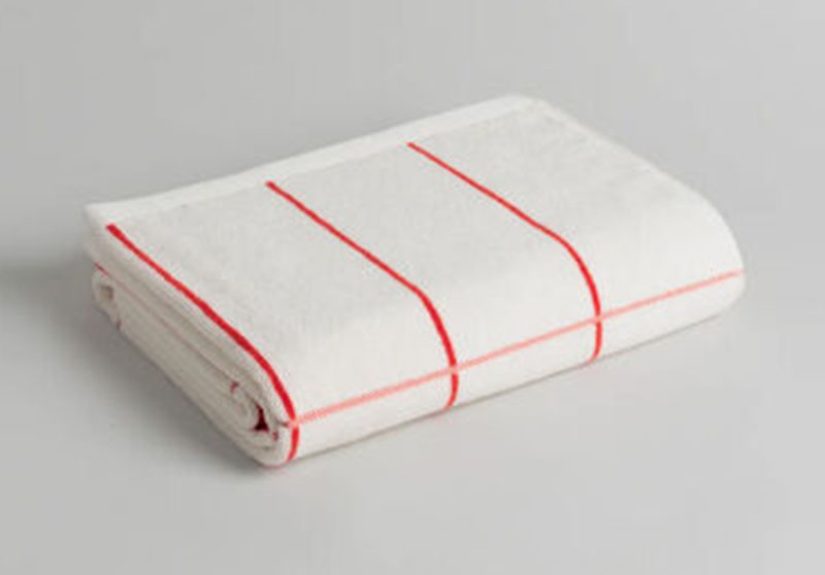
- One 6-by-9-foot or 9-by-12-foot canvas drop cloth, prewashed and dried
- Four wooden dowels, closet rods, or smooth 1-by-2 boards, about 5 to 6 feet long
- Strong cotton rope, jute rope, or paracord for tying the top
- Sewing machine with a heavy-duty needle
- All-purpose or heavy-duty thread
- Scissors or rotary cutter
- Measuring tape
- Pencil, washable fabric marker, or tailor’s chalk
- Iron and ironing board
- Pins or sewing clips
- Drill with a bit large enough for your rope, if drilling holes in the poles
Optional Decor
- Pom-pom trim or cotton fringe
- Fabric paint or stencils
- Bias tape for a polished door edge
- Small fabric flags or bunting
- A washable floor cushion or round rug
- Battery-operated fairy lights used only with supervision
If you want the cleanest finish, use wood poles instead of PVC. Wood looks warmer and pairs nicely with canvas. PVC can work, especially if you want a lightweight frame, but it may look more “science fair” unless painted or wrapped. Choose smooth poles with no splinters, cracks, or sharp edges. If needed, sand the wood before assembly.
Planning the Shape: What Makes It 4-Sided?
A 4-sided teepee uses four vertical supports and four fabric panels. Think of it as a square pyramid with fabric walls. The back and two side panels are usually full triangles. The front panel is split into two flaps so kids can enter and exit easily. The top does not need to close perfectly; in fact, leaving a small opening near the poles helps the fabric gather more naturally.
For a beginner-friendly pattern, cut four tall triangle-like panels with a flat top instead of a sharp point. Each panel can measure roughly 48 inches wide at the bottom, 6 to 8 inches wide at the top, and 55 to 60 inches tall. The exact measurements depend on your pole length and how wide you want the base. The drop cloth teepee does not need mathematical perfection. It needs symmetry, strong seams, and enough room for a child to sit inside with a book, a plush dinosaur, and strong opinions about snacks.
Step 1: Wash, Dry, and Press the Drop Cloth
Before doing anything dramatic with scissors, wash the drop cloth in warm or hot water and dry it fully. This helps remove stiffness, dust, and sizing from the fabric. It also encourages shrinking before you sew. After drying, press the fabric with an iron. Canvas wrinkles can be stubborn, so use steam if your iron allows it.
Do not skip this step if the teepee cover may ever be washed again. Prewashing is especially important because the fabric panels need to hang evenly. If one side shrinks after construction, your teepee may start leaning like it heard disappointing news.
Step 2: Cut the Four Main Panels
Lay the drop cloth on a clean floor or large table. Measure and mark four panels. A simple panel size for many indoor teepees is:
- Bottom width: 48 inches
- Top width: 6 inches
- Height: 58 inches
- Seam allowance: Add 1/2 inch to each side
Use a straightedge or long ruler to connect the bottom corners to the top corners. Cut slowly so the canvas does not shift. If your drop cloth has existing hemmed edges, use them strategically along the bottom of the panels. This saves sewing time and gives the base a neat finish.
For the front, cut one full panel first, then divide it vertically into two door flap pieces. Add extra width to the inner edges if you want the flaps to overlap. A slight overlap looks better than a front opening that gapes like it has just seen your craft-store receipt.
Step 3: Finish the Door Opening
The front opening gets the most action, so finish these edges well. Fold each inner door edge over 1/4 inch, press, fold again, and sew a straight seam. If you want a more decorative look, bind the edges with bias tape. You can also add two small fabric ties halfway down the front opening so the flaps can be tied back during playtime.
Keep ties short and securely stitched. Avoid long dangling cords, especially if the teepee is for toddlers or very young children. For a safer alternative, use short hook-and-loop tabs, fabric loops, or simply let the flaps hang naturally.
Step 4: Sew the Panels Together
Place two panels right sides together and sew along one long side using a 1/2-inch seam allowance. Backstitch at the top and bottom for strength. Continue adding panels until all four sides are connected in a loop, with the two front door pieces forming the final opening.
Canvas can fray, so finish the raw seams if possible. A zigzag stitch along the edge works well. A serger is helpful but not required. You can also press seams open and topstitch them flat for a sturdier, more polished result. Topstitching is especially useful because a play teepee will be opened, closed, tugged, rearranged, and possibly used as headquarters for a stuffed-animal rebellion.
Step 5: Create Pole Pockets
Pole pockets are fabric channels that hold each pole in place. They make the teepee more stable and help the cover sit neatly on the frame. To create them, fold each vertical seam toward one side and sew a straight line about 1.5 to 2 inches away from the seam, depending on your pole thickness. The pocket should be roomy enough for the pole to slide in without wrestling.
If you are using thicker wooden rods, test the pocket width with a scrap piece of fabric first. Too tight, and the cover will be difficult to remove. Too loose, and the teepee may shift around. Aim for “easy slide,” not “laundry-day battle.”
Step 6: Prepare the Poles
Sand the poles until they are smooth. If you want a more finished look, you can stain or seal the wood, but allow it to cure completely before using it around children. About 8 to 10 inches from the top of each pole, drill a hole through the center. Thread rope through the holes when assembling the teepee. This helps keep the poles from slipping down and gives the frame a stronger top connection.
If you do not want to drill, you can wrap rope around the poles several times and tie a tight knot. Drilling is usually more secure, but careful wrapping can work for a decorative indoor tent that is moved gently.
Step 7: Assemble the Teepee
Slide one pole into each pocket. Stand the teepee upright and spread the poles into a square base. Thread rope through the drilled holes or wrap rope around the top several times. Pull the poles together until the fabric looks evenly tensioned, then tie a strong knot. Adjust the base until the teepee stands straight.
This step is easier with two people. One person can hold the top while the other adjusts the legs. If the teepee looks crooked, do not panic. Most teepees need a little wiggling before they settle. Move each pole a few inches at a time and check the fabric tension. The goal is stable, not museum-level geometry.
Step 8: Add a Floor Cushion and Simple Decor
Now comes the fun part. Add a washable rug, a round floor cushion, or a folded quilt inside. Keep the interior simple so kids can move in and out easily. A teepee packed with pillows may look beautiful in photos, but in real life it can become a soft mountain range that children immediately conquer.
For decor, less is often better. Try one of these easy ideas:
- Paint tiny stars on the canvas using fabric paint.
- Add a narrow band of trim around the front opening.
- Sew a small pocket inside for books or flashcards.
- Use removable fabric garland for birthdays or holidays.
- Place the teepee beside a bookshelf to create a reading corner.
Avoid heavy decorations that could fall. Skip glass beads, sharp ornaments, or tiny detachable items. If using lights, choose battery-operated lights that stay cool, secure the battery pack out of reach, and turn them off when playtime ends.
Safety Tips for a DIY Kids Teepee
A homemade play tent should be cute, but it also needs to be practical and safe. Place the teepee on a flat surface away from stairs, doors, heaters, fireplaces, candles, and windows with blind cords. Do not let children climb the poles, hang from the rope, or use the teepee as a gymnastics apparatus. This is a cozy hideout, not a tiny circus tent.
Check the teepee regularly. Tighten the rope if the top loosens. Inspect the seams for stress. Look for splinters, cracked poles, loose trim, or fraying cords. If the teepee is used by toddlers, keep decorations minimal and supervise closely. Never use a DIY teepee as a sleeping enclosure for babies or young children.
Because canvas and drop cloth materials vary, keep the teepee away from flame and heat sources. Fabric play spaces should always be treated as flammable unless you have specific safety information from the manufacturer. If you paint the fabric, use non-toxic fabric paint and let it dry fully before children use the teepee.
Common Mistakes to Avoid
Skipping the Prewash
Unwashed canvas may shrink later. Prewash it, dry it, and iron it before cutting. This one step can save the whole project.
Making the Base Too Narrow
A narrow base may look tall and elegant, but it can be tippy. A wider base gives the teepee better stability and more usable space inside.
Using Weak Thread
Canvas is heavier than quilting cotton. Use strong thread and a heavy-duty needle so the seams can handle normal play.
Adding Too Many Decorations
Trim is adorable until it becomes a maintenance problem. Choose one or two decorative details and attach them securely.
How to Clean and Store Your Drop Cloth Teepee
If your teepee cover is removable, spot clean small marks with mild soap and water. For bigger messes, remove the poles and wash the cover on a gentle cycle if your fabric and decorations allow it. Air drying is usually safer than high heat, especially after the cover has been sewn. Iron lightly if the fabric wrinkles.
To store the teepee, untie the top rope, slide out the poles, fold the fabric, and bundle everything together. If you want quick setup later, mark the inside of each pole pocket with a small label so you know where each pole belongs. This is not required, but it does make future assembly feel less like solving a beige fabric puzzle.
Design Variations for Different Rooms
For a nursery, keep the teepee simple and decorative, placed where adults can enjoy the look without treating it as a crib accessory. For a toddler room, prioritize stability, short ties, and washable materials. For older kids, consider adding an inside book pocket, a small name banner, or painted constellations. In a shared playroom, make the base wider and use a durable floor mat so multiple kids can sit inside without elbow negotiations.
If your home leans farmhouse, leave the drop cloth natural and add cotton fringe. If your style is modern, paint black or charcoal geometric shapes near the bottom. For a boho look, add tassels, but keep them short and secure. For a woodland theme, stencil pine trees or tiny animal footprints. The beauty of canvas is that it gives you a blank page, and unlike an actual blank page, it does not judge you for taking three snack breaks.
Budget Breakdown
A DIY 4-sided drop cloth teepee can often be made for far less than a boutique play tent. A drop cloth, four wooden poles, rope, thread, and basic trim usually cost less than many ready-made kids’ tents, especially if you already own a sewing machine and basic tools. The final price depends on pole quality, fabric size, and decorations. The cheapest version is a plain canvas teepee with rope ties. The pricier version includes decorative trim, custom paint, a cushion, and upgraded wood poles.
If you want to save money, spend on the frame first. Strong, smooth poles matter more than fancy trim. A sturdy teepee with plain fabric is better than a wobbly teepee wearing expensive pom-poms.
of Real-Life Experience: What You Learn While Making a Drop Cloth Teepee
The first thing you learn while making a DIY 4-sided drop cloth teepee is that canvas has a personality. It is not delicate, but it is not always obedient either. It wrinkles, shifts, and sometimes refuses to fold exactly where you told it to fold. That is why pressing the fabric matters so much. A hot iron turns the project from “camping tarp in distress” into “intentional handmade play tent.” If the fabric looks messy during cutting, do not panic. Once the panels are sewn, the poles are inserted, and the base is spread out, the whole thing starts looking charming very quickly.
The second lesson is that children do not care about microscopic sewing imperfections. Adults may notice that one seam is slightly more enthusiastic than the others, but kids see a secret clubhouse. They see a reading cave, a pretend forest cabin, a rocket ship, a puppet theater, and a place to hide from cleanup time. That is the magic of this project. It does not need to be flawless to become loved.
One practical experience worth sharing: test the teepee before adding decorations. Assemble the plain version first. Let it stand for a few minutes. Adjust the pole spread. Open and close the front flaps. Check whether the cover pulls too tightly at the top or sags near the floor. After that, decide where trim, ties, pockets, or painted details should go. Decorating before testing can lead to awkward placement, especially around the door opening.
Another helpful tip is to keep the bottom edge slightly above the floor rather than dragging heavily. A teepee that pools on the floor may look cozy, but it collects dust, gets stepped on, and can make the structure harder to adjust. A clean bottom hem that just kisses the floor is easier to maintain and looks more polished.
Expect the teepee to become part of daily life. It may start as a weekend DIY project, but soon it becomes a reading corner, a stuffed animal hospital, a snack-free zone that somehow contains crumbs, and a quiet spot after a busy day. That is why washable materials are important. Natural canvas hides small marks well, but life with kids is a contact sport. Choose decor that can survive real use.
The final lesson is that simple projects often create the most joy. A 4-sided drop cloth teepee does not require advanced carpentry or expensive fabric. It asks for measuring, patience, a little sewing, and the willingness to crawl inside at least once to confirm that yes, it is cozy. And when a child pulls back the canvas door and declares it their new house, library, castle, or dragon cave, the effort feels completely worth it.
Conclusion
A DIY 4-sided drop cloth teepee is affordable, customizable, and genuinely useful. It creates a soft indoor play space without requiring a major renovation or a giant budget. With prewashed canvas, smooth poles, sturdy seams, and thoughtful safety choices, you can build a teepee-style tent that looks beautiful and stands up to everyday play. Keep the design simple, make the frame stable, avoid loose hazards, and add just enough personality to make it feel special.
Whether you place it in a bedroom, playroom, reading corner, or living room nook, this handmade teepee has the kind of charm store-bought decor rarely matches. It says, “Someone made this for you,” which is a pretty wonderful thing for a child to feel. Plus, it gives your couch cushions a much-needed break from their former career as architecture.