Table of Contents >> Show >> Hide
- Why Craft Supply Organization Matters More Than You Think
- Step 1: Declutter and Sort Before You Store
- Smart Storage Principles for Any Craft Space
- The Hometalk-Inspired DIY Craft Paint Wall Organizer
- Storage Ideas You Can Mix and Match
- How to Keep Your New Craft System Working
- Real-Life Experiences: Bringing Your Craft Storage Ideas to Life
- Conclusion
If your craft supplies are currently “stored” in a mysterious pile on the dining table,
this article is for you. Between glitter, glue sticks, paint bottles, and that one pair
of scissors everyone keeps stealing, a craft stash can turn from hobby to chaos fast.
The good news? With a few smart, DIY craft supply organization storage ideas inspired
by Hometalk-style projects, you can turn the mess into a creative, functional zone you
actually enjoy looking at.
Professional organizers and craft bloggers agree on a few basics: use vertical space,
choose the right bins, label everything, and create simple systems you can maintain
even when you’re rushing to finish a project.
In this guide, we’ll walk through a Hometalk-inspired DIY paint storage project plus
flexible ideasrolling carts, cube shelves, mason jars, and small-space hacksthat
work whether you have a full craft room or just a single corner.
Why Craft Supply Organization Matters More Than You Think
An organized craft area isn’t just “pretty.” It saves time, money, and frustration.
Clear bins and labeled containers make it easier to see what you already have, so you
don’t keep buying duplicates of the same washi tape or acrylic paint.
Airtight containers and sturdy storage boxes also protect supplies from dust, moisture,
and curious pets.
When your supplies are easy to find, you’re more likely to actually create. That’s why
many crafters use open shelving, cube units, or rolling carts with clearly divided
sectionsso they can see their tools at a glance instead of digging through random
bags and boxes.
Step 1: Declutter and Sort Before You Store
Do a Quick “Craft Audit”
Before you build a single organizer, pull everything out and sort it by category:
paints, adhesives, cutting tools, paper, fabric, yarn, kids’ supplies, and so on.
Organizing experts recommend decluttering firsttoss dried-out markers, donate
duplicate supplies, and be honest about projects you’ll never finish.
As you sort, notice how much you have of each category. This will help you choose the
right kind of storage. A serious painter may need a dedicated paint rack, while a
paper crafter might prioritize vertical paper organizers or magazine files.
Create Storage “Zones”
Once everything is sorted, group supplies into zones that match the way you work:
- Everyday supplies: scissors, glue, pens, pencils, tape, basic paints.
- Project-specific supplies: vinyl for your cutting machine, jewelry findings, or resin tools.
- Kids’ crafting: washable markers, crayons, stickers, coloring books.
- Messy or seasonal supplies: glitter, spray paint, holiday decor pieces.
Each zone will eventually get its own container, drawer, shelf, or cart section, so
everyone in the household can learn where things live and where they should go back.
Smart Storage Principles for Any Craft Space
Use Vertical Space (Pegboards, Rails, and Wall Systems)
If you don’t have a full craft room, walls are your best friend. Organizers and craft
bloggers often recommend pegboards, wall rails, and mounted shelves to get supplies
off work surfaces and into easy view.
Add hooks for scissors and rulers, small shelves or cups for brushes and pens, and
clip-on baskets for ribbon and tape.
You can even mount a slim rail behind a door or inside a closet for extra storage.
Small-space crafters love this “go vertical” strategy because it frees up floor space
and keeps tables clear for actual crafting.
See-Through vs. Hidden Storage
There’s a reason professional organizers rave about clear bins and containers.
Transparent storage lets you see exactly what’s inside, makes labeling easier, and
helps prevent “out of sight, out of mind” craft hoarding.
Clear plastic containers and jars are especially helpful for paints, buttons, beads,
and other small items.
On the other hand, opaque bins or fabric baskets can make a space feel calmer by
hiding visual clutter. Many crafters use a mix: clear bins for small, colorful items
that double as decor, and opaque bins within cube shelves for paper packs, fabric
scraps, or tools that aren’t pretty but still essential.
Label Everything (Future You Will Be So Grateful)
Labeling each bin or drawer may feel a little extra, but it’s one of the biggest
time-savers in a busy craft space. Paper crafting brands and organization blogs
consistently recommend simple, clear labelsprinted, handwritten, or even chalkboard
tagsso you don’t have to open three different containers to find your glue dots.
Keep labels broad enough that they still make sense if your stash changes: “Paint &
Brushes,” “Adhesives,” “Kid Crafts,” “Fabric & Thread,” “Vinyl & Transfers,” and so
on. That way, your system can adapt over time without needing a full relabel.
The Hometalk-Inspired DIY Craft Paint Wall Organizer
Hometalk shares tons of clever ways to turn everyday materials into storage gold. One
standout idea, shared widely on Pinterest, is a PVC “wallflower” style paint organizer
that neatly stores bottles in a flower-like cluster on the wall.
It’s perfect for acrylic craft paints but can also hold markers, glue bottles, or
similar items.
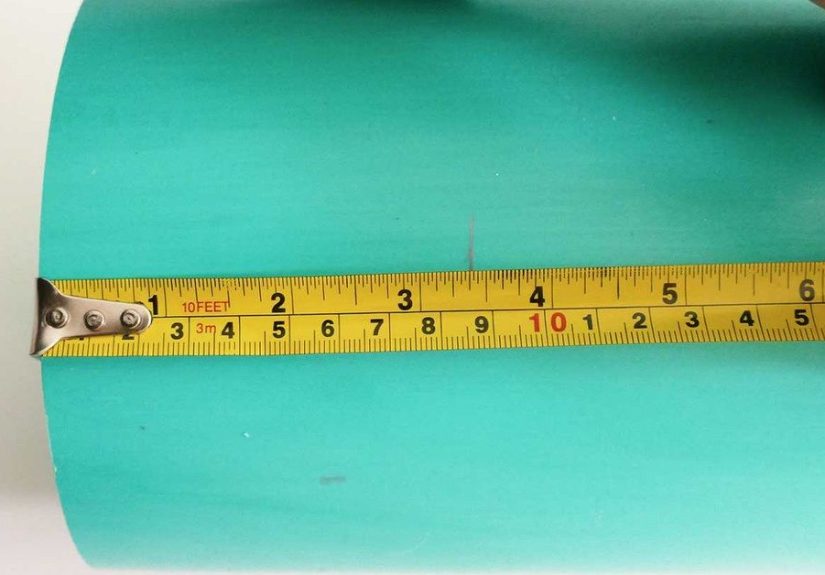
What You’ll Need
- 4″–6″ diameter PVC pipe (amount depends on how many “cells” you want)
- Measuring tape and pencil
- Hand saw or miter saw (for cutting PVC)
- Sandpaper (to smooth edges)
- Strong construction adhesive or PVC cement
- Primer and spray paint (optional, for color)
- Scrap wood backing board and screws for mounting
Step-by-Step Instructions
-
Measure the depth. Measure your paint bottles and mark the PVC
pipe to a depth that will hold them securelyoften around 3½ inches works well for
standard craft paints. -
Cut the pipe into “rings.” Carefully cut multiple rings at the
same depth. Sand the cut edges until they’re smooth and safe to handle. -
Arrange the rings. On a flat surface, arrange the rings in a loose
flower or honeycomb shape. Adjust until you’re happy with the layout. -
Glue the rings together. Use construction adhesive or PVC cement
to glue the contact points between rings. Let everything dry according to the
instructions. -
Attach to a backing board. For easier wall mounting, glue or screw
the entire PVC cluster to a piece of painted scrap wood that’s slightly larger than
your design. -
Paint (optional). Spray the whole piece in a color that matches
your craft spacea crisp white, soft pastel, or bold accent shade. -
Mount and fill. Secure the board to the wall with anchors and
screws, then slide a paint bottle into each PVC “cell.” Admire your new wall art
slash storage solution.
This project turns an often-messy categoryloose paint bottlesinto a vertical display
that doubles as art and makes color selection fast and fun.
Storage Ideas You Can Mix and Match
1. Rolling Cart “Mobile Craft Station”
Rolling carts are the superheroes of small-space craft organization. Organizing pros
recommend three-tier carts because they hold a surprising amount and can roll between
rooms as needed.
Use small bins or cups on each tier to divide categories:
- Top tier: scissors, pens, pencils, rulers, glue, and washi tape.
- Middle tier: paints, brushes, palettes, and small canvases.
- Bottom tier: paper pads, sketchbooks, or kids’ supplies.
If you share space with a home office or dining area, just roll the cart out when
it’s craft time and tuck it away in a closet or corner afterward.
2. Cube Shelves and Fabric Bins
Cube shelving units (think Kallax-style) are a favorite among crafters for a reason:
they’re modular, affordable, and easy to customize. Many creators fill the cubes with
collapsible bins, jars, and trays to hold everything from yarn to paper stacks.
Try designating each cube for a different category: “Paper & Cardstock,” “Fabric,”
“Vinyl & Transfers,” “Kids Crafts,” “Paint & Brushes.” Clear jars or baskets can go
on top for a decorative, colorful look.
3. Mason Jars, Dollar Store Containers, and Tiny Things
For beads, buttons, sequins, googly eyes, and other tiny items, mason jars and
repurposed containers are hard to beat. Recent organizing guides recommend glass jars
and airtight containers to corral small supplies while still showing off their fun
colors.
You can:
- Line jars up on a shelf or inside a cube.
- Hang mason jars on a board using hose clamps for wall storage.
- Use muffin tins, ice cube trays, or small plastic containers from the dollar store as bead or sequin organizers.
Dollar stores are also great for budget-friendly craft suppliespaints, brushes,
paper products, basic adhesives, and small toolsso it makes sense to grab matching
small bins and trays while you’re there.
4. Kid-Friendly Craft Supply Zones
If you craft with kids, set up a dedicated zone they can reach safely. Organizing
experts suggest shallow bins about the size of a shoebox, each holding a single
category like “Crayons & Markers,” “Stickers,” or “Play-Doh.”
Store them on low shelves, so kids can grab what they need and help put things away.
For finished art and in-progress projects, stackable trays or letter racks work well
and double as drying space.
Keep grown-up suppliessharp tools, hot glue, permanent markerson higher shelves or
in latching bins.
5. Tiny Home and Apartment Hacks
No spare room? No problem. Many crafters successfully organize supplies in closets,
small nooks, and even under beds by combining vertical storage, modular bins, and
foldaway workstations.
A few space-saving tricks:
- Turn a hall closet into a “craft cupboard” with cube shelves and labeled bins.
- Use under-bed rolling bins for fabric, yarn, or seasonal craft supplies.
- Add an over-the-door pocket organizer for punches, stamps, scissors, and tape.
- Create a fold-down wall desk with shallow shelves above it for essentials.
How to Keep Your New Craft System Working
The hardest part isn’t organizing onceit’s keeping things that way. Online organizing
communities often recommend simple maintenance habits: a quick tidy after each craft
session and a slightly deeper reset once a month.
- Do a five-minute clean-up. Put tools back in their zones before you leave the table.
- Respect your containers. If a bin is overflowing, it’s time to declutter or upgrade the storage.
- Revisit labels. If you ignore a label, it probably needs to be renamed or reorganized.
- Rotate kids’ supplies. Keep a small curated set of kids’ crafts accessible and store extras elsewhere.
Think of your craft supply organization as a living system. It’s okay to tweak and
refine it as your hobbies, tools, and storage options change.
Real-Life Experiences: Bringing Your Craft Storage Ideas to Life
It’s one thing to pin a dozen dreamy craft rooms and another to make an organizing
system actually work in real life. So let’s walk through a few everyday scenarios and
see how these DIY craft supply organization ideas play out.
The Dining Table Crafter
Imagine you don’t have a craft room at alljust a kitchen table that also hosts
homework, takeout, and family game night. In this case, a rolling cart and a few
latching bins become game-changers. Your everyday supplies live on the cart: scissors,
pens, glue, and a container of basic paints. Paper pads and sketchbooks slide into a
file-style bin on the lowest shelf. When inspiration strikes, you roll the cart to the
table, pull out what you need, and when you’re done, everything goes back on the cart
and rolls away to a corner or closet.
The PVC paint “wallflower” organizer works here toomounted on a small stretch of wall
in the kitchen or hallway. Because the bottles sit snugly in their PVC cells, they
don’t get knocked over easily, and you can instantly see which colors need restocking.
Over time, you’ll notice you spend less time hunting and more time painting.
The Multicrafter With Too Many Hobbies
Maybe you sew, paint, scrapbook, and dabble in resinall from one room. Instead of
mixing everything together, give each hobby its own “home base.” Fabric gets folded on
mini “bolts” (wrapped around cardboard or comic book boards) and stored upright in a
basket so you can flip through by color.
Paint supplies live in the PVC wall organizer and a small drawer unit nearby.
Scrapbooking supplies move into clear bins labeled “Stamps,” “Paper Scraps,” and
“Embellishments.”
When you want to switch from sewing to paper crafting, you grab only the bins you
need. The rest stays contained, so your desk doesn’t slowly turn into a multicolored
avalanche.
The Parent With the “Craft Tornado” Kids
Kids’ craft supplies tend to migrateone day they’re in the kitchen, the next day in
the living room, and eventually in the car. A simple solution is to build a kid-level
craft station using cube shelves or a low bookcase. Each bin gets a big, easy-to-read
label: “Markers,” “Coloring Books,” “Stickers,” “Play-Doh.” You can even tape a little
picture on each bin for pre-readers.
The rule is simple: only as many supplies come out as can fit back into the bins on
the shelf. After each craft session, you turn cleanup into part of the projectputting
markers back in their caddy, stacking coloring books, and closing bins. Over time,
kids learn where things belong, and you spend less time stepping on rogue crayons.
The Small-Space Maker in a Studio Apartment
In a studio or tiny apartment, every inch matters. Here, a single tall bookshelf, an
over-the-door organizer, and a couple of under-bed bins can hold an impressive amount
of craft gear. Clear shoebox-style containers organize categories like “Yarn,”
“Painting,” “Paper,” and “Glue & Tape,” while the over-the-door organizer keeps tools
like scissors, hole punches, and small bottles within reach but off the furniture.
A fold-down wall desk or a lightweight folding table becomes your work surface. When
you’re done, you tuck it away, and your living room instantly looks “normal” again.
You still have a legit craft setupit’s just disguised as smart storage.
The Bottom Line From Real-World Use
Across all these scenarios, the most successful systems share three things:
- Simple categories: If you can explain your system in a sentence, you’re more likely to use it.
- Right-sized containers: Bins that are too big turn into junk drawers; smaller ones keep you honest.
- Easy access: Supplies you use most often should be visible and within arm’s reach.
When you design your craft supply organization with real life in mindnot just
Pinterest perfectionyou create a space that supports your creativity instead of
slowing it down.
Conclusion
You don’t need a massive studio or custom cabinetry to have a beautifully organized
craft area. By decluttering, using vertical space, mixing clear and concealed storage,
and trying budget-friendly DIY projects like the PVC paint “wallflower,” you can
create a craft supply organization system that fits your home and your hobbies.
Start small: choose one areamaybe your paints, your kids’ craft corner, or that
overloaded drawerand give it a Hometalk-style makeover with bins, jars, or a rolling
cart. Once you see how much easier crafting becomes when everything has a place,
you’ll be inspired to tackle the rest of your supplies, one organized zone at a time.


