Table of Contents >> Show >> Hide
- Fast Troubleshooting: Match the Sound to the Likely Culprit
- Do These 5 “No-Tools” Checks First
- Top Causes of a Noisy Dryer (and What to Do)
- Cause #1: Drum support rollers with flat spots (classic “thump-thump-thump”)
- Cause #2: A worn or seized idler pulley (high-pitched squeal, often from the front/lower area)
- Cause #3: A worn drive belt (slapping, squeaking, or inconsistent thumping)
- Cause #4: Drum bearings, glides, or felt seals wearing down (scraping or grinding)
- Cause #5: Blower wheel problems (rumbling, roaring, or rattling near the vent area)
- Cause #6: Something stuck where it shouldn’t be (coins, bra wires, screws, or “how did that even get there?”)
- Cause #7: Motor wear or electrical strain (humming, buzzing, whining)
- Decision Time: DIY, Technician, or “Stop Using It Now”
- How to Prevent Dryer Noises (and Extend Dryer Life)
- Conclusion
- Real-Life Dryer Noise Experiences (500+ Words of “Been There, Heard That”)
- Experience #1: The “Coin in a Blender” Rattle That Wasn’t a Coin
- Experience #2: The Once-Per-Rotation Thump That Drove Everyone Nuts
- Experience #3: The Startup Squeal That Went Away (Until It Didn’t)
- Experience #4: The Grinding Sound That Turned Out to Be a Sneaky Foreign Object
- Experience #5: The Roaring “Jet Engine” Dryer That Also Took Forever to Dry
A dryer is supposed to sound like a gentle whoosh of warm air and a soft tumble. If yours has started
squealing like a startled rubber duck, thumping like a bass drum, or grinding like it’s auditioning for a heavy-metal band,
don’t ignore it. Loud dryer noises are usually your appliance’s way of saying: “Hey… a part is wearing out, something’s loose,
or I just swallowed a coin.”
The good news: many noise problems have a logical pattern, and you can often narrow the cause in minutes.
The better news: catching it early can prevent bigger (and pricier) damage.
The most important news: safety firstalways unplug an electric dryer before checking anything beyond the drum,
and for gas dryers, shut off the gas supply if you suspect anything serious or smell gas. When in doubt, call a qualified technician.
Fast Troubleshooting: Match the Sound to the Likely Culprit
Before you take your dryer apart, identify what you’re hearing, when it happens,
and whether it changes with load size. Those clues are basically the dryer’s “symptom checker.”
| Noise | What It Often Means | Quick Check |
|---|---|---|
| Rattling / clinking | Loose items in drum, object stuck in baffle, loose panel, something vibrating nearby | Empty pockets, check drum seams & baffles, move items off dryer top |
| Thumping / banging | Unbalanced load, heavy item “slapping,” flat-spotted rollers, belt issues | Run empty; if it still thumps once per drum turn, suspect support parts |
| Squealing / squeaking | Idler pulley, drum rollers/bearings, belt friction, motor bearing wear | Does it squeal at startup then fade? That often points to pulley/belt tension |
| Grinding / scraping | Worn glides, felt seal damage, seized roller, drum rubbing cabinet | Stop using if it’s metal-on-metal; check for rub marks and rough drum spin |
| Rumbling / roaring | Blower wheel obstruction or looseness, rollers wearing, lint/debris buildup | Listen near the rear/vent area; check for vibration and airflow issues |
| Buzzing / humming | Motor strain, something stuck, electrical/motor issue | If drum won’t turn or noise is loud and steady, power down and call a pro |
Do These 5 “No-Tools” Checks First
1) Remove the obvious offenders (coins, zippers, buttons, and “mystery screws”)
Rattling is often just hardware doing the cha-cha in the drum. Check pockets and seams,
and look along the front edge of the drum opening for anything that could be tapping as it tumbles.
Also check the lint screen housing area for stray items (they love to hide there like lint gremlins).
2) Run a short cycle with the dryer empty
This is the fastest “is it the laundry or the dryer?” test. If the noise disappears with an empty drum,
the culprit is often an unbalanced load, a bulky item repeatedly hitting the drum, or a pocket item that only makes noise when clothes shift around.
If it stays loud while empty, you’re more likely dealing with worn support parts, a blower issue, or internal friction.
3) Level the dryer and steady anything that wobbles
An unlevel dryer can vibrate, thump, or shake loudlyespecially on spin-up and slow-down.
Gently rock the dryer at the corners. If it moves, adjust the leveling legs so it sits solidly.
Bonus: move anything leaning against the dryer (brooms, laundry baskets, that one hanger you swear isn’t yours).
4) Check the vent and airflow basics
Poor airflow can make a dryer work harder, and extra strain can amplify normal vibrations into “why does my laundry room sound haunted?” territory.
Clean the lint screen after every load and keep the vent path as clear as possible. If drying times have increased along with noise,
it’s a big hint that lint buildup may be contributing.
5) Look for loose exterior screws and panels
Sometimes the dryer is fineyour cabinet isn’t. A slightly loose panel screw or bracket can buzz or rattle as the machine vibrates.
If the noise changes when you lightly press on a panel (without blocking vents), a loose fastener may be involved.
Top Causes of a Noisy Dryer (and What to Do)
Cause #1: Drum support rollers with flat spots (classic “thump-thump-thump”)
Many dryers use drum support rollers to help the drum spin smoothly. Over time, those rollers can wear unevenly.
When that happens, you’ll often hear a rhythmic thump that matches the drum’s rotationsometimes once per turn, like a metronome with attitude.
What to do: If the thumping continues when the dryer is empty, rollers are a prime suspect.
Replacing rollers is a common repair, and many DIYers tackle it successfullybut it does require opening the cabinet.
If you’re not comfortable disassembling appliances (or you have a gas dryer and aren’t confident), call a technician.
Cause #2: A worn or seized idler pulley (high-pitched squeal, often from the front/lower area)
The idler pulley keeps tension on the belt that turns the drum. When its bearing wears out, it can squeal loudlyespecially at startup,
when everything is cold and stiff. If the squeal gets worse over days or weeks, don’t wait for the pulley to fully seize and shred the belt.
What to do: If the sound seems to come from the lower front area, and especially if you notice a rubbery smell,
stop using the dryer and get it checked. This repair is often straightforward for pros and experienced DIYers,
and it’s one of the most common “make it quiet again” fixes.
Cause #3: A worn drive belt (slapping, squeaking, or inconsistent thumping)
The belt is what connects the motor’s power to the drum’s spin. A worn, stretched, or damaged belt can squeak,
slap the cabinet, or make a rhythmic sound that changes with load size. Sometimes it’s subtle; sometimes it sounds like a flip-flop in a wind tunnel.
What to do: If you suspect belt problems, don’t keep running the dryer “just to finish laundry.”
A failing belt can snap, leaving you with a drum that won’t turn (and a pile of damp socks that will judge you silently).
A technician can confirm quickly, and DIY belt replacement is common if you’re comfortable with appliance repair.
Cause #4: Drum bearings, glides, or felt seals wearing down (scraping or grinding)
Depending on the dryer design, the drum may ride on front glides or a rear bearing, and a felt seal helps prevent rubbing and air leaks.
When these wear out, you may hear scraping, grinding, or a rough “shhhk-shhhk” sound as the drum turns.
If it’s truly metal-on-metal, keep using the dryer can damage the drum or cabinet.
What to do: Power down and inspect for obvious rub marks near the drum opening.
If the drum feels rough or stiff when rotated by hand (with power disconnected), stop and schedule service.
These repairs often involve replacing worn supports and, in some cases, the felt seal at the same time for best results.
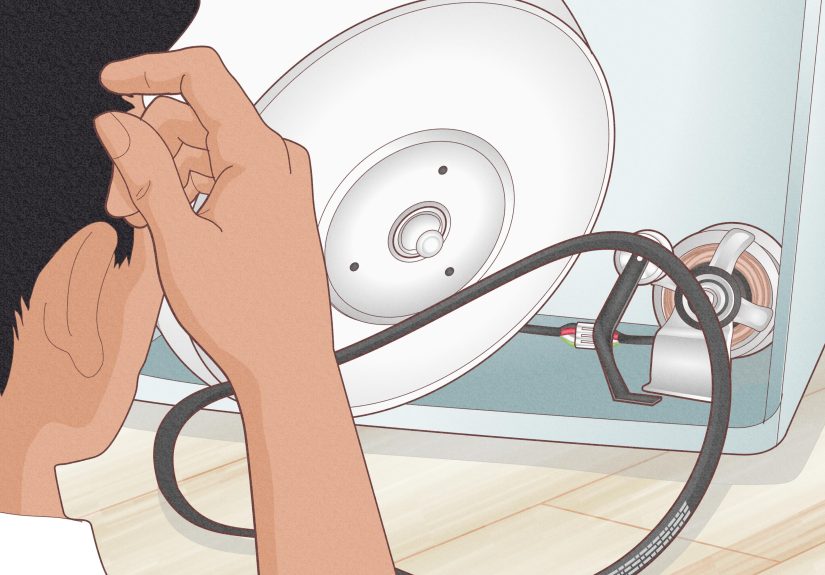
Cause #5: Blower wheel problems (rumbling, roaring, or rattling near the vent area)
The blower wheel moves air through the dryer. If it’s clogged with lint/debris, loose on the shaft, or damaged,
it can rumble or roarsometimes loudly enough to convince you a small motorcycle moved into your laundry room.
Because airflow is essential for safe drying, blower wheel issues deserve prompt attention.
What to do: If the noise is strongest at the back or near the vent outlet, and you also notice weaker airflow or longer dry times,
stop using the dryer until it’s inspected. Cleaning lint from accessible areas is helpful, but blower wheel inspection typically requires opening the cabinet.
Cause #6: Something stuck where it shouldn’t be (coins, bra wires, screws, or “how did that even get there?”)
Objects can slip between the drum and cabinet, lodge in drum baffles, or get trapped near the lint housing.
The sound often depends on the object: coins clink, metal bits scrape, and a zipper can “tick-tick-tick” like a tiny time bomb.
What to do: Remove all items and inspect the drum thoroughlyespecially around seams and baffles.
If you still hear scraping or clicking with an empty drum, a foreign object may be trapped out of sight.
At that point, service is often faster (and safer) than forcing a DIY exploration.
Cause #7: Motor wear or electrical strain (humming, buzzing, whining)
A dryer motor can make different noises depending on what’s happening: a steady hum, a loud buzz, or a higher-pitched whine.
Sometimes it’s a failing motor bearing; sometimes the motor is straining because something else (like a stuck roller or jammed blower wheel) is creating resistance.
What to do: If the dryer struggles to start, the drum doesn’t turn, the noise is sudden and intense,
or you notice overheating, stop using it and call a professional. Motor and electrical issues aren’t the place for guesswork.
Decision Time: DIY, Technician, or “Stop Using It Now”
You can often DIY if:
- The dryer is simply unlevel and vibrating.
- The noise is clearly from loose items or an unbalanced load.
- You’re comfortable with basic appliance disassembly, have the correct parts, and can follow a model-specific guide safely.
Call a technician if:
- You have a gas dryer and the repair involves internal components (or you’re not confident).
- The noise is grinding/scraping, the drum feels rough, or performance is changing (long dry times, weak airflow).
- You suspect the motor, blower wheel, or internal supports and you’re not experienced with repairs.
Stop using it immediately if:
- You smell burning, see smoke, or hear harsh metal-on-metal grinding.
- The dryer overheats, trips breakers repeatedly, or makes a loud electrical buzzing sound.
- You smell gas (shut off the gas supply, ventilate the area, and contact a professional right away).
How to Prevent Dryer Noises (and Extend Dryer Life)
- Empty pockets like it’s your job. Coins and screws are tiny but loud.
- Don’t overloadheavy loads can stress rollers, belt, and motor.
- Balance bulky items (comforters, towels) so they tumble evenly.
- Keep airflow strong: clean the lint screen every load and keep vents maintained.
- Listen for “new” sounds: a small squeak today can become a full concert tomorrow.
Conclusion
A loud dryer isn’t just annoyingit’s a clue. Rattles often mean loose items or panels. Thumps commonly point to load issues or worn rollers.
Squeals usually implicate belts or pulleys. Grinding and scraping can signal worn glides, seals, or bearingsand that’s where you stop and take it seriously.
With a little detective work (and a lot less denial), you can often pinpoint the cause quickly and decide whether it’s a simple fix or time to call in a pro.
Either way, your reward is a quieter laundry room… and the sweet sound of socks drying in peace.
Real-Life Dryer Noise Experiences (500+ Words of “Been There, Heard That”)
If you’ve never experienced a dryer noise mystery, congratulationsyou’re either incredibly lucky or your dryer is silently plotting.
For everyone else, here are some common “true-to-life” scenarios people run into, what the noise sounded like, and what actually fixed it.
Think of this as the laundry-room version of a medical dramaminus the dramatic hallway running, plus more lint.
Experience #1: The “Coin in a Blender” Rattle That Wasn’t a Coin
A homeowner swore a quarter was bouncing around inside the drum. The sound was a sharp clink-clink that got louder with heavier loads.
Pockets were empty. The lint screen area was clear. The dryer was still rattling like it had joined a percussion ensemble.
The culprit ended up being a small screw that had backed out of a drum baffle (the little fin inside the drum that helps lift clothes).
Every time the drum rotated, the baffle flexed slightly and the loose screw tapped metal. Tightening the baffle screws solved it instantly.
Lesson: “rattling in the drum” isn’t always something in your laundrysometimes it’s something that used to be attached to your dryer.
Experience #2: The Once-Per-Rotation Thump That Drove Everyone Nuts
This one is classic: a rhythmic thump that happened once per drum revolution. It didn’t matter if the drum was full, half full, or empty.
The sound was steady, predictable, and somehow more irritating because it was so consistentlike a dripping faucet for your ears.
In many cases, that pattern points to a support roller with a flat spot. Rollers wear unevenly, especially as dryers age,
and a flat spot makes the drum “bump” every time it passes that point. Replacing the rollers (often as a set) brought the dryer back to the gentle hum everyone misses.
Lesson: when the thump keeps perfect time with the drum, suspect a rotating partnot your laundry load.
Experience #3: The Startup Squeal That Went Away (Until It Didn’t)
Another common story: the dryer squealed loudly for the first 10–30 seconds, then quieted down.
People tend to ignore this because the dryer “settles in.” But that startup squeal is often a pulley or belt tension issue,
where a worn bearing complains most when it’s cold. Over time, the squeal can last longer, get louder, and eventually show up mid-cycle.
When addressed early, the fix is usually simpler and cheaper than waiting for the belt to wear through or the pulley to seize.
Lesson: noises that fade are still warningsyour dryer isn’t “warming up,” it’s “wearing out.”
Experience #4: The Grinding Sound That Turned Out to Be a Sneaky Foreign Object
Grinding noises are the ones that make people nervous for good reason. In one case, the dryer sounded like sandpaper on metal,
but only when it was runningnot when the drum was spun by hand. The cause wasn’t a bearing at all.
A thin piece of metal (think: a bra underwire or small clip) had slipped between the drum and the front seal area.
Under load and heat, it shifted just enough to scrape intermittently. Once removed, the sound vanished.
Lesson: not every scary noise means a failing motorbut every scary noise deserves a real check before you keep running cycles.
Experience #5: The Roaring “Jet Engine” Dryer That Also Took Forever to Dry
When a dryer is loud and clothes take longer to dry, it’s time to think airflow and blower-related issues.
People often describe this as a roaring, rumbling, or whooshing sound that seems to come from the back of the dryer.
Sometimes lint buildup and debris can throw off the blower wheel or restrict airflow, making the motor work harder and the cabinet vibrate more.
Whether it ends up being vent maintenance, lint cleanup, or a blower component issue, the key pattern is: noise + poor performance.
Lesson: your dryer isn’t just loudit’s struggling, and helping it breathe can make a huge difference.