Table of Contents >> Show >> Hide
- Before You Start: Tools, Materials, and a Quick Game Plan
- Chair Rail Height: The “Looks Right” Rule (Without Overthinking It)
- How to Install a Chair Rail in 13 Steps
- Step 1: Choose your chair rail style and confirm the height
- Step 2: Measure each wall run and calculate how much molding to buy
- Step 3: Prep the wall so the trim sits flat
- Step 4: Mark the chair rail height around the room
- Step 5: Snap (or draw) a level guideline
- Step 6: Locate studs and mark nailing points
- Step 7: Plan your joints (inside corners, outside corners, and long runs)
- Step 8: Cut the first piece and start on a “clean” wall
- Step 9: Cope inside corners for tighter, more forgiving fits
- Step 10: Miter outside corners and test-fit before you nail
- Step 11: Use scarf joints for long walls (and aim them the right way)
- Step 12: Install the chair rail (nail into studs, stay on the line)
- Step 13: Fill, sand, caulk, then paint or stain for a finished look
- Troubleshooting: Common Chair Rail Problems (and Fixes That Actually Work)
- Real-World Experiences: What Installing a Chair Rail Actually Feels Like (500+ Words)
- Conclusion
Chair rail molding is the interior design equivalent of a well-placed belt: it breaks up a big blank wall, adds structure, and makes the whole room look like it has its life together. Historically, it helped protect plaster walls from chair backs. Today, it protects your walls from scuffs and gives your dining room the kind of “I definitely own matching napkins” energy.
This guide walks you through a clean, pro-looking chair rail installation in 13 stepslayout, measuring, inside/outside corners, fastening, and finishingplus the real-world “oops” moments homeowners run into (and how to fix them without inventing new swear words).
Before You Start: Tools, Materials, and a Quick Game Plan
Tools
- Tape measure and pencil
- Level or laser level
- Stud finder
- Miter saw (or miter box + handsaw)
- Coping saw (highly recommended for inside corners)
- Finish nailer/brad nailer (or hammer + finishing nails + nail set)
- Sandpaper (120–220 grit), putty knife
Materials
- Chair rail molding (wood, MDF, or polyurethane)
- Finishing nails (often 1 1/2″–2 1/2″, depending on thickness and wall type)
- Construction adhesive (optional, especially helpful when studs are tricky)
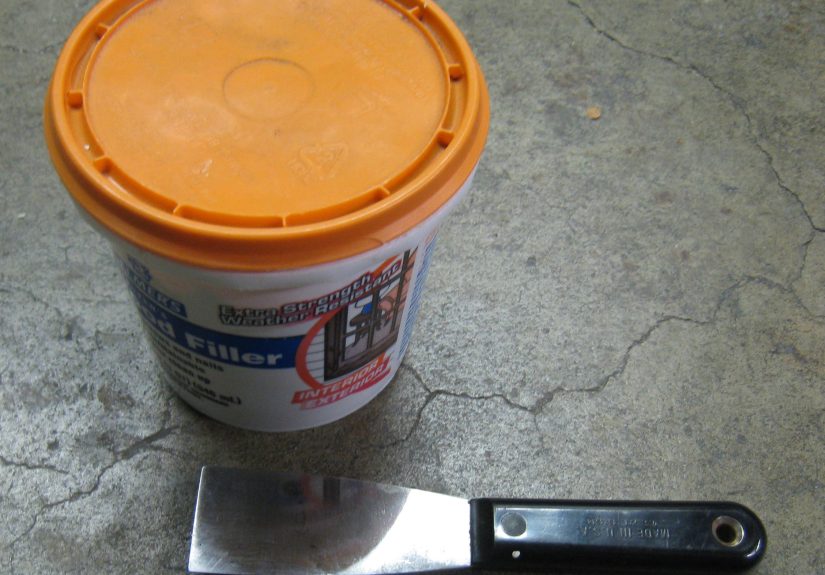
- Wood filler, paintable caulk
- Primer/paint or stain + clear coat
Safety (Quick but Important)
Wear eye protection when cutting, and a dust mask if you’re cutting MDF. Keep hands away from blades (yes, that includes “just one quick cut”). If you’re nailing near outlets or switches, be mindful that wires can run vertically from those boxesdon’t go wild with long fasteners.
Chair Rail Height: The “Looks Right” Rule (Without Overthinking It)
A classic rule of thumb is to place the chair rail around one-third of the wall height. In many homes with 8-foot ceilings, that lands roughly in the 32-inch neighborhoodoften somewhere in the 32–42 inch range overall, depending on ceiling height, room proportions, and style.
One design tip that saves regrets: avoid placing the chair rail exactly halfway up the wall. Half-and-half can make a room feel visually “stuck,” like it’s wearing a shirt that’s slightly too tight. One-third (or sometimes a bit above that) tends to read more intentional and balanced.
How to Install a Chair Rail in 13 Steps
-
Step 1: Choose your chair rail style and confirm the height
Decide whether your chair rail will be a simple horizontal band or the “top edge” of wainscoting, beadboard, or picture-frame molding. Hold a scrap piece on the wall and step backlook at it from the doorway and from where you’ll actually sit. What looks great close-up can look oddly high (or low) from across the room.
If you’re unsure, start with the one-third rule and adjust slightly up or down to complement windows, built-ins, and existing trim lines.
-
Step 2: Measure each wall run and calculate how much molding to buy
Measure each wall where the chair rail will run (excluding openings if you’re stopping at casings). Add extra length for corners, scarf joints, and mistakesbecause the first cut is always a “practice cut” if you’re being emotionally honest.
Example: If your room has runs of 12 ft, 14 ft, 12 ft, and 14 ft, that’s 52 ft total. Add a little extra per wall (or at least 10% overall). Buying one extra 8-foot stick is cheaper than a second trip to the store while your wall is judging you.
-
Step 3: Prep the wall so the trim sits flat
Remove anything in the waydecor hooks, tiny nails, and that mystery screw you’ve been ignoring since 2019. If the wall has big bumps, ridges, or dried paint drips, knock them down with light sanding so the molding can sit tight to the drywall.
Pro move: If you plan to paint the wall, do it before the chair rail goes up. Touch-ups are easier than cutting in a perfect line behind trim.
-
Step 4: Mark the chair rail height around the room
Measure up from the floor at several points on each wall and make light pencil marks. If your floor isn’t perfectly level (welcome to Earth), referencing the floor can create a chair rail that “waves” relative to the ceiling. In most rooms, people notice alignment with other trim and corners more than they notice what the floor is doing.
-
Step 5: Snap (or draw) a level guideline
Use a level or laser level to connect your marks into a continuous line around the room. This line is your installation roadmap and helps you keep every piece consistent.
Tip: In older homes, walls can be out of plumb and corners can be… creatively interpreted. A laser makes layout faster and more consistent, but a standard level works just fine with patience.
-
Step 6: Locate studs and mark nailing points
Use a stud finder to locate studs along your guideline and mark them lightly. Fastening into studs makes the chair rail sturdier and reduces the chance of future gaps.
If you can’t land every fastener on a stud (it happens), you can still secure the trim with additional nails, construction adhesive, or appropriate wall anchors in select spotsespecially if you’re working with thinner molding.
-
Step 7: Plan your joints (inside corners, outside corners, and long runs)
Before cutting anything, decide how you’ll handle:
- Inside corners: cope (recommended) or miter.
- Outside corners: miter two 45° cuts.
- Long walls: use a scarf joint where two pieces meet mid-wall.
Dry-fitting (holding pieces in place without fasteners) is not wasted timeit’s how you avoid building a modern art installation called “Why Doesn’t This Corner Close?”
-
Step 8: Cut the first piece and start on a “clean” wall
Start with your longest, straightest run if possible. Cut the first piece to length. If you’re using coped inside corners, one piece can die square into the corner (a straight 90° cut), and the mating piece gets the cope.
If you’re mitering inside corners instead, you’ll cut complementary 45° mitersjust know that slightly imperfect corners and seasonal movement can open those joints more easily than a cope.
-
Step 9: Cope inside corners for tighter, more forgiving fits
Coping is basically letting one piece overlap the profile of the other, which hides small corner imperfections. The basic approach:
- Cut one piece square to butt into the corner.
- On the other piece, cut a 45° miter to expose the molding profile.
- Use a coping saw to cut along that profile so it fits snugly over the first piece.
After coping, test-fit and fine-tune with a file or sandpaper. It’s like tailoring: the last 2% is what makes it look expensive.
-
Step 10: Miter outside corners and test-fit before you nail
Outside corners typically use two 45° miter cuts that meet at the corner. Cut slightly long if you’re unsure, then sneak up on the perfect fit with small adjustments. Label pieces as you go (A, B, C…) so you don’t accidentally install “Wall 1’s corner” on “Wall 3’s personality.”
If the corner isn’t a perfect 90°, you may need to adjust your miter angle. A quick test fit will tell you whether the joint is tight at the front edge (the part everyone sees).
-
Step 11: Use scarf joints for long walls (and aim them the right way)
When one wall run is longer than your available molding lengths, use a scarf joint (two opposing angled cuts, commonly around 45°) so the seam is less noticeable than a straight butt joint.
For a cleaner look, position the scarf so the “overlapping” direction faces away from the main entry view. Add a dab of wood glue at the joint, press tight, then fasten.
-
Step 12: Install the chair rail (nail into studs, stay on the line)
Run a thin bead of construction adhesive on the back if you want extra holding powerespecially if studs are limited along your line. Then align the molding to your guideline and fasten it.
- Nail into studs when possible.
- Keep the molding aligned with your guideline as you go.
- Check level periodically, especially near corners and joint transitions.
If you’re using a nail gun, you’ll get faster, cleaner results. If you’re hand-nailing, pre-drilling can help prevent splittingparticularly near the ends and in hardwood chair rail.
-
Step 13: Fill, sand, caulk, then paint or stain for a finished look
Once everything is up:
- Set nail heads slightly below the surface (if needed).
- Fill nail holes and small joint gaps with wood filler; let dry and sand smooth.
- Caulk the top and bottom edges where the molding meets the wall for a seamless line.
- Prime and paint, or stain and clear-coat depending on your finish plan.
This is the step that makes a “weekend DIY” look like a “professional trim job.” Don’t skip it. Caulk is the makeup artist of the molding world: subtle, powerful, and best applied with restraint.
Troubleshooting: Common Chair Rail Problems (and Fixes That Actually Work)
Problem: Gaps behind the molding on wavy walls
Light gaps are common, especially in older homes. Press the molding tight where studs are located, then use paintable caulk for small gaps. For larger gaps, consider scribing (trimming the back edge to match the wall) or using a slightly thicker profile that hides inconsistencies better.
Problem: Inside corners don’t close neatly
This is exactly why many pros cope inside corners. If you already mitered and it’s open, you can sometimes fix it with slight recuts (adjusting the angle), or with careful caulk and paint if the gap is minor.
Problem: Outside corners are too open or too tight
Your corner probably isn’t a perfect 90°. Test-fit, then tweak your miter angle. If you see a gap at the front edge, prioritize closing that visible edge even if the back edge has a tiny gap (caulk can handle what eyeballs can’t see).
Problem: The chair rail looks “off” even though it’s level
Sometimes a perfectly level line can still look wrong if it clashes with other visual referenceslike a sloped ceiling, an out-of-level window header, or existing trim. In decorative work, “looks aligned with the room” often wins over “perfectly level in a vacuum.”
Real-World Experiences: What Installing a Chair Rail Actually Feels Like (500+ Words)
Let’s talk about the part no instruction sheet ever admits: installing chair rail is rarely hard because of the chair rail. It’s hard because houses are sneaky. Walls bow. Corners lie about being 90 degrees. Floors dip like they’re practicing for the limbo. And the moment you say, “This will be quick,” your miter saw hears you and responds with, “Bet.”
One very common experience is the “level vs. looks level” debate. Homeowners often start by measuring up from the floor at multiple points, only to realize the line doesn’t look consistent once it wraps the room. That’s when you learn a surprisingly grown-up lesson: your eyes care more about how the chair rail relates to windows, casings, and the overall architecture than whether it’s the exact same distance from a floor that slopes 3/8 inch across the room. In many projects, using a laser level to establish a consistent reference linethen making small judgment calls around tricky areasends up producing a better final look than rigidly following the floor.
Another “classic” moment is discovering that inside corners are basically improv theater. You cut two perfect 45s, press them into the corner, and… there’s daylight. That’s not you failing; that’s the corner being itself. People often report that coping feels intimidating until they do it once. After that, coping becomes the confidence boost of the whole job because it’s forgiving. You can shave a little more, test-fit, shave a little more, and suddenly the joint looks tight even if the drywall corner is slightly rounded or out of square. The first coped joint might take 15 minutes. The fourth might take five. The fifth makes you wonder why you ever tried to “force” miters into a corner that was never a right angle to begin with.
There’s also the real-life challenge of long walls. In theory, you can make a joint anywhere. In practice, you realize a straight butt joint mid-wall practically puts on a spotlight and says, “Hello, I am a seam.” Homeowners who switch to scarf joints usually feel immediate relief: the angled seam is harder to notice, especially after filler and paint. The small experience-based trick is orientationangling the overlap so it faces away from the typical viewing direction. It’s a tiny change that makes the joint disappear from the places people naturally stand.
Then comes fastening. If you’re using a nail gun, the experience is often: “Wow, that was satisfying.” If you’re hand-nailing, the experience is: “Wow, my forearms have opinions.” Either way, most DIYers notice that the chair rail feels dramatically more solid when it’s nailed into studs. When they can’t hit studs consistently, they often use a small amount of construction adhesive to add holding power. The key experience-based takeaway is moderation: too much adhesive can get messy and complicate removal later, but a thin bead can prevent future movement and gapsespecially on walls that aren’t perfectly flat.
Finally, finishing is where the emotional arc completes. Many people install the chair rail and think, “It looks okay,” then fill nail holes, sand, and apply caulk, and suddenly it looks finished. This is the moment when the trim stops reading as “stuff stuck to the wall” and starts reading as “architectural detail.” Experience teaches that caulk is not a substitute for good cuts, but it is absolutely the difference between “weekend project” and “wow, did you hire someone?”
The best part? After you’ve done one room, the next one feels much easier. You’ll measure more confidently, dry-fit more patiently, and you’ll know the truth: chair rail isn’t hardit just demands that you respect the house you’re working with. And if the house still fights you, at least it’ll look classy while doing it.
Conclusion
Installing a chair rail is one of those projects with a high “wow factor” and a manageable learning curve. The keys are simple: choose a height that fits the room, lay out a consistent guideline, plan your joints, and don’t rush the finishing steps. Once it’s caulked, painted (or stained), and crisp, your walls will look more intentionallike your home quietly upgraded its resume.


