Table of Contents >> Show >> Hide
- The Cricket Survival Checklist (Do This First)
- Step 1: Pick the Right Crickets (Yes, It Matters)
- Step 2: Housing That Doesn’t Turn Into a Stink Box
- Step 3: TemperatureWarm, Not Roasted
- Step 4: HumidityCrickets Prefer “Dry-ish”
- Step 5: Hydration Without the Drowning Olympics
- Step 6: FeedingKeep Them Alive, Then Make Them Worth Eating
- Step 7: Cleaning & Odor Control (Where Most “Die-Offs” Are Born)
- Step 8: Space & Crowd Control
- Step 9: TroubleshootingWhy Are My Crickets Still Dying?
- Step 10: Feeding Your Reptile Safely (Quick Notes)
- Conclusion: Make Their World Boring
- Extra: Common Keeper Experiences ( of Real-World “What Usually Happens”)
- 1) The “Sealed Tote” Era (aka: The Accidental Cricket Sauna)
- 2) The Water Bowl Tragedy (Tiny Pools, Big Consequences)
- 3) The Produce Pile Problem (When “Healthy Snacks” Turn Into Mold)
- 4) The Heat Spike Surprise (Aka: “Why Did They All Die Overnight?”)
- 5) The Gut-Load Glow-Up (When Your Feeders Become Better Feed)
Feeder crickets have one job: stay alive long enough to become lunch. And yet, somehow, they treat that job like an optional hobby.
The good news: keeping crickets alive isn’t magicit’s mostly airflow, warmth, dryness, safe hydration, and basic housekeeping.
Do those five things well and your “cricket apocalypse” turns into a boring, peaceful little insect condo. (Boring is the goal. Boring means alive.)
The Cricket Survival Checklist (Do This First)
- Ventilation: big screened openings beat tiny pinholes every time.
- Temperature: warm and steadyno sun-baked sauna, no cold garage chill.
- Low moisture: crickets do best “dry-ish,” not “tropical rainforest.”
- Hydration without drowning: gels/crystals/sponge, plus moisture from produce.
- Clean often: dead crickets + damp food = smell + die-offs.
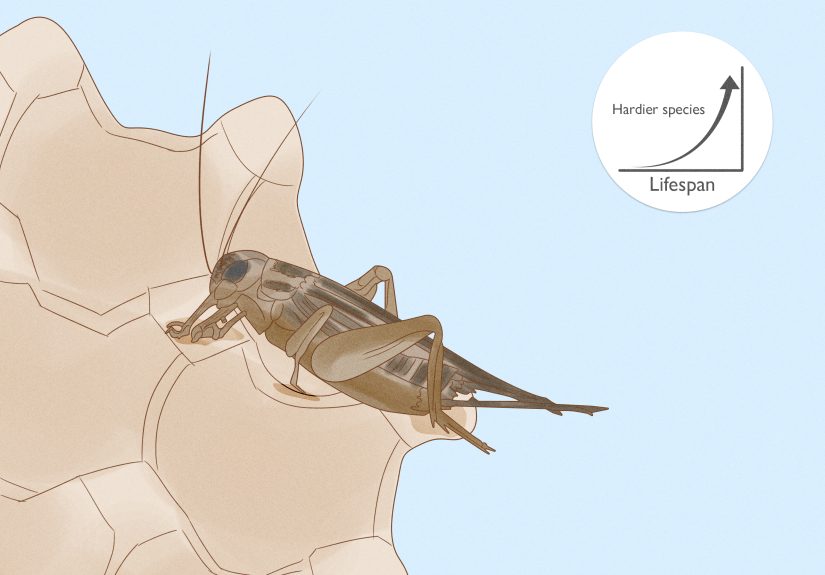
Step 1: Pick the Right Crickets (Yes, It Matters)
If you’ve ever bought crickets from a big chain store and watched them fade like a cheap T-shirt, you’re not imagining things.
Different species and supply chains can change survival. Many keepers report that banded crickets tend to last longer than
classic “house” crickets, especially when shipping and store time eat into their lifespan. If you’re buying for a week or two of feeding,
consider asking what species you’re getting and ordering smaller batches more often instead of one “cricket mountain” that turns into a “cricket cemetery.”
Quick buying tips
- Buy active crickets: they should move quickly and climb.
- Avoid wet containers: condensation is a red flag for mold and stress.
- Match size to your pet: too-big crickets don’t just waste moneythey can stress your reptile.
Step 2: Housing That Doesn’t Turn Into a Stink Box
Your goal is a container that is escape-proof, well-ventilated, and easy to clean.
A plastic tote or a small aquarium works great as long as the lid is mostly screen. Inside, you’ll add climbing surfaces (egg flats / tubes)
so crickets aren’t piled on top of each other like commuters on a broken subway.
Ventilation: more screen, less “hope”
Crickets crash fast in stale air. If your container lid only has a few tiny holes, that’s basically a “cricket crockpot.”
Use a mesh/screen lid, or cut large openings and attach screen securely. If you’re storing a lot of crickets, small ventilation holes usually aren’t enough.
Interior setup (simple & effective)
- Egg flats (not the flimsy carton from your fridge): stack vertically or layer like shelves for airflow.
- Paper towel rolls/tubes: optional, but helpful for hiding and easy “shake-out” feeding.
- Bare bottom or absorbent liner: paper towels or unprinted paper makes cleanup easy.
- Moisture control: if your room runs humid, a thin layer of something absorbent (like vermiculite) can help keep conditions drier.
Step 3: TemperatureWarm, Not Roasted
Temperature is the invisible hand controlling cricket energy, appetite, and survival. Too cold and they slow down, stop eating well,
and may die off. Too hot and you’ll speed-run a mass die-off (plus the smell… you’ll remember the smell).
Practical temperature ranges
- Everyday holding: many care guides recommend a moderate “room-warm” range (often around the low-to-mid 70s°F).
- Longer-term keeping / stronger activity: many feeder-care resources suggest warmer ranges (often mid-70s to mid-80s°F).
- Avoid extremes: don’t park the bin in direct sunlight, next to a heater vent, or in a cold draft.
If you use a heat mat or lamp, treat it like a seasoning shaker, not a fire hose: low wattage, thermostat if possible,
and always preserve airflow. Warm + sealed = disaster.
Step 4: HumidityCrickets Prefer “Dry-ish”
This is where most people accidentally sabotage themselves. Crickets need water, but they do not want a wet environment.
Damp substrate, misting, and condensation encourage mold, bacteria, and mites. Many rearing guides emphasize keeping the bottom of the enclosure dry,
making the “wet zone” only the hydration source (or egg-laying area if you’re breeding).
How to tell your bin is too humid
- Condensation on walls/lid
- Egg flats getting soggy or collapsing
- Musty smell (mold) instead of the normal “crickets smell like crickets”
- Crickets clustering at the very top, acting like the floor is lava
Step 5: Hydration Without the Drowning Olympics
Crickets dehydrate quickly, but open water bowls are basically tiny swimming pools with a 100% tragic ending.
The fix is simple: provide water in a form that doesn’t let them fall in and drown.
Best hydration options
- Hydration gel / “quencher” products: designed for insects to drink safely.
- Water crystals: polymer crystals hold water in a gel-like form (safer than a dish of water).
- Sponge method: a shallow dish with a clean sponge reduces drowning risk.
- Moist produce: carrot, apple, orange, squash, etc. provide moisture and calories (but must be swapped often).
The #1 rule: clean and refresh hydration daily (or at least frequently). Dirty gels and rotting produce are a shortcut to stink, mold, and death.
Step 6: FeedingKeep Them Alive, Then Make Them Worth Eating
A cricket that survives but eats junk is like a salad made entirely of croutons: technically food, emotionally disappointing.
Since crickets are omnivores and will eat a wide variety of foods, you can use diet to improve your pet’s nutrition through gut loading
(feeding nutrient-rich foods shortly before offering crickets to your reptile).
What to feed crickets (the practical menu)
- Staple dry diet: quality cricket chow, gut-load mix, or powdered grain-based feed (many people use a chicken mash-style base).
- Fresh produce add-ons: dark leafy greens, carrots, sweet potato, squash, oranges, apples (small pieces).
- Avoid mold magnets: anything that gets slimy fast should be offered in tiny amounts and removed promptly.
Gut-loading timing (the sweet spot)
For feeder quality, aim to gut-load for 24–48 hours before feeding. That’s enough time for crickets to pack in nutrients without
you running a full-time cricket restaurant. Offer a high-quality dry base plus fresh, nutrient-rich produce, and keep hydration available.
Step 7: Cleaning & Odor Control (Where Most “Die-Offs” Are Born)
If you only remember one gross fact, make it this: dead crickets quickly foul the enclosure.
Many care sheets warn that leaving dead crickets and damp food can trigger ammonia smell, bacteria growth, and cannibalismbasically a tiny insect horror movie.
The cure is routine maintenance, not heroics.
Easy cleaning routine
- Daily (takes 2 minutes): remove dead crickets, toss old produce, check hydration.
- Weekly: dump frass (droppings), replace damp/chewed egg flats, wipe surfaces, refresh liners.
- Monthly (or as needed): full bin wash with hot water, dry completely before re-setup.
Pro tip: keep two sets of egg flats so you can swap quickly. Clean bins are boring bins. Boring bins keep crickets alive.
Step 8: Space & Crowd Control
Overcrowding raises stress, waste buildup, and humiditythree things crickets are terrible at handling.
If you’re keeping hundreds, scale up the enclosure (and ventilation) rather than trying to “make it work” in a tiny keeper.
More space improves airflow and makes it easier to keep food dry and clean.
Rules of thumb that actually help
- More crickets = more ventilation (don’t negotiate with physics).
- Add more climbing surfaces so they can spread out.
- Split big batches into two containers if you canyour nose will thank you.
Step 9: TroubleshootingWhy Are My Crickets Still Dying?
If they die within 24–72 hours
- Ventilation is inadequate: upgrade to a mesh lid or larger screened openings.
- They’re overheated: move away from windows/sun/heat vents; reduce heat source.
- Moisture is too high: remove damp substrate, stop misting, switch to gels/crystals instead of wet produce piles.
- Old or stressed stock: shipping + store time can shorten remaining lifespan; buy smaller batches from a reliable supplier.
If they smell awful
- Remove dead crickets immediately.
- Replace egg flats and liners.
- Remove produce within 24–48 hours (sooner if it’s getting soft).
- Increase airflow and reduce humidity sources.
If they’re not eating
- Check temperature (too cold slows feeding).
- Offer a fresh dry base and a small amount of produce for appetite.
- Confirm hydration is available (dehydrated crickets get sluggish fast).
Step 10: Feeding Your Reptile Safely (Quick Notes)
When it’s showtime, keep feeding safe and sensible. Use appropriately sized crickets (many care sheets suggest no larger than the space between your pet’s eyes).
If you dust insects with supplements, do it right before feedingnot as a permanent “powder snowstorm” inside the cricket bin.
Crickets can be harmed if they’re constantly breathing supplement dust.
Conclusion: Make Their World Boring
Crickets thrive when their environment is stable, dry, airy, and cleanwith hydration they can’t drown in and food that doesn’t rot in a day.
Build a simple setup, follow a quick maintenance routine, and you’ll stop donating money to the Great Cricket Die-Off of Every Weekend.
Keep it boring. Keep it dry. Keep it ventilated. And your reptiles get better meals, too.
Extra: Common Keeper Experiences ( of Real-World “What Usually Happens”)
Below are patterns that reptile keepers commonly describe when they finally crack the code on keeping feeder crickets alive. Think of these as
“composite experiences” based on the most frequent scenarios people run intono exotic lab equipment required, just small adjustments that add up fast.
1) The “Sealed Tote” Era (aka: The Accidental Cricket Sauna)
A super common first setup is a storage tote with a lid snapped on tight, because, understandably, nobody wants crickets roaming the house like tiny,
chirping roommates who don’t pay rent. The problem is that a sealed lid traps heat and moisture. The bin warms up from room temperature, the crickets breathe,
waste accumulates, and suddenly you’ve built a humid microclimate that encourages mold and bacterial growth. Keepers often report that the “fix” feels too easy:
swap to a lid that is mostly screen, or cut a large window and attach mesh. The result is usually immediateless odor, more activity, fewer sudden deaths.
2) The Water Bowl Tragedy (Tiny Pools, Big Consequences)
Many people try to be kind and provide a little dish of water. Crickets respond by… drowning. Even when only a few drown, the water becomes contaminated quickly,
and wet spots spread. Keepers who switch to hydration gel, water crystals, or the sponge method usually describe a sharp improvement in survival.
The “aha moment” is realizing that crickets need access to water, not an open body of water. The best setups keep hydration contained,
clean, and shallowso moisture doesn’t take over the whole bin.
3) The Produce Pile Problem (When “Healthy Snacks” Turn Into Mold)
Another common story: you toss in a generous amount of fruit and veggies, feel proud, and then two days later the bin smells like a compost experiment.
Crickets will happily eat produce, but leftovers break down fastespecially in warm enclosures. Keepers who succeed tend to do the opposite of “generous”:
they offer small pieces, put them on a dish or a dry spot, and remove anything that softens or starts to look wet. Many also keep a dry staple diet available
all the time, using produce as a controlled supplement rather than the entire menu.
4) The Heat Spike Surprise (Aka: “Why Did They All Die Overnight?”)
People often underestimate how quickly temperatures can swingsun through a window, a heater cycling on, or a heat mat that’s stronger than expected.
Keepers commonly describe a “perfectly fine” bin that suddenly crashes after a warm afternoon. The lesson tends to be: avoid direct sunlight,
use low-wattage heat if needed, and preserve airflow so heat doesn’t build up. If you want to be extra safe, place a simple thermometer where the crickets live,
not across the room where humans live.
5) The Gut-Load Glow-Up (When Your Feeders Become Better Feed)
A final “experience” many keepers report is noticing improved pet appetite and condition once they treat feeder care like part of the pet’s nutrition plan.
The routine usually becomes: keep crickets stable and alive, then gut-load with nutrient-rich foods for 24–48 hours before feeding.
That small window is where you turn “random bug” into “intentional nutrition.” It’s also where many people realize that feeder care is less about perfection
and more about consistencysmall daily habits that prevent the chain reaction of moisture, stink, stress, and die-offs.


