Table of Contents >> Show >> Hide
- Why a Santa Gnome on the Porch Works So Well
- Choose Your Build Style: Big Porch Statement or Cute Sidekick
- Quick Supply Cheat Sheet (With Smart Substitutions)
- Option A: Stacked-Pot Front Porch Santa Gnome (Charming & Clean)
- Option B: Evergreen Tomato-Cage Santa Gnome (Outdoor-Ready & Surprisingly Fancy)
- Option C: No-Sew Sock Santa Gnome (Mini Porch Buddy)
- Weatherproofing & Porch Safety (Keep It Cute and Not Chaotic)
- Make It Look “Designed,” Not “Random Stuff on the Porch”
- Troubleshooting: Fix the Common “Gnome Problems”
- Storing Your Santa Gnome So Next Year Is Easy
- Conclusion
- of Real-World Porch Gnome Experience (So You Don’t Learn the Hard Way)
Every front porch deserves a tiny, bearded security guard who looks like Santa got a side hustle as a garden gnome.
Enter: the Christmas Holiday Front Porch Santa Gnome DIYa cheerful, slightly mysterious greeter who
silently judges delivery people (kindly) and makes your neighbors ask, “Okay but… where did you get that?”
This guide pulls together practical techniques and “what actually holds up outside” advice inspired by a mix of
reputable U.S. DIY and home-and-garden sourcesthink: Better Homes & Gardens, This Old House, Fine Gardening,
Clemson University HGIC, University of Illinois Extension, Good Housekeeping, plus long-running craft educators
and DIY publishers like Instructables and established U.S. craft bloggers who specialize in gnome builds.
No links here (because you’re publishing), just the best takeawaysrewritten and tested in the court of porch reality.
Why a Santa Gnome on the Porch Works So Well
A porch gnome hits the sweet spot between festive and friendly. It’s not as loud as a giant inflatable,
not as fragile as a wreath made of hopes and thin wire, and it gives your entryway an intentional “welcome”
moment. Gnomes are also tied to Scandinavian-style holiday folklore (tomte/nisse vibes), which makes them feel
classic even when they’re made out of… a tomato cage and zip ties. (Crafting is magical like that.)
Choose Your Build Style: Big Porch Statement or Cute Sidekick
Below are three build options that work beautifully as front porch Christmas decor.
Pick oneor make a “gnome family” and become that house (the good kind).
- Option A: Stacked-Pot Porch Santa Gnome best for covered porches; looks designer, costs less than a fancy wreath.
- Option B: Evergreen Tomato-Cage Santa Gnome best for outdoors; sturdy, wind-friendly, and smells like Christmas.
- Option C: No-Sew Sock Santa Gnome (Mini) best for planters, benches, and porch shelves; fast and addictive.
Quick Supply Cheat Sheet (With Smart Substitutions)
Most Santa gnome DIYs are the same three ingredients with different outfits: a body, a beard, a nose, and a hat.
The rest is just styling.
Tools (All Options)
- Scissors (plus a craft knife if cutting faux fur cleanly)
- Hot glue gun (or strong craft glue; see weatherproof tips below)
- Zip ties and/or floral wire (outdoor MVPs)
- Wire cutters or heavy-duty scissors (for tomato cages)
- Pruners (if using fresh greenery)
Materials You Can Mix and Match
- Nose: wooden bead, felt ball, wool dryer ball, ornament, or a “soft” DIY ball in a stocking
- Beard: faux fur, fluffy fleece, Spanish moss, yarn, or even faux greenery for a frosty look
- Hat: fleece cone, felt cone, Santa hat, sweater sleeve, or a sewn/rolled fabric cone
- Weight: rice, beans, gravel, sand, or poly pellets (use what you have)
- Outdoor stability: bricks, sandbags, plant pot, tomato cage, stakes, clips, and zip ties
Option A: Stacked-Pot Front Porch Santa Gnome (Charming & Clean)
This build is perfect for a covered porch. The “body” is simply stacked plastic garden pots, disguised with
moss or greenery, then topped with a tall hat. It reads high-end, but it’s actually very “I made this in an hour
and now I’m emotionally attached.”
What You’ll Need
- 1–2 plastic garden pots (example: one 12-inch pot, plus an 8-inch pot for a taller gnome)
- Sheet moss (or burlap/greenery garland as a swap)
- Faux greenery stems (frosted/flocked looks extra wintery)
- Wool dryer ball or wooden bead (nose)
- 3 wooden dowels (roughly 20–24 inches each) + 1 zip tie (for the hat “tent”)
- Fleece or felt fabric for hat (about a 27×27-inch square for a tall cone hat)
- Optional: faux berries, ribbon, mini ornaments, mittens, candy cane prop
Step-by-Step
-
Stack the pots (upside down).
Flip the pots so the openings face down. If making a tall gnome, glue the smaller pot on top of the larger pot,
centered. Let it set fully so your gnome doesn’t do the “slow motion lean” later. -
Wrap the body.
Cut sheet moss into long strips and glue vertically around the pot body, overlapping slightly.
Leave a few inches at the top uncoveredyour hat brim and beard will hide the seam.
Swap: no moss? Wrap with burlap, faux cedar garland, or even weather-resistant fabric. -
Add the beard.
Trim faux greenery stems and hot glue them to the front in a beard shape. Fluffed, layered, and slightly messy is good
Santa gnomes are not known for crisp beard lines. -
Give him a nose (aka the “boop target”).
Glue the nose right above the beard. Add berries or small ornaments to the beard if you want extra sparkle. -
Build the hat structure.
Zip-tie the dowels together at one end to make a tripod. Insert the dowel ends into pot drainage holes if you have them.
If you don’t, glue the dowel ends to the pot top. This structure keeps the hat tall instead of sad. -
Make the cone hat.
Fold your fleece square in half, cut a diagonal edge to form a cone shape, then glue or sew the seam.
Turn right-side out and slide it over the dowel tripod. Adjust the tilt: slightly slouchy looks cozy. -
Add arms (optional but adorable).
Wrap short dowels in fleece and glue them to the sides. Add fluffy cuffs and mittens if you want full Santa energy.
Porch Styling Tip
Place the pot gnome next to a lantern or a small evergreen planter so it looks like a designed vignette.
If you have a doormat with a bold pattern, keep the gnome hat solid (red, cream, or plaid) so it doesn’t get visually loud.
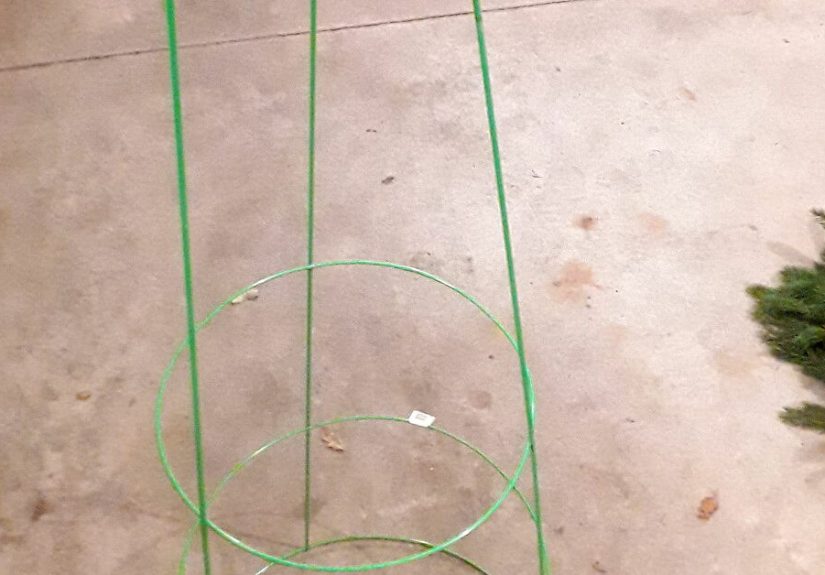
Option B: Evergreen Tomato-Cage Santa Gnome (Outdoor-Ready & Surprisingly Fancy)
If you want a Christmas holiday front porch Santa gnome DIY that can handle cold air and light wind,
go evergreen. The tomato cage becomes the frame, greenery becomes the body, and a Santa hat finishes the look.
It’s part craft, part garden project, part “why does this look so good?”
What You’ll Need
- 1 tomato cage (size = gnome height; bigger cage, bigger drama)
- Zip ties or floral wire (you’ll use more than you think)
- Greenery (fresh cut evergreen branches or sturdy faux greenery)
- Santa hat (or red felt fabric to make one)
- Nose (ornament, felt ball, wooden bead, or a stuffed stocking ball)
- Beard (Spanish moss, yarn, faux fur, or pale faux greenery)
- Mittens (child-size mittens work great) + optional prop (candy cane, mini wreath)
- Optional: battery-powered lights for sparkle
Step-by-Step
-
Flip and secure the frame.
Turn the tomato cage upside down so the wide ring becomes the base. Bring the three “legs” together at the top and
secure them with duct tape, wire, or multiple zip ties. You’re making a stable cone. -
Prep greenery bundles.
Cut branches into manageable pieces (roughly forearm length works nicely). Bundle a few stems together so you can attach quickly.
Mixing textures (cedar + pine + something wispy) makes it look intentional. -
Attach greenery from bottom to top.
Start at the lowest ring and work upward. Let each layer drape over the cut stems below to hide mechanics and look lush.
Keep turning the cage so coverage is even on all sides. -
Add the beard and nose.
Place the beard material on the front (Spanish moss is easy and lightweight; faux fur looks plush).
Attach the nose slightly above the beard line so the hat can “rest” over it. -
Hat time.
Pull a Santa hat down over the top and part of the nose area. Secure with wire or zip ties behind the greenery.
If the hat flops too much, stuff a little lightweight filler inside (or tuck in a foam block) to give it shape. -
Mittens and accessories.
Wire mittens to the sides as “hands.” Add a candy cane, tiny lantern, or mini wreath. Suddenly your gnome has a personality. -
Optional lights (the “wow” upgrade).
Weave a short string of battery lights through the greenery and hide the battery pack behind the body.
Use outdoor-rated lights if they’ll be exposed to moisture.
Where to Place It
- Best spot: next to a porch column or railing where you can discreetly zip-tie it for wind security.
- Elevate slightly: set it in a heavy planter or on a sturdy mat to keep it off wet ground.
- Pair it: one gnome on each side of the door looks symmetrical and instantly “done.”
Option C: No-Sew Sock Santa Gnome (Mini Porch Buddy)
This one is quick, cozy, and dangerous because you can make “just one” and then realize it’s midnight and you’ve created five.
A sock gnome is perfect for a porch bench, a small table, or sitting in a planter like it owns the place.
What You’ll Need
- 1 plain sock (to hold weight) + 1 fuzzy sock (optional for the outer body)
- Rice/beans/gravel/poly pellets for weight
- Rubber band or string
- Faux fur (beard) + wooden bead or felt ball (nose)
- Felt/fleece for hat (or use part of a sock/sweater sleeve)
- Hot glue
Step-by-Step
-
Make the body.
Pour about 1.5–2 cups of rice into a sock toe. Shape it into a stable “beanbag snowman” base and tie off with a rubber band. -
Cut the beard the smart way.
If using faux fur, cut from the backing with a craft knife so you don’t chop the fur fibers. This keeps the beard fluffy instead of looking like a bad haircut. -
Glue the beard, then the nose.
Wrap the beard around the front and glue. Add the nose on top, slightly overlapping the beard edge. -
Make a cone hat.
Roll felt into a cone, glue the seam, and slip it on. For a sock-hat trick: pull the sock’s heel section onto the gnome,
tuck the heel upward inside to hide it, then tie off the top for a cute slouch. -
Finish with tiny details.
Add a pom-pom, jingle bell, mini wreath, or ribbon trim. Small detail, big “store-bought who?” energy.
Weatherproofing & Porch Safety (Keep It Cute and Not Chaotic)
Outdoor décor has three enemies: wind, moisture, and “why did I put that there?” planning.
These tips help your Santa gnome decoration last longer.
Wind-Proofing
- Anchor it. Use zip ties to secure gnomes to railings, columns, or heavy planters.
- Add weight. Hide bricks or sandbags behind or inside the base so it doesn’t tip forward.
- Let air pass through. Evergreen/tomato-cage gnomes handle wind well because they’re not a solid sail.
Moisture-Proofing
- Use outdoor-friendly materials. Plastic, treated wood, and weather-resistant fabrics hold up better than delicate paper decor.
- Elevate off wet ground. Place gnomes on mats, stands, or in planters to avoid standing water and ice.
- Seal what needs sealing. If you paint wood pieces, add a clear sealant so moisture doesn’t wreck your work.
- Fabric protection helps. A fabric protector spray can help hats resist light moisture (follow label directions and use ventilation).
Electrical Safety (If You Add Lights)
- Use outdoor-rated lights and keep connections protected and off the ground when possible.
- Use GFCI-protected outlets for outdoor power.
- Battery lights are often simplest for gnomesno cords to trip over, no mystery puddle risk.
Make It Look “Designed,” Not “Random Stuff on the Porch”
The difference between “cute DIY” and “wow, this porch looks styled” is usually scale + grouping + repetition.
Here are easy ways to level up your front porch Christmas decor with your Santa gnome as the star.
Three Foolproof Porch Layouts
-
Symmetry: Two tall items flanking the door (gnome + evergreen planter on each side).
It feels classic and takes zero design degree. -
Triangle grouping: Put the gnome (tall), a lantern (medium), and a smaller plant or sign (short) in a cluster.
Your eye reads it as intentional. -
Bench moment: One mini sock gnome on the bench + one larger porch gnome on the floor beside it.
Add a throw pillow and you’ve got “holiday magazine porch.”
Color Ideas That Always Work
- Classic Santa: red + white + evergreen + a pop of gold
- Modern cozy: cream + taupe + forest green + black accents
- Cabin plaid: buffalo check hat + red berries + natural wood textures
Troubleshooting: Fix the Common “Gnome Problems”
- Hat keeps collapsing: add internal structure (dowels, foam block, or extra stuffing) and secure the hat seam to the frame.
- Beard looks flat: fluff it, trim uneven edges, or layer beard material (a base layer + a top layer) for dimension.
- Gnome tips forward: weight the base and move the nose/beard slightly higher so the “visual weight” stays centered.
- Glue won’t hold outdoors: reinforce with zip ties, wire, or outdoor-rated adhesive, and place under cover when possible.
- Greenery dries out too fast: if it’s in a container, water until freezing temps arrive; use tougher evergreens; keep out of harsh sun/wind.
Storing Your Santa Gnome So Next Year Is Easy
If you want this to be a yearly tradition (and you dofuture you will thank you), store smart:
- Remove hats and soft parts, and store them in a dry bin so they don’t get crushed.
- Label bins: “Gnome Hats,” “Gnome Noses,” “Tiny Mittens That I Will Forget Exist.”
- If using fresh greenery, compost it after the season and save the frame for next year.
- Take a quick photo of your porch setup so you can recreate it without reinventing the wheel.
Conclusion
A Christmas Holiday Front Porch Santa Gnome DIY is one of those projects that delivers big joy for a surprisingly
small effort. Whether you build the stacked-pot version for a clean porch look, the evergreen tomato-cage gnome for outdoor toughness,
or a mini no-sew sock gnome for instant charm, the secret is the same: solid structure, cozy textures, and a little personality.
Keep it stable, keep it weather-aware, and don’t be afraid to name your gnome. (It’s hard to stay grumpy in winter when “Gary the Gnome”
is guarding your doormat like it’s his full-time job.)
of Real-World Porch Gnome Experience (So You Don’t Learn the Hard Way)
The first time I made a front porch Santa gnome, I learned a lesson that should be printed on a crafting apron:
everything looks sturdy until the wind politely disagrees. I had built a beautiful, tall hatvery “North Pole chic”and
placed the gnome right where it looked best, which was also the exact spot where a winter gust turns your porch into a wind tunnel.
Ten minutes later, the hat was leaning like it had just heard an unbelievable piece of gossip. The fix was simple: structure and anchors.
A couple of hidden zip ties and a weighted base took my gnome from “dramatic” to “dependable.”
Next came the beard. Faux fur is incredible for that plush Santa look, but it has one rule: cut the backing, not the hair.
If you cut it like normal fabric, the beard can end up looking like it lost a fight with a vacuum cleaner. Once I started slicing the backing
with a craft knife, the difference was immediatefull, fluffy, and convincingly gnome-ish. I also learned that beards look better slightly wider
than you think. A narrow beard makes the nose feel oversized; a wider beard makes the face look balanced and intentional.
I’ve also tried the evergreen tomato-cage gnome, and honestly, it’s the “outdoor champion” option. There’s something satisfying about turning
basic garden supplies into holiday décor that looks like it came from a fancy winter market. The trick is layering greenery from the bottom up,
like shingles on a roof. When you do that, the frame disappears and the gnome looks lush and expensiveeven if your materials were not.
If you add mittens, you’ll want them level. One mitten higher than the other turns your friendly porch greeter into a gnome who looks like
he’s trying to hail a taxi.
The most unexpected lesson? Placement matters as much as the build. A gnome sitting alone can look like you ran out of decorating steam.
But add a lantern, a small planter, or a little cluster of ornaments, and suddenly it’s a styled scene. I now treat the gnome like the main character:
it gets supporting actors. And if you’re working with a smaller porch, a mini sock gnome is perfect because it adds charm without blocking the walkway
or turning your entry into an obstacle course.
Finally, don’t underestimate the power of “quick maintenance.” After a wet day, I do a 30-second porch scan: straighten the hat, fluff the beard,
and make sure nothing is sitting in a puddle. That tiny habit keeps the whole setup looking fresh all season. The best part is that once you make one,
you’ll start seeing gnome potential everywherepots, socks, tomato cages, leftover fabric. It’s a slippery slope… but it’s a festive one.