Table of Contents >> Show >> Hide
- What Is a Self-Sustaining Terrarium, Really?
- What You Need to Make a Self-Sustaining Terrarium
- How to Choose the Right Container
- Best Plants for a Self-Sustaining Terrarium
- Step-by-Step: How to Make a Self-Sustaining Terrarium Like a Pro
- How to Care for a Closed Terrarium
- Common Terrarium Mistakes to Avoid
- Pro Tips for a Terrarium That Looks Designer-Made
- What the Experience of Making a Self-Sustaining Terrarium Is Really Like
- Conclusion
A self-sustaining terrarium is what happens when houseplants move into a stylish glass condo and agree to recycle their own water. In theory, it sounds almost magical. In practice, it is a beautifully simple indoor gardening project that works when you respect a few non-negotiables: the right container, the right layers, the right plants, and the discipline not to water it like you are trying to rescue a cactus in July.
If you have ever admired those lush little worlds sealed inside jars and wondered whether they are genuinely low-maintenance or just social-media bait with moss, good news: a closed terrarium can be wonderfully easy to care for. The trick is understanding that “self-sustaining” does not mean “set it up and ignore it until the sun burns out.” It means the terrarium creates a mini water cycle, holds humidity well, and needs far less intervention than a regular potted plant arrangement.
This guide will show you exactly how to make a self-sustaining terrarium like a pro, from choosing the best terrarium plants to layering materials properly, avoiding rookie mistakes, and keeping the whole thing looking sharp instead of swampy. Whether you want a moody moss garden, a tiny tropical jungle, or a polished DIY terrarium for your desk, you are in the right place.
What Is a Self-Sustaining Terrarium, Really?
A self-sustaining terrarium is usually a closed terrarium: a clear container with a lid that traps moisture and creates a humid environment. Water evaporates from the soil and plant leaves, condenses on the inside of the glass, and drips back into the growing medium. That cycle is why a well-built terrarium can go for weeks or even months without additional watering.
That said, let us retire one myth immediately: a terrarium is not immortal. Plants still grow. Leaves still age. Light still matters. Condensation still needs monitoring. A terrarium is better thought of as a mini ecosystem that needs occasional steering, not a plant time capsule you seal and forget.
The most successful self-sustaining terrariums mimic the conditions of a forest floor: filtered light, steady moisture, warm temperatures, and plenty of humidity. That is why tropical, compact, moisture-loving plants usually thrive, while desert plants absolutely do not. Put a succulent in a sealed terrarium and you are basically asking it to live in a sauna. It will not send a thank-you note.
What You Need to Make a Self-Sustaining Terrarium
Before you start building, gather the right supplies. A good terrarium is not complicated, but each layer has a job to do.
Basic Materials
- Clear glass container with a lid
- Small gravel or pebbles for drainage
- Activated charcoal
- Sheet moss or sphagnum moss
- Sterile potting mix suitable for tropical houseplants
- Small humidity-loving terrarium plants
- Long tweezers, spoon, chopstick, or narrow trowel
- Spray bottle or small watering tool
- Optional decorative elements like stones or wood
Why These Layers Matter
The drainage layer helps keep excess water away from the roots. Activated charcoal helps filter water and reduce the stale, funky, “what died in here?” effect that can happen in enclosed containers. Moss acts like a barrier so the soil does not slip down into the gravel. The potting mix supports roots while holding enough moisture for that enclosed environment to work.
If you skip half the layers and toss plants into a jar with random dirt, your terrarium may still look cute for a week. After that, it tends to become an experiment in mold, rot, and regret.
How to Choose the Right Container
The best container for a DIY self-sustaining terrarium is clear, tall enough for airflow around the plants, and equipped with a lid or cover. Mason jars, apothecary jars, cookie jars, glass canisters, and small aquariums can all work well.
Choose a container with enough opening space to make planting possible. A narrow-neck bottle terrarium looks cool, but it is a patience test disguised as decor. If this is your first build, start with something you can actually reach into without inventing twelve new curse words.
What to Look For
- Clear glass for maximum light
- A lid to hold humidity
- Enough depth for layers and roots
- Enough width for a pleasing design
- Easy access for trimming and cleaning
Size matters more than people think. Tiny containers are charming, but they dry out faster, fog up more dramatically, and leave less room for error. A medium-size jar is often the sweet spot for beginners.
Best Plants for a Self-Sustaining Terrarium
The best terrarium plants stay relatively small, tolerate humidity, and enjoy medium to bright indirect light. Texture matters too. A terrarium looks far more polished when you mix shapes, heights, and leaf patterns.
Great Closed Terrarium Plants
- Fittonia for bold leaf veins and compact growth
- Peperomia for texture and manageable size
- Mosses for softness and a woodland feel
- Selaginella for lush, fern-like ground cover
- Mini ferns for a classic tropical look
- Pilea for small leaves and easy styling
- Maranta or prayer plant for color and personality
- Cryptanthus for a spiky shape and contrast
Plants to Avoid in a Sealed Terrarium
- Succulents
- Cacti
- Large, fast-growing tropical plants
- Anything already struggling in its nursery pot
A pro-looking terrarium usually includes one upright plant, one or two mid-size texture plants, and one trailing or low-growing plant. Think of it like interior design, only smaller and with more chlorophyll.
Step-by-Step: How to Make a Self-Sustaining Terrarium Like a Pro
1. Clean the Container Thoroughly
Wash the inside of the glass with hot, soapy water and let it dry completely. Starting with a clean container reduces the chances of mold, bacteria, and mystery fuzz making an early appearance.
2. Add a Drainage Layer
Place about 1 to 2 inches of gravel or small pebbles at the bottom. In larger containers, you can go a little deeper. This layer creates space for excess water to collect away from the roots.
3. Add Activated Charcoal
Sprinkle a thin layer of activated charcoal over the gravel. This is one of those small steps that pays off later. It helps keep the environment fresher and improves the overall health of a closed terrarium.
4. Add a Moss Barrier
Lay a thin sheet of moss over the charcoal. This keeps the soil from working its way into the drainage layer, which helps maintain the structure of the terrarium over time.
5. Add the Potting Mix
Add enough soil for the plants to root comfortably, usually 2 to 3 inches depending on the size of your plants and container. Keep the soil slightly damp, not wet. You want “fresh brownie texture,” not “plant soup.”
6. Plan the Layout Before Planting
Set the plants on top of the soil before digging. Place taller plants toward the back if the terrarium will be viewed from one side, or near the center if it will be viewed from all angles. Keep some breathing room between plants and the glass so leaves do not stay pressed against the sides and begin to rot.
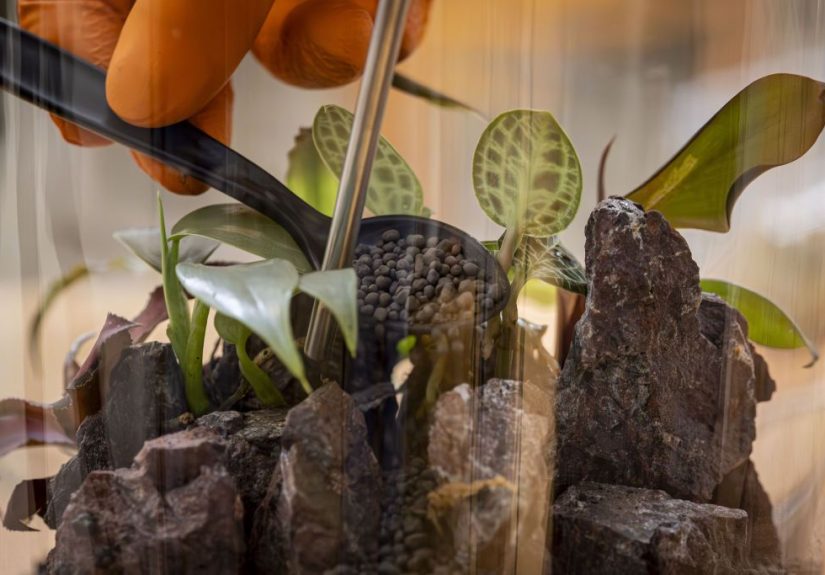
7. Plant Carefully
Remove each plant from its pot, shake off some excess soil, and gently loosen the roots if necessary. Dig small planting holes and settle each plant at the same depth it was growing before. Use tweezers, chopsticks, or a long spoon to position everything without crushing the leaves.
8. Add Finishing Touches
Now you can add extra moss, a decorative stone, or a small piece of wood if you want a more finished look. Keep it tasteful. A terrarium should look like a miniature landscape, not a yard sale in a jar.
9. Water Lightly
After planting, mist or lightly water just enough to settle the soil. This is the moment many beginners go wrong. The terrarium should be moist, not soaked. If water pools heavily at the bottom, you overshot.
10. Leave It Open Briefly, Then Close It
Let foliage dry before sealing the terrarium. Once the leaves are dry, place the lid on and move the container to a spot with bright, indirect light.
How to Care for a Closed Terrarium
Give It Bright, Indirect Light
A self-sustaining terrarium loves light, just not harsh direct sun. Direct sunlight can turn a glass container into a tiny greenhouse oven, overheating the plants and cooking your hard work in record time. An east-facing room, a bright shelf away from the window, or filtered light is usually ideal.
Watch the Condensation
Condensation is your feedback system. A light mist or a little moisture on the glass is normal. Heavy, constant fog or large droplets all day long means the terrarium is too wet. Remove the lid for a little while and let excess moisture escape. If there is no condensation at all and the soil looks dry, the terrarium may need a small drink.
Water Sparingly
This is the whole point of a self-sustaining terrarium: you should not need to water often. Some closed terrariums need water only every few months. Always check the soil and the behavior of the plants first. Water on observation, not on habit.
Trim Aggressive Growth
Even compact plants eventually test boundaries. Trim stems that touch the glass or crowd their neighbors. Terrarium care is part gardening, part editing. You are shaping a miniature scene, not hosting a free-for-all.
Do Not Fertilize Too Early
Fertilizer encourages fast growth, which is the opposite of what you want in a closed terrarium. Slow growth keeps the design balanced and reduces maintenance. In most cases, skip fertilizer, especially during the first year.
Common Terrarium Mistakes to Avoid
Using the Wrong Plants
A closed terrarium is for humidity-loving plants, not desert plants. If you want succulents, build an open terrarium instead.
Overwatering
This is the number one terrarium killer. Closed containers do not have drainage holes, so extra water has nowhere useful to go.
Too Much Direct Sun
Sun plus glass plus enclosed humidity equals a very efficient plant meltdown.
Overcrowding
Plants need room for air circulation and future growth. If everything is jammed together on day one, it will only get messier from there.
Ignoring Early Warning Signs
Yellow leaves, mushy stems, mold, and nonstop fogging are your terrarium’s way of waving a tiny emergency flag. Respond early and you can usually correct the problem.
Pro Tips for a Terrarium That Looks Designer-Made
- Use odd numbers of plants for a more natural composition.
- Mix leaf textures instead of using plants that all look the same.
- Create gentle hills with the soil for depth and visual interest.
- Keep decorative elements minimal so the plants stay the stars.
- Clean the inside glass when needed because dirty glass blocks light and ruins the view.
- Rotate the terrarium occasionally so growth stays balanced.
A professionally styled terrarium does not necessarily have more materials. It just has better restraint. A little asymmetry, a clear focal plant, and smart spacing can make even a budget terrarium look elevated.
What the Experience of Making a Self-Sustaining Terrarium Is Really Like
One of the best things about building a self-sustaining terrarium is that it feels like a creative project and a gardening project at the same time. You are not just potting a plant. You are designing a miniature environment, which changes the whole experience. The first few minutes are usually practical: washing the glass, sorting materials, deciding whether your gravel layer looks elegant or suspiciously like aquarium leftovers. Then, somewhere between placing the moss barrier and setting in the first little Fittonia, the project becomes oddly calming.
Many people expect the process to be fiddly, and honestly, it can be. You will almost certainly have a moment when a leaf bends the wrong way, a pinch of soil lands on the glass, or your “simple” layout suddenly starts looking like a tropical traffic jam. But that is part of the charm. Terrarium building teaches patience fast. You start paying attention to proportions, leaf size, spacing, and angles in a way that regular container gardening does not always demand.
The most memorable part often comes a day or two later. You check the jar and see the glass gently fogging in the morning. Suddenly the closed terrarium stops looking like a craft project and starts looking like a living system. The condensation forms, shifts, and clears. Tiny leaves lift toward the light. Moss settles in. The whole thing feels alive in a very satisfying, low-key way.
There is also a learning curve that every terrarium owner seems to experience. At first, people tend to fuss over it too much. They open it too often, water too soon, or move it around the house trying to find the “perfect” spot. Then they realize that terrarium care is mostly about observation. Once you understand what healthy condensation looks like and how the plants respond, you become less reactive and more confident. That is usually the moment the hobby gets really enjoyable.
Another common experience is discovering that terrariums are a lesson in editing. The plant you loved at the garden center may be too big in three months. A stem that looked whimsical may start pressing against the glass like it is trying to escape. Something eventually needs pruning. Instead of treating that as failure, experienced growers treat it as part of the rhythm. A terrarium is not frozen art. It is living design, and it looks best when you interact with it lightly over time.
People also underestimate how much personality a terrarium adds to a room. A good one draws attention without shouting for it. On a desk, bookshelf, or coffee table, it adds texture, color, and that subtle “I definitely have my life together” energy. Even better, it usually becomes a conversation starter. Guests lean in. They ask whether it is real. They ask whether you water it. You get to casually explain the water cycle like a miniature-ecosystem wizard.
In the long run, the experience of making a self-sustaining terrarium is rewarding because it combines beauty with a manageable level of care. It gives you the pleasure of indoor gardening without the constant maintenance of a crowded houseplant collection. And unlike some DIY projects that end with leftover supplies and a mild identity crisis, this one keeps evolving after the build is done. It grows, settles, changes shape, and becomes more interesting with time. That is what makes it feel less like decor and more like a living piece of the room.
Conclusion
Learning how to make a self-sustaining terrarium like a pro is really about getting the balance right. Choose a clear container with a lid, build the right drainage and soil layers, use compact humidity-loving plants, and resist the urge to overwater. Give it bright indirect light, trim it when needed, and let the mini ecosystem do much of the work.
When done well, a closed terrarium is one of the most rewarding indoor garden projects you can make. It is decorative, relaxing, science-friendly, and surprisingly elegant for something that begins with gravel, moss, and a jar from the back of the cabinet. Build it carefully, care for it lightly, and your tiny indoor jungle can thrive like a pro-level masterpiece.