Table of Contents >> Show >> Hide
- Introduction: Why Pencil Drawings Still Feel Like Magic
- What Makes Pencil Drawing So Timeless?
- Understanding the Tools Behind Great Pencil Drawings
- Core Pencil Drawing Techniques Every Artist Should Know
- How to Make Pencil Drawings Look More Realistic
- Popular Subjects for Pencil Drawings
- Developing a Personal Style in Pencil Art
- Common Pencil Drawing Mistakes and How to Fix Them
- How to Present and Preserve Pencil Drawings
- of Personal Experience: What Pencil Drawing Has Taught Me
- Conclusion: Pencil Drawings Turn Simple Tools Into Personal Art
Note: This article synthesizes real information from reputable U.S.-based museum, art education, conservation, and art-supply resources, including major museum collections, graphite-material guides, drawing technique resources, and paper-selection advice. Source links are intentionally omitted as requested.
Introduction: Why Pencil Drawings Still Feel Like Magic
Pencil drawings may look simple at first glance. A pencil, a sheet of paper, a hand, and maybe an eraser sitting nearby like a tiny white safety netwhat could be more basic? But that simplicity is exactly why pencil art has survived every trend, every flashy digital tool, and every “new must-have” creative gadget. Pencil drawing is direct. It lets an artist think out loud without shouting. One line can whisper. A cluster of dark shading can growl. A soft smudge can turn flat paper into mist, skin, metal, fabric, or moonlight.
When people say “my art pencil drawings,” they often mean more than finished sketches. They mean the private world behind the page: the patience, experiments, broken pencil tips, accidental smears, and that glorious moment when a drawing finally starts looking back at you. Pencil drawing is personal because every mark records pressure, movement, hesitation, and confidence. Unlike some media that hide the artist’s hand, graphite shows everything. It is honestsometimes brutally honest, like a mirror with excellent lighting.
This guide explores pencil drawing as both an art form and a creative practice. We will look at materials, techniques, styles, composition, shading, realism, expressive sketching, and how to build a personal drawing voice. Whether you are creating portraits, landscapes, still life, fantasy illustrations, animal sketches, or quiet doodles in the corner of a notebook, pencil drawings offer a powerful way to turn observation into art.
What Makes Pencil Drawing So Timeless?
Pencil drawing has a long history because it is flexible, affordable, and deeply expressive. Graphite, the material inside most drawing pencils, is a form of carbon. It can create pale silver lines, rich dark shadows, smooth gradients, and textured marks. Modern pencils are typically made from graphite mixed with clay or another binder, then encased in wood. The balance of graphite and binder affects hardness, darkness, and how the pencil behaves on paper.
That may sound technical, but the creative result is beautifully simple: one pencil can sketch a quick idea, while a full set of graphite pencils can build dramatic depth. A hard pencil can draw crisp architectural lines. A soft pencil can create velvety shadows. A kneaded eraser can lift highlights so gently it feels like turning on a tiny flashlight inside the drawing.
Museums continue to collect and exhibit pencil and graphite works because drawing is not merely preparation for “real art.” It is real art. Many major artists have used pencil drawings for studies, finished pieces, visual experiments, and expressive mark-making. The medium is humble, but its possibilities are not. Pencil is the quiet tool that can build an entire universe without needing a paintbrush, palette, or dramatic studio apron.
Understanding the Tools Behind Great Pencil Drawings
Graphite Pencils: The HB Scale Made Simple
Drawing pencils usually follow the HB scale. Pencils marked with H are harder and make lighter, sharper marks. Pencils marked with B are softer and make darker, richer marks. HB sits in the middle and is similar to the everyday writing pencil. A 2H pencil is useful for light construction lines, clean outlines, and early sketching. A 2B or 4B pencil is great for shading. A 6B or 8B can create deep shadows, but it also smudges more easily. Like a dramatic friend, it brings intensity but requires supervision.
For beginners, a small pencil range is enough: 2H, HB, 2B, 4B, and 6B. This gives you light lines, middle tones, and strong darks without turning your desk into a pencil jungle. Advanced artists may use a wider range, but skill matters more than owning every pencil grade known to humanity.
Paper: The Unsung Hero of Pencil Art
Paper changes everything. Smooth paper allows fine details and clean blending, making it excellent for portraits, realistic eyes, delicate textures, and polished graphite work. Medium or toothy paper grips more graphite, which can help build darker values and expressive textures. Toned paper gives the artist a middle value from the start, making highlights and shadows easier to organize.
Sketch paper is usually thinner and better for practice, quick ideas, and studies. Drawing paper is often heavier and more durable, which helps when layering graphite, erasing repeatedly, or creating finished art. If your drawing paper buckles, tears, or gives up halfway through a portrait, it may be time to upgrade. Paper has feelings tooprobably.
Erasers, Blending Tools, and Sharpeners
A kneaded eraser is one of the best tools for pencil drawing because it can lift graphite without damaging the paper. You can pinch it into a point to create tiny highlights in hair, eyes, glass, or water. A vinyl eraser is stronger and better for removing larger areas. A blending stump can smooth graphite, but it should be used carefully. Over-blending can make a drawing look flat or muddy. Finger blending may feel natural, but skin oils can affect the paper, so a tissue or stump is usually safer.
A good sharpener also matters. Crisp points are useful for eyelashes, fabric threads, tree branches, and architectural edges. A dull pencil can still be useful for soft shading, but if you are trying to draw a realistic eye with a blunt 6B pencil, good luck. That pupil may become a small black pancake.
Core Pencil Drawing Techniques Every Artist Should Know
Line Drawing and Contour
Line is the foundation of pencil art. Contour drawing focuses on the outer edges of a subject, while inner contour lines describe forms within the object. A confident contour line can make a simple sketch feel alive. The trick is to observe more than you assume. Many beginners draw what they think an eye, hand, or cup looks like instead of what is actually in front of them.
Try slow contour practice. Look carefully at the subject and let your pencil move with your eyes. The result may be imperfect, but it trains observation. And observation is the secret ingredient in drawingright after patience and snacks.
Hatching and Crosshatching
Hatching uses repeated parallel lines to create tone. Crosshatching layers lines in different directions for darker values and richer texture. Artists have used these methods for centuries because they give shading structure and energy. Instead of rubbing graphite into a gray cloud, hatching lets the viewer feel the movement of the hand.
For example, to shade a cheek in a portrait, use curved hatching that follows the form of the face. To draw a tree trunk, use irregular vertical marks that suggest bark. To shade metal, use sharper contrast between light and dark. The direction of your marks should support the shape you are drawing, not fight it like two cats in a cardboard box.
Blending and Smooth Gradients
Blending creates soft transitions, which are useful for skin, clouds, glass, fabric, and atmospheric backgrounds. A smooth gradient moves gradually from light to dark. Start with light pressure, build layers slowly, and avoid pressing too hard too soon. Once graphite is crushed into the paper, it can be difficult to lift.
A common beginner mistake is trying to get dark values by attacking the paper with a single pencil. Instead, layer graphite patiently. Use softer pencils for darker areas, but keep the paper texture alive. Realistic shading depends on value control, not brute force. Your pencil is a tool, not a tiny sword.
Stippling, Scumbling, and Texture
Stippling uses dots to build tone. Scumbling uses loose, circular, scribbly marks. Both can create texture and atmosphere. Stippling is slow but precise, making it useful for pores, sand, rough stone, or subtle texture. Scumbling is excellent for foliage, clouds, animal fur, and expressive backgrounds.
Texture is not about drawing every detail. It is about choosing the right visual clues. To draw fur, group strands into shapes and use highlights sparingly. To draw wood, focus on grain direction and value changes. To draw fabric, observe folds first, then texture. Details are dessert, not dinner.
How to Make Pencil Drawings Look More Realistic
Start With Big Shapes
Realistic drawing begins with structure. Before eyelashes, wrinkles, leaf veins, or shiny highlights, block in the big shapes. Look for simple forms: circles, boxes, cylinders, triangles, and shadow masses. A portrait can begin as an oval with guideline angles. A still life can begin as boxes and ellipses. A landscape can begin as large value areas.
This stage may look boring, but it prevents disaster later. If the head is too wide, the cup is tilted strangely, or the horse has suspiciously short legs, no amount of beautiful shading will save it. Proportion is the skeleton of realism.
Use a Full Value Range
Value means how light or dark something is. Strong pencil drawings usually include a range from bright highlights to deep shadows. Beginners often stay in the middle gray zone because they are afraid of going too dark. But without dark values, drawings can look pale and unfinished.
Make a value scale from 1 to 10. Practice creating ten steps from white paper to your darkest graphite. Then compare your drawing to the scale. Are your shadows truly dark? Are your highlights clean? This simple habit can improve pencil art quickly because it trains your eye to see contrast.
Protect the Highlights
In pencil drawing, the brightest highlights are often the untouched paper. That means you need to plan them early. In a realistic eye, the tiny white reflection gives the drawing life. In glass, highlights create shine. In metal, sharp highlights suggest reflection. In water, broken highlights create sparkle.
You can lift some highlights with an eraser, but preserving white paper gives a cleaner result. Think of highlights as VIP guests. Save them a seat before the graphite crowd takes over.
Popular Subjects for Pencil Drawings
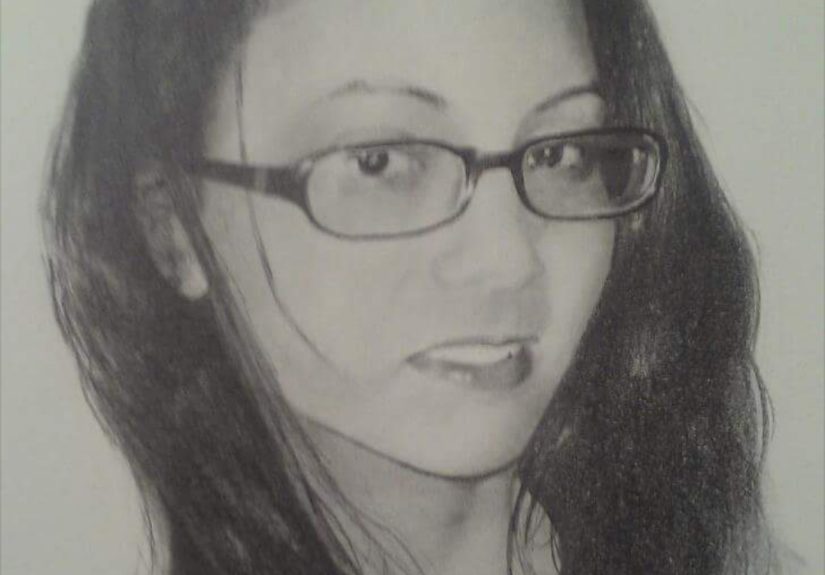
Portraits and Facial Features
Pencil is perfect for portraits because it captures subtle shifts in value. Eyes, lips, noses, cheekbones, and hair all depend on careful observation. A realistic portrait is not built from outlines alone. It is built from shadow shapes, soft edges, hard edges, and accurate proportions.
When drawing eyes, avoid outlining the entire eye with a heavy dark line. Real eyes are shaped by eyelids, shadows, and reflections. When drawing lips, focus on values rather than drawing a cartoon mouth outline. When drawing hair, avoid drawing every strand. Build hair as masses first, then add selected strands and highlights.
Animals and Fur
Animal pencil drawings can be charming, dramatic, or wildly emotionalespecially if the subject is a dog who believes dinner is already five minutes late. Fur requires patience. Work in layers, follow the direction of growth, and vary pencil pressure. Dark shadows underneath fur clumps make lighter strands stand out.
For wildlife drawings, pay close attention to the eyes. A well-drawn animal eye can carry the whole piece. Whether you are drawing a cat, horse, wolf, bird, or beloved family pet, the eyes establish personality.
Landscapes and Nature Studies
Pencil landscapes teach depth, atmosphere, and texture. Trees, rocks, water, grass, clouds, and mountains all require different marks. Distant objects should usually have lighter values and softer edges. Foreground objects can have stronger contrast and clearer texture. This creates a sense of space.
Graphite is especially beautiful for tree studies. Branches, bark, leaves, and shadows can be suggested through varied line weight and layered tone. The goal is not to count every leaf. That way lies madness, or at least a very long afternoon.
Still Life and Everyday Objects
Still life drawing is one of the best ways to build skill. A cup, apple, shoe, key, lamp, or folded towel can teach proportion, light, shadow, perspective, and texture. Everyday objects are patient models. They do not move, complain, blink, or ask whether you got their good side.
Set up a simple still life near a single light source. Observe the cast shadow, form shadow, reflected light, and highlight. This practice trains your eye to understand how light behaves, which improves every kind of pencil drawing.
Developing a Personal Style in Pencil Art
Technique is important, but style gives pencil drawings personality. Some artists love smooth realism. Others prefer energetic sketch lines, visible hatching, surreal imagination, graphic contrast, or loose expressive marks. Your style grows from repeated choices: the subjects you choose, the pressure you use, the lines you favor, the amount of detail you enjoy, and the mood you create.
Do not rush to “find your style” as if it is hiding under the couch. Style develops naturally when you draw often, study artists you admire, and allow yourself to experiment. Copying master drawings for practice can teach technique, but your finished work should eventually reflect your own decisions. The more you draw, the more your hand starts to develop a recognizable voice.
Common Pencil Drawing Mistakes and How to Fix Them
Pressing Too Hard Too Early
Heavy pressure at the beginning makes lines hard to erase and can dent the paper. Start lightly. Build confidence as the drawing develops. A pale construction line is much easier to adjust than a dark outline that has moved in permanently and signed a lease.
Ignoring the Light Source
Shading only works when you know where the light comes from. Choose one clear light direction. Then keep highlights, shadows, and cast shadows consistent. Inconsistent lighting can make a drawing look confusing, even if the details are beautiful.
Over-Blending
Blending can create softness, but too much blending removes texture and form. Use blending as one tool, not the entire personality of the drawing. Keep some visible pencil marks to preserve energy and structure.
Drawing Details Too Soon
Details are tempting. They are also sneaky. If you start with eyelashes before the eye is correctly placed, you may end up with beautifully shaded eyelashes on a face that looks slightly lost. Work from big to small: structure, proportion, values, edges, then details.
How to Present and Preserve Pencil Drawings
Pencil drawings can smudge, so storage and presentation matter. Keep finished drawings under clean paper, in a portfolio, or framed behind glass. Use acid-free materials when possible. Avoid touching the drawing surface with bare fingers because oils can leave marks. If using fixative, test it first on a practice sheet, since some sprays can darken or change the surface.
For online sharing, photograph pencil art in natural indirect light. Avoid glare, shadows from your phone, and dramatic desk-lamp lighting unless you enjoy making your artwork look like it is being interrogated. Crop cleanly, adjust brightness carefully, and keep the image true to the original.
of Personal Experience: What Pencil Drawing Has Taught Me
My experience with pencil drawings has taught me that art does not always arrive with fireworks. Sometimes it begins with a quiet line that looks unimpressive at first. A simple oval becomes a face. A few uncertain marks become a hand. A soft shadow under an object suddenly makes the page feel three-dimensional. Pencil drawing rewards patience in a way that feels almost old-fashioned, like bread rising or waiting for coffee to brew.
One of the most valuable lessons is learning to slow down. In the beginning, many artists rush because they want the drawing to look finished immediately. I have done that too: sketch the outline, darken the eyes, shade everything quickly, then wonder why the result looks stiff. Over time, pencil drawing teaches you to pause. You begin to ask better questions. Where is the light coming from? Is this edge sharp or soft? Is the shadow actually black, or is it a middle gray? Is the nose really that shape, or did my brain just use the “generic nose file” again?
Another experience that changes everything is discovering the power of erasing. Beginners often think erasers are only for mistakes. In pencil art, erasers are drawing tools. A kneaded eraser can pull light out of darkness. It can create shine on hair, moisture in an eye, dust in sunlight, or the pale edge of a cloud. Once you understand that subtracting graphite is as creative as adding it, drawing becomes more flexible and less intimidating.
I have also learned that not every drawing needs to become a masterpiece. Some drawings are warm-ups. Some are experiments. Some are honest little disasters with valuable lessons hiding inside them. A failed hand study may teach more than a successful doodle. A portrait with one eye slightly too high may train your observation for the next attempt. The sketchbook is not a courtroom. It is a workshop.
Pencil drawing also builds confidence because progress is visible. When you compare early sketches with newer work, you can see better proportions, smoother values, stronger contrast, and more intentional lines. That progress may not happen overnight, but it happens. Every page adds mileage to the hand and clarity to the eye.
Most of all, pencil drawings feel personal because they carry evidence of time. A painting may cover its early steps, but graphite often reveals the journey: faint construction lines, layered shadows, erased highlights, and tiny decisions. That honesty is beautiful. It reminds us that art is not only about talent. It is about looking closely, practicing regularly, making mistakes, adjusting, and returning to the page. The pencil may be small, but it has a big personality. Treat it well, and it will tell your stories in silver, gray, and black.
Conclusion: Pencil Drawings Turn Simple Tools Into Personal Art
Pencil drawing proves that powerful art does not require expensive materials or complicated setups. With graphite, paper, patience, and observation, an artist can create portraits, landscapes, animals, textures, studies, and imaginative worlds. The best pencil drawings combine technical skill with personal expression. They use line, value, contrast, texture, and composition to turn a blank page into something meaningful.
Whether you are just beginning or refining years of practice, pencil art offers endless room to grow. Start with basic tools, learn the behavior of graphite, practice value control, study light, and draw from life as often as possible. Most importantly, enjoy the process. A pencil drawing is not just an imageit is a record of attention. And in a fast, noisy world, attention is a pretty wonderful thing to put on paper.


