Table of Contents >> Show >> Hide
- Step 1: Do a “trip check-in” with your diabetes care team
- Step 2: Pack like a pro (and then pack more)
- Step 3: Keep insulin safe from heat, cold, and chaos
- Step 4: Plan for airport security like you’re the calm main character
- Step 5: Master time zones (without turning your dosing into a math exam)
- Step 6: Build a “meal and snack” game plan (because travel meals are weird)
- Step 7: Prepare for more movement (and surprise movement)
- Step 8: Plan for illness, emergencies, and “stuff happens” moments
- Step 9: Protect your routine with tiny habits (not perfection)
- Real-World Travel Experiences (The Stuff People Don’t Put on Postcards)
- Conclusion: Travel Confidently, Not Cautiously
Traveling is supposed to lower your stress, not turn your blood sugar into a reality show with surprise plot twists.
Whether you’re heading to a beach, a big city, or your cousin’s “quick weekend” wedding that somehow has three outfit changes,
diabetes doesn’t have to be the villain of the trip.
The key is simple: plan like a responsible adult, pack like you don’t trust airline logistics, and stay flexible like you’re doing yoga in an airport terminal.
This guide walks you through nine practical stepscovering packing, airport security, time zones, meals, activity, and what to do if something goes sideways.
(Because travel is basically “unexpected situations” wearing sunglasses.)
Medical note: This article is general education, not personal medical advice. Before major tripsespecially across time zonesask your clinician how to adjust meds, insulin timing, or pump settings for your specific plan.
Step 1: Do a “trip check-in” with your diabetes care team
A quick pre-trip plan can prevent the classic vacation problem: you arrive, you relax… and your routine disappears like socks in a hotel laundry bag.
Before you go, aim to confirm the basics:
- Medication timing: especially if you’ll cross time zones or change meal schedules.
- Activity changes: walking tours, hiking, swimming, theme parksmovement can lower glucose and change insulin needs.
- Sick-day rules: what to do if you get food poisoning, a fever, or a stubborn stomach bug.
- Prescriptions and backups: refill timing, emergency prescriptions, and what to do if meds get lost.
If you use insulin, ask specifically about east/west travel, long flights, and how to handle a “short day” vs. a “long day.”
If you use a CGM/pump, confirm how you should treat sensor changes, infusion set changes, or compression lows while sleeping in weird beds.
Step 2: Pack like a pro (and then pack more)
Here’s a travel truth: the only thing more predictable than a delayed flight is someone telling you, “Don’t worry, your bag will totally arrive.”
Pack with the assumption that delays happen and checked bags sometimes take spontaneous vacations of their own.
Your diabetes travel packing checklist
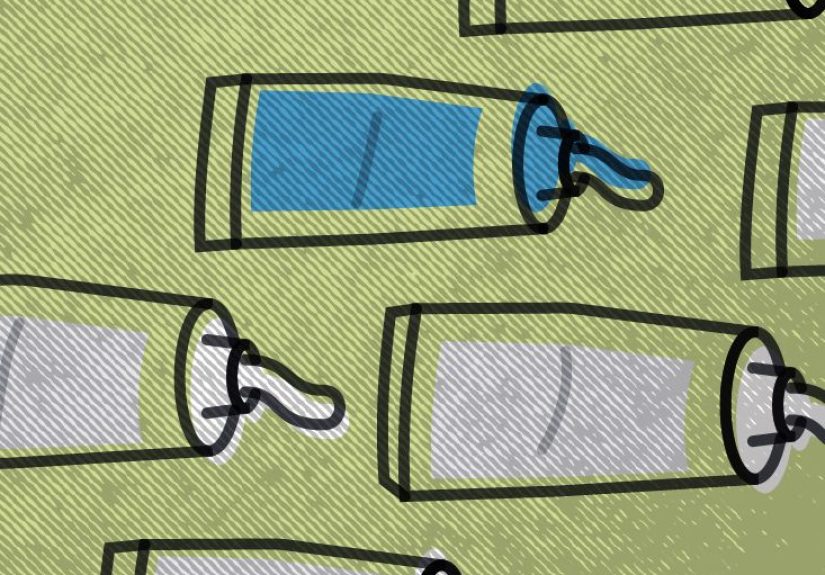
- Medications: insulin and/or oral meds (bring extra), plus any injectable meds (like GLP-1s) if applicable.
- Testing/monitoring: meter, test strips, lancets, CGM sensors and transmitters, extra batteries/chargers if needed.
- Delivery supplies: pen needles, syringes, pump reservoirs/cartridges, infusion sets, skin prep, adhesive patches.
- Low blood sugar treatments: glucose tabs/gel, small juice boxes, hard candy (the non-melty kind), and snacks with carbs.
- Ketone supplies: urine ketone strips or blood ketone meter/strips if recommended for you.
- Glucagon: if prescribedcheck expiration dates before you pack.
- Medical ID: bracelet/necklace and/or phone medical ID set up.
- Documentation: prescriptions, a brief doctor’s note if helpful, and device info (pump/CGM model + support numbers).
Two smart packing habits: (1) carry-on only for diabetes supplies, and (2) split extras between two bags
(for example: half in your backpack, half in your partner’s bag). Redundancy isn’t paranoiait’s travel wisdom.
Step 3: Keep insulin safe from heat, cold, and chaos
Insulin is hardworking, but it’s not invincible. Extreme heat and freezing temperatures can reduce effectiveness.
Travel environments are full of “temperature surprises,” like a hot car, a freezing cargo hold, or a hotel mini-fridge that’s basically an ice cave.
- Never check insulin: checked luggage can be exposed to temperature extremes and delays.
- Avoid direct heat: don’t leave supplies in cars, beach bags in direct sun, or on a windowsill.
- Be careful with hotel fridges: keep insulin away from the back wall where it can freeze; consider a fridge thermometer.
- Use a cooling case if needed: especially for warm climates or long day trips without reliable cooling.
If you notice insulin that looks unusual (clumps, frosting, discoloration) or seems “weaker than normal,” treat it as a red flag and use a backup if available.
Step 4: Plan for airport security like you’re the calm main character
Airport security is the place where time stops, shoes come off, and everyone forgets how lines work.
The good news: diabetes supplies and medications are allowed through security, including liquids and devices, once properly screened.
Security tips that reduce drama
- Declare supplies: tell the officer you have diabetes supplies and separate them for screening if requested.
- Know your device screening options: if you wear a pump/CGM, you can request alternative screening (like a pat-down) if you prefer.
- Bring insulin properly labeled: keep it in original packaging when possible to reduce questions.
- Keep supplies organized: a clear pouch or a dedicated “diabetes kit” makes security faster.
Pro tip: Practice your one-sentence explanation at home. Something like:
“I have diabetesthis is insulin and medical supplies.” Calm, clear, and no TED Talk required.
Step 5: Master time zones (without turning your dosing into a math exam)
Time zones can mess with medication schedules because your “usual time” becomes… not your usual time.
The goal is to keep insulin/meds aligned with your body’s needs, meals, and sleepespecially for long-acting insulin and basal rates.
Practical time-zone strategies
- For shorter trips (1–2 time zones): many people can adjust gradually with minimal changesask your clinician what’s safe for you.
- For long trips: use alarms based on the number of hours between doses (instead of local clock time), then transition.
- East vs. west: traveling east shortens your day (sometimes meaning less insulin is needed), traveling west lengthens it (sometimes meaning more).
- Pump users: discuss whether to change your pump time at takeoff, landing, or graduallyyour plan depends on your basal settings and trip length.
If you hear your brain whisper, “I’ll just figure it out when I land,” that is the travel equivalent of packing no underwear.
Make a plan before departure and keep it written downpaper backup beats panicked guessing.
Step 6: Build a “meal and snack” game plan (because travel meals are weird)
Travel food has two modes: “nothing available” and “giant cinnamon roll the size of a steering wheel.”
Either way, your blood sugar deserves a strategy.
Smart food moves
- Pack balanced snacks: carbs for lows, plus protein/fiber snacks (nuts, cheese crackers, peanut butter packets) for steadier energy.
- Don’t wait until you’re starving: long gaps between meals can lead to lows, then rebound highs.
- Ask about meal timing on flights: if you’re relying on airplane meals, timing can be unpredictable.
- Hydrate: dehydration can push blood glucose higher and makes you feel lousy faster.
Restaurant tip: if you’re unsure, aim for “protein + fiber + a carb you can dose for.”
Example: grilled chicken salad + bread roll (or fruit) is easier to manage than mystery noodles in a “chef’s special sauce.”
Step 7: Prepare for more movement (and surprise movement)
Vacations often mean more steps than normalwalking airports, exploring neighborhoods, climbing hotel stairs because the elevator is “temporarily” broken.
Activity can lower blood glucose during and after movement, sometimes for hours.
Move smarter
- Check more often: especially if you’re walking all day or doing new activities.
- Keep low treatments on you: not “in the hotel,” not “in the car,” on you.
- Bring foot care basics: comfortable shoes, blister pads, and socks that don’t hate you.
- Plan for overnight effects: big activity days can increase nighttime lows for some people.
If you’re doing something intense (hiking, long bike tours, swimming for hours), talk to your clinician in advance about insulin adjustments,
carb strategies, and safe ranges. Adventure is greatunplanned hypoglycemia is not.
Step 8: Plan for illness, emergencies, and “stuff happens” moments
Even the best trips can throw curveballs: stomach bugs, missed connections, lost supplies, or a sensor that decides to retire early.
A simple emergency plan keeps you safer and calmer.
Your emergency toolkit
- Emergency contacts: store your clinician/pharmacy numbers and your device support line.
- Know where help is: identify nearby urgent care/hospital options at your destination.
- Carry a medical summary: medications, doses, allergies, and your usual treatment plan.
- Have sick-day supplies: fluids, easy carbs, and ketone testing tools if appropriate.
If you become sick and can’t keep food down, or you’re seeing persistent high readings that don’t respond to your normal corrections,
follow your sick-day plan and seek medical care when needed. Travel isn’t the time to “tough it out” with uncontrolled numbers.
Step 9: Protect your routine with tiny habits (not perfection)
You don’t need a flawless schedule. You need a few “anchors” that keep you steady even when everything else changes.
- Use reminders: phone alarms for meds, site changes, sensor changes, and hydration.
- Set up a daily reset: each morning, do a quick check: supplies, snacks, low treatment, charged devices.
- Keep bedtime simple: confirm you have what you need nearby (meter/phone/low treatment) before you crash.
- Stay flexible: travel is unpredictableyour plan should include backup options, not guilt.
The goal isn’t “perfect glucose.” The goal is enjoying your trip while staying safe and confident.
Diabetes can come along, but it doesn’t get to pick the playlist.
Real-World Travel Experiences (The Stuff People Don’t Put on Postcards)
To make these steps feel real, here are a few experience-based scenarioscommon situations that travelers with diabetes often run into
and how the nine steps above keep the story from turning into a stressful mess.
1) The “We’re Boarding… Just Kidding” Delay
You arrive early, you’re feeling responsible, and you even remembered your charger. Then the gate agent announces a delay.
Two hours becomes four. The snack options nearby are either “air” or “cinnamon sugar everything.”
This is where Step 2 and Step 6 save the day: you already packed fast carbs for lows (glucose tabs) and steady snacks (nuts, crackers, or a protein bar).
Instead of chasing rollercoaster blood sugar with random food, you can treat a low quickly and then stabilize.
If you’re using insulin, having predictable carbs makes dosing less like gambling and more like math you can actually win.
2) The Beach Day That Turns Into a Heat Test
A beach day sounds relaxing until you realize your bag is basically a tiny oven in the sun.
People often learn the hard way that “I’ll keep it in my tote” is not an insulin storage strategy.
Step 3 matters here: you keep insulin shaded, avoid direct heat, and use a cooling case when needed.
You also notice how heat and swimming can change glucose patternssometimes trending lower from activity, sometimes higher from dehydration.
That’s why Step 7 (more checking when you’re more active) and Step 6 (hydration) are such a powerful combo.
The result: you enjoy the water, not a constant worry spiral.
3) The Time-Zone Whiplash Night
After crossing multiple time zones, you wake up at 3 a.m. wide-eyed, unsure if your body thinks it’s morning or a nap.
This is where Step 5 prevents the “Oops, I doubled something” moment.
Travelers often do best when they have a written dosing/med timing plan and alarms based on time between dosesnot just the clock on the wall.
If you use a pump, changing the time setting with a plan (not panic) reduces confusion.
If you use long-acting insulin, knowing how travel east or west affects your “day length” can be the difference between
playing defense all night and sleeping like you deserve.
4) The Security Line Conversation
Many travelers feel nervous about TSA because they don’t want to be “that person” holding up the line.
But here’s the reality: being prepared is what keeps things moving.
Step 4 helps because you keep supplies organized, you declare what you’re carrying, and you know your screening options for devices.
Instead of fumbling explanations while people behind you sigh dramatically, you confidently say,
“I have diabetesthese are medical supplies,” and you move forward.
The best part? That calm confidence tends to be contagious. Officers have seen it before, and your prepared approach makes it routine.
5) The “I Walked 18,000 Steps Without Realizing” Surprise
Vacation walking sneaks up on people. You’re not “exercising,” you’re just exploringuntil your body disagrees.
Step 7 and Step 9 handle this: you check a bit more often, keep low treatments on you, and treat movement like part of the plan,
not a random event. Many travelers find that the real win isn’t perfect numbersit’s catching patterns early.
When you notice you trend low after long walks, you can adjust with a snack, a temporary basal (if appropriate), or a dosing tweak recommended by your clinician.
Instead of ending the day exhausted and frustrated, you end it proudand still able to enjoy dinner.
These experiences all point to the same truth: traveling with diabetes isn’t about controlling everything.
It’s about building smart backups so you can handle the unpredictable parts with less stress and more freedom.
Conclusion: Travel Confidently, Not Cautiously
You don’t have to “earn” travel by having perfect blood sugar. You travel because you’re a human who deserves new places, new food,
and at least one photo that makes your friends jealous in the healthiest way possible.
With the nine steps abovepre-trip planning, smarter packing, temperature protection, security readiness, time-zone strategy, food planning,
activity awareness, emergency prep, and small daily habitsyou can travel safer and feel more in control without letting diabetes run the itinerary.