Table of Contents >> Show >> Hide
- First, a quick reality check: Google My Maps vs. Google Maps
- Create your custom route in Google My Maps (step-by-step)
- 1) Start a new map (and name it like Future-You will thank you)
- 2) Add your route using “Add directions”
- 3) Make the route “yours,” not just “whatever the algorithm felt like today”
- 4) Draw your own line for truly custom paths (great for planning and reference)
- 5) Add pins, notes, and “don’t forget this” details
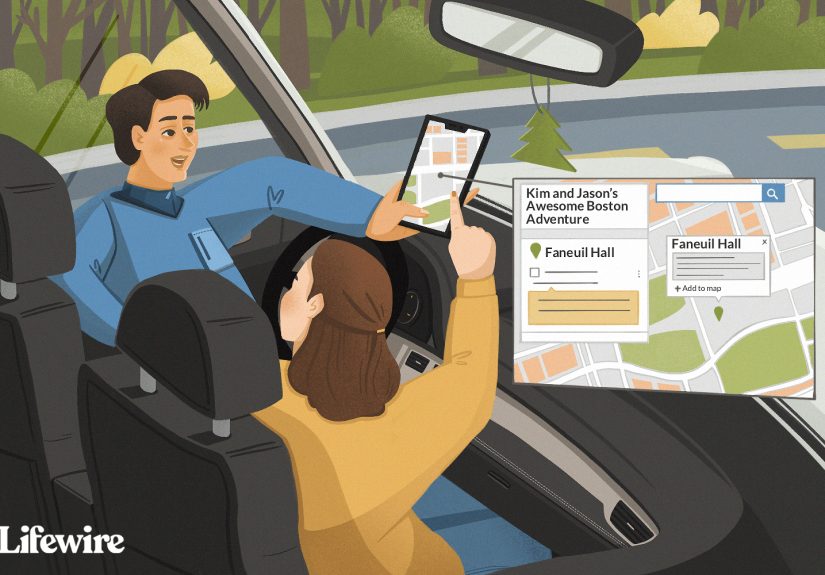
- Send the custom route to your phone (3 methods that actually work)
- Troubleshooting: the usual reasons it’s not showing up on your phone
- Pro tips to make your custom route painless on the road
- FAQ
- Conclusion
- Real-world experience: what actually happens when you try this in the wild (and what to do about it)
Planning a route on your phone is like trying to fold a fitted sheet: technically possible, emotionally expensive.
If you want a custom routewith your exact stops, your favorite backroads, and that “must-hit” taco
stand you’ll forget exists the second you get hungryGoogle My Maps is the grown-up way to do it.
You build the map comfortably on a laptop, then bring it with you on your phone when it’s time to actually move
your feet (or your car).
This guide shows you how to create a custom route in Google My Maps, then get it onto your phone in a way that’s
actually useful in real life. We’ll cover what My Maps can (and can’t) do, the best “send it to my phone” methods,
and the common gotchas that make people yell “WHY” at a map like it can feel shame.
First, a quick reality check: Google My Maps vs. Google Maps
Google My Maps is for building custom maps: adding layers, pins, notes, and routes that match
your plan. It shines for trip planning, event logistics, delivery territories, weekend hiking lists, and anything
where “just search it later” is a lie you tell yourself.
Google Maps (the regular app/site) is for navigation: live traffic, turn-by-turn directions,
lane guidance, rerouting, and all the stuff that keeps you from accidentally joining a parade route.
The winning strategy is usually:
Plan in My Maps → Navigate in Google Maps.
My Maps gets you organized. Google Maps gets you there.
Create your custom route in Google My Maps (step-by-step)
1) Start a new map (and name it like Future-You will thank you)
- On a computer, open Google My Maps and sign in with the Google account you’ll use on your phone.
- Click Create a new map.
-
Click Untitled map and give it a clear name (e.g., “Austin Food Crawl – Saturday” or
“Client Visits – North Loop”). -
Optional: choose a base map style (default, satellite, terrain). Pick whatever makes your route
easiest to read.
Pro naming tip: if you’re making multiple maps, lead with a date or city. “2026-03 Yosemite – Day Hikes” sorts
nicely and doesn’t make you scroll through ten maps called “Trip!!!!”
2) Add your route using “Add directions”
My Maps can create a directions layer where you enter Point A and Point B (and sometimes additional destinations),
and it draws a route on the map.
- In the toolbar under the search bar, click Add directions (it often looks like a tiny branching arrow).
- A new Directions layer appears in the left panel with fields like A and B.
- Choose your travel mode (typically Driving, Walking, or Bikingtransit is often not supported in My Maps directions layers).
- Enter your start in A and your destination in B.
If you’re planning a route with multiple stops (coffee → bookstore → scenic overlook → dinner), you can usually add
destinations and reorder them. If My Maps feels limiting for complex multi-stop navigation, you can still use My Maps
to store the stop list and then build the final multi-stop route in Google Maps (we’ll do that below).
3) Make the route “yours,” not just “whatever the algorithm felt like today”
A “custom route” usually means one of these:
- Customized stops (the best kind): you control where you go and in what order.
-
Customized roads (the trickier kind): you want to follow a particular road for scenic reasons,
construction avoidance, toll avoidance, or personal vendettas.
In My Maps, you can often adjust the path by dragging parts of the displayed route (depending on the route type and interface updates).
But here’s the important truth: even if you can draw the perfect line on the map, that doesn’t guarantee turn-by-turn
navigation will obediently follow it later.
If you need navigation to follow a very specific set of roads, the most reliable approach is to
break your route into deliberate waypoints (extra stops) so Google Maps has fewer chances to “help” you into a different route.
Think of it like guiding a toddler: don’t say “go to the kitchen,” say “take my hand, step on the rug, now the tile, now the kitchen.”
4) Draw your own line for truly custom paths (great for planning and reference)
Want to trace a hiking route, bike path, parade route, or a “drive this scenic loop even if it takes longer” plan?
Use the drawing tools:
- Click Draw a line → Add line or shape.
- Click points on the map to trace your path.
- Double-click to finish, then name the line (e.g., “Scenic Ridge Trail” or “Avoid Highway Loop”).
This kind of line is perfect as a visual guide and for sharing with others, but remember:
hand-drawn lines are not guaranteed to become navigable turn-by-turn routes. They’re a plan, not a chauffeur.
5) Add pins, notes, and “don’t forget this” details
Custom routes are useful. Custom routes with context are unstoppable.
- Add pins for stops (restaurants, trailheads, parking lots, viewpoints).
- Use layers like “Day 1,” “Day 2,” “Food,” “Gas,” “Bathrooms (critical),” etc.
- Add notes like “Parking entrance is behind the building” or “This place closes at 3pm.”
- Color-code routes and pins so your map is readable at a glance.
My Maps has generous-but-not-infinite limits. If you’re building a monster map (thousands of pins, lines, or shapes),
keep an eye on size limits and consider splitting into multiple maps by day or category.
Send the custom route to your phone (3 methods that actually work)
Option A: Open your My Map in the Google Maps app (best for “I need my plan on the go”)
You can view maps you created in My Maps on your phone inside the Google Maps app (as long as you’re signed into the same account).
This is ideal when you want your custom pins, layers, and drawn routes available while you’re out.
- On your phone, open the Google Maps app.
- Make sure you’re signed into the same Google account used to create the My Map.
- Go to You (or Saved, depending on the app version) → Maps.
- Select your custom map and open it.
Once you’re looking at your custom map, you can tap pins for details and use it as your “master plan” while you navigate.
For turn-by-turn directions, you’ll often tap a place and jump into standard Google Maps navigation from there.
When to choose Option A: road trips with lots of stops, events with multiple locations, travel itineraries, and any time you want
your full custom map (not just a single route) accessible on your phone.
Option B: Use Google Maps “Send to phone” for real navigation (best for turn-by-turn)
If what you really want is: “I built this route on my computer; now I want it to pop up on my phone so I can hit Start,”
then use Google Maps (regular) directions on desktop and the built-in Send to phone feature.
- On your computer, open Google Maps.
- Click Directions and enter your start and destination (and add stops if needed).
- Choose the route you want.
- Click Send to phone and select your device.
- On your phone, tap the notification to open the route and start navigation.
The key move: use My Maps to design the plan, but build the final navigable route in Google Maps using
multiple stops (and route adjustments where available). Then use “Send to phone” so your phone receives the exact trip you prepared on desktop.
When to choose Option B: commuting routes, client visits, errands, and any time turn-by-turn guidance matters more than seeing a whole custom map.
Option C: Export your My Map (KML/KMZ) as a backup or shareable file
If you want a portable copy of your custom map (for archiving, sharing with teams, or moving between tools),
export it from My Maps:
- On your computer in My Maps, open the map.
- Use the menu in the left panel and choose Export to KML/KMZ.
- Save the file and share it to yourself (email, cloud drive, etc.).
KML/KMZ is great for compatibility with mapping tools (like Google Earth) and for keeping a “just in case” copy.
For pure turn-by-turn navigation inside Google Maps, Option B is usually smoother.
Troubleshooting: the usual reasons it’s not showing up on your phone
“I can’t find my My Map in the Google Maps app”
- Wrong account: confirm you’re signed into the same Google account on your phone.
- App UI differences: the Maps section may live under You or Saved.
- Sharing settings: if the map was created in a different account or shared to you, make sure you’re opening it from the right profile.
- My Maps editing: creation/editing is primarily a desktop-browser experience; on mobile you’re typically viewing, not building.
“Send to phone” doesn’t appear on desktop Google Maps
- Sign-in check: you need to be logged in on desktop with the same Google account as your phone.
- Notification permissions: your phone must allow Google Maps notifications to receive the prompt reliably.
- Device mismatch: if you have multiple devices, make sure the right one is selected.
“Google Maps keeps rerouting me away from my custom path”
This is the big one. If you drew a line in My Maps, Google Maps navigation may still choose a different “best” route.
To improve your odds:
- Use waypoints: add intermediate stops along the road you want.
- Split the route: create separate legs (Stop 1 → Stop 2 → Stop 3) instead of one long route.
- Check route options: confirm avoid-tolls/avoid-highways settings if they apply to your trip.
Pro tips to make your custom route painless on the road
Build your map like a “travel dashboard,” not just a route
- One layer per day (or per neighborhood) keeps the map readable.
- Pin essentials: parking, bathrooms, gas/charging, and “safe fallback” food.
- Add timing notes: “arrive by 10:30,” “tickets scanned here,” “closed Mondays.”
Use sharing settings with intention
If you’re sending the map to your phone, you can keep it private and simply access it while signed in.
If you’re sending it to other people, use link-sharing thoughtfully:
- Private: best when the map includes home addresses, kid locations, or personal routines.
- Anyone with the link: great for groups (weddings, meetups, road trips) without making it searchable.
- Public: only if you truly want the world to see it.
Keep a “phone-first” map design
- Short names for pins (“Tacos,” “Parking A,” “Trailhead”).
- Consistent icons/colors so your brain doesn’t have to re-learn the legend mid-walk.
- Don’t overload with tiny detailssave essays for the notes field.
FAQ
Can I build or edit a My Map on my phone?
In general, My Maps is built for creating/editing in a web browser on a computer. On phones, you can view your My Maps
inside Google Maps, which is perfect for using your plan on the go.
Can My Maps give me turn-by-turn navigation on my exact drawn route?
Not reliably. My Maps is excellent for planning and reference. For real navigation, use Google Maps directions with
waypoints and then start navigation from your phone.
What’s the cleanest “send to phone” workflow?
Plan the stops and layout in My Maps, then rebuild the final navigable route in Google Maps (desktop), click
Send to phone, and start navigation on your phone. It’s the best combo of planning power and navigation reliability.
Conclusion
Google My Maps is your planning headquarters: layers, pins, notes, and custom paths that match how you actually travel.
When you’re ready to leave, you have two smart choices: open your custom map in the Google Maps app to keep your whole plan in your pocket,
or use Google Maps desktop directions + Send to phone for turn-by-turn navigation.
Either way, you’ll spend less time squinting at your screen and more time enjoying the tripbecause the only thing that should be “recalculating”
is your decision to get dessert twice.
Real-world experience: what actually happens when you try this in the wild (and what to do about it)
Let’s talk about the moment you’ll care about most: you’re halfway out the door, one shoe on, coffee in hand, and someone says,
“So… where’s the route?” This is when My Maps goes from “cool planning tool” to “please don’t embarrass me in front of my friends.”
In real life, the best My Maps wins come from treating it like a trip control panel, not a single magic route button.
For example, when I plan a weekend of errands (grocery, hardware store, pickup, drop-off), I don’t just make one route. I make a layer called
“Stops,” drop pins with short names, and add notes like “parking entrance on Oak St” or “closes at 6.” On the day of, I open the map on my phone
and I’m not navigating the whole day at onceI’m tapping the next pin, checking the note, and launching directions for that stop.
It’s less glamorous than “one route to rule them all,” but it’s dramatically more reliable.
Group trips are where My Maps shines and also where it tries to start a fight. If you share a custom map with friends, one person will open it
instantly, another will say “I don’t see it,” and a third will somehow be looking at a completely different account because their phone auto-switched
profiles. The fix is boring but effective: before the trip, send a quick message that says, “Open Google Maps → You/Saved → Maps → select ‘Trip Map’.”
Then ask everyone to open it once at home on Wi-Fi. That single dry run prevents 87% of “where is it??” texts later.
The biggest expectation gap is navigation. People assume a hand-drawn line in My Maps will become a perfect GPS route. Sometimes it feels like it should.
But navigation tools prioritize traffic, time, and road rules, and they’ll happily reroute you if they think they’re helping. When I must follow a
specific roadsay, avoiding tolls, construction, or a mountain pass that turns into an ice rink at duskI don’t trust a single long route. I add
waypoints (extra stops) along the exact corridor I want. Yes, it looks a little fussy. No, you will not regret it when you’re not
accidentally paying $12 to cross a bridge you didn’t even want to admire.
Another small win: use My Maps for the things Google Maps directions doesn’t capture welllike “best photo spot,” “quiet picnic area,”
“restroom that’s actually open,” and “parking lot that doesn’t require a prayer.” Those details turn a route into an experience. And if you ever lose signal,
having your pins and notes visible can still save the day even when live rerouting can’t.
In short: My Maps is amazing at helping you remember and organize. Google Maps is amazing at helping you move. Combine them, and you’ll
feel like the kind of person who owns matching luggageeven if you’re actually traveling with a tote bag and vibes.