Table of Contents >> Show >> Hide
- Why Wall Decals Solve the “No Nails” Problem So Well
- Know Your Decal Types Before You Fall in Love
- Will It Stick? A Reality Check for Your Walls
- Picking the Right Wall Decal for Your Goal
- Prep Work: The Unsexy Step That Makes Everything Work
- How to Apply Wall Decals Without Bubbles, Tears, or Regret
- Removal: How to Take Decals Off Without Taking the Paint With Them
- Troubleshooting: When Decals Misbehave
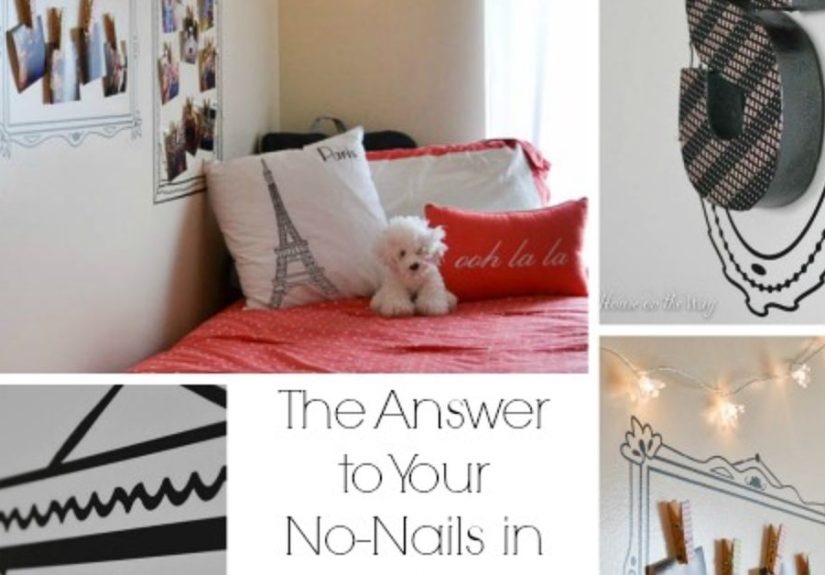
- When Wall Decals Aren’t Enough: No-Nails Backup Options
- Real-World Experiences: The Extra You’ll Actually Use
- Conclusion
If you’ve ever rented an apartment, lived in a dorm, or answered to a “no wall damage” house rule, you already know the drill:
you want your space to feel like your space… but your lease wants your walls to look like they’ve never met you.
Enter wall decalsone of the rare decor upgrades that can be bold, affordable, and (usually) drama-free to remove.
This guide is for anyone who wants wall decor without nails, screws, anchors, spackle, or a final walkthrough that feels like a courtroom cross-examination.
We’ll cover how wall decals work, which walls they like (and which ones they hate), how to install them without bubbles,
and how to remove them without peeling off half your paint like a sad sunburn.
Why Wall Decals Solve the “No Nails” Problem So Well
Wall decals are essentially the “commitment-light” version of wall art. Instead of puncturing drywall, you’re using a removable adhesive layer
that bonds to the surface enough to stay put, but not enough to require a renovation when you change your mind.
Done right, decals can:
- Replace nails entirely for many decorative needs (quotes, shapes, murals, patterns, kids’ decor).
- Move with you (some are repositionable and can survive a careful transfer).
- Work in awkward spaces where frames look cramped (behind desks, above headboards, in narrow hallways).
- Create impact fastan accent wall vibe without the “I guess we live with this forever now” feeling.
Know Your Decal Types Before You Fall in Love
1) Removable vinyl wall decals
The classic. These come as shapes, patterns, kids’ characters, botanical sets, and typography. Many are designed to be removable and repositionable,
especially the ones marketed for renters and nurseries.
2) Peel-and-stick wallpaper murals (the decal’s overachieving cousin)
If you want “one huge visual moment” (think: mountain mural behind the bed, a giant abstract, or faux-tile look), peel-and-stick wallpaper panels
behave like oversized decals. They’re still nail-free, but they demand more prep and patience.
3) Fabric decals
These can be more forgiving during installation (less stretching, fewer wrinkles), and some remove cleanly from delicate paint.
The vibe is often more matte and “painted-on,” which is great if you hate shiny finishes.
Will It Stick? A Reality Check for Your Walls
Decals are picky eaters. They don’t “stick to walls,” they stick to specific wall conditions. Before you buy anything,
do a quick wall auditbecause textured walls and freshly painted walls are where decal dreams go to wobble.
Texture matters more than you think
Heavy texture (orange peel, knockdown, deep roller texture) reduces contact area. Less contact = less adhesion. You may see corners lifting,
seams bubbling, or entire panels slowly migrating like they’re trying to escape.
If your wall texture is noticeable to the touch, choose smaller decals (less surface tension), avoid giant one-piece murals,
and plan to test a sample first.
Paint finish matters, too
Super-flat or chalky matte paint can be fragile, and some adhesives can pull pigment if the paint isn’t fully cured or if the finish is powdery.
Glossy paint can be easier to wipe clean, but some decals may slide during installation or resist bonding if there’s any residue.
The safest path: clean wall, fully cured paint, and a small test patch.
Fresh paint: “dry” is not the same as “cured”
Paint can feel dry fast, but curing takes longeroften weeks. If you apply decals too soon, the adhesive can fail (peeling, bubbling)
or the removal can damage soft paint. Many manufacturers and installers recommend waiting a few weeks before applying adhesive decor on new paint.
When in doubt, wait longer and do the fingernail test (press gently in an inconspicuous spot; if it dents easily, it’s not ready).
Picking the Right Wall Decal for Your Goal
“Wall decal” is a big umbrella. The best choice depends on what you’re trying to accomplish.
For renters who want maximum impact with minimum risk
- Small-to-medium decals in sets (botanicals, stars, dots, geometric shapes).
- Quote decals on smooth walls (they look custom without looking like you tried too hard).
- Decal clusters that build a “mural” from many pieces (easier to fix if one piece misbehaves).
For kids’ rooms (where tastes change faster than seasons)
- Repositionable characters and animals so you can update the vibe without repainting.
- Name decals for doors or above bedshigh payoff, low wall coverage.
- Growth charts that don’t require drilling (and don’t disappear when you move).
For adults who want “designed” rather than “dorm”
- Monochrome botanicals or line-art faces.
- Large arch decals that mimic painted accent shapes.
- Subtle patterns behind shelves, a desk, or a reading nooklike wallpaper, but less commitment.
Prep Work: The Unsexy Step That Makes Everything Work
The difference between “wow” and “why is it peeling already?” is usually prep. You don’t need a professional toolkitjust a few minutes of discipline.
Step 1: Clean the wall (properly)
Dust, grease, and cleaner residue can sabotage adhesion. A common approach is wiping with water plus a small amount of rubbing alcohol,
then letting the wall dry completely. Avoid heavy household cleaners that leave slick residue.
Step 2: Choose placement with painter-level honesty
Stand back and consider: vents, humidity sources, direct sunlight, and high-traffic zones all affect longevity. If it’s right behind a door that slams open,
it’s going to get clipped. If it’s next to a steamy shower, edges may lift.
Step 3: Measure, mark, and level
Use a tape measure and a level (or a laser level if you’re fancy) to mark light reference points.
This is especially important for quote decals, stripes, or repeating patterns where “slightly crooked” becomes “all you can see.”
How to Apply Wall Decals Without Bubbles, Tears, or Regret
The goal is controlled contact: don’t slap the whole decal onto the wall at once and hope the universe likes you.
The “slow peel + smooth” method
- Position first. Hold the decal up (use painter’s tape as a temporary hinge for larger pieces).
- Peel backing gradually. Expose a small section of adhesive instead of the whole thing.
- Smooth from center outward. Use a soft squeegee, a felt-edged tool, or a credit card wrapped in a microfiber cloth.
- Work in sections. For large decals or mural panels, keep the rest supported so it doesn’t fold onto itself.
- Press edges firmly. Edges are where lifting begins. Give them extra love.
Pro tip: temperature is a hidden variable
Very cold rooms can make adhesives stiffer; very hot rooms can make them too soft. A comfortable indoor temperature tends to be the sweet spot.
Removal: How to Take Decals Off Without Taking the Paint With Them
Removal is where “no nails” becomes “no panic.” The main rules: go slow, use gentle heat when needed, and keep your pulling angle low.
Method 1: Slow peel at a low angle
Start from a corner and peel slowly, keeping the decal close to the wall (low angle). This reduces stress on the paint film.
If you feel resistance, pausedon’t power through like you’re starting a lawnmower.
Method 2: Warm the adhesive
A hair dryer (or a low-heat steamer) can soften adhesive so the decal releases more easily. Warm a small section, peel a bit, warm the next section,
and repeat. Think “gentle persuasion,” not “torching crème brûlée.”
Method 3: Mild soapy water for stubborn areas
Some peel-and-stick materials respond well to mild warm water or a mild soapy solution to loosen the adhesiveespecially if you’re removing larger panels.
Use minimal moisture and avoid soaking drywall.
Removing leftover residue
If you’re left with sticky residue, start gently: warm soapy water and a soft cloth. If that’s not enough, common options include rubbing alcohol,
adhesive removers, or household methods like vinegar or oilsbut always test in an inconspicuous spot first.
Use plastic scrapers (like an old gift card) instead of metal tools to avoid gouging paint.
Troubleshooting: When Decals Misbehave
Problem: Edges lifting
- Cause: Dust, texture, humidity, or insufficient pressure on edges.
- Fix: Clean gently, warm slightly with a hair dryer, press edges down with a cloth-wrapped card.
- Prevention: Choose smaller decals on textured walls; avoid placing near steam sources.
Problem: Bubbles
- Cause: Applying too fast, trapping air, or uneven wall surface.
- Fix: Smooth outward; for tiny bubbles, carefully lift and re-smooth (if repositionable).
Problem: Paint comes up during removal
- Cause: Paint not fully cured, fragile matte paint, overly aggressive pull angle.
- Fix: Warm the decal first, peel lower and slower. If damage occurs, spot repair with matching paint.
- Prevention: Wait for full cure after painting; test a small decal before committing to a full wall.
When Wall Decals Aren’t Enough: No-Nails Backup Options
Sometimes you want wall art, shelves, or functional storagethings decals can’t do alone. Here are renter-friendly companions:
- Damage-free hanging strips for frames (follow removal directions carefullystretch-release systems are designed to come off cleanly).
- Removable hooks for lightweight items (keys, lanyards, string lights).
- Leaning decor (large mirrors or frames leaning on a dresserno attachment needed).
- Foam board “panels” (apply decals to a panel and lean or mount it with removable strips for a low-risk accent).
Real-World Experiences: The Extra You’ll Actually Use
Here’s what tends to happen in real homesespecially rentalswhen people try wall decals for the first time. Not horror stories,
more like “ah, so that’s why everyone says to test a corner.”
The most common first-timer move is skipping wall cleaning because the wall looks clean. Then, two days later,
the decal starts lifting at the edges like it’s trying to wave hello. It’s usually not the decal’s fault; it’s tiny dust,
airborne kitchen grease, or cleaner residue you can’t see. The fix is almost always the same: remove the decal, clean the area gently,
let it dry completely, and reapply with firm pressureespecially at corners. People who do the “wipe + dry + press” routine
are the same people who later say decals are “shockingly easy.”
The second most common moment is the “texture surprise.” A wall that looks smooth from across the room can feel like a mountain range
when a decal is pressed against it. On textured walls, big murals may look great for a week and then develop tiny air gaps that grow into bubbles.
The workaround that consistently wins: choose smaller decals (more edge control), or create an accent pattern with many pieces.
A scattered constellation of stars or a botanical cluster can look intentionaland it survives texture better than one huge sheet.
Another real-life lesson: fresh paint and adhesive decor do not share the same definition of “ready.” People paint on a Saturday,
decorate on a Sunday, and then wonder why the decal peels or the paint lifts later. Paint can feel dry quickly, but it’s still hardening.
If you’ve recently painted, waiting a few weeks feels annoying, but it’s cheaper than repainting an entire wall because a quote decal
decided to take souvenirs.
Removal experiences are usually positive when folks go slow. The people who have the best results peel at a low angle,
warm the decal gently, and treat the process like unwrapping a fragile gift. The people who struggle are the ones who yank straight out from the wall.
That outward pull puts stress on paint, especially in older rentals where paint layers may already be doing the minimum required to stay employed.
Finally, there’s the “design surprise”: decals can look more upscale than expected if you choose modern shapes, limited colors,
and deliberate spacing. Many renters get the best results by using decals like a graphic elementarches behind a nightstand,
a vertical line pattern behind a desk, or a subtle repeating motif on one wallrather than covering every inch.
It reads less like a sticker and more like a thoughtful design choice. And if you hate it? Congrats. You just discovered the entire point:
you can remove it without patching a single nail hole.
Conclusion
Wall decals are one of the smartest answers to the “no nails” rule: they add personality fast, keep walls intact,
and let you experiment without committing to permanent changes. The magic formula is simple:
fully cured paint + clean wall + slow application + gentle removal.
Follow that, and you’ll get the fun part of decorating without the landlord-level consequences.