Table of Contents >> Show >> Hide
- Before You Start: A Quick DIY Framing Cheat Sheet
- 1) Washi-Tape “Designer” Frame Upgrade
- 2) Spray-Painted Thrift Frame (A.K.A. “Expensive-Looking on Purpose”)
- 3) Twine- or Jute-Wrapped Rustic Frame
- 4) Simple Scrap-Wood Frame (Straight Cuts, No Drama)
- 5) Mitered-Corner Wood Frame (Classic, Crisp, Very Satisfying)
- 6) Acrylic “Floating” Frame (Modern and Minimal)
- 7) Magnetic Poster Hanger Frame (Fast, Flexible, No Glass Needed)
- 8) Clothespin Display Frame (One Frame, Many Photos)
- 9) Shadow Box Frame for 3D Keepsakes
- 10) Window-Sash Multi-Photo Frame (Farmhouse Classic)
- Make Your DIY Frames Look Professional: The “Don’t Skip This” Tips
- Conclusion: Frame What You Love, Not Just What’s Convenient
- Experience Notes: What People Learn After Making (and Hanging) a Bunch of DIY Frames
Custom framing is gorgeous… and it can also cost the same as a small appliance you weren’t planning to buy.
The good news: you can make DIY picture frames that look polished, protect your photos and art,
and still leave enough budget for snacks (the true fuel of creativity).
Below are ten beginner-friendly, low-stress ways to build or upgrade frames using common materials like scrap wood,
thrift-store finds, acrylic sheets, and even humble washi tape. You’ll also get a few pro-level tricks for
hanging, spacing, and keeping your art happy long-termwithout turning your wall into a test site for nail holes.
Before You Start: A Quick DIY Framing Cheat Sheet
The “best” homemade picture frame is the one you’ll actually finish. So pick a project that matches your tools
and your attention span (both are valid constraints).
Basic tools most projects use
- Measuring tape or ruler, pencil
- Utility knife and cutting mat (for mat board or paper)
- Scissors (for fabric, tape, twine)
- Hot glue gun or wood glue
- Sandpaper (120–220 grit)
- Small clamps (helpful, not mandatory)
- Optional but nice: miter box/saw, brad nailer, drill
Materials that instantly level up your results
- Acid-free backing (foam board or mat board) to help reduce yellowing over time
- Clear acrylic (lighter than glass and less shatter-prone)
- Hanging hardware: D-rings, sawtooth hangers, picture wire, wall hooks
- Felt bumpers (keeps frames from scuffing the wall and going crooked)
Safety note: when cutting wood or acrylic, wear eye protection. Your eyeballs are not “replaceable parts.”
1) Washi-Tape “Designer” Frame Upgrade
This is the fastest glow-up in the DIY picture frame universe: take a plain frame (new or thrifted) and dress it
like it’s going to a gallery opening.
Skill: Beginner | Time: 15–30 minutes | Cost: Low
Materials
- Plain frame (wood, plastic, or metal)
- Washi tape (one pattern or a mix)
- Clear sealer (optional, for durability)
How to make it
- Wipe the frame clean and let it dry.
- Apply washi tape along the frame edges, smoothing as you go to avoid bubbles.
- Overlap patterns on corners or miter the tape with a craft knife for crisp joins.
- Optional: add a light clear sealer coat if it’ll be handled a lot (kids’ art rotation, busy hallway, etc.).
Best for: Small photos, art prints, quick seasonal swaps, and “I need this done by dinner.”
Pro tip: Pick one accent color from the photo/art and repeat it in the tape. Instant cohesion.
2) Spray-Painted Thrift Frame (A.K.A. “Expensive-Looking on Purpose”)
Thrift stores are basically frame buffets. Grab an outdated frame, repaint it, and suddenly it looks like you
bought it at a boutique that plays soft jazz and sells candles named “Rainy Intentions.”
Skill: Beginner | Time: 1–2 hours (plus drying) | Cost: Low
Materials
- Old frame (wood or sturdy composite works best)
- Spray primer + spray paint (or paint + brush)
- Sandpaper, drop cloth, painter’s tape
How to make it
- Remove the backing and glass/acrylic.
- Lightly sand glossy areas and wipe off dust.
- Prime if needed, then spray paint in light coats, letting each coat flash-dry.
- Let it cure fully before reassembling (dry to touch isn’t the same as cured).
Best for: Gallery walls where you want one consistent frame color across different sizes.
Pro tip: Metallic gold looks “vintage fancy.” Matte black looks “museum serious.” Choose your vibe.
3) Twine- or Jute-Wrapped Rustic Frame
If your décor leans cozy, farmhouse, coastal, or “I own at least one throw blanket per chair,” a wrapped frame
gives texture with almost no tools.
Skill: Beginner | Time: 30–60 minutes | Cost: Low
Materials
- Simple frame (wood is easiest)
- Twine, jute, or thin rope
- Hot glue or strong craft glue
How to make it
- Start at the back corner with a dab of glue to anchor the twine.
- Wrap tightly around the frame, adding a dot of glue every few wraps.
- At corners, wrap in a clean “X” pattern or bunch slightly for a more organic look.
- Secure the end on the back with glue and trim.
Best for: Family photos, beach prints, botanical art, and warm-toned spaces.
Pro tip: Mix two twine shades (natural + charcoal) for subtle striping.
4) Simple Scrap-Wood Frame (Straight Cuts, No Drama)
Don’t want to mess with fancy miter joints? You can make a clean, modern wood frame using straight cuts and
butt joints. It’s the “sheet pan dinner” of frame building: reliable, satisfying, hard to ruin.
Skill: Beginner-Intermediate | Time: 1–2 hours | Cost: Low
Materials
- Scrap wood strips (1×2 or similar)
- Wood glue + brad nails (or screws)
- Sandpaper, stain or paint
How to make it
- Measure your art/photo size and add a small lip allowance if you’re creating a recess for acrylic and backing.
- Cut two long pieces and two short pieces to form a rectangle.
- Glue and clamp, then reinforce with brad nails or small screws.
- Sand edges, finish (stain/paint), and add backing + acrylic.
Best for: Posters, prints, and any art where you want a clean border without ornate details.
Pro tip: Add thin trim on the inside edge to create a neat “rabbet” ledge for your backing.
5) Mitered-Corner Wood Frame (Classic, Crisp, Very Satisfying)
This is the traditional “real frame” look. Miters feel intimidating until you do two and realize the secret is
patience and measuring like you mean it.
Skill: Intermediate | Time: 2–3 hours | Cost: Low-Medium
Materials
- Picture frame molding or wood trim
- Miter box/saw (or miter saw), wood glue
- Corner clamps (helpful), finishing nails or V-nails (optional)
How to make it
- Measure your artwork’s outer size (including any mat opening you plan to use).
- Cut 45° miter endstest-fit dry before gluing.
- Glue corners and clamp until set; reinforce corners if desired.
- Sand lightly, finish the frame, then add acrylic, art, and backing.
Best for: Gifts, “main wall” art, and anywhere you want a frame to look professionally made.
Pro tip: If tiny gaps happen, wood filler is your friend. So is not staring at the gap from one inch away.
6) Acrylic “Floating” Frame (Modern and Minimal)
Floating frames make photos and prints look like they’re hovering. They’re sleek, modern, and surprisingly easy
because the “frame” is basically two clear panels holding the art.
Skill: Beginner | Time: 1–2 hours | Cost: Medium
Materials
- Two acrylic sheets (same size)
- Standoff hardware (or binder clips for a budget version)
- Small spacers (optional, for a true float look)
How to make it
- Remove protective film from acrylic only when you’re ready to assemble (it scratches if you breathe near it wrong).
- Center your photo/print between the sheets.
- Use standoffs at corners to secure; add tiny spacers behind the art if you want it to “lift.”
- Hang from the standoff hardware or add a wire for larger sizes.
Best for: Minimalist spaces, black-and-white photos, line art, and modern gallery walls.
Pro tip: Use cotton gloves or a microfiber cloth to avoid fingerprintsunless fingerprints are part of your artistic message.
7) Magnetic Poster Hanger Frame (Fast, Flexible, No Glass Needed)
This one is perfect for posters, kids’ art, and prints you rotate often. Two wood slats clamp the top and bottom
with magnetsno complicated frame build required.
Skill: Beginner | Time: 30–90 minutes | Cost: Low-Medium
Materials
- Four thin wood slats (two for top, two for bottom)
- Small magnets (embedded or glued)
- String or leather cord for hanging
How to make it
- Cut slats slightly wider than your poster.
- Attach magnets so each pair clamps together (top pair and bottom pair).
- Clamp the poster between the top slats; do the same at the bottom to keep it straight.
- Add a cord at the top and hang.
Best for: Posters, typography prints, calendars, and art you switch out seasonally.
Pro tip: Sand and stain the slats for a boutique lookno one has to know it was made during a “creative procrastination” moment.
8) Clothespin Display Frame (One Frame, Many Photos)
This is part frame, part rotating gallery, part “I’m pretending I’m not sentimental” (you are, and that’s nice).
It’s great for postcards, photo booth strips, mini prints, and small art swaps.
Skill: Beginner | Time: 45–90 minutes | Cost: Low
Materials
- Large frame (with glass removed)
- Twine or thin wire
- Mini clothespins
How to make it
- Remove glass and backing; you want an open frame.
- Staple or tie twine across the back in 2–5 horizontal rows.
- Clip photos and art to the twine with mini clothespins.
- Hang the frame like normal.
Best for: Dorm rooms, kitchens, family command centers, and “I take too many photos” households.
Pro tip: Keep spacing between rows consistent so it looks intentional, not like twine spaghetti.
9) Shadow Box Frame for 3D Keepsakes
Photos are great, but sometimes you want to frame a concert ticket, a medal, a pressed flower, or that tiny shoe
from your kid that you can’t emotionally throw away. Shadow boxes are “deep” frames made for dimensional items.
Skill: Beginner-Intermediate | Time: 2–4 hours | Cost: Medium
Materials
- Deep frame or a frame you can build up
- Foam board or plywood backing
- Hot glue, pins, or museum putty (depending on the object)
How to make it
- Create depth by adding wood strips behind the frame (or use a pre-made deep frame).
- Cover the backing with fabric, paper, or paint for a clean background.
- Arrange items first without gluetake a photo so you can recreate the layout.
- Secure objects, reassemble, and hang.
Best for: Keepsakes, awards, baby items, travel mementos, and anything that won’t lie flat.
Pro tip: If the item matters, avoid permanent glue directly on ituse reversible mounting when possible.
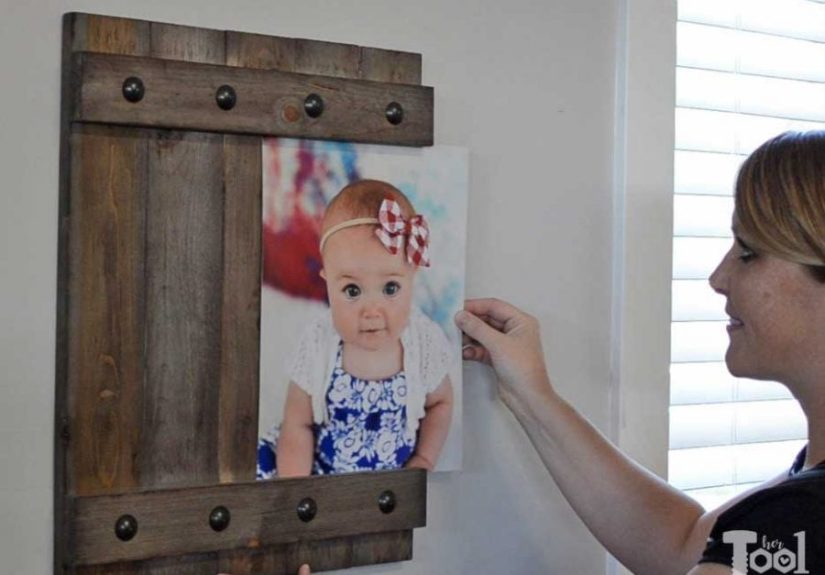
10) Window-Sash Multi-Photo Frame (Farmhouse Classic)
An old window sash instantly becomes a dramatic multi-photo frame. It’s a statement piece that says, “Yes, I DIY…
and yes, I do have opinions about paint colors.”
Skill: Beginner-Intermediate | Time: 2–5 hours | Cost: Low-Medium
Materials
- Old window sash (cleaned)
- Photos/prints cut to fit panes
- Painter’s tape, backing paper, and hanging hardware
How to make it
- Clean the sash thoroughly; sand rough areas.
- Paint or seal if desired (especially if the finish is flaking).
- Place photos behind each pane and secure with tape or backing pieces.
- Add sturdy hanging hardwarethese can be heavier than they look.
Best for: Family photo grids, seasonal photo swaps, or a mix of photos and simple line art.
Pro tip: Keep a consistent border around each photo so the whole piece feels cohesive.
Make Your DIY Frames Look Professional: The “Don’t Skip This” Tips
Use a mat (even a simple one)
Matting adds breathing room and makes even budget frames look intentional. It also creates a little separation
between art and glazing. You can buy pre-cut mats or cut your own with a sharp blade and steady hands (go slow).
Choose the right backing
For photos and artwork you care about, use acid-free foam board or mat board as the backing. It’s an easy upgrade
that can help keep prints looking cleaner over time.
Hang smarter, not harder
For medium-to-large frames, D-rings plus picture wire tends to be more stable than a single sawtooth hanger.
Use wall hooks rated for your frame’s weight, add felt bumpers, andif you’re doing a gallery wallconsider
marking your hook points before you commit.
Gallery wall spacing that feels “designed”
A quick rule that works in real homes: keep spacing between frames consistent (often around 2–3 inches) and build
around a central “anchor” piece. Lay it out on the floor first, then transfer to the wall.
Keep glare and fingerprints under control
Acrylic is lightweight and safer than glass in many homes. Clean with a microfiber cloth and a cleaner designed
for acrylic to avoid hazing and scratches.
Conclusion: Frame What You Love, Not Just What’s Convenient
The secret to great framing isn’t owning a thousand toolsit’s choosing a simple method that matches your art and
your lifestyle. If you rotate photos often, go for magnetic hangers or clothespin displays. If you want heirloom
vibes, build a mitered wood frame. If you’re working with keepsakes, a shadow box is your best friend.
Start with one easy DIY picture frame this weekend. Once you see how much a good frame elevates a print or photo,
you’ll begin noticing blank wall space the way bakers notice a clean kitchen counter: as an opportunity.
Experience Notes: What People Learn After Making (and Hanging) a Bunch of DIY Frames
After you make your first few DIY picture frames, something funny happens: you stop thinking of frames as “extras”
and start seeing them as part of the artwork. The same photo can read as cozy, modern, vintage, or bold depending
on the frame finish and the mat choice. That’s why many DIYers end up with a little “frame test corner” on the
floorjust swapping options until the piece finally looks like it belongs in the room.
A common beginner surprise is how much tiny details matter. Sanding an edge for 60 seconds makes
paint look smoother. Wiping dust before painting prevents gritty “mystery texture.” Adding felt bumpers stops
frames from drifting crooked, which is the silent villain of gallery walls. None of these steps are glamorous,
but they’re the difference between “homemade” and “handcrafted.”
People also learn quickly that hanging is its own craft. The wall is not a forgiving canvas, and it remembers
every missed hook attempt. The best real-world habit is planning: measure the frame, decide the center point,
and mark it lightly before you ever pick up a hammer. For gallery walls, it helps to commit to consistent spacing
instead of eyeballing it. Eyeballing is fun until you step back and realize your “art arrangement” looks like it
tried to escape in different directions.
Another lesson: the back of the frame matters. DIYers often focus on the frontpaint, stain,
twine, tapethen slap the art in with whatever cardboard they find. But if you’re framing something meaningful,
upgrading the backing to a clean, sturdy, acid-free board is a small change that can pay off. It keeps everything
flatter, reduces warping, and generally makes the whole thing feel more “finished.” Even if you’re not going full
museum-grade, “not actively damaging your print” is a great baseline goal.
Finally, most folks discover their personal frame style. Some love the perfection of mitered corners and crisp
lines. Others embrace the charming messiness of paint strokes and thrift-store frames with a little history.
Either approach is valid. The point is to build a home that feels like younot a catalog page. And if you end up
with a tiny stack of “almost right” frames in a closet, welcome to the club. That’s not failure. That’s inventory
for future inspiration.


