Table of Contents >> Show >> Hide
- Start Here: 5 Questions That Pick the Right Saw for You
- 10 Types of Saws (And What They’re Actually For)
- How to Choose the Right Saw: A Simple “Cut + Material + Volume” Formula
- Blade & Teeth Basics: Your Saw Is Only as Good as Its Blade
- Safety (Because Fingers Are Hard to Replace)
- Quick Buying Guide: Which Saw Should You Get First?
- Wrap-Up: The Right Saw Makes the Project Feel Easier
- Real-World Experiences: 7 Saw Lessons I Learned the Noisy Way (About )
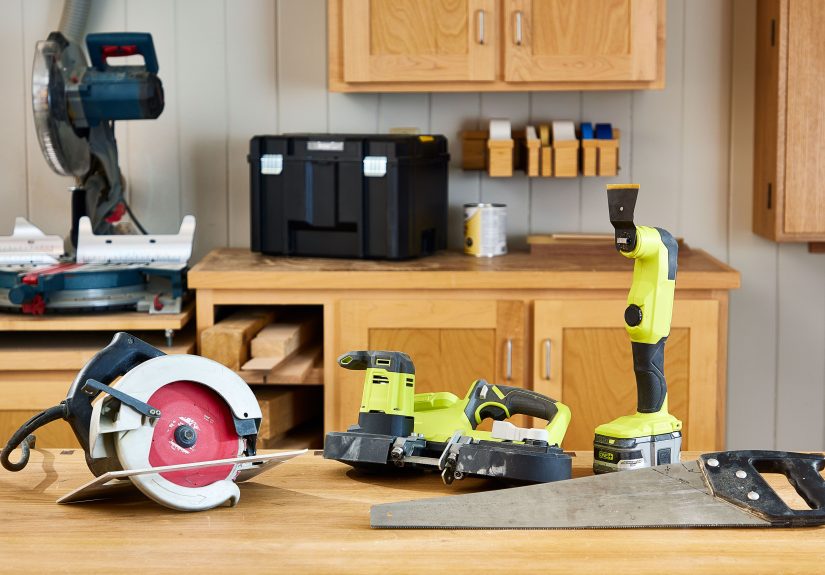
Walk into any hardware store and head for the saw aisle. Congratulationsyou’ve entered the “How many ways can humans possibly cut stuff?” museum. There are saws that slice, saws that nibble, saws that spin, and at least one saw that looks like it was designed by a person who really hates drywall.
The good news: choosing the right saw isn’t mysterious. It’s basically matchmaking. You’re looking for the tool that fits your material, your cut, your workspace, and your patience level. (If your patience is low, I have great news about power saws.)
In this guide, we’ll cover 10 types of saws, what each one is best at, and a simple system to pick the right saw for your next DIY or woodworking projectwithout buying three tools you didn’t need and one you definitely did.
Start Here: 5 Questions That Pick the Right Saw for You
Before you pick a saw, pick your problem. Answer these questions and the “right saw” usually reveals itself:
- What material are you cutting? (Wood, plywood, PVC, metal, laminate, tree limb…)
- What kind of cut do you need? Straight, curved, angled, bevel, plunge, or “just remove it.”
- How clean does the cut need to be? Framing tolerance vs. furniture joinery are different planets.
- Where are you working? Jobsite, garage, basement, backyardpower and space matter.
- How many repeats? One cut can be improvised. Fifty identical cuts beg for the right tool.
Keep those answers nearby. Now let’s meet the saw cast.
10 Types of Saws (And What They’re Actually For)
1) Hand Saw (Panel Saw)
The classic hand saw is simple, quiet, and doesn’t need a batteryor an outlet, or a charging schedule, or a motivational speech. It’s ideal for quick cuts when you don’t want to set up power tools, especially on small stock or light projects.
Best for: Basic crosscuts in lumber, trimming boards to rough length, quick home repairs.
Choose it when: You’re making a few cuts and setup time would be longer than the actual sawing.
What to look for: Comfortable handle, rigid blade, and a tooth pattern suited for your cut. As a general idea, fewer teeth cut faster (rougher), more teeth cut slower (cleaner). If you want a smoother cut with less effort, consider a pull-style “Japanese” hand saw as an alternativemany cut on the pull stroke, which can feel more controlled.
Example: You’re replacing one fence picket. This is a hand-saw moment. No one needs a table saw to fix a fence picket. (Someone will do it anyway. Don’t be that someone.)
2) Hacksaw
The hacksaw is the “metal and plastic” specialist. It uses a thin, fine-toothed blade tensioned in a frame. It’s not glamorous, but it’s extremely useful when you need to cut bolts, conduit, PVC, or metal pipe and you don’t want sparks flying in your face.
Best for: Metal rods, bolts, threaded pipe, PVC, aluminum stock (with the right blade).
Choose it when: You need control and a clean cut on small metal or plastic pieces.
What to look for: A solid frame and the right blade tooth count for your material thickness. Secure the workpiece firmlymetal loves to vibrate, and vibration loves to ruin your cut line.
3) Coping Saw
The coping saw is basically a hand saw that went to yoga. It’s designed for tight curves and inside cuts, using a thin blade held under tension. If you’ve ever tried to fit trim neatly or cut a curvy notch that needs finesse, coping saws quietly save the day.
Best for: Curved cuts in thin wood, coping crown molding joints, small interior cutouts.
Choose it when: Your cut line bends and you need control more than speed.
Pro tip: Let the blade do the work. If you push like you’re mad at the wood, the blade will twist, snap, or bothusually in a dramatic way that scares pets.
4) Jigsaw
The jigsaw is the go-to for curves in sheet goods and for cutouts like sink openings, outlet boxes, and odd shapes that would make a circular saw cry. It’s also friendly for beginners because the blade is small and the tool is easy to maneuverthough “easy” depends heavily on choosing the right blade.
Best for: Curves, cutouts, short straight cuts in plywood, laminate, and thin boards.
Choose it when: You need a shaped cut or an interior cut that starts in the middle of a panel.
What to look for: Orbital settings (for faster rough cuts), solid base plate, and variable speed. If you care about a clean edge, use a finer-tooth blade and slower speed. A rough “construction” blade will tear out plywood like it’s trying to win an argument.
Example: Cutting a countertop opening for a sink. Drill starter holes at corners, then jigsaw between them. It’s practically a rite of passagelike getting paint in your hair, but louder.
5) Circular Saw
If you want one portable power saw that can handle a huge range of straight cuts, the circular saw is a top contender. It excels at breaking down plywood and cutting framing lumber quickly. With a straightedge guide (or a track system), it can get impressively accurate.
Best for: Straight cuts in plywood, OSB, framing lumber; jobsite work; quick breakdown cuts.
Choose it when: You need straight cuts but don’t have space (or desire) for a table saw setup.
What to look for: Comfortable grip, easy bevel adjustment, and a stable base. Decide corded vs. cordless based on your typical projects and where you work. For sheet goods, a good blade matters as much as the saw.
Reality check: A circular saw plus a straight guide can cover a lot of beginner and homeowner cutting needs, especially when a table saw feels like overkill.
6) Miter Saw (Chop Saw / Compound Miter Saw)
The miter saw is the “repeatable, accurate crosscut” machine. You drop the blade down onto the workpiece, which is perfect for cutting boards to length and making crisp angles for trim, frames, and molding. If you’ve got a pile of 2x4s or baseboards to cut, a miter saw is a gift to your future self.
Best for: Crosscuts, miters (angles), bevel cuts; trim work; framing; flooring cuts.
Choose it when: You need lots of consistent length cuts or clean angled cuts.
What to look for: Blade size (capacity), bevel range, and whether you need a sliding model for wider boards. For trim, stability and accuracy beat horsepower theater.
Beginner-friendly note: Miter saws are often less intimidating than table saws because the work stays still and the blade movesjust keep hands well away and use the guard properly.
7) Table Saw
The table saw is the centerpiece of many woodworking shops because it’s exceptionally good at straight, repeatable cutsespecially rip cuts (cutting along the length of a board). With the right jigs, it can also crosscut, bevel, and handle joinery operations. It’s powerful and precise… and it demands respect.
Best for: Rip cuts, repeatable cuts, cabinetry, furniture parts, breaking down lumber (with support).
Choose it when: You need accuracy and repeatability, especially for woodworking and sheet goods.
What to look for: Fence quality (huge), rip capacity, stable table, and safety features like a proper blade guard, riving knife, and anti-kickback protection. Dust collection also matters more than you think.
Example: Building cabinets. A table saw makes ripping panels and creating consistent parts far easier than trying to do everything with a handheld saw.
8) Band Saw
Band saws use a continuous loop blade that runs over wheels, giving a smooth cut and excellent control for curves. They’re also loved for resawingslicing a thicker board into thinner slabsespecially in furniture and fine woodworking. If you want curves with less drama than a jigsaw, the band saw is your calm, capable friend.
Best for: Curves, resawing, ripping smaller stock, cutting thicker wood cleanly.
Choose it when: You do woodworking and want cleaner curves or resaw capability.
What to look for: Throat capacity, resaw height, and blade availability. Blade selection is everything: wider blades track straighter for ripping/resawing; narrower blades handle tighter curves.
9) Reciprocating Saw
The reciprocating saw is the demolition expert. It’s not here for delicate joinery; it’s here to remove things. It’s a lifesaver for remodeling, pruning roots, cutting nails in studs, and slicing through materials in places where a circular saw can’t fit.
Best for: Demo work, rough cuts, cutting through mixed materials (wood + nails), tight spaces.
Choose it when: Precision is optional and access is limited.
What to look for: Orbital action (faster cutting), tool-free blade changes, and vibration control. Blades matter enormouslyuse demolition blades for nail-embedded wood and metal-cutting blades for steel.
Example: Removing an old window frame or cutting out a rotted section of lumber. This is where the reciprocating saw earns its nickname reputation.
10) Chainsaw
If your “project” involves trees, storm cleanup, firewood, or cutting large outdoor timbers, the chainsaw belongs in the conversation. It’s fast, powerful, and absolutely not a tool to “figure out as you go.” Respect the kickback zone, wear proper protection, and keep the chain sharp.
Best for: Limbing, bucking firewood, felling small trees (with training), rough outdoor cutting.
Choose it when: Your material is literally a tree, or close enough.
What to look for: Bar length appropriate to your typical diameter, reliable chain tensioning, and safety features (chain brake). For occasional homeowners, battery models can be surprisingly practical.
How to Choose the Right Saw: A Simple “Cut + Material + Volume” Formula
Match the Saw to the Cut
- Long straight cuts in sheet goods: Circular saw (with guide) or table saw.
- Repeatable crosscuts and angles: Miter saw.
- Rip cuts for woodworking: Table saw (or band saw for certain ripping/resaw tasks).
- Curves and cutouts: Jigsaw (or band saw for cleaner curves).
- Demo and tight-space cuts: Reciprocating saw.
- Outdoor wood/limbs: Chainsaw.
- Small metal/plastic: Hacksaw.
Match the Saw to the Material
Most saws are “material-flexible” if you use the right bladebut some pairings are naturally happier:
- Framing lumber: Circular saw or miter saw (fast, reliable).
- Plywood/OSB: Circular saw with a fine-tooth blade; table saw for repeated accuracy.
- Trim and molding: Miter saw for crisp miters; coping saw for coped joints.
- Metal pipe/bolts: Hacksaw for controlled cuts; reciprocating saw for faster rough cuts.
- Laminate: Fine-tooth blades and painter’s tape help reduce chipping.
Match the Saw to the Project Volume (How Many Cuts?)
If you’re doing a handful of cuts, a circular saw or jigsaw might be enough. If you’re doing dozens of identical cuts, a miter saw (for crosscuts) or table saw (for rips) will save time and produce more consistent results. Your future self will thank you. Your current self might grumble, but that’s normal.
Blade & Teeth Basics: Your Saw Is Only as Good as Its Blade
If a saw is the engine, the blade is the tires. You can have a powerful saw and still get ugly cuts if the blade is wrong, dull, or mismatched to the material.
Teeth Per Inch (TPI): Speed vs. Smoothness
Generally: Lower TPI cuts faster and rougher (great for framing), while higher TPI cuts slower and smoother (better for finish work). For band saws, a practical rule of thumb is to keep multiple teeth engaged in the material at all times so the blade doesn’t chatter or snag. For jigsaws, finer blades tend to leave a cleaner edge, especially on visible cuts.
Kerf, Tooth Geometry, and “Why Is My Cut Burning?”
Blade geometry affects heat, speed, and finish. A thin-kerf blade removes less material, which can be easier on smaller saws. Burning often comes from a dull blade, feeding too slowly, or using the wrong tooth style for the material. The fix is usually boring but effective: swap blades, clean pitch buildup, and let the tool maintain a steady pace.
Specialty Blades Are Not a Scam (Usually)
Need cleaner plywood cuts? Use a plywood/finish blade. Cutting metal? Use a metal-rated blade. Cutting nail-embedded wood? Use a demolition blade and accept that it’s a sacrifice. The right blade is often cheaper than fixing tear-out or replacing a piece you just ruined.
Safety (Because Fingers Are Hard to Replace)
You don’t need to become a safety robot, but you do need a few non-negotiables:
- Use guards and safety features as designed. Especially on table saws, miter saws, and circular saws.
- Wear eye protection (and hearing protection when using power saws).
- Keep blades sharp. Dull blades increase force, wandering, and kickback risk.
- Support the workpiece. Poor support causes binding and surprise movements.
- Use push sticks and proper technique when cutting small stock on a table saw.
- Let the saw reach full speed before entering the cut, and don’t force it.
For table saws in particular, safe operation is strongly tied to correct guarding and anti-kickback measures. If you’re new to table saws, start with basic cuts, learn proper stance and feed direction, and treat kickback prevention as part of the toolnot an optional upgrade to your personality.
Quick Buying Guide: Which Saw Should You Get First?
If you’re building a basic DIY setup and you want the most versatility without adopting a second mortgage:
- Most versatile starter: A circular saw + straightedge guide (great for lumber and sheet goods).
- Add for curves and cutouts: A jigsaw.
- Add for trim and repeat cuts: A miter saw.
- For serious woodworking: A table saw (with strong safety features) becomes the hub.
- For remodeling: A reciprocating saw is the “remove anything” button.
Think in “project lanes.” Home repair and remodeling lean portable: circular, jigsaw, reciprocating. Furniture and cabinetry lean shop-based: table saw, band saw, miter saw for support.
Wrap-Up: The Right Saw Makes the Project Feel Easier
Choosing the right saw isn’t about owning every saw ever invented (though the tool aisle will encourage that lifestyle). It’s about matching the tool to the cut, the material, and the number of repeatsthen pairing it with the right blade. Do that, and your cuts get straighter, your curves get smoother, and your projects stop drifting from “DIY” into “why did I do this.”
When in doubt, pick the saw that gives you control first and speed second. Speed is fun, but control is how you end up with a finished project instead of “abstract modern lumber art.”
Real-World Experiences: 7 Saw Lessons I Learned the Noisy Way (About )
The first time I used a circular saw on plywood, I expected a clean, confident slicelike a cooking show where the chef chops onions and somehow doesn’t cry. What I got was splintering, a wavy line, and the realization that “freehand” is a fun word people say right before they buy a straightedge guide.
Lesson one: guides are not cheating. A $20 clamp-on guide can turn a circular saw from “close enough” into “wow, that’s actually straight.” If you’re building shelves, cabinets, or anything where edges meet other edges, guide rails and straightedges are basically your best friends. They don’t talk back, and they don’t borrow your tools.
Lesson two: your blade is a mood ring. A dull blade makes everything hardermore effort, more heat, more burning, more swearing. I once tried to power through a long rip cut with a blade that was past its prime. The wood burned, the cut drifted, and I spent the next hour sanding and pretending it was “intentional character.” Swapping blades would’ve taken two minutes. Two minutes! That’s less time than it takes to find the pencil you just had.
Lesson three: miter saws make you feel like a wizarduntil you forget to support a long board. If one end droops, the cut can shift, pinch, or pull slightly out of square. The fix is simple: support wings, roller stands, or even a perfectly timed stack of scrap pieces. When the board stays level, the miter saw becomes the repeatability machine it was born to be.
Lesson four: jigsaws are honest tools. They will not pretend they’re great at perfectly straight lines for six feet. They’re wonderful for curves and cutouts, but if you ask them to be a table saw, they’ll politely drift off your line and make you question your life choices. Use the jigsaw for what it’s good atthen clean up the edge if the cut will be visible.
Lesson five: table saws reward setup. The magic isn’t just the motorit’s the fence alignment, blade height, and work support. When you take the extra minute to set the fence properly and keep the stock tight to it, the saw delivers parts that fit together like they belong in the same universe. Skip setup, and you get “mystery gaps” that require creative clamping.
Lesson six: reciprocating saws are therapy. Remodeling can be stressful. The reciprocating saw turns stress into progress. Just don’t expect pretty cuts. If you want “gone,” it’s perfect. If you want “fine furniture,” put it back in the case.
Lesson seven: the best saw is the one you’ll use safely. If a tool feels awkward, underpowered, or sketchy in your hands, you’ll avoid itor rush itand neither is good. Choose a saw that fits your workspace and skill level, then build up from there. Projects get better when your tools feel like helpers instead of adrenaline dispensers.