Table of Contents >> Show >> Hide
- Before You Pour: The 10-Minute Reality Check
- The 12 Mistakes That Turn “Fresh Slab Day” Into “Why Is It Doing That?”
- 1) Skipping Subgrade Prep (a.k.a. Pouring on “Whatever Dirt Was There”)
- 2) Choosing the Wrong Mix (Strength, Aggregate Size, Air, or Set Time)
- 3) Adding Water to “Make It Easier” (and Accidentally Making It Weaker)
- 4) Mixing Too Dry (Then Overworking the Surface to Compensate)
- 5) Pouring Too Thin (Concrete Is Not Magic Paint)
- 6) Weak Formwork and Poor Grade Control (Crooked, Bowed, or Sloped the Wrong Way)
- 7) Reinforcement Mistakes (Wrong Type, Wrong Location, or “It’ll Float Up… Right?”)
- 8) Ignoring Vapor Barriers and Moisture Management
- 9) Pouring Too Slowly (Creating Cold Joints and Uneven Texture)
- 10) Finishing Too Early (Troweling While Bleed Water Is Still There)
- 11) Botching Control Joints (Wrong Layout, Wrong Depth, Wrong Timing)
- 12) Neglecting Curing and Weather Protection (The Most Expensive “Oops”)
- A Bonus “Mistake” That Deserves a Loud Warning: Treating Wet Concrete Like Harmless Mud
- Quick Troubleshooting: What You’re Seeing (and What It Usually Means)
- Pro Habits That Make Concrete Look (and Perform) Like You Paid Pros
- Real-World Experiences & Lessons Learned (Extra Field Notes)
- The “It Was Only a Little Water” Driveway Apron
- The Patio That Cracked in a Perfectly Straight Line (Spoiler: It Was the Base)
- The Beautiful Smooth Finish That Started Peeling
- The Windy-Day Pour That Developed Spiderweb Cracks by Dinner
- The Control Joints That Were “Definitely Deep Enough” (They Were Not)
- The Rain Shower That Ruined the Finish (But Didn’t Need To)
- The Safety Lesson Nobody Wants to Learn Twice
- Conclusion
Concrete looks like the easiest thing in the world: gray stuff goes in a hole, then you wait, then you drive on it.
And yet, concrete has a special talent for remembering every shortcut you tooklike an elephant, but with more
cracking and fewer adorable ears.
This guide breaks down the 12 most common mistakes when pouring concrete, why they happen, what they
cost you (besides pride), and how to avoid them with practical, jobsite-tested habits. Whether you’re pouring a
patio, walkway, shed slab, or driveway extension, the goal is the same: a slab that cures strong, flat, and durable
instead of becoming a future “before” photo.
Before You Pour: The 10-Minute Reality Check
The biggest concrete wins happen before the truck arrives. Take ten minutes and confirm these basics:
- Weather: Is there heat, wind, freezing temps, or rain in the next 24 hours?
- Thickness & slope: Do you know the required thickness, and where water will drain?
- Base & forms: Is the subgrade compacted and the formwork braced?
- Tools & help: Do you have enough hands and the right tools to place and finish on time?
- Curing plan: Do you have plastic sheeting, curing compound, or a watering plan ready?
Concrete doesn’t punish you for being new. It punishes you for being unprepared.
The 12 Mistakes That Turn “Fresh Slab Day” Into “Why Is It Doing That?”
1) Skipping Subgrade Prep (a.k.a. Pouring on “Whatever Dirt Was There”)
What it looks like: Random cracking, settling, rocking corners, and a slab that feels like it’s
floating over a secret sinkhole.
Why it happens: People underestimate the base. Concrete is strong in compression, but it needs
uniform support. Soft spots, organic soil, or poorly draining ground can moveand your slab moves with it.
Fix the habit: Excavate to proper depth, remove organic material, and build a compacted base
(often crushed stone/gravel) with consistent grade. Use a plate compactor if possible; a “stomp test” is not
engineering, no matter how confident the stomping.
Example: A patio poured over loose fill may look perfect on day one, then develop a crack line
exactly where a buried soft pocket settles after the first heavy rain.
2) Choosing the Wrong Mix (Strength, Aggregate Size, Air, or Set Time)
What it looks like: Surface scaling, weak edges, finishing nightmares, or a slab that sets faster
than your team can screed.
Why it happens: “Concrete is concrete” is like saying “all shoes are shoes.” Technically true.
Functionally… enjoy running a marathon in flip-flops.
Fix the habit: Match the mix to the job:
- Exterior freeze/thaw regions: Air-entrained concrete and proper finishing/curing matter.
- Thin sections or tight reinforcement: Aggregate size matters for flow and consolidation.
- Hot weather: Consider set-retarding strategies and faster placement plans.
- Decorative finishes: Plan for workability without “adding water on the fly.”
3) Adding Water to “Make It Easier” (and Accidentally Making It Weaker)
What it looks like: Dusting, scaling, excessive shrinkage cracks, and a surface that wears faster
than you expected.
Why it happens: Wet concrete flows nicely. It also increases the water-to-cement ratio and can leave
a more porous cement paste once curedmeaning less strength and durability.
Fix the habit: Order the slump/workability you need, use water-reducing admixtures when appropriate,
and don’t let “just a splash” become a lifestyle. If you’re mixing bags, measure water consistently.
Example: A driveway apron that was watered down to “place easier” may develop surface flaking after
a winter or two, especially if finishing and curing were also rushed.
4) Mixing Too Dry (Then Overworking the Surface to Compensate)
What it looks like: Honeycombing, rough voids, poor bond around reinforcement, and corners that chip.
Why it happens: DIYers sometimes fear a wet mix (fair), then go too far the other direction and end
up with a mix that won’t consolidate.
Fix the habit: Aim for a workable mix that can be placed and consolidated without excessive pushing,
pounding, or panic-troweling. Place in lifts if needed and consolidate properly (especially around edges and rebar).
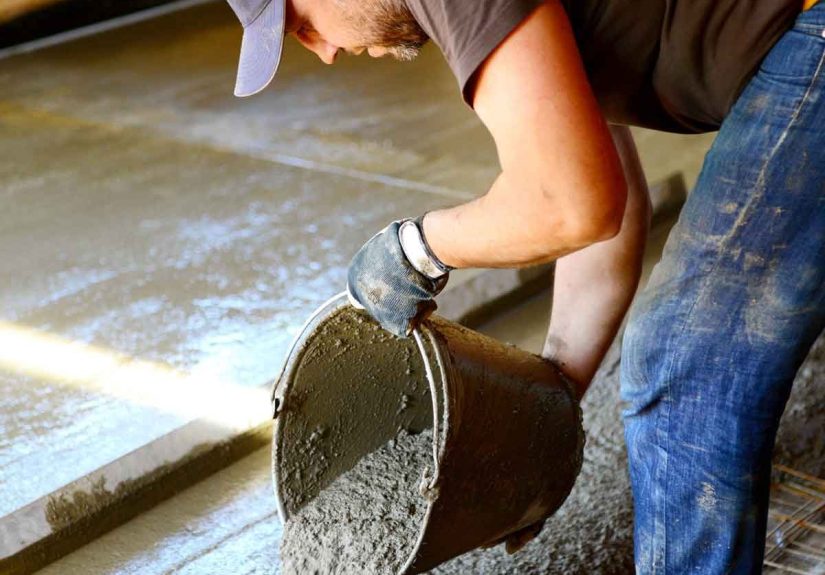
5) Pouring Too Thin (Concrete Is Not Magic Paint)
What it looks like: Cracked slabs, curling edges, and breakage under normal loads.
Why it happens: People underestimate loads (cars, furniture, hot tubs, sheds) or try to stretch
concrete volume. Thin concrete can’t distribute stress well, especially with a questionable base.
Fix the habit: Follow thickness guidelines for your application and local requirements. If you need
to reduce volume, reduce the slab footprintnot the thickness.
6) Weak Formwork and Poor Grade Control (Crooked, Bowed, or Sloped the Wrong Way)
What it looks like: Wavy edges, a slab that drains toward your house, or forms that bulge during the pour.
Why it happens: Concrete is heavy and pushes outward. If forms aren’t staked and braced, they move.
If grade isn’t checked, your “level” slab becomes a surprise water feature.
Fix the habit: Stake and brace forms like you’re expecting an argument from 3,000+ pounds of wet material.
Verify grade and slope with a string line/laser level, not “it looks kinda right.”
7) Reinforcement Mistakes (Wrong Type, Wrong Location, or “It’ll Float Up… Right?”)
What it looks like: Cracking that opens more than expected, edges that chip, or reinforcement visible
where it shouldn’t be.
Why it happens: Reinforcement helps manage crack width and load distribution, but only if it’s placed
correctly. Mesh sitting on the ground does almost nothing once the concrete is on top of it.
Fix the habit: Use chairs/spacers so reinforcement ends up in the intended zone of the slab. Plan
lap lengths, avoid rebar too close to the surface, and don’t rely on “we’ll pull it up with a rake” as a strategy.
8) Ignoring Vapor Barriers and Moisture Management
What it looks like: Moisture issues under flooring, curling behavior, or finishing challenges when
slabs are placed directly over certain vapor-retarding setups.
Why it happens: Moisture moves. If your slab is part of a conditioned space, or you’re putting
flooring/epoxy on top later, moisture control becomes a design issuenot a “maybe.”
Fix the habit: Use the right vapor barrier/vapor retarder approach for the project, tape seams, and
coordinate with flooring plans. Also consider drainage, base material, and slab detailing so you don’t “solve”
moisture in one way while creating curling or finishing headaches in another.
9) Pouring Too Slowly (Creating Cold Joints and Uneven Texture)
What it looks like: A visible line between placements, weak bonding, and a slab that behaves like it’s
made of multiple unrelated slabs that just happen to share a mailing address.
Why it happens: Concrete starts hydrating immediately. If one section begins setting while another
is still being placed, you risk cold joints and inconsistent consolidation/finishing.
Fix the habit: Stage labor and tools, keep placement continuous, and avoid long delays between batches.
If delays are unavoidable, plan pour sizes accordingly.
10) Finishing Too Early (Troweling While Bleed Water Is Still There)
What it looks like: Surface scaling, delamination, blistering, or a weak “crust” that flakes.
Why it happens: Bleed water rises as solids settle. If you seal the surface too soon, you can trap
water and create a weak, moisture-rich layer at the top.
Fix the habit: Wait. Let bleed water evaporate naturally before final finishing. Use the right tool
at the right timebull float early, trowel later (if needed), and don’t confuse “shiny water” with “ready to finish.”
Example: A garage slab that was steel-troweled while bleed water remained may look smooth at first,
then develop surface peeling under normal use.
11) Botching Control Joints (Wrong Layout, Wrong Depth, Wrong Timing)
What it looks like: Random cracks that ignore your beautiful rectangle shape and choose chaos instead.
Why it happens: Concrete shrinks as it cures. Control joints are how you tell the slab where to crack
on purposeso it doesn’t crack where it feels like it.
Fix the habit: Plan joint layout (square-ish panels are your friend), cut joints at the right time,
and cut them deep enough. A practical rule for many slabs is a control-joint depth of at least one-quarter of
the slab thickness. Use early-entry saws or timing that matches your set conditions so joints actually work.
12) Neglecting Curing and Weather Protection (The Most Expensive “Oops”)
What it looks like: Plastic shrinkage cracks, weak surface, curling, dusting, or reduced long-term durability.
Why it happens: Concrete doesn’t “dry.” It hydrates. If moisture leaves too quicklyespecially in
hot, windy conditionshydration suffers. If it freezes before gaining strength, damage can be permanent. If rain hits
at the wrong time, it can ruin the surface.
Fix the habit: Have a curing plan before you pour:
- Hot/windy: Block wind, dampen the base (without leaving puddles), pour during cooler hours, and begin curing as soon as finishing allows.
- Cold: Protect from freezing and maintain appropriate temperatures for curing.
- Rain risk: Keep plastic sheeting ready; don’t let rainwater sit on the surface during finishing.
- Standard curing: Use wet curing (misting/soaking coverings) or curing compounds per project needs.
A Bonus “Mistake” That Deserves a Loud Warning: Treating Wet Concrete Like Harmless Mud
Wet concrete is caustic. Skin contact can cause serious irritation or burns, and you may not feel it immediately.
Gloves, boots, long sleeves, and washing stations aren’t “overkill”they’re the baseline for safe work.
Quick Troubleshooting: What You’re Seeing (and What It Usually Means)
- Hairline cracks within hours: Often plastic shrinkage from heat/wind and insufficient early protection/curing.
- Powdery surface: Often too much water, finishing too early, or poor curing.
- Flaking/scaling top layer: Frequently early finishing over bleed water, added water during finishing, or freeze/thaw durability issues.
- Edges breaking off: Thin edges, weak base at perimeter, poor consolidation, or impact loads too soon.
- Standing water after rain: Grade/slope errorusually a formwork or screeding problem.
Pro Habits That Make Concrete Look (and Perform) Like You Paid Pros
- Plan the pour like a mini-event: tools staged, helpers briefed, weather checked, curing supplies ready.
- Respect timing: place continuously, don’t overwork, and finish only when the slab is ready.
- Control water obsessively: in the mix, on the surface, and during curing.
- Tell cracks where to go: good joint layout beats “hope.”
- Cure like you mean it: the first few days decide a lot of the slab’s future personality.
Real-World Experiences & Lessons Learned (Extra Field Notes)
The best way to understand concrete mistakes is to see how they show up in real life. The stories below are drawn
from common jobsite and DIY scenariosbecause concrete errors have a small set of greatest hits, and they tour
constantly.
The “It Was Only a Little Water” Driveway Apron
A homeowner wanted the apron to flow nicely around a tight corner near the garage. The mix felt stiff, so water
was added “just to help it move.” The pour looked great that afternoon. By the next season, the surface began
dusting and showing shallow scaling where tires turned. The lesson wasn’t “never adjust anything”it was
control workability the right way (ordering appropriate slump, using admixtures when needed) instead
of changing the water-to-cement ratio on the fly.
The Patio That Cracked in a Perfectly Straight Line (Spoiler: It Was the Base)
Everything about the finish looked solid, but a crack appeared exactly where an old landscaping trench had been
backfilled. The base was compacted “enough,” except it wasn’t. When the trench fill settled, the slab bridged over
the movement and cracked. The takeaway: concrete reveals hidden ground problems. If there was a trench,
a tree, soft soil, or a change in fill, treat that zone like it’s guilty until proven compacted.
The Beautiful Smooth Finish That Started Peeling
This one hurts because it starts with good intentions. Someone wanted a sleek, steel-troweled surface and began
finishing earlywhile bleed water was still present. The slab looked like a magazine photo for about a week. Then
the surface started flaking in patches, especially where it was overworked. The fix isn’t “never trowel”it’s
finishing at the right time and not sealing in water. Concrete will forgive many things; trapping
bleed water is not one of them.
The Windy-Day Pour That Developed Spiderweb Cracks by Dinner
High temperature plus wind is a sneaky combo. Even if the air feels “fine,” wind accelerates evaporation at the
surface. If evaporation outruns bleeding, the surface can shrink and crack while the concrete is still plastic.
In these situations, the best crews shift the pour time, set up windbreaks, pre-wet the subgrade (without puddles),
and move quickly into curing. The lesson: wind is not just annoyingit’s structural.
The Control Joints That Were “Definitely Deep Enough” (They Were Not)
A slab was jointed lightlymore like “drawn on” than cutbecause nobody wanted to drag out a saw. The slab cracked
randomly, and the owner swore the joints were “right there.” The truth is control joints only work when they’re
planned, timed, and cut to a meaningful depth so the slab can crack where intended. The lesson: joints are
not decoration. They’re engineering you can see.
The Rain Shower That Ruined the Finish (But Didn’t Need To)
A quick rain hit during finishing. Instead of covering immediately, the crew tried to “work through it,” troweling
water into the surface. That created a weak top layer and a blotchy finish. With a simple plastic cover plan and a
pause in finishing, the slab could have been saved. The lesson: have a rain plan, even if the forecast
looks friendlybecause weather loves plot twists.
The Safety Lesson Nobody Wants to Learn Twice
Wet concrete on skin can cause serious irritation or burns, and it may not hurt right away. People kneel in it,
splash it into boots, or handle it without gloves because “it’s just mud.” Then hours later, the damage shows up.
The lesson is simple: PPE and wash-up are part of the pour. Build them into the plan the same way you
plan tools and curing.
Conclusion
Pouring concrete isn’t about perfectionit’s about avoiding predictable mistakes. Most slab failures trace back to
a handful of controllable issues: base prep, water control, timing, joints, and curing. Get those right, and your
concrete will do what it’s supposed to do: sit there quietly for years, looking boring in the best possible way.