Table of Contents >> Show >> Hide
If tents are the luxury condos of the campsite, tarp shelters are the clever studio apartments: smaller, simpler, cheaper, and surprisingly stylish when you know what you’re doing. A tarp can give you shade at lunch, rain coverage at dinner, and a decent place to sleep when the weather is mild and your setup is smart. It is not magic, though. A floppy blue rectangle thrown over a tree branch is not “camp architecture.” It is a future puddle.
The good news is that learning a few reliable tarp shelter setups can make you more flexible outdoors, whether you’re camping at a developed campground, backpacking light, or building a simple weather cover for a backyard overnight. The trick is choosing the right pitch for the conditions instead of forcing one setup to do every job. Calm weather, breezy weather, and sideways-rain weather do not all deserve the same shelter plan.
In this guide, you’ll learn three practical tarp shelter designs that beginners can actually use: the A-frame, the lean-to, and the diamond pitch. Along the way, we’ll cover the gear you need, the knots that make life easier, common mistakes that turn tarps into kites, and a few real-world lessons that only show up after you’ve spent a damp night listening to fabric flap like an angry flag.
Why a Tarp Shelter Is Worth Learning
A tarp shelter is popular for one simple reason: versatility. A good tarp is lightweight, packs smaller than many tents, and can be pitched in several ways depending on terrain and weather. It can also serve more than one purpose. The same tarp might become a sleeping shelter one night, a cooking cover the next day, and a shady hangout at lunch. That kind of flexibility is why experienced campers keep coming back to tarps, even when they own fancier shelters.
There’s another reason tarp shelters remain useful: they teach you to read the environment. When you use a tarp, you pay attention to wind direction, slope, drainage, tree spacing, stake placement, and tension. A tent often hides those decisions behind color-coded poles. A tarp makes you think. Politely, but firmly.
That said, tarp camping works best when you stay realistic. A tarp is excellent for light travel, fair to moderate conditions, and adaptable camp coverage. It is not a substitute for judgment. If severe weather is expected, plan accordingly, check campground rules, and remember that a tarp is not protection from lightning. In a thunderstorm, the safe move is a substantial building or a hard-topped vehicle, not heroic optimism under nylon.
What You Need Before You Start
Basic Gear List
Before building any tarp shelter, gather a few basics:
- A rectangular or square tarp
- Guylines or sturdy cord
- Stakes
- Two trees, trekking poles, paddles, or upright poles for support
- A ground sheet if you plan to sleep underneath
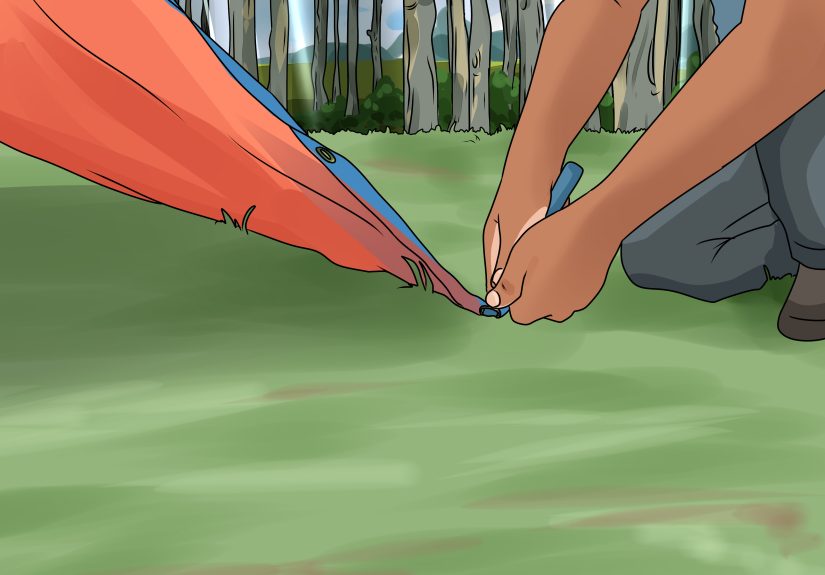
Beginners usually do best with a rectangular tarp because it gives you more pitching options and a little forgiveness while you learn. Extra guylines are not overkill. They are the difference between “cozy shelter” and “fabric interpretive dance.”
Three Useful Knots
You do not need to become a knot wizard, but you should know a few basics. A bowline is helpful for making a fixed loop. Two half-hitches are handy for attaching a line to a grommet or anchor point. A taut-line hitch is the star of the show because it creates an adjustable loop that lets you tighten or loosen guylines without retying everything from scratch. Learn those three, and tarp life gets dramatically easier.
Where to Pitch
Pick an existing durable campsite when possible instead of creating a new one. Avoid low spots where water collects, fragile vegetation, and areas too close to rivers, streams, lakes, or wetlands. Look up as well as down. The ground might be flat, but if there are dead branches overhead, that spot just became a bad bargain. If you’re using trees as anchors, protect the bark with padding or webbing and follow local rules. Some campgrounds do not allow ropes tied to trees at all.
1. The A-Frame Tarp Shelter
The A-frame is the classic tarp shelter for a reason. It is simple, balanced, and easy to understand. If a child drew a shelter with a crayon, it would probably look like an A-frame. Two sloping sides meet at a ridgeline, creating decent coverage and solid ventilation. It is a great choice for beginners and works well in calm to moderately wet weather.
Best Uses for the A-Frame
- Fair-weather camping
- Light to moderate rain
- Overnights where you want easy entry and exit
- Two-person coverage with the right-size tarp
How to Build It
Start by running a ridgeline between two trees or by using two trekking poles to support the centerline of the tarp. Drape the tarp evenly over that line so both sides hang down in roughly equal panels. Stake out the four corners, then tighten each side until the tarp is taut. If your tarp has additional side tie-outs, use them. They improve airflow and reduce sagging.
If you want more ventilation, pitch the edges slightly off the ground. If you expect rain or cooler wind, pitch it lower. That ability to adjust height is one of the biggest advantages of an A-frame. Think of it as the shelter version of rolling up your sleeves: same shirt, different mood.
Why It Works
The A-frame sheds water well because the sloped sides encourage runoff instead of pooling. It also gives you a predictable sleeping space. Most people can quickly understand where their head goes, where gear fits, and where rain is likely to drip if the pitch is sloppy. In other words, it is forgiving enough for beginners while still being useful for experienced campers.
Its Weak Spot
The standard A-frame is not the best choice when strong wind is hitting broadside. If wind-driven rain is coming from one end, you may wish you had more closure or a lower pitch. It is a dependable shelter, but not the outdoor equivalent of a bunker.
2. The Lean-To Tarp Shelter
The lean-to is the relaxed, social tarp shelter. One side is anchored high, and the other side slopes down toward the ground or lower stakes. It creates an open front with excellent views and good airflow. If you want shade, a simple rain break, or a quick camp lounge, the lean-to is a winner.
Best Uses for the Lean-To
- Cooking or hanging out at camp
- Blocking wind from one main direction
- Warm weather with a chance of light rain
- Lunch stops and temporary shelter
How to Build It
Secure one long edge of the tarp to a ridgeline or elevated support points on trees or poles. Then stake the opposite edge low to the ground, forming a slanted roof. Angle the open side away from the prevailing wind if you want a more comfortable interior. Tighten the corners and side tie-outs until the tarp feels stable and smooth.
If you’re using the lean-to as a camp fly rather than a sleep shelter, raise the front enough for people to move around easily underneath. If you plan to sleep under it, bring the front lower and pitch the back more securely. A lean-to can be airy and pleasant, but it should not resemble a giant sail waiting for applause.
Why It Works
The lean-to shines when you need usable living space. It’s excellent for a dining area, gear sorting, or a spot to wait out a passing shower. Because one side is open, it feels roomy and less enclosed than other tarp pitches. That makes it especially pleasant in warm weather.
Its Weak Spot
The same open design that feels welcoming can also let in weather if the wind shifts. A lean-to is direction-dependent. Set it up facing the wrong way and you may spend the night getting misted like a salad at the grocery store.
3. The Diamond Tarp Shelter
The diamond pitch, sometimes called a plow-point style setup, is a favorite when you want better wind protection with minimal hardware. Instead of using the tarp in a neat rectangle, you rotate it so one corner becomes the high point and the opposite corner points toward the ground. The result is a compact shelter with solid weather resistance and a smaller footprint.
Best Uses for the Diamond Pitch
- Breezy conditions
- Solo tarp camping
- Limited space between trees or rocks
- Quick setup with fewer support points
How to Build It
Choose a tree or support for the high corner of the tarp and secure that point with a ridgeline or cord. Pull the opposite corner down to the ground and stake it firmly. Then stake out the remaining two corners to create sidewalls and interior space. Adjust the angle until the shelter is taut, stable, and shaped to block the prevailing wind.
This pitch works especially well for one person because it creates a more enclosed feeling without requiring a complicated frame. You can keep the entry slightly open for ventilation while still gaining better protection than a wide-open lean-to.
Why It Works
The diamond pitch presents less surface area to the wind and creates a naturally defensive shape. It is a smart option when the weather is turning but not severe. It also saves time because you can build it with fewer support points than some larger, more symmetrical setups.
Its Weak Spot
Interior room is more limited. You trade spaciousness for protection. If you are camping with a second person or a mountain of gear, this pitch can feel cozy in the charming sense or cramped in the “whose elbow is that?” sense.
How to Choose the Right Tarp Shelter
If the forecast is mild and you want a beginner-friendly overnight setup, use the A-frame. If you mainly want a camp hangout, kitchen cover, or quick rain break, use the lean-to. If the wind is more of a concern and you’re camping solo, the diamond pitch is usually the smartest pick.
Here’s the simplest way to think about it:
- A-frame: best all-around beginner option
- Lean-to: best for shade, airflow, and camp living space
- Diamond: best for compact weather protection
The real secret is not memorizing one perfect setup. It is learning how weather, terrain, and tarp shape interact. The tarp is only half the shelter. The other half is your decision-making.
Common Mistakes to Avoid
Pitfall 1: Pitching in a Drainage Path
Flat-looking ground can still become a shallow stream in heavy rain. Avoid depressions, obvious runoff channels, and the bottom of slopes. Your tarp should be a roof, not front-row seats to surprise hydrology.
Pitfall 2: Leaving the Tarp Loose
A saggy tarp collects water, flaps in the wind, and loses coverage. Tension matters. Tighten your guylines, recheck the stakes, and adjust after the fabric settles. Nylon in particular can relax a little with moisture.
Pitfall 3: Ignoring Wind Direction
A shelter that looks good in still air may fail the moment wind arrives. Before you pitch, pause and study the site. Which way is the wind blowing now? Which way will weather likely move? Put the lowest, most closed side toward the weather whenever possible.
Pitfall 4: Damaging Trees
Never use nails or wire on living trees. If local rules allow tree tie-offs, use padding or wide material to protect bark. Better yet, use poles or approved attachment methods when required. Good outdoor skills include leaving the place looking like you were never there, except perhaps for your very smug knot work.
Pitfall 5: Treating a Tarp Like Storm Armor
A tarp can handle a lot when pitched well, but it is not a license to ignore forecasts. In thunderstorms, especially with lightning, move to proper shelter. In developed campgrounds, know where that shelter is before you need it.
Field Notes: Experience Teaches What the Diagram Doesn’t
The first time many people sleep under a tarp, they expect one of two outcomes: either a rugged outdoor triumph worthy of a memoir, or complete misery. In reality, the first night is usually something in between. You stay mostly dry, learn three new opinions about wind, and discover that every tiny adjustment matters more than you thought.
One of the most common lessons is that tarp shelter comfort starts long before bedtime. Campers often focus on the shape of the pitch and forget the site itself. But a perfect A-frame in the wrong place is still the wrong shelter. Ask anyone who has confidently set up on “nice flat ground” only to wake up with water flowing politely under their sleeping pad. The tarp did its job. The campsite did not.
Another experience many campers have is learning the value of a lower pitch. Beginners love headroom, and who can blame them? A tall tarp looks airy and civilized. Then the wind picks up after dark, and suddenly that elegant, high shelter sounds like a marching band wrapped in plastic. Lowering the ridgeline by even a small amount often makes the shelter quieter, warmer, and more stable. The view gets worse, but the sleep gets better. That is a trade most people are happy to make at 2 a.m.
There’s also the matter of guylines. On paper, they seem like a boring accessory. In real use, they are the whole game. Campers with too few lines or poorly placed stakes spend the evening retightening corners while pretending they are “fine.” Campers with enough guylines and a few adjustable knots look suspiciously calm. Experience teaches that extra cord weighs very little and solves a surprising number of problems.
Then there is the social side of tarp camping. A tarp changes the mood of camp because it feels more open than a tent. You hear more, see more, and spend more time paying attention to the world around you. On a clear evening, that openness feels wonderful. On a buggy night, it feels like a philosophical test. That’s why many experienced tarp users pair the setup with a ground sheet, bivy, or bug net depending on season and location. They are not cheating. They are sleeping.
Perhaps the biggest experience-based lesson is that tarp skills improve quickly. The first pitch may look improvised. The second gets better. By the third or fourth try, you start noticing tension angles, stake placement, and how different shapes suit different weather. What seemed complicated becomes intuitive. You stop building “a tarp shelter” and start building the right tarp shelter for that moment.
That is what makes tarp camping satisfying. It rewards observation, not just equipment. It asks you to read the sky, feel the wind, and use simple materials well. And when you wake up dry under a tarp you pitched yourself, with your coffee heating up and the morning light coming in from the open side, it feels less like roughing it and more like you finally learned the trick. The tarp did not become fancy overnight. You just got better at listening to what the campsite was telling you.
Conclusion
Learning three solid tarp shelter setups gives you real flexibility outdoors. The A-frame is the dependable all-rounder, the lean-to is the easygoing camp lounge with practical rain coverage, and the diamond pitch is the compact problem-solver when wind becomes part of the conversation. None of them require expensive gear or advanced mountaineering credentials. They require practice, observation, and a willingness to tweak your setup before the weather does it for you.
Start simple. Practice in a backyard or local campground before relying on a tarp for a longer trip. Learn a few knots, bring enough guylines, respect campsite rules, and pitch with the weather in mind. Do that, and a plain tarp turns into one of the most useful shelters you can carry.


