Table of Contents >> Show >> Hide
- Memory Wire Bracelet Basics (So Your Bracelet Doesn’t Turn Into a Slinky Situation)
- Way #1: The Classic Patterned Wrap (Beginner-Friendly, High “I Made This!” Energy)
- Way #2: The “Floating Focal” Bracelet (Wire-Wrapped Accents for Extra Sparkle)
- Way #3: The Mixed-Media “Stacked Look” Bracelet (Beads + Ribbon/Leather + Charms)
- Troubleshooting: Common Memory Wire Bracelet Problems (and the Fixes)
- Quick Style Recipes (Copy, Paste, Bead)
- Maker Experiences: What People Usually Learn After a Few Memory Wire Bracelets (About )
- Conclusion
If you love the idea of a bracelet that basically claps back into shapeno clasp, no drama, no “where did my stretchy cord go?”
then a memory wire bracelet is your new best craft project. Memory wire is pre-formed steel wire that holds its coil shape,
which means your bracelet naturally wraps your wrist and stays put.
The best part: you can make one in under an hour, and it still looks like something you’d spot in a boutique displayright next to the candle
that smells like “Coastal Tax Refund.” In this guide, you’ll learn three distinct ways to make a memory wire bracelet:
a classic patterned wrap, a sparkly “floating focal” design with wire-wrapped accents, and a mixed-media style that looks layered without
actually requiring you to stack five bracelets and lose two by lunch.
Safety note: memory wire is springy steel. Wear eye protection when cutting, hold wire ends firmly, and consider adult help
if you’re new to heavy-duty cutters. Your wrists want jewelry, not surprise pokes.
Memory Wire Bracelet Basics (So Your Bracelet Doesn’t Turn Into a Slinky Situation)
What is memory wire?
Memory wire is cold-forged steel wire sold in coils sized for rings, bracelets, or necklaces. It “remembers” its round shape, so it doesn’t
rely on elastic stretch or a clasp to fit.
Tools you actually need
- Memory wire cutters/shears (regular cutters can get damaged and may not cut cleanly).
- Round-nose pliers (for making end loops)
- Chain-nose or needle-nose pliers (for gripping, opening jump rings, and wrangling tiny things)
- Optional: memory wire finishing pliers (makes consistent loops easier)
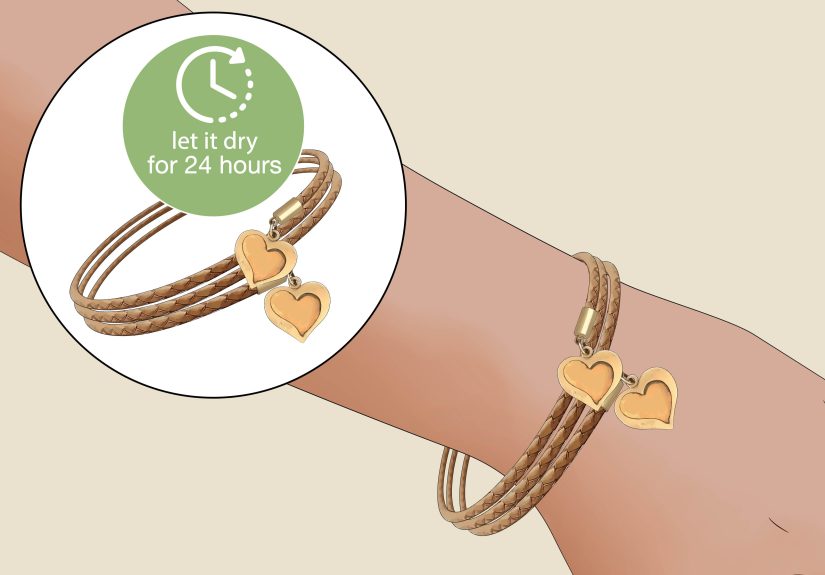
- Optional: jewelry glue + memory wire end caps/finials (for a sleek, “store-bought” finish)
- Nice-to-have: bead board or a towel (beads love escaping like they’re auditioning for an action movie)
How many coils do you cut?
For most wrap-style bracelets, 3–6 coils is a good range. Three coils feel light and minimal; six coils look like a stacked
set. You can also do double-wire styles or “cuff” looks, but start with 3–4 coils while you learn the rhythm.
How to finish the ends (the two big options)
- Make loops on both ends: A classic finish that can also hold charms or dangles.
- Glue on end caps/finials: A polished, bead-like end that looks super clean and feels smooth on the wrist.
In the projects below, I’ll show loop-finishing as the default because it’s beginner-friendly and doesn’t require glue to cure. If you prefer
end caps, you can swap that finishing step in most designs.
Way #1: The Classic Patterned Wrap (Beginner-Friendly, High “I Made This!” Energy)
This is the go-to beaded memory wire bracelet: simple, clean, and customizable. The “secret sauce” is your patterntiny spacer
beads, a repeating color combo, or a planned focal bead every so often. It’s like building a playlist, but for your wrist.
Materials
- Bracelet-size memory wire (3–5 coils)
- Beads (mix sizes like 4mm, 6mm, and a few statement beads)
- Spacer beads (optional but highly recommended for rhythm and sparkle)
- 1–2 charms + jump rings (optional)
Step-by-step
-
Cut your wire: Use memory wire shears and cut 3–5 full coils. Hold the coil firmly so it doesn’t spring
into a new career as a tiny metal helicopter. -
Make the first end loop: With round-nose pliers, grab about 3/8–1/2 inch of wire at the end and roll it
toward the coil’s natural curve to form a loop. This prevents beads from sliding off. -
Plan a pattern (optional, but saves regret): On a bead board (or a towel), lay out a repeat like:
6mm color bead → spacer → 4mm bead → spacer. Repeat until it feels balanced. -
String the beads: Slide beads onto the coil. Keep them snug, but leave a tiny bit of “wiggle room” so the bracelet can wrap
comfortably and the beads can move slightly. -
Add a focal moment: Every 1–2 coils, add a larger bead or charm station to create visual “anchors.” Example: a single 10mm
bead at the start of each coil looks intentional and designer-y. - Stop before the end: Leave about 3/8–1/2 inch bare wire for your finishing loop.
- Make the final loop: Cut excess wire (if needed), then roll a matching loop. Try to mirror the first end for a polished finish.
- Optional charm upgrade: Add a jump ring + charm to one loop. It’s the jewelry equivalent of adding a lemon twist to sparkling water.
Design tips (a little “why” behind the beads)
- Use spacers to separate colors and prevent the bracelet from looking like a bag of Skittles fell on your wrist.
- Repeat = expensive-looking. A simple repeating pattern reads “intentional,” even if you made it while watching TV.
- Comfort check: If beads are jammed tight end-to-end, the coil can feel stiff. A little movement helps it wrap smoothly.
Way #2: The “Floating Focal” Bracelet (Wire-Wrapped Accents for Extra Sparkle)
This method gives your bracelet dimension: beads on the coil plus little wire-wrapped clusters that sit on top, like tiny sparkly
punctuation marks. It’s a great option when you want a more “handcrafted art jewelry” look.
Materials
- Bracelet memory wire (3–4 coils works nicely)
- Base beads (seed beads, 4mm rounds, small spacers)
- Accent beads (crystals, pearls, gemstone rounds)
- Thin craft wire (e.g., 24–28 gauge) or headpins/eyepins for dangles
- Round-nose + chain-nose pliers, flush cutters (for thin wire)
Step-by-step
- Cut and loop one end: Same as Way #1cut coils and form a loop so nothing escapes.
- String a “foundation”: Add smaller beads first (seed beads/spacers) so you have a smooth base with room for accents.
-
Create an accent cluster: Take 2–4 inches of thin craft wire. String 1–3 accent beads (like a crystal + pearl). Make a tiny
twist to secure them, leaving wire tails. -
Attach the cluster to the memory wire: Wrap the wire tails around the memory wire coil between beads, then trim and
tuck the ends tightly with chain-nose pliers so nothing scratches. - Repeat with spacing: Add a cluster every 1/2 coil, or group clusters near the top for a “statement front” effect.
- Finish beading: Continue stringing beads, leaving space at the end for your finishing loop.
- Make the final end loop: Cut if needed, then form the final loop.
Why this works (quick analysis)
The base beads keep the bracelet comfortable and stable. The wire-wrapped clusters add height and sparkle without making the bracelet bulky.
You also get a “custom” look because clusters are slightly irregularin the good way, like homemade cookies with character.
Pro-level tweaks (still beginner-safe)
- Use a focal zone: Put clusters mostly on the top half of the bracelet so it’s comfy on the underside of your wrist.
- Keep wraps short: Too many wraps in one spot can create a stiff kink. Two to four wraps is usually plenty.
- Check for scratchy ends: Run your fingertip along the inside of the coil. If you feel a snag, tuck it tighter.
Way #3: The Mixed-Media “Stacked Look” Bracelet (Beads + Ribbon/Leather + Charms)
Want that layered, boho, “I definitely have my life together” bracelet stackwithout actually wearing seven separate bracelets? Mixed-media
memory wire gives you the stacked illusion in a single piece. It’s also fantastic for using up leftover ribbon, thin leather cord, or chain.
Materials
- Bracelet memory wire (4–6 coils for the stacked vibe)
- Large-hole beads (or beads with roomy centers)
- Ribbon, thin leather cord, or soft chain (lightweight)
- Spacer beads + 1 focal bead or pendant
- Jump rings + a few charms (optional)
- Round-nose and chain-nose pliers, memory wire cutters
Step-by-step
- Cut wire and make the first loop: Same start as the other methods.
- Create “bead stations”: String a short section of beads (example: 10–15 beads) to anchor your design.
-
Add mixed media: Slide on a large-hole bead, then thread a short length of ribbon/leather through that bead so it sits alongside
the coil. Tie a small knot or make a tiny fold to keep it from slipping too far. - Alternate textures: Repeat: bead section → large-hole bead → ribbon/leather segment. Aim for 2–4 mixed-media segments total.
- Add a focal front: Place your biggest focal bead or pendant area near the center of one coil. When worn, it naturally faces up.
- Finish the last coil with beads: Keep the final coil mostly beaded for comfort and structure.
- Make the final loop: Leave space, cut if needed, and roll the closing loop.
- Charm it up (optional): Add a charm to an end loop or attach a small dangle cluster so it peeks out at the wrist edge.
Why this works (quick analysis)
Beads provide structure while ribbon/leather adds softness and contrast. The bracelet looks like a curated stack because different textures
catch light differently. It’s also a sneaky way to turn random craft leftovers into “intentional design.”
Comfort and durability tips
- Keep ribbon/leather lightweight so the coil can still spring back into shape.
- Avoid sharp-edged beads near ribbon; they can fray fabric over time.
- Balance the bracelet: Too many heavy beads on one coil can make the bracelet rotate on your wrist.
Troubleshooting: Common Memory Wire Bracelet Problems (and the Fixes)
“My beads slide off the end.”
You need a secure finisheither a loop on the end or a glued-on end cap/finial. Loops are quick; end caps look extra polished.
“My loop looks weird and wonky.”
Totally normal at first. Use the coil’s natural curve as your guide and roll the wire gradually with round-nose pliers. Finishing pliers can help
you get consistent loop sizes.
“I tried to cut it and my cutters cried.”
Memory wire is hardened steeluse memory wire cutters/shears. Regular cutters can get damaged.
“The bracelet feels too tight.”
Use fewer beads per coil (leave micro-gaps), or switch to slightly larger bracelet-size memory wire. Also, make sure your end loops leave enough
room so beads aren’t packed to the edges.
“It spins on my wrist and the pretty part hides.”
Add a focal bead or a cluster near the “top” of one coil, and keep heavier beads centered. Balanced weight helps the bracelet naturally face up.
Quick Style Recipes (Copy, Paste, Bead)
- Minimalist: matte black 4mm beads + one gold spacer every 5 beads + a single tiny charm on the end loop.
- Coastal: white pearls + pale blue glass + silver spacers + one starfish charm (subtle, not souvenir-shop).
- Earthy boho: wood beads + turquoise accents + leather segment (Way #3) + a small tassel dangle.
- Glam: crystal bicones + seed bead separators + wire-wrapped clusters (Way #2) concentrated on the top half.
Maker Experiences: What People Usually Learn After a Few Memory Wire Bracelets (About )
Most people’s first experience with memory wire is the same: you pick it up and think, “Oh, cutewire.” Then the coil springs open a bit and you
realize it has the personality of a tiny metal slinky with opinions. The learning curve is short, but it’s real. The good news is that the
“mistakes” are usually cosmetic, not catastrophic.
One common early discovery: bead choice changes everything. Beginners often start with a random mix, then notice the bracelet looks
busy from a distance. The “aha” moment comes when they repeat a patternmaybe two colors and a spacer beadand suddenly the bracelet looks
intentional. Crafters also learn that matte beads hide small spacing issues, while glossy crystals spotlight every little
inconsistency. That’s not bad; it just means sparkle is honest.
Another shared experience is the end-finishing glow-up. Early bracelets sometimes have slightly uneven loops, which can look handmade
(in a charming way) or slightly lopsided (in a “did my bracelet melt?” way). After a couple tries, people start leaving a bit more wire at the end,
rolling the loop slowly, and using the coil’s natural curve as a guide. Many makers say the moment they tried finishing pliers or glue-on end caps,
they understood why “finishing” is half the look: the bracelet instantly reads more polished and giftable.
Comfort is a big lesson, too. New makers often pack beads tightly because it feels “secure,” but then the bracelet can feel stiff. After wearing it
for a day, they notice that a tiny bit of movement makes the coil wrap more naturally. People also learn to keep bulky clusters mostly on the top
half of the bracelet, so the underside of the wrist stays smooth. That’s the difference between “statement jewelry” and “why is my keyboard
fighting back?”
Many crafters also discover memory wire is great for using leftovers. A few beads from one project, a charm from another, and some
spacers that have been rolling around your supply box since the dawn of timememory wire turns that into a cohesive piece fast. Mixed-media designs
(like adding ribbon or leather) often start as an experiment and end as a favorite, because the bracelet looks layered without feeling heavy.
Finally, there’s the practical “tool reality” moment: memory wire is tough, and using the right cutters matters. People who try standard cutters
learn quicklysometimes with dented bladeswhy memory wire shears exist. Once the right tool is in hand, the whole craft becomes smoother and more
enjoyable, and the focus shifts from wrestling the material to playing with color, texture, and design.
Conclusion
A memory wire bracelet is one of the most satisfying jewelry projects because it’s quick, customizable, and forgiving. Start with the classic
patterned wrap, level up with wire-wrapped accent clusters, and then try a mixed-media stacked look when you want something truly unique. Once you
learn clean end finishes and comfortable spacing, you’ll be able to make bracelets that look boutique-worthywithout boutique prices.