Table of Contents >> Show >> Hide
- Before You Lock It Down: A Quick Reality Check
- Method 1: Use Passwords + Permissions (The Classic Combo)
- Method 2: Add a Watermark (Polite Deterrence With Teeth)
- Method 3: Flatten the PDF (Freeze the Layout, Reduce Easy Copying)
- Method 4: Digitally Sign or Certify the PDF (Make Changes Obvious)
- Bonus Layer: Remove Sensitive Content (Because “Protected” Isn’t the Same as “Safe”)
- Which Method Should You Use?
- Common Mistakes That Make “Protected PDFs” Not So Protected
- Conclusion
- of Real-World Experiences: PDFs in the Wild
PDFs have a reputation for being “final,” which is hilariousbecause the moment you email one, someone will
inevitably try to copy a paragraph, tweak a price, or “just adjust the logo a little.” If you’ve ever watched a
carefully formatted PDF come back looking like it survived a blender, you already know: you don’t just share a
PDF. You defend it.
The good news: you don’t need to be a cybersecurity wizard to make your PDF significantly harder to copy and
edit. The even better news: the most effective approach is usually a “layer cake” of simple protections. Below
are four easy, practical methods that work well for most peopleplus some real-world-style lessons (the kind you
learn after a PDF causes mild chaos).
Before You Lock It Down: A Quick Reality Check
Let’s set expectations so your blood pressure stays in a safe ZIP code. No method can make a PDF 100% immune to
copying if someone can view it. A determined person can always retype content, take screenshots, photograph their
screen, or use OCR (text recognition) on an image-based PDF. What protection can do is:
- Prevent casual editing (the “oops I changed it” crowd).
- Discourage copying (make it annoying enough that most people won’t bother).
- Control printing and extraction for compliant PDF viewers.
- Make tampering obvious (digital signatures/certification).
Think of this like putting a lock on your front door. It won’t stop a meteor, but it absolutely helps with the
problem you actually have: uninvited “guests” who try the handle.
Method 1: Use Passwords + Permissions (The Classic Combo)
This is the go-to because it’s quick and widely supported. Most PDF tools let you set:
a password to open the document (so only authorized people can view it) and/or
a permissions password (so people can open it, but can’t easily print, edit, or copy).
Best for
- Client deliverables (proposals, reports, design proofs)
- Internal docs that shouldn’t be modified (policies, SOPs)
- Pricing sheets or contracts you don’t want “edited creatively”
How to do it in Adobe Acrobat (easy, reliable)
- Open your PDF in Acrobat.
- Go to the protection tools (often labeled “Protect a PDF” or “Protect with password”).
-
Choose password protection, then select whether you want:
- Viewing (requires a password to open), and/or
- Editing/Permissions (restricts printing, editing, copying).
-
For permissions, set:
- Printing allowed: none, low resolution, or high resolution (choose “none” if you really mean it).
- Changes allowed: none (or allow only form filling/signing if needed).
- Copying: disable content copying/extraction if your tool provides that checkbox.
- Save the PDF so the settings actually apply (this is the step people forget, then blame the universe).
How to do it in Microsoft 365 (great for organizations)
If your workplace uses Microsoft Purview Information Protection (sensitivity labels), you can apply a label and
encryption to a Word/Excel/PowerPoint file, then Save a Copy as PDF. The resulting PDF can inherit the
label and encryption ruleshandy if your organization already has a security policy and wants PDFs governed the
same way as the original files.
Two small but important tips
-
Share the password separately. If you email the PDF and the password in the same message, you’ve
basically put the spare key under the doormat and added a neon sign. -
Use a strong password and store it safely. Many tools won’t recover forgotten PDF passwords for
you. “I’ll remember it” is not a strategyit’s a plot twist.
Why this works (and where it doesn’t)
Passwords and permissions stop most everyday editing and copying in standard PDF readers. But some third-party
tools may not fully honor permission restrictions. That’s why you’ll often want to combine this method with at
least one more layer below (watermark, flattening, or signatures).
Method 2: Add a Watermark (Polite Deterrence With Teeth)
Watermarks don’t “lock” content, but they change the psychology. People are less likely to share or reuse
content that screams “CONFIDENTIAL,” “DRAFT,” or “Property of: Your Company.” And if someone prints it, the
watermark goes along for the ride like a clingy but helpful friend.
Best for
- Draft documents and reviews (“Please don’t forward this”)
- Training manuals, internal playbooks, proprietary process docs
- Client proofs where you want attribution on every page
How to watermark in Adobe Acrobat
- Open the PDF and choose the editing toolset.
- Select Watermark and then Add.
-
Choose your watermark source:
- Text (e.g., “CONFIDENTIAL DO NOT DISTRIBUTE”), or
- Image (like a logo; transparent PNGs usually look best).
- Adjust opacity, size, rotation, and placement so it’s visible but not a crime against readability.
- Apply to all pages (or selected pages), then save.
Watermark ideas that actually help
- Ownership: “© 2026 Acme Co. All Rights Reserved.”
- Distribution control: “Internal Use Only” or “Not for External Sharing.”
- Traceability: Add a client name, project ID, or invoice number so leaks are less “mysterious.”
Pro tip: A watermark pairs beautifully with Method 1. Permissions reduce easy copying; watermarks reduce
“eh, I’ll just share it” behavior.
Method 3: Flatten the PDF (Freeze the Layout, Reduce Easy Copying)
Flattening turns a layered, interactive, or form-heavy PDF into something more “baked.” It can merge layers,
annotations, and form fields so the file behaves more like a finalized output. In many workflows, the simplest
flattening method is literally: Print to PDF.
Best for
- Final versions you don’t want casually edited
- Forms that should become read-only after completion
- Documents where you want to reduce easy text extraction
Easy way on Windows: Print to PDF
- Open the PDF.
- Go to File > Print.
- Select Microsoft Print to PDF (or another PDF printer option you trust).
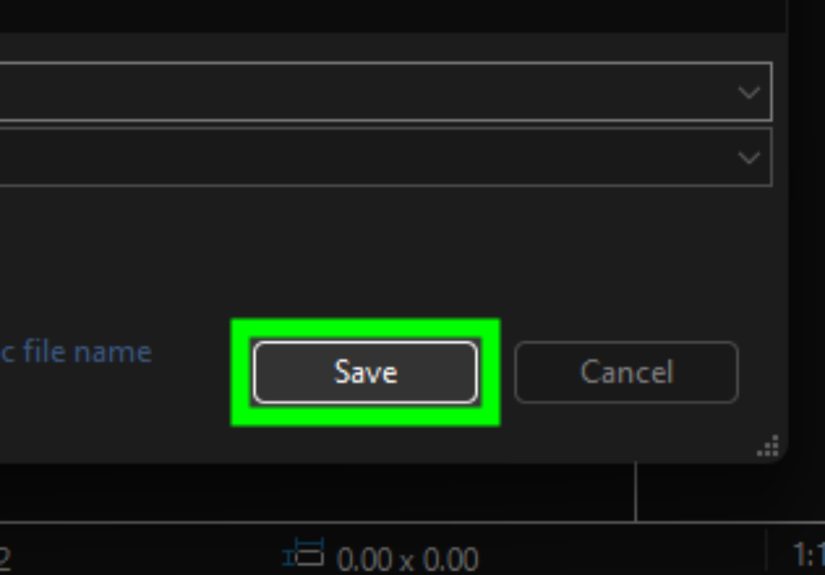
- Print, name the new file, and save it.
- Open the saved PDF to confirm it looks correct (and that you didn’t accidentally print it to a parallel universe).
Easy way on Mac: Use Preview to export a “fresh” PDF
- Open the PDF in Preview.
- Choose File > Export as PDF (note: not just “Export” in some workflows).
- Name the file and save. The exported version is often flattened enough for typical submission/sharing needs.
Power-user option in Adobe Acrobat: Flattener Preview
Acrobat includes a flattening workflow that can convert text to outlines and apply flattening settingsuseful when
you need tighter control than “Print to PDF.”
- Make a copy of your PDF first (because flattening is a one-way trip).
- Open the flattening tools (often under advanced print production settings).
- Adjust the raster/vector balance if needed.
- Apply flattening (for example, converting text to outlines) and save.
Flattening trade-offs (read this before you commit)
- Searchability/accessibility may suffer if text becomes outlines or images.
- OCR can undo some of the “no-copy” effect if someone runs text recognition later.
- Always keep an editable original (your future self will send thank-you notes).
Method 4: Digitally Sign or Certify the PDF (Make Changes Obvious)
If you care less about stopping someone from copying a sentence and more about ensuring the document can’t be
altered without detection, digital signatures and certification are your best friends. In Acrobat workflows, a
signed PDF can become read-only for others, and locking options can prevent further changes after signing.
Best for
- Contracts, approvals, official records
- Anything where integrity matters more than convenience
- Documents that need to prove “this is the exact version I issued”
Signing vs. certifying (plain English)
- Digital signature: Confirms who signed and whether the document changed afterward.
- Certification: Lets you approve the content and specify what changes (if any) are allowed after certification.
How to certify in Acrobat (high-level steps)
- Open the PDF and go to the certificate/signing tools.
- Select Certify (visible or invisible signature options may be available).
- Draw the signature rectangle (for visible certification) or proceed with invisible certification.
- Choose your digital ID (create/configure one if needed).
-
Select what actions are permitted after certifying (for example, allow form filling and signatures, but block
content edits). - Review warnings, sign, and save the certified copy under a new filename.
Why this is powerful
A certified/signed PDF is less about “no one can touch this” and more about “if someone touches this, it will be
obvious.” That’s a big deal for compliance, approvals, and legal workflows.
Bonus Layer: Remove Sensitive Content (Because “Protected” Isn’t the Same as “Safe”)
If your PDF contains sensitive info (SSNs, bank details, private addresses, confidential client data), consider
redacting it rather than relying purely on copy/print restrictions. Restrictions can be bypassed; true removal is
a different level of safety. Many professional PDF tools include a redaction workflow that permanently removes
selected content and can also sanitize hidden data.
Which Method Should You Use?
Here’s a quick decision guide that won’t make you overthink it:
- I need basic “don’t edit/copy” protection: Method 1 (Passwords + Permissions)
- I’m sharing drafts and want a visible deterrent: Method 2 (Watermark) + Method 1
- I want it to behave like a final, frozen deliverable: Method 3 (Flatten) + Method 2
- I need integrity and audit-friendly proof: Method 4 (Sign/Certify) + Method 1
Common Mistakes That Make “Protected PDFs” Not So Protected
- Sending the password in the same email as the file.
- Forgetting to save after changing security settings.
- Only using permissions when you really needed encryption (open password) too.
- Keeping the editable source file in a shared folder while locking only the exported PDF.
- Flattening without checking accessibility (and accidentally making it harder for screen readers or searches).
- Assuming restrictions are absolute instead of treating them as part of a layered approach.
Conclusion
Protecting a PDF from copying and editing doesn’t have to be complicated. Start with passwords and permissions,
add a watermark to discourage misuse, flatten the file when you need a “final” version that’s harder to tamper
with, and use signatures or certification when integrity truly matters. Stack the layers you need, keep an
editable original, and you’ll spend a lot less time arguing with your own documents.
of Real-World Experiences: PDFs in the Wild
If PDFs could talk, they’d probably say, “I was built for consistency,” and then immediately whisper,
“but humans are creative.” Here are a few common experiences people run into when trying to keep PDFs from being
copied or editedplus what tends to work in practice.
Experience #1: The “It’s Just a Small Change” Surprise.
A team sends a pricing PDF to a partner. The partner replies with a version that has a “small clarification”
except the clarification looks suspiciously like a rewritten payment schedule. This is where Method 1 shines:
lock editing and copying, and require an open password if the document is sensitive. Even if someone finds a way
around restrictions, at least you’ve prevented the casual “I edited it in my PDF tool like it was a Word doc”
behavior. Pair it with a watermark that includes a version label (“Issued: Feb 2026 | v1.3”), and suddenly
“Which version is real?” becomes a question with a clean answer.
Experience #2: The Forwarded Attachment That Went on a Field Trip.
Someone forwards a confidential PDF to “one more person who should see this,” and that person forwards it again,
and now your document is basically on a world tour. This is where watermarks earn their keep. A watermark doesn’t
physically block copying, but it changes the emotional calculus: people hesitate when every page screams
“CONFIDENTIAL” and carries a client name or project ID. In many workplaces, that tiny speed bump is enough to
stop well-meaning oversharing. And if it doesn’t stop it, it at least reduces the odds that the doc gets treated
like public-domain clip art.
Experience #3: The Form That Looked Fine… Until It Was Uploaded.
Fillable PDFs are amazing right up until a submission portal rejects them or displays them incorrectly. Many
grant, compliance, and intake systems prefer flattened PDFs because layers and interactive elements can cause
errors. Printing to PDF (flattening) becomes the quick fixand as a side benefit, it also reduces casual editing
and straightforward text copying. The trade-off is that flattening can make the document less searchable or
accessible if you convert text into outlines or images. A practical habit is to keep two versions: an editable
“working file” and a flattened “final submission” file. The second one is what you distribute.
Experience #4: The “Prove This Wasn’t Altered” Moment.
Sometimes the real problem isn’t copyingit’s trust. A contract, policy, or approval document gets circulated,
and later someone claims, “That’s not the version I saw.” Digital signatures and certification are built for this
moment. They’re less about preventing someone from taking the text and more about providing a visible signal when
a file has changed after signing. That’s powerful in legal, financial, or regulated workflows where integrity is
the point. The best habit here is boring but essential: always save an unsigned original and sign/certify a copy.
That way, you can still make legitimate edits without nuking your own workflow.
The recurring theme? PDF protection works best when you match the method to the risk. For internal docs, a
permissions password and watermark may be plenty. For external deliverables, flattening plus watermarking reduces
casual reuse. For high-stakes documents, signatures/certification add the “tamper-evident seal” you actually
need. Most of the time, the “right” setup isn’t one single featureit’s a couple of small choices stacked
together.