Table of Contents >> Show >> Hide
- What You’ll Make
- Project Snapshot
- Step 1: Choose the Candle and Size Your Stand
- Step 2: Gather Materials (Fast, Cheap, Beginner-Friendly)
- Step 3: Build a Sturdy Base (No Wobble Allowed)
- Step 4: Add the Column (The “Stand” Part)
- Step 5: Create a Safe Candle Seat
- Step 6: Finish It Farmhouse-Style (Paint, Stain, Distress)
- Step 7: Seal, Style, and Set It Up Safely
- Farmhouse Styling Ideas That Look “Designer,” Not “Dorm Room”
- Common Mistakes (and Quick Fixes)
- FAQ
- Real-World Experiences: What People Learn After Making a Farmhouse DIY Candle Stand
- You discover that proportion is the secret sauce
- You learn the value of patience (aka “dry time is not a suggestion”)
- You figure out what “farmhouse distressing” actually means
- You discover stain can be moody (especially on softwoods)
- You start styling in “sets,” because one candle stand can look lonely
- You realize flameless candles are the “busy household” upgrade
- Wrap-Up
- SEO Tags
Want that cozy “modern farmhouse” vibe without paying boutique prices? A DIY candle stand (also called a rustic candle holder
or candlestick pedestal) is one of the fastest ways to add warm, layered décor to a dining table, mantel, coffee table, or entryway.
The best part: you can make one with beginner-friendly materials, minimal mess, and a finish that looks intentionally timeworn
not “oops, I dropped it.”
In this guide, you’ll get a simple 7-step build that works whether you’re styling taper candles, small pillars, or (my favorite for
stress-free living) flameless LED candles. Along the way, I’ll point out the little design choices that make a candle stand look
expensive: proportion, contrast, and an “old-but-not-crumbly” farmhouse finish.
Project Snapshot
- Skill level: Beginner
- Time: 45–120 minutes (plus dry time)
- Budget: Low (especially if you use scrap wood)
- Farmhouse look: Rustic, warm, neutral, slightly imperfectin a charming way
Quick note: This candle stand can be made without heavy power-tool work by using pre-cut pieces (or asking a hardware store to cut
wood to size). If you’re under 18, have an adult handle cutting or drilling tasks. The goal here is cute décor, not an ER cameo.
Step 1: Choose the Candle and Size Your Stand
Before you touch glue or paint, decide what your stand is holding. Candle type changes everything: the top opening size, the height,
and how stable the base needs to be. Farmhouse décor loves “collected” piecesso you can even make a set of three stands in different
heights for that layered look.
Pick one candle style
- Taper candles: Classic farmhouse. Slim, tall, and dramatic. Needs a snug candle cup (typically around 7/8″).
- Small pillar candles: Softer, chunkier look. Needs a flat top with a small rim or plate to catch drips.
- Votive/tealight: Great for shallow trays or recessed cups. Super easy to center.
- Flameless LED candles: The safest option and still looks cozyespecially in groupings.
Use these simple sizing rules
- Base width: For a stable look, aim for a base that’s at least 1.5× the candle’s width.
- Height: 6–10″ reads “decorative” without blocking conversation across a table.
- Visual balance: Chunkier bases + slimmer tops = farmhouse-friendly proportions.
Example: If you’re using a slim taper, a stand with a wider, “hefty” base (like a 4–5″ square or round) keeps it looking intentional
like it came from a vintage market instead of the “Random Wood Pieces I Found” aisle.
Step 2: Gather Materials (Fast, Cheap, Beginner-Friendly)
The easiest farmhouse candle stands are basically three parts: a base, a column, and a top. You can get all three from scraps,
craft-store wood rounds, or pre-cut lumber. The finish is what sells the farmhouse vibe.
Materials
- Base piece: wood block, wood round, or small “mini cutting board” shape
- Column: short wooden post, dowel segment, small stair spindle offcut, or chunky scrap piece
- Top piece: small wood square/round (slightly smaller than the base looks best)
- Candle seat: metal candle cup OR small heat-safe glass/ceramic insert (recommended for real flames)
- Wood glue: general-purpose wood glue
- Sandpaper: medium + fine grit (for smoothing and distressing)
- Finish: stain or paint (chalk-style paint, milk paint, or satin latex all work)
- Topcoat: clear protective coat (especially if you distress or use a light paint color)
- Felt pads: optional, but your table will thank you
Helpful (but optional) tools
- Measuring tape or ruler
- Clamps or heavy books (for gluing pressure)
- Small brush or lint-free rag
- Craft knife (for cleaning glue squeeze-out after it dries)
- If a hole is needed for a taper cup: a drill (adult use recommended)
Farmhouse style tip: Mix textures. A stained wood base with a painted top looks curated. A fully painted stand with slightly sanded
edges looks like it survived a few family dinnersand still came back for seconds.
Step 3: Build a Sturdy Base (No Wobble Allowed)
A farmhouse candle stand should feel solidlike it could hold a candle during a dramatic windstorm in a historical novel. (Not that you
should test that. Please don’t.)
Two easy base options
- Single-piece base (fastest): Use one thick wood block or wood round. Sand edges slightly to soften the look.
-
Stacked base (more farmhouse “heft”): Glue two thinner pieces together (for example, a square + a round).
This adds height and gives a layered, architectural look.
Quick stability check
- Place the base on a flat surface and press on each corner/edge. If it rocks, sand the bottom lightly until stable.
- If it still rocks, add felt pads and adjust height until it sits flat.
Design note: Farmhouse décor loves simple shapessquares, rounds, and subtle curves. Overly intricate bases can shift the vibe from
“rustic farmhouse” to “I got lost in a baroque museum gift shop.”
Step 4: Add the Column (The “Stand” Part)
The column is where your candle stand gets its silhouette. A straight, chunky column reads modern farmhouse. A slightly turned spindle
can read vintage farmhouse. Both workchoose based on what you already have.
How to size the column
- Column height: 2–6″ is a sweet spot for quick candle stands.
- Column width: Thicker columns feel rustic; thinner columns feel more modern.
- Centering: Center the column on the base for a classic pedestal. Offset it slightly for a more modern “artisan” look.
Assembly (simple and strong)
- Mark the center of your base (a quick “X” corner-to-corner works on squares).
- Apply a thin, even layer of wood glue to the column bottom.
- Press into place, wipe excess glue, and clamp (or place a heavy book on top).
Let it set before adding the top. The most common DIY mistake is treating glue like instant noodles: “It’s ready in three minutes,
right?” It’s not. Glue is more of a “give me a minute, I’m becoming furniture” situation.
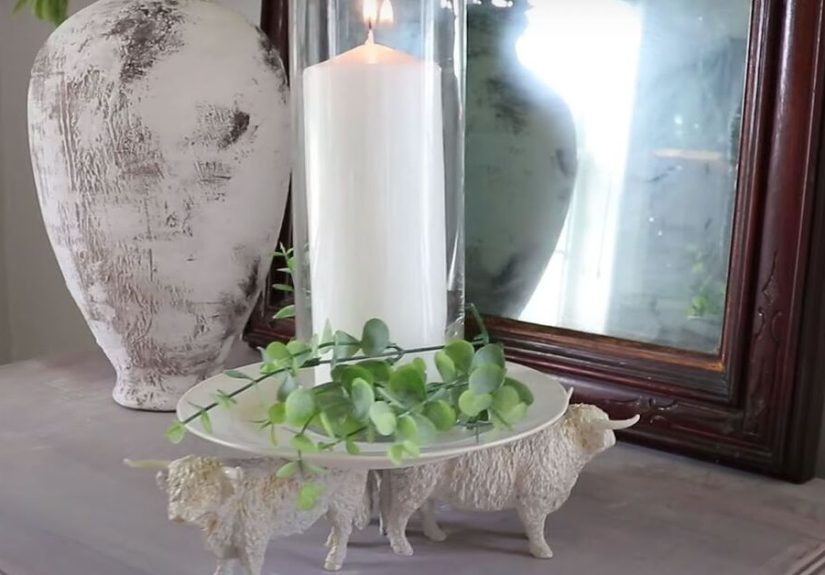
Step 5: Create a Safe Candle Seat
This step matters most if you plan to use real candles. The farmhouse aesthetic can be rustic, but your candle setup should be
stable, heat-aware, and designed to catch drips. The safest design includes a noncombustible insert (metal, glass, or
ceramic) so the candle isn’t sitting directly on raw wood.
Three easy candle-seat options
-
Metal taper cup (recommended for real tapers): Glue or secure a metal cup on the top piece.
It looks polished and helps hold the taper snugly. - Heat-safe glass/ceramic insert: Great for small pillars or votives. It catches wax and reduces heat transfer to wood.
-
Flat top with a “drip zone”: Use a small plate-like top and keep pillar candles centered. Works best with LED candles
or candles in a container.
If your design requires making a hole for a taper cup, use a pre-drilled top piece or have an adult drill the recess. The goal is a
snug fitno wiggling candle that looks like it’s rehearsing for a talent show.
Attach the top
- Center the top piece over the column.
- Glue it down, apply pressure, and let it set.
- Once secure, add your candle insert/cup (if you didn’t already).
Step 6: Finish It Farmhouse-Style (Paint, Stain, Distress)
Farmhouse finishes are all about contrast: light paint over darker wood, warm stain under crisp white, or a black accent that makes
everything feel intentional. Your candle stand should look like it’s been loved for years… but not like it’s been through a dishwasher.
Option A: Warm stain + matte topcoat (classic rustic)
- Sand the whole stand until smooth, especially edges.
- If using soft wood (like pine), apply a wood conditioner for more even stain absorption.
- Wipe on stain, let it sit briefly, then wipe off excess.
- Let dry fully, then protect with a clear coat.
Option B: Painted farmhouse finish (clean, bright, cozy)
- Paint with a farmhouse-friendly color: warm white, creamy ivory, greige, charcoal, or soft black.
- When dry, lightly sand edges and corners to reveal wood beneath (that’s your “aged” look).
- Optional: Dry-brush a little darker paint in creases for depth.
Option C: “Whitewashed” look (rustic without feeling heavy)
- Mix paint with a little water (thin it slightly).
- Brush on, then wipe back with a rag so wood grain shows through.
- Seal once it’s fully dry.
Pro tip: Distressing looks best when it matches “real life” wearedges, corners, and places hands naturally grab. If you distress the
center of a flat surface, it can look less “antique” and more “my cat tried woodworking.”
Step 7: Seal, Style, and Set It Up Safely
Sealing isn’t the glamorous part, but it’s what keeps your candle stand from looking grimy after one season. A topcoat helps resist
stains, scuffs, and wax dripsespecially if you used light paint or a chalk-style finish.
Seal it
- Matte or satin topcoat keeps the farmhouse look (super glossy can look “new”).
- Apply thin coats and let them cure fully before heavy handling.
Add finishing touches
- Stick felt pads underneath to protect surfaces and reduce wobble.
- If using a set, label the bottoms (S/M/L) so you don’t play “guess the height” every holiday.
Basic safety habits (especially for real flames)
- Use a sturdy holder and place it on a stable, heat-resistant surface.
- Keep flames away from anything that can burn (curtains, books, greenery, décor bows, etc.).
- Never leave a burning candle unattended.
- Consider flameless candles for households with kids, pets, or busy schedules.
Farmhouse Styling Ideas That Look “Designer,” Not “Dorm Room”
Your candle stand is the supporting actor. Styling is the main character. Here are farmhouse-friendly ways to use candle stands without
creating clutter (or a centerpiece so tall your family needs binoculars to see each other).
1) The “Set of Three” classic
- Make three stands in different heights (for example: 6″, 8″, and 10″).
- Keep the finish consistent (all stained, all painted, or a coordinated mix).
- Group them on a tray with a simple accent: greenery, beads, or a small book stack.
2) Contrast for modern farmhouse
- Pair a natural wood base with a white top (or vice versa).
- Add black tapers for a crisp, high-contrast look.
3) Seasonal swaps that don’t require a storage unit
- Fall: warm stain + dried stems
- Winter: white/ivory finish + deep green accents
- Spring: soft greige + fresh florals
- Summer: light wood + simple linen textures
Common Mistakes (and Quick Fixes)
Mistake: The stand wobbles
Fix: Sand the bottom lightly on a flat surface, then add felt pads. If it’s still wobbly, the base piece may be warped
swap it out or rotate it until it sits flatter.
Mistake: The candle looks off-center
Fix: Centering matters visually. If it’s slightly off, lean into the “handmade artisan” vibe by styling it in a group
(it’s much less noticeable). For future builds, mark center points before gluing.
Mistake: Paint chips too easily
Fix: Seal it. Chalk-style finishes look gorgeous but often need a protective topcoat for durabilityespecially on a piece
you’ll move around.
Mistake: Stain looks blotchy
Fix: Softwoods can absorb stain unevenly. A wood conditioner before staining helps even out the look. Another option is
a gel stain, which tends to sit more on the surface and can look more uniform.
FAQ
How tall should a farmhouse candle stand be?
For tables, 6–10″ is a comfortable range. For mantels or shelves, you can go tallerespecially if you’re using flameless candles and
want a dramatic, layered look.
Can I make this without power tools?
Yes. Use pre-cut wood pieces (or have them cut at the store), choose a top that doesn’t require drilling, and use an insert you can
attach without cutting a recess. Sanding and finishing can be done by hand.
What’s the most farmhouse-looking finish?
A warm stain with a matte topcoat is timeless. If you want brighter modern farmhouse, a creamy white paint with lightly distressed edges
is the classic move.
Is wood safe for candle holders?
Wood is common in décor, but for real flames it’s best to use a noncombustible insert (metal, glass, or ceramic), keep candles stable,
and follow basic fire-safety practices. If you want the look with less worry, use LED candles.
Real-World Experiences: What People Learn After Making a Farmhouse DIY Candle Stand
The funny thing about “quick and easy” DIY projects is that they’re usually quick and easy… after you learn the handful of small lessons
that no one puts in the cute, perfectly-lit photos. Here are the real-world experiences most DIYers bump into (and how to handle them)
so your candle stand ends up looking farmhouse-chic instead of “mystery craft from the back of the closet.”
You discover that proportion is the secret sauce
A candle stand can be technically well-made and still look “off” if the base and top are the same size or the column is too skinny for
the overall footprint. Most people end up remaking their first stand about 10% wider at the base and suddenly it looks like something
you’d see styled on a magazine coffee table. If your first version feels a little flimsy visually, try the same build again with a
wider base or a thicker column. Farmhouse style loves visual weightespecially at the bottom.
You learn the value of patience (aka “dry time is not a suggestion”)
Glue and paint both have that awkward phase where they feel dry enough to touch but not cured enough to handle. If you rush assembly,
the pieces can shift slightly, and the candle ends up centered in an alternate universe. If you rush the topcoat, fingerprints can
become permanent décor. The real experience here is realizing that the “work time” is short, but the “leave it alone time” is what makes
it look professionally finished. A great routine: assemble, walk away, do literally anything else, then come back for finishing.
You figure out what “farmhouse distressing” actually means
Many people start distressing like they’re trying to sand through time itself. The result can look random or harsh. After one or two
attempts, most DIYers settle into a lighter touch: edges, corners, and the places hands naturally grab. That’s when the piece starts
looking authentically aged. Another common “aha” moment: distressing is about contrast. If you want the worn edges to pop, you need a
darker base layer under a lighter top layer, or exposed wood under paint. If everything is the same tone, distressing can disappear
visually.
You discover stain can be moody (especially on softwoods)
Real experience: you wipe stain on, and your wood decides to absorb it in dramatic patches like it’s auditioning for a soap opera.
That blotchy look is super common on softwoods. Most DIYers either switch to a pre-stain conditioner, choose a gel stain, or embrace the
rustic vibe and call it “character.” The key lesson is that the finish you imagine in your head will look different on different wood
types. Testing on a scrap piece is the difference between “dreamy farmhouse warmth” and “why does this look like camouflage.”
You start styling in “sets,” because one candle stand can look lonely
A single candle stand can absolutely work, but many people notice it looks more intentional when paired with a second stand, a small
vase, or a tray. Farmhouse décor is big on grouping: different heights, similar colors, and a mix of textures. Once you make one stand,
it’s common to make another twoone shorter and one tallerbecause a trio instantly looks like a styled vignette rather than a single
object sitting there like it’s waiting for instructions.
You realize flameless candles are the “busy household” upgrade
Even candle lovers often keep LED candles on their DIY stands for everyday use, then switch to real candles for special occasions.
The vibe stays cozy either way, and the setup feels easier to live withespecially if you have pets, kids, or a schedule that doesn’t
allow for “sit and watch the candle like it’s a suspense movie.” This hybrid approach is one of the most common real-life outcomes:
style first, safety always, and flexibility for how you actually live.
Bottom line: the best farmhouse DIY candle stands don’t come from perfection. They come from small choicesslightly wider bases, balanced
heights, a finish with depth, and a setup that’s stable and sensible. Make one, learn one thing, then make the next one even better.
That’s the real farmhouse spirit: practical, warm, and built to last.


