Table of Contents >> Show >> Hide
- Why DIY Closet Shelves Are the “Small Project, Big Payoff” Upgrade
- Main Keyword (Without the Awkward Keyword Stuffing): DIY Closet Shelves
- The Easiest Build: Cleat-and-Shelf (Beginner-Proof)
- Plan First: Measure Like You Mean It
- Step-by-Step: DIY Closet Shelves With Cleats
- 1) Clear the closet and prep the walls
- 2) Mark your shelf lines (make the level your best friend)
- 3) Cut the cleats to length
- 4) Install cleats (pilot holes make this painless)
- 5) Cut and test-fit your shelf boards
- 6) Add a face edge to reduce sag (the “secret upgrade”)
- 7) Secure the shelves and finish
- Make Them Strong: Prevent Sag Without an Engineering Degree
- Easy Upgrades That Make DIY Closet Shelves Look Custom
- Mistakes to Avoid (So Your Shelves Don’t Become a Lesson in Gravity)
- Quick Examples: 3 DIY Closet Shelf Layouts You Can Copy
- Conclusion: Your Closet, But Make It Functional
- Real-Life Experiences: What Actually Happens When You DIY Closet Shelves (Extra )
Closets have a special talent: you can clean your entire bedroom and still have one door hiding a tiny tornado of hoodies, shoes, and “I’ll wear this someday” jeans. The good news? DIY closet shelves are one of the fastest, cheapest, most satisfying home upgrades you can dobecause nothing feels more luxurious than finding your stuff.
This guide focuses on the easiest method that looks clean, holds real weight, and doesn’t require a woodworking degree: cleats + shelf boards. It’s beginner-friendly, flexible for weird closet sizes, and scalablefrom a linen closet to a full reach-in that’s been freelancing as a hamper.
Why DIY Closet Shelves Are the “Small Project, Big Payoff” Upgrade
Closet shelving fixes the two classic problems: wasted vertical space and messy piles. Once you add shelves, you can separate categories (towels, sweaters, bags), stack bins neatly, and stop playing closet Jenga every morning.
Store-bought systems can be great, but DIY shelves let you customize depth, spacing, and strength. Plus, you’ll get bragging rights every time someone says, “Wow, your closet is so organized,” and you casually reply, “Oh this? Just a little weekend project.”
Main Keyword (Without the Awkward Keyword Stuffing): DIY Closet Shelves
If you’re here for DIY closet shelves that are actually easy, you’re in the right place. We’ll keep it practical, use common tools, and focus on simple steps that create sturdy shelves you’ll trust with more than a single lonely scarf.
The Easiest Build: Cleat-and-Shelf (Beginner-Proof)
What you’re building (and why it’s so easy)
A cleat is just a support strip screwed into wall studs. Install cleats on the back wall and side walls, then set shelf boards on top. That’s it. No fancy brackets required (though you can add them if you want). The cleats do the heavy lifting, and the shelves sit flat and tidy.
Tools & materials you’ll actually use
- Stud finder (or a magnet + patience)
- Level (a long one helps; a laser level is a deluxe upgrade)
- Tape measure and pencil
- Drill/driver + bits (pilot bit + driver bit)
- Miter saw or circular saw (even a handsaw works for small closets)
- Cleats: 1×2 or 1×3 boards (straight, not banana-shaped)
- Shelf boards: 3/4-inch plywood, pine boards, or melamine
- Wood screws: typically 2-1/2″ to 3″ for studs (plus shorter screws for shelf-to-cleat)
- Optional: iron-on edge banding, 1×2 face trim, wood filler, caulk, primer/paint
Plan First: Measure Like You Mean It
Step 1: Decide what the shelves are for
Shelves for folded clothes need different spacing than shelves for bins, shoes, or linens. Before you cut anything, do a quick “closet inventory.” Grab a bin you actually use. Stack two towels. Measure a shoe box. This isn’t overthinkingit’s preventing the classic DIY moment of, “Why is this shelf exactly 1 inch too short?”
Step 2: Pick the right shelf depth
For most closets, shelf depth is a sweet spot problem: deeper shelves hold more, but they also hide more. The most common workable range is 12–16 inches. Twelve inches is great for folded clothes and reach-in closets; sixteen inches is better for bulky items like blankets or large bins. If the closet is tight, going too deep can make the back half a museum exhibit of forgotten stuff.
Step 3: Plan shelf spacing (the “don’t waste vertical space” rule)
A simple approach: put the bottom shelf high enough to keep items off the floor (often 12–18 inches), then set shelf spacing based on what you’re storing:
- Folded shirts/sweaters: about 10–12 inches of vertical space
- Linen/towels: about 12–16 inches
- Bins: measure your bins, then add 1–2 inches so you can lift them out easily
- Shoes: often 6–10 inches, depending on heels/boots
Step 4: Find studs (and avoid surprises in the wall)
Studs are the difference between “sturdy shelf” and “gravity wins again.” In many homes, studs are commonly spaced around 16 inches on center, though you’ll sometimes see 24 inches. Use a stud finder, or use a strong magnet to locate drywall screws/nails that hit studs. Mark stud centers lightly with pencil or painter’s tape.
Safety note: be cautious drilling near outlets, switches, or plumbing walls. If your closet shares a wall with a bathroom or kitchen, go slow, use pilot holes, and keep screw length appropriate. Nobody wants “bonus water feature.”
Step-by-Step: DIY Closet Shelves With Cleats
1) Clear the closet and prep the walls
Remove old wire shelving, brackets, and anything that’s in your way. Patch holes, sand bumps, and touch up paint if needed. Shelves look 10x more “built-in” when the walls behind them are clean and finished.
2) Mark your shelf lines (make the level your best friend)
Decide your shelf heights, then draw a level line across the back wall where the top of the cleat will go. Repeat for each shelf. If your closet walls are slightly crooked (many are), trust your level more than your eyeballs. Eyeballs lie. Levels are brutally honest.
3) Cut the cleats to length
You’ll typically install three cleats per shelf:
- One cleat across the back wall
- One cleat on each side wall (depth-length)
For shelf depth, cut side cleats to match the depth you chose (example: 12 inches). If your closet is wider than the shelf span you’re comfortable with, plan a center support (more on that below).
4) Install cleats (pilot holes make this painless)
Hold the cleat on your level line, then drill pilot holes at stud locations. Drive 2-1/2″ to 3″ screws into studs. Check for level again before fully tightening. Repeat for side cleats. Your goal is a neat “U” shape of supports.
If you must screw where there’s no stud (it happens), use heavy-duty wall anchors rated for the loadbut treat anchors as backup, not as your main structural plan. For closet shelves that hold real weight, studs are king.
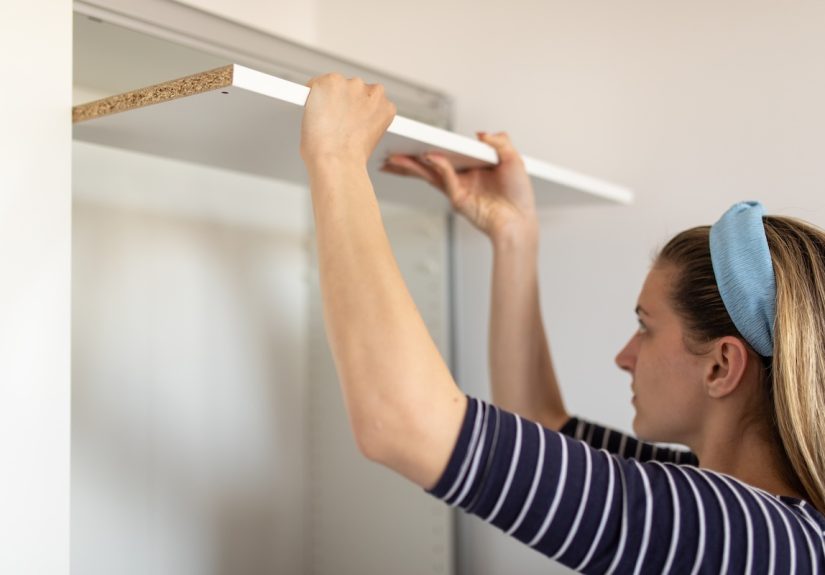
5) Cut and test-fit your shelf boards
Measure the closet width at the back and at the frontclosets can be slightly out of square. Cut shelves to fit, then test them on the cleats. Aim for a snug fit without forcing it. If it’s too tight, shave a little off and re-test. This is DIY, not a medieval battering ram situation.
6) Add a face edge to reduce sag (the “secret upgrade”)
If you’re using plywood, one of the best easy upgrades is adding a 1×2 face trim to the front edge with wood glue and nails/brads. It stiffens the shelf dramatically and makes the whole thing look finished. It also helps prevent that slow-motion shelf droop that turns into a sad smile over time.
7) Secure the shelves and finish
Once shelves fit nicely, secure them to cleats with shorter screws from the top (or from underneath if you want hidden fasteners). Fill holes, caulk small gaps where the shelf meets the wall, sand lightly, then prime and paint (or stain and seal). Painted shelves feel clean and custom. Sealed shelves wipe easierimportant if you store shoes, dusty bags, or anything with glitter. (Glitter is forever.)
Make Them Strong: Prevent Sag Without an Engineering Degree
Use simple span rules (and when to add support)
Shelf sag depends on material thickness, depth, span, and load. As a practical rule of thumb, a 3/4-inch plywood shelf is often comfortable around 24–30 inches under moderate loads, but if you’re storing heavier bins, stacks of books, or anything that could qualify as “my gym equipment phase,” shorten the span or add support.
Easy ways to toughen shelves:
- Add face trim (1×2 or 1×3) to stiffen the front edge
- Add a center support (a vertical divider or a front-to-back brace)
- Use thicker material (or add a second layer for a thicker shelf)
- Reduce shelf depth if you don’t need the extra inches
Pick the best shelf material for your closet
Here’s the plain-English breakdown:
- 3/4″ plywood: strong, stable, and great for painting. Excellent for DIY closet shelving.
- Solid pine boards: easy to find, looks nice stained, but can warp if low qualitychoose straight boards.
- MDF: smooth for paint, but heavy and can swell with moisture. Fine for dry closets, less ideal for damp basements.
- Melamine: clean white finish, wipes easily, popular for closet organizers; can sag if spanning too far without support.
If your closet tends to be humid (hello, coastal air or a closet near a bathroom), plywood with paint or polyurethane is a reliable choice.
Want adjustable shelves instead?
If your storage needs change (they will), consider adding:
- Shelf standards (track + bracket): easiest adjustable option, great for closets
- Shelf pin holes: more “built-in” look, but requires accurate drilling (a jig helps)
- French cleats: fantastic for modular systems and removable units
Adjustable systems can be especially helpful for kids’ closets as clothing sizes and storage needs evolve faster than your sock pile grows.
Easy Upgrades That Make DIY Closet Shelves Look Custom
1) Add a hanging rod under the top shelf
A top shelf plus a hanging rod is classic for a reason: the shelf holds bins or off-season items, while the rod handles daily clothes. If your closet is wide, consider a center rod support so it doesn’t bow over time.
2) Create zones (so your closet stays organized)
Closet shelves work best when they’re assigned jobs:
- Top shelf: rarely used items, seasonal bins, luggage
- Eye-level shelves: everyday folded clothes, handbags, accessories
- Lower shelves: shoes, baskets, laundry sorting bins
3) Add lighting (the easiest “why didn’t I do this sooner” upgrade)
A simple stick-on LED light bar makes your closet feel larger and keeps you from choosing outfits in the dark like a fashion-themed escape room. Choose something bright, warm, and rechargeable if possible.
Mistakes to Avoid (So Your Shelves Don’t Become a Lesson in Gravity)
Anchors as your main plan
Drywall anchors are useful, but shelves loaded with bins and stacks of sweaters deserve stud support. Use anchors only where necessary, and always match the anchor rating to the load.
Shelves too deep for the space
Deep shelves sound great until you realize the back becomes a storage black hole. In reach-in closets, 12 inches is often plenty. If you go deeper, plan bins that slide out easily so you can still access what’s behind them.
Ignoring door swing and trim
Shelves that interfere with a closet door feel like a prank you played on your future self. Check clearance before installing. Also watch for baseboards and trimeither notch cleats/shelves or remove baseboards for a cleaner built-in look.
Quick Examples: 3 DIY Closet Shelf Layouts You Can Copy
1) Small reach-in closet (easy mode)
Install one top shelf (12 inches deep) across the full width, add a rod beneath it, then add 2–3 shelves on one side for folded clothes or bins. The other side stays open for long hanging items like coats and dresses.
2) Linen closet (hello, towel towers)
Go with 12–14 inch depth shelves, spaced 12–14 inches apart. Add a lip or small face trim to keep stacks neat. Store heavier items like detergent lower, and keep the top shelf for guest towels or extra bedding.
3) Kids’ closet (future-proof)
Add adjustable shelves on standards so you can change heights as needs shift. Keep a low shelf or bin area for shoes and toys, and reserve one “growth shelf” for the clothes you swear still fit.
Conclusion: Your Closet, But Make It Functional
The easiest way to build DIY closet shelves is the cleat-and-shelf method: screw cleats into studs, set shelf boards on top, and finish cleanly. You’ll gain vertical storage, reduce clutter, and make your closet easier to use every single day. Start simple, build strong, and add upgrades like face trim or adjustable standards if you want a more custom system later.
Real-Life Experiences: What Actually Happens When You DIY Closet Shelves (Extra )
Let’s talk about the part nobody puts on the glossy “before-and-after” photos: the real-life experience of building closet shelves. You start confidentmeasuring tape in hand, playlist on, living your best DIY life. Then your closet reminds you it was built in the era of “close enough” carpentry. One wall is slightly bowed, the corners aren’t square, and the baseboard is doing its own thing. Don’t panic. This is normal. The easiest way to keep your sanity is to measure the closet width at the front and back, then cut shelves to the smallest measurement and cover tiny gaps with caulk. Caulk is basically makeup for homes: it smooths out the imperfections and makes everything look intentional.
Next comes stud-finding, which feels like a treasure hunt where the treasure is “a piece of wood behind drywall.” Sometimes your stud finder beeps like it’s excited about everythingpipes, nails, your emotional stateso it helps to double-check with a magnet or a small test hole. A lot of DIYers learn the hard way that anchors aren’t magic. The shelf might look fine for a week, then one day you hear a soft thunk and realize gravity has filed a formal complaint. Screwing cleats into studs is the moment your shelves become trustworthy. It’s also the moment you feel like you could fix anything. (This confidence may lead to other projects. Pace yourself.)
Cutting shelves is usually straightforward until you meet the “one-eighth inch problem.” You cut perfectly, you swear, but the shelf won’t fit. That’s when you learn that walls can be slightly angled, and drywall corners have personalities. The easiest fix is to trim a little at a time, test-fit often, and label each shelf so you don’t mix them up. If you’re painting shelves, small gaps are totally forgivable. If you’re staining, you’ll want cleaner cutsor a trim piece that hides a multitude of sins.
The biggest “aha” moment for most people is shelf sag. At first, a shelf looks perfectly flat. Then you load it with jeans, blankets, and bins and it slowly develops a subtle curve like a relaxed smile. Adding a 1×2 face trim to the front edge feels like cheating because it works so well. It also makes shelves look finished, like they came with the house. And once your shelves are up, you’ll probably reorganize three times in a week. That’s not failurethat’s you discovering what actually makes your routine easier.
The final real-life surprise is how much calmer the room feels. A functional closet doesn’t just store clothes; it stores decisions. When your shelves have zonesshirts here, bins there, shoes down lowyou stop wasting time digging and start your day with less chaos. And the next time you see a messy closet online, you’ll think, “I could fix that.” Because you can.