Table of Contents >> Show >> Hide
- Why a Bathroom Cabinet Makeover Is Worth It
- Before You Start: Ask These Three Questions
- Tools and Materials You’ll Probably Need
- Step-by-Step Bathroom Cabinet Makeover
- Best Design Ideas for a Fresh, Modern Vanity
- Common Bathroom Cabinet Makeover Mistakes
- How to Make the Finish Last
- Bathroom Cabinet Makeover on a Budget
- Conclusion
- Experiences, Lessons, and Real-World Tips From Bathroom Cabinet Makeovers
A tired bathroom cabinet has a special talent: it can make the whole room look older than it is. Even if the tile is fine, the faucet still works, and the mirror is only mildly judgmental, a scuffed vanity with dated hardware can drag the entire space back to the early-2000s. The good news? A full replacement is not your only option. In many bathrooms, a smart cabinet makeover can deliver a dramatic before-and-after without turning your home into a dusty construction zone for two weeks.
This is where a bathroom cabinet makeover earns its keep. With the right prep, a durable primer, the right paint, and a little patience, you can transform a builder-grade vanity, refresh worn wood, modernize laminate, and make old hardware look like a regrettable memory. Whether your style leans crisp white, moody navy, earthy green, or warm wood tones, this guide walks through the process from planning to final polish.
Why a Bathroom Cabinet Makeover Is Worth It
A cabinet makeover is one of the most cost-effective ways to change the feel of a bathroom. Instead of ripping out a vanity that still has solid bones, you can keep the existing storage and update what people actually notice: color, finish, hardware, countertop styling, and surrounding details. For many homeowners, that means more impact for less money and far less chaos.
It also gives you flexibility. You can go classic with white shaker-style vibes, make a dramatic move with charcoal or deep blue, or warm things up with a wood-look finish and brass pulls. In smaller bathrooms, repainting the vanity can help the room feel brighter and more intentional. In larger baths, a darker cabinet color can add contrast and a custom look.
That said, not every vanity is a makeover candidate. If the cabinet box is swollen from long-term water exposure, crumbling at the bottom, moldy, or delaminating beyond repair, replacement may be the smarter choice. A makeover works best when the cabinet structure is sound and the problems are mostly cosmetic.
Before You Start: Ask These Three Questions
1. Is the cabinet structurally solid?
Open the doors and inspect the sink base, side panels, and bottom shelf. Minor dents, scratches, old finish, and small veneer issues are repairable. Major swelling, soft spots, or serious water damage are your sign that the vanity may be past the “cute glow-up” stage and entering “please replace me” territory.
2. What is the surface made of?
Solid wood and wood veneer are usually the easiest to refresh. MDF can also paint beautifully, but it hates water and rough treatment. Laminate is absolutely makeover-friendly, but it needs careful cleaning, light sanding, and a bonding primer. Skip the guesswork here, because the best prep depends on the material.
3. Are you changing the style or just freshening it up?
If you only want a cleaner, newer version of what you have, paint plus hardware may be enough. If you want a more designer look, consider adding new knobs or pulls, updating the faucet, reframing the mirror, changing the light fixture, or swapping the countertop and backsplash. A cabinet makeover works best when it feels connected to the rest of the bathroom.
Tools and Materials You’ll Probably Need
- Screwdriver or drill
- Painter’s tape
- Drop cloths
- Cleaner or degreaser
- Wood filler or putty
- Sandpaper in medium and fine grits
- Tack cloth or damp microfiber cloth
- Bonding or stain-blocking primer
- Cabinet paint or durable bathroom-friendly enamel
- Angled brush and small foam roller
- New hardware, if replacing knobs or pulls
- Caulk, if you are resealing around the vanity top or side edges
If that list feels long, do not panic. Most of the magic is in cleaning, prep, and patience. The glamorous paint color gets the attention, but the unglamorous sanding step is what keeps it from peeling off and embarrassing you later.
Step-by-Step Bathroom Cabinet Makeover
Step 1: Remove doors, drawers, and hardware
Take off the cabinet doors, remove drawer fronts if possible, and pull all knobs, handles, and hinges. Label each piece so reassembly is not a puzzle designed by a trickster god. Put screws in small bags and write where they belong. If you are reusing the hardware, clean it now. If you are replacing it, decide whether the new hardware uses the same hole spacing. If not, plan to fill the old holes.
Step 2: Clean like you mean it
Bathrooms collect a lovely cocktail of toothpaste splatter, hairspray residue, soap film, hand lotion, and mystery grime. Paint does not bond well to mystery grime. Scrub every surface thoroughly, especially around doors, drawer edges, and the sink area. Let everything dry fully before moving on.
Step 3: Repair damage and fill holes
Use wood filler or putty on dents, dings, and old hardware holes. For minor veneer problems, trim loose edges and repair them before priming. If you find slight water damage near the sink edge, fix the leak first, let the area dry, then repair the surface. This is the part where you stop future problems instead of painting over them and hoping for emotional closure.
Step 4: Sand for adhesion, not punishment
Lightly sand glossy surfaces to dull the finish and improve primer grip. You do not need to sand the cabinet into another dimension; you just need to scuff it enough for the next coat to hold. On laminate, be gentle. Aggressive sanding can damage the thin top layer. Wipe away dust with a tack cloth or a slightly damp microfiber cloth.
Step 5: Prime the vanity
This step matters more in a bathroom than almost anywhere else. A quality bonding or stain-blocking primer helps paint adhere, blocks old stains or tannins from bleeding through, and improves durability in a humid environment. Use a brush for corners and profiles, then a small foam roller for flat areas. Let the primer dry fully according to the product directions.
Step 6: Paint in thin, even coats
Now for the fun part. Use a high-quality cabinet paint, enamel, or other durable interior paint designed for trim and cabinets. Thin coats are better than thick ones. Thick paint may look productive in the moment, but later it rewards you with drips, brush marks, and regret. Start with the cabinet frame, then the doors and drawer fronts. Let each coat dry completely before adding the next. Most vanities look best with two finish coats.
Step 7: Let it cure before reassembly
Dry and cured are not the same thing. Dry means you can touch it carefully. Cured means it is hard enough for regular use. Give the finish time before reinstalling doors, drawer fronts, and hardware. Rushing this step is how fingerprints, dents, and stuck cabinet doors become part of the design story.
Step 8: Reinstall and style the space
Attach the hardware, rehang the doors, and adjust hinges if needed. Then zoom out. Add matching accessories, a new mirror, fresh caulk lines, better lighting, or a tray on the countertop. Often, the final 10 percent of styling creates 50 percent of the visual payoff.
Best Design Ideas for a Fresh, Modern Vanity
Pick a color that suits the room size
White, soft greige, pale sage, and light blue can brighten a small bath and keep it feeling open. Navy, forest green, charcoal, and black can look expensive and polished, especially when paired with warm metal hardware. If your bathroom already has bold tile, a quieter vanity color may create better balance.
Upgrade hardware for instant style
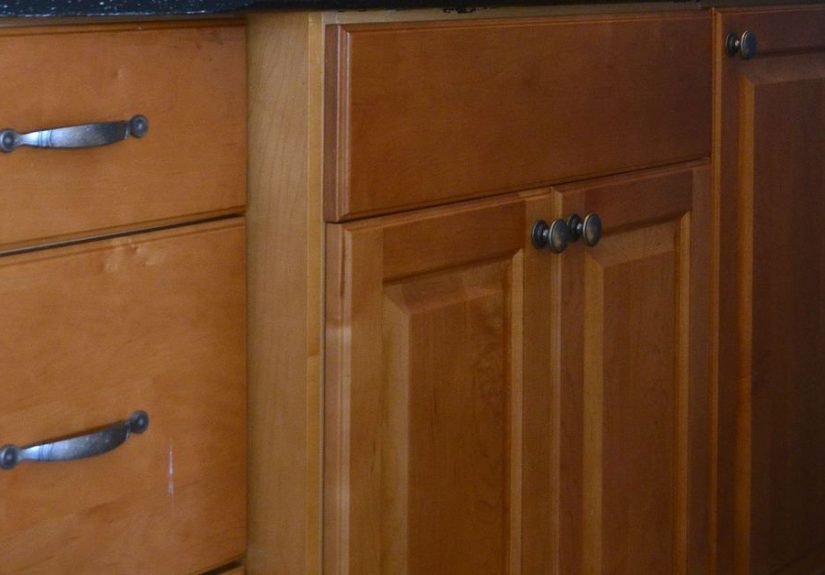
Changing knobs and pulls is the easiest part of the makeover and one of the most visible. Matte black creates contrast. Brushed brass adds warmth. Polished nickel feels classic. Try to coordinate hardware with the faucet and light fixture so the room looks intentional rather than accidentally assembled during three separate shopping trips.
Consider the countertop and backsplash
If the cabinet is still good but the vanity top screams “rental unit from another century,” replacing the countertop can take the makeover much further. Even small updates, like a new backsplash or a cleaner side splash detail, can make the vanity feel custom.
Do not forget the mirror and lighting
A freshly painted cabinet under a sad old light bar is like wearing a tailored suit with muddy shoes. Pair the makeover with better lighting and a more current mirror shape, and the whole bathroom starts making better life choices.
Common Bathroom Cabinet Makeover Mistakes
- Skipping prep: Dirt, gloss, and dust will sabotage even great paint.
- Using the wrong primer: Bathrooms need adhesion and moisture resistance, not wishful thinking.
- Painting over active leaks: Fix plumbing and ventilation issues first.
- Applying thick coats: This leads to drips and a gummy finish.
- Ignoring cure time: Hardware and doors can mar the paint if reinstalled too soon.
- Choosing style without context: A trendy vanity color should still work with your walls, floor, and fixtures.
How to Make the Finish Last
Good ventilation is a cabinet’s best friend. Run the exhaust fan during showers and for a while afterward. Wipe standing water near the sink base. Fix drips quickly. Use gentle cleaners instead of harsh abrasives. And if you chose a painted finish, remember that even durable cabinet paint appreciates a little kindness. This is a bathroom vanity, not a hockey puck.
Bathroom Cabinet Makeover on a Budget
If you want the biggest impact for the least money, focus on this order: paint, hardware, faucet, mirror, and lighting. Those changes can make an old vanity feel surprisingly custom. If you have a bit more room in the budget, add a new countertop or backsplash. If the cabinet itself is beyond saving, then replacement becomes the budget conversation you were trying to avoid in the first place.
One smart strategy is to refresh what is structurally sound and spend on the details people notice first. A sturdy vanity with fresh paint and quality hardware often looks better than a cheap new cabinet with flimsy drawers and a finish that gives up at the first sign of humidity.
Conclusion
A bathroom cabinet makeover is one of those rare home projects that can be practical, affordable, and genuinely satisfying. It improves the look of the room, gives you a chance to solve small wear-and-tear problems, and helps your bathroom feel more personal without requiring a full remodel. The keys are simple: assess the cabinet honestly, prep thoroughly, use the right primer and paint, and resist the urge to rush. In other words, do the boring steps well so the pretty steps can shine.
If you take your time, your old vanity can come back looking cleaner, smarter, and far more expensive than it has any right to. And that is the sweet spot of a great makeover: maximum style, minimum demolition, and a daily reminder that yes, you really did pull this off yourself.
Experiences, Lessons, and Real-World Tips From Bathroom Cabinet Makeovers
One of the most common experiences people have with a bathroom cabinet makeover is underestimating how much better the room can look without changing its layout. A lot of homeowners assume the vanity has to be replaced because it feels outdated, when the real issue is usually the finish, hardware, or surrounding details. Once the cabinet gets cleaned up, painted, and paired with a better mirror or light fixture, the room often looks surprisingly high-end. It is the home-improvement version of getting a haircut, better glasses, and finally throwing out that shirt from college.
Another common lesson is that prep work is not optional theater. People who rush past cleaning and sanding usually notice problems fast: fish-eye marks in the paint, peeling near the sink, or a finish that scratches too easily. By contrast, the makeovers that hold up best are usually the ones where the cabinet was cleaned thoroughly, lightly sanded, primed correctly, and allowed to cure for several days before regular use. It is not dramatic work, but it is the difference between “fresh makeover” and “why is the drawer front sticky?”
Color choice also tends to be more emotional than expected. Many people start out convinced they want safe white, then realize their bathroom would benefit from a more distinctive tone. Deep blue, green, black, and muted gray keep showing up in successful makeovers because they add contrast and hide daily wear better than bright white. On the other hand, in a tiny bathroom with limited light, a lighter vanity can make the room feel less cramped. The best results usually come from choosing a cabinet color that supports the whole space instead of chasing a trend in isolation.
Hardware changes are another lesson in small details making a huge difference. Many makeover stories share the same plot twist: the cabinet looked fine after paint, but once the new pulls or knobs were installed, it suddenly looked finished. That final step often creates the “custom” feel people were hoping for from the beginning. Matching the hardware to the faucet and vanity light usually helps the bathroom feel intentional, even when the materials are modest.
People also learn quickly that bathrooms are less forgiving than bedrooms or hallways. Moisture exposes shortcuts. A slow leak under the sink, poor ventilation, or sloppy caulk lines can undo a beautiful finish. The best makeover experiences usually involve fixing tiny plumbing or sealing issues before painting, not after. It is much easier to protect a new finish than to rescue one.
Finally, the most satisfying part of a bathroom cabinet makeover is often not the dramatic before-and-after photo. It is the daily use. A vanity that opens smoothly, wipes clean easily, and feels like it belongs in the room can quietly improve the whole routine. You notice it while brushing your teeth, getting ready for work, or putting away towels. A good makeover does not just look better on day one; it makes the bathroom feel better every ordinary day after that. And honestly, that is the kind of home improvement that earns bragging rights.