Table of Contents >> Show >> Hide
- Why Your Hallway Deserves a Makeover
- Step 1: Study Your “Before” Like a Designer
- Step 2: Choose Your Hallway Makeover Style
- Step 3: Transform the Envelope – Paint, Walls, and Floors
- Step 4: Fix the Lighting – Your Hallway’s Glow-Up
- Step 5: Maximize Storage Without Crowding the Space
- Step 6: Style It – Decor, Art, and Mirrors
- Real-Life DIY Hallway Makeover Ideas You Can Borrow
- Common Hallway Makeover Mistakes (and How to Avoid Them)
- A Simple DIY Hallway Makeover Plan
- Extra: Real-World Experiences with DIY Hallway Makeovers
- 1. The Hallway is a Domino Project
- 2. Board and Batten Looks Scary, But It’s Very Forgiving
- 3. Lighting Changes Your Mood (and Your Photos)
- 4. Storage Decisions Make or Break the “After”
- 5. Progress Photos Keep You Motivated
- 6. Small Details Have Big Impact
- 7. The Best “After” Is the One You Actually Use
If your hallway is the place where mismatched shoes go to die and dust bunnies hold weekly meetings, you are not alone. Hallways are the most hardworking, most ignored spaces in the house. That’s exactly why “before and after” hallway makeovers are so satisfyingespecially the DIY kind you see on Hometalk and other home–decor sites.
The good news? You don’t need a full renovation or a reality TV crew to pull off a dramatic hallway makeover. With smart paint choices, better lighting, a few storage hacks, and some personality on the walls, you can turn that dark tunnel into a space you’re actually proud to walk through.
Let’s walk (not shuffle in shame) through how to plan, design, and execute the best DIY hallway makeoverbefore and after photos absolutely encouraged.
Why Your Hallway Deserves a Makeover
Hallways do more than connect rooms. They create the first impression of your home, influence how light moves through the space, and quietly collect clutter like umbrellas, backpacks, and shoes. Designers often treat hallways as “bonus rooms” where you can add storage, show off art, and experiment with color without overwhelming the rest of the house.
DIYers on platforms like Hometalk, HGTV, and Apartment Therapy prove over and over that even the narrowest, gloomiest hallway can become:
- A mini–gallery filled with family photos or art prints
- A mudroom-style landing zone with hooks, benches, and cubbies
- A bright, airy passage thanks to better paint, mirrors, and lighting
- A cozy, character-filled corridor with paneling, wallpaper, or bold color
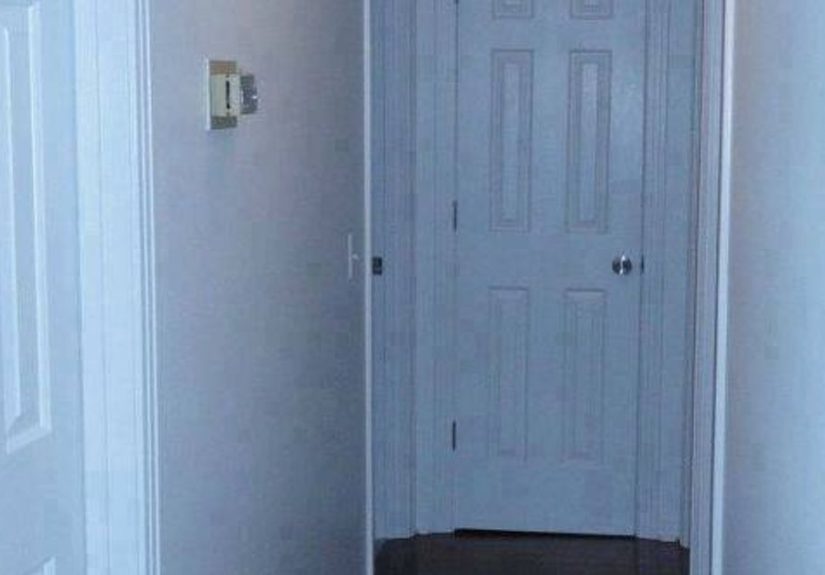
The magic is in the “before and after.” Your “before” is the honest snapshot: dingy walls, builder-grade light, random clutter. The “after” is what happens when you add intention, function, and a bit of DIY elbow grease.
Step 1: Study Your “Before” Like a Designer
Before you buy a single gallon of paint, look at your hallway the way pro designers do in those makeover articles.
Check the Light
Is your hallway dark and cave-like? Most are. Note where you have (or don’t have):
- Natural light from doors or side windows
- Ceiling fixtures or recessed lights
- Shadows caused by low ceilings or dark floors
Hallways with little natural light benefit from light, warm paint colors, reflective surfaces, and layered lighting. Think bright but not sterilesoft whites, pale greiges, and light pastels usually beat stark white or heavy darks.
Map the Traffic and Clutter
Next, figure out how your hallway is used (or abused):
- Do shoes pile up near the front door?
- Are coats, backpacks, or dog leashes always on the floor?
- Do kids race through with toys, meaning anything fragile is doomed?
This tells you where you need storage and where you should keep things minimal so the hallway doesn’t feel like an obstacle course.
Measure and Photograph
Measure the width, length, and height. Take “before” photos from both ends and from the middle. This will help you plan, shop, and later enjoy that sweet before/after comparison. It also keeps you from buying a console table that turns your hallway into a sideways shimmy zone.
Step 2: Choose Your Hallway Makeover Style
Now it’s time to pick a direction. Most successful DIY hallway makeovers fall into one (or a mix) of these styles:
1. Light and Airy
Perfect for narrow, dark hallways. Think:
- Soft white or pale neutral walls
- Simple trim, light-colored runners, woven baskets
- Mirrors and glass to bounce light
2. Bold and Moody
If your hallway already feels like a tunnel, you can lean in with deep colors and dramatic lighting:
- Rich greens, blues, or charcoal on walls or lower paneling
- Warm lighting, brass or black fixtures
- Artwork that pops against the darker backdrop
3. Farmhouse or Cottage
For that cozy, lived-in vibe:
- Board-and-batten or beadboard wainscoting
- Neutral paint with natural wood accents
- Hooks, baskets, and vintage-style signs or framed prints
4. Modern and Minimal
Clean lines and calm energy:
- Low-contrast color palette (walls and trim in similar tones)
- Hidden or sleek storage solutions instead of bulky furniture
- One large mirror or a few carefully chosen pieces of art
Pick a style that complements the rest of your home so your hallway doesn’t feel like it belongs to a completely different family.
Step 3: Transform the Envelope – Paint, Walls, and Floors
Get the Paint Right
Paint is the most dramatic, budget-friendly change you can make, and it’s the star of many jaw-dropping “after” photos. For most hallways:
- Choose warm whites or light neutrals rather than harsh, bright white.
- Use a slightly more durable finish (like eggshell or satin) so scuffs can be wiped away.
- Consider painting the ceiling just a touch lighter than the walls to visually lift the space.
If you’re going moody, balance dark walls with lighter trim, light floors, and good lighting so it feels luxe, not like a haunted house corridor.
Add Character with Paneling or Wainscoting
Many DIYers (including plenty of viral Hometalk makeovers) add half-wall panelingboard and batten, beadboard, or simple flat panelsto break up long walls and protect them from everyday wear.
Typical approach:
- Install a simple rail around 36–42 inches high.
- Add vertical battens or panels below.
- Paint the lower portion in a contrasting or slightly darker color than the upper wall.
This creates visual rhythm and makes your hallway feel custom and finished, not builder-basic.
Upgrade the Floors and Runner
If replacing flooring isn’t in the budget, a good runner can still change everything. Look for:
- Low-pile rugs that won’t trip anyone or block doors
- Patterns that hide dirt (hello, kids and pets!)
- Rug pads or non-slip backing to keep the runner in place
Wood or wood-look flooring running the length of the hall can visually stretch the space, while a light rug keeps it feeling bright and inviting.
Step 4: Fix the Lighting – Your Hallway’s Glow-Up
Hallways often suffer from one lonely ceiling light doing its best. Help it out:
- Replace dated fixtures. Swap old dome lights for simple flush mounts, semi-flush lights, or small pendants spaced down the hallway.
- Use brighter, warmer bulbs. Aim for LED bulbs with a warm or soft white temperature and enough lumens to actually light the space.
- Add accent lighting. If wiring allows, sconces or picture lights can give your hallway gallery-wall status.
In before-and-after hallway makeovers, the combination of fresh paint and better lighting is usually what makes people ask, “Are you sure this is the same house?”
Step 5: Maximize Storage Without Crowding the Space
Because hallways are narrow, every inch of depth matters. Steal ideas from pro organizers and small-space designers:
Go Vertical
- Use narrow wall-mounted shelves or ledges for keys, mail, and decor.
- Install hooks for coats, bags, and hats instead of bulky coat trees.
- Consider a peg rail running along one side of the hallway for flexible hanging.
Use Slim Furniture
If your hallway is wide enough, a slim console table, floating cabinet, or IKEA-style shoe cabinet can offer closed storage without hogging space. Measure carefullyleave at least 36 inches of clear walking path so your “after” doesn’t feel like an obstacle course.
Hide the Chaos
Baskets under a shallow bench, closed cabinets for shoes, and lidded bins on higher shelves keep everyday clutter out of sight. The less visual noise, the more your new paint and decor can shine.
Step 6: Style It – Decor, Art, and Mirrors
Create a Simple Gallery Wall
Long hallways are perfect for art or family photos. For a polished look:
- Stick to a consistent frame color (all black, all white, or all wood).
- Align frames along a central line or use a grid pattern for a structured feel.
- Keep depth in mindno chunky shelves if your hallway is already narrow.
Add Mirrors to Bounce Light
Mirrors are a top hallway trick, especially in dark or windowless spaces. A large mirror at the end of the hall or a series of small mirrors along one wall makes the space feel bigger and brighter instantly.
Include Texture and Greenery
Soft runners, woven baskets, a jute stool, or a small faux plant on a shelf all add warmth. Even a single vase with greenery on a floating shelf can turn a “meh” hallway into a styled moment.
Real-Life DIY Hallway Makeover Ideas You Can Borrow
While every home is different, many of the most shared hallway before/after projects online use similar strategies. Here are a few patterns you’ll notice:
- The dark-to-light transformation: Old beige or yellow walls become soft white or light greige, with a fresh runner and brighter lighting. The hallway instantly looks longer and more modern.
- The paneling upgrade: DIY board and batten or beadboard halfway up the wall, painted a contrasting color, adds character and protects the walls from daily wear.
- The gallery makeover: Plain walls turn into curated galleries of prints or photos, often paired with slimmer lighting and a stylish rug.
- The mini-mudroom solution: Near an entry door, a shallow bench, hooks, and baskets create a “landing zone” without a full-blown mudroom.
These projects use mostly basic toolspaint supplies, a miter saw (or have boards cut at the store), a level, and a drill. It’s more about planning and patience than advanced carpentry skills.
Common Hallway Makeover Mistakes (and How to Avoid Them)
- Overfilling the space: Too much furniture or decor makes a narrow hallway feel like an obstacle course. When in doubt, remove one item.
- Ignoring lighting: Great paint won’t fix a dark cave if you still have a single dim bulb. Budget for at least one lighting upgrade.
- Choosing the wrong paint color: Super dark or ultra stark white can both be tricky in hallways. Test samples in your actual lighting before committing.
- Skipping prep: Dirty, glossy, or damaged walls will show through even the best paint job. Clean, patch, and prime first.
- Forgetting function: A hallway that looks great but has nowhere to drop coats or shoes will go back to “before” mode fast.
A Simple DIY Hallway Makeover Plan
If you want a straightforward weekend-friendly project, try this order of operations:
- Declutter completelyremove everything from the hallway, even art and rugs.
- Patch holes, sand rough spots, and clean the walls.
- Paint ceiling and walls.
- Add paneling or wainscoting if you’re including it, then paint it.
- Update light fixtures and switch plates.
- Install hooks, shelves, or slim storage pieces.
- Lay down your runner or rug.
- Hang art and mirrors, then take your “after” photos and bask in your genius.
Don’t worry if you can’t do it all at once. Many of the best DIY hallway transformations happen in stagespaint this month, paneling next month, lights and decor later.
Extra: Real-World Experiences with DIY Hallway Makeovers
Want to avoid rookie mistakes and steal a few pro-level mindset tricks? Here are some experience-based lessons from typical DIY hallway projects:
1. The Hallway is a Domino Project
Most DIYers discover that once the hallway is fresh and bright, everything connected to it suddenly looks tired. That old beige bedroom door color? Now it screams “before photo.” Plan for the possibility that your hallway makeover will inspire (or force) you to repaint adjacent doors or add a bit of trim touch-up in nearby rooms.
A smart way to manage this is to choose a neutral color palette that works with the rest of your home. That way, if you do repaint doors later, they’ll coordinate neatly instead of starting an endless color chaos cycle.
2. Board and Batten Looks Scary, But It’s Very Forgiving
One of the most common hallway “after” stars is board and batten, and many DIYers hesitate because it sounds like a big carpentry project. In reality, once you’ve measured and planned your spacing, it’s mostly a repeatable process: cut, glue or nail, fill holes, sand, and paint. The boards actually hide minor wall imperfections and give you a high-end look for a modest budget.
If you’re nervous, start with one wall rather than the entire hallway. By the time you finish that first section, you’ll either feel confident enough to continueor you’ll still have a polished accent wall that instantly elevates the space.
3. Lighting Changes Your Mood (and Your Photos)
Many hallway DIYers say their biggest “why didn’t I do this sooner?” moment is switching out old fixtures and upgrading bulbs. Even a basic semi-flush fixture with a brighter, warmer LED can transform the vibe. It also makes your photos look bettera big deal if you love sharing your projects online.
Tip from experience: decide on your lighting fixtures early, especially if they hang lower than the original ones. You’ll want to make sure door swings and tall family members can still pass comfortably underneath.
4. Storage Decisions Make or Break the “After”
A gorgeous hallway with nowhere to put shoes will be destroyed in a week. Experienced DIYers learn quickly that function has to come first. That might mean swapping the cute but bulky console table for a slim wall-mounted shelf and a row of hooks, or choosing a closed shoe cabinet over open bins to keep visual clutter down.
Before you install anything, act it out. Stand where you’d hang your coat, drop your bag, or tie your shoes. Is there enough space to move? Does anything stick out too far? Make adjustments now, not after everything is drilled into the wall.
5. Progress Photos Keep You Motivated
Hallway projects can feel never-ending because you’re working in a long, repetitive space. Taking pictures at each phasebare walls, fresh paint, paneling up, lights installed, art addedhelps you see how much you’ve accomplished. That’s why Hometalk-style before and afters are so addictive; they show the journey, not just the destination.
When you’re tired and covered in paint, scrolling back through your own mini timeline can be the little push you need to finish that last coat or hang those final frames.
6. Small Details Have Big Impact
Experienced DIYers often talk about how tiny decisions made the space feel “finished”: swapping yellowed outlet covers for fresh white ones, painting door edges, caulking panel seams, or aligning artwork neatly. None of these details are expensive, but together they create that polished, magazine-ready effect.
If you’re on a tight budget, focus on details that deliver big visual payoffcrisp paint lines, updated hardware, and a runner that ties your colors together. Your hallway will look intentionally designed, not just “freshly painted.”
7. The Best “After” Is the One You Actually Use
Finally, the most important lesson: a beautiful hallway you’re afraid to touch isn’t a success. The best DIY hallway makeovers are the ones where the family actually hangs up their coats, kicks off their shoes, and walks through without thinking about scuffs or smudges. Durable finishes, wipeable surfaces, and storage that fits your real life keep your “after” looking good in six monthsnot just on reveal day.
So dream big, plan smart, and embrace that satisfying moment when you put the “before” and “after” photos side by side. Your hallway won’t just be a pass-through anymoreit’ll be a space you’re proud to show off.