Table of Contents >> Show >> Hide
- What Are Chocolate Revel Bars?
- Why People Love Them (Besides the Obvious Chocolate Situation)
- The Flavor & Texture Breakdown
- Key Ingredients (And What They Do)
- Chocolate Revel Bars Recipe (Classic 9×13 Pan)
- Pro Tips for Bars That Cut Clean and Taste Even Better
- Fun Variations (Choose Your Adventure)
- Serving Ideas (AKA, How to Make People Think You’re a Genius)
- Storage & Freezing
- Troubleshooting: Common Revel Bar Problems (And Easy Fixes)
- FAQ
- Conclusion
- Kitchen “Experiences” & Real-World Revel Bar Notes (Extra)
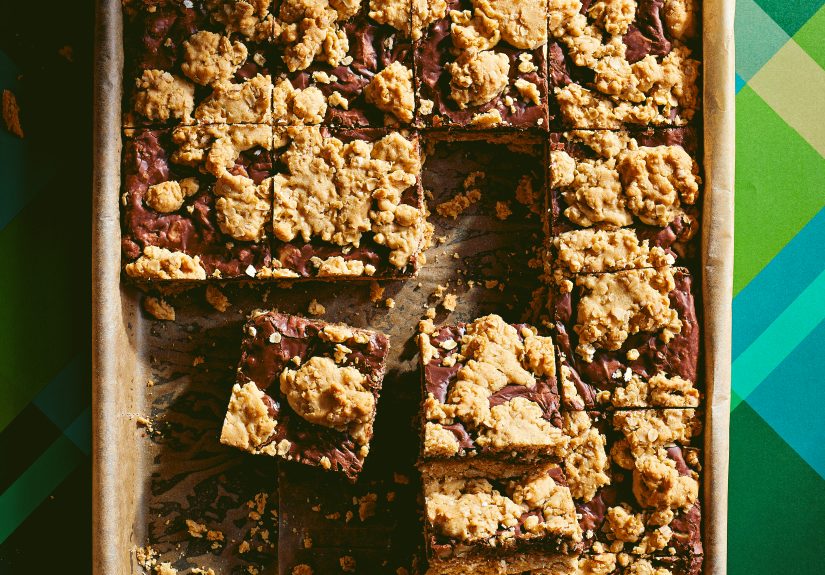
If an oatmeal cookie and a fudge brownie had a really excellent time at a potluck and decided to “make it official,” you’d get Chocolate Revel Bars. They’re chewy, buttery, and unapologetically chocolateytwo layers of oat-packed cookie dough hugging a glossy, condensed-milk fudge center. These bars are famous for disappearing fast, traveling well, and making people ask, “Wait… what are these and why have you been keeping them from me?”
In classic American home-baking fashion, revel bars are simple, practical, and a little dramatic (in the best way). The oatmeal base bakes up tender and toasty, while the filling turns into a soft-set chocolate layer that feels like fudge without requiring a candy thermometer or an advanced degree in Sugar Science.
What Are Chocolate Revel Bars?
Chocolate Revel Bars are a type of bar cookie made with an oatmeal cookie dough baked in two layers, with a rich chocolate filling in the middle. The filling is typically made by melting chocolate chips with sweetened condensed milk, butter, vanilla, and a pinch of salt. Many versions include chopped walnuts or pecans for crunch, but the “nuts optional” clause is basically written into the social contract of revel bars.
You’ll see them called by a few cousin namesoatmeal fudge bars, chocolate oatmeal bars, or simply revel bars. No matter the title, the vibe is the same: chewy oat layers + fudgy chocolate center = happy people.
Why People Love Them (Besides the Obvious Chocolate Situation)
- They’re forgiving. The dough is sturdy, the filling is straightforward, and small “oops” moments still taste great.
- They slice clean (eventually). Let them cool fully and you’ll get neat squares worthy of a bake sale table.
- They’re freezer-friendly. Make a batch now, stash some for later, and feel like your past self is your personal assistant.
- They travel well. Potlucks, picnics, school events, office snacksthese bars show up and do their job.
The Flavor & Texture Breakdown
Oatmeal cookie layers
Expect a chewy-buttery base with brown sugar caramel notes. Oats add hearty texture without making the bars “healthy.” (Let’s not lie to ourselves. Oats are doing their best, though.)
Chocolate filling
The center is smooth, rich, and slightly gooey when warmlike a soft fudge that sets into a dense, sliceable layer as it cools. Sweetened condensed milk gives it that thick, glossy texture and keeps it from turning into dry, crumbly chocolate sadness.
Key Ingredients (And What They Do)
- Old-fashioned or quick oats: Quick oats make a slightly tighter, more uniform chew; old-fashioned oats give a heartier bite. Either works; you can even do a 50/50 blend.
- Brown sugar: Adds moisture and that warm caramel flavor that makes the chocolate taste even deeper.
- Butter: Flavor, tenderness, and that bakery-style richness.
- Flour + baking soda: Structure and lift, so the dough bakes into a soft cookie layer instead of a pancake.
- Sweetened condensed milk: The “fudge shortcut” that makes the filling thick, smooth, and reliably sliceable.
- Chocolate chips: Semisweet is the classic choice; milk chocolate is sweeter and softer; dark chocolate adds intensity.
- Salt + vanilla: The tiny details that make everything taste like you actually know what you’re doing.
- Nuts (optional): Walnuts and pecans add crunch and balance the sweetness. Skip if you’re feeding a crowd with allergies or picky eaters.
Chocolate Revel Bars Recipe (Classic 9×13 Pan)
This is a classic, crowd-friendly version that yields about 24 medium bars (or fewer if your “taste tests” mysteriously multiply). The method is simple: mix dough, press most of it in the pan, melt the filling, spread it on, then crumble the rest on top.
Equipment
- 9×13-inch baking pan
- Parchment paper or foil (highly recommended)
- Mixing bowls
- Saucepan (or microwave-safe bowl)
- Spatula
Ingredients
- For the oatmeal dough:
- 1 cup (2 sticks) unsalted butter, softened
- 2 cups packed brown sugar (light or dark)
- 2 large eggs
- 2 teaspoons vanilla extract
- 2 1/2 cups all-purpose flour
- 1 teaspoon baking soda
- 1 teaspoon fine salt
- 3 cups oats (quick or old-fashioned)
- For the chocolate filling:
- 1 (14-ounce) can sweetened condensed milk (not evaporated milk)
- 1 1/2 cups semisweet chocolate chips (use up to 2 cups for an extra-thick center)
- 2 tablespoons butter
- 1/2 teaspoon salt
- 1 teaspoon vanilla extract
- 1/2 cup chopped walnuts or pecans (optional)
Instructions
- Prep the pan: Heat oven to 350°F. Line a 9×13 pan with parchment (or foil) and lightly grease it. Leave a bit of overhang so you can lift the bars out later like a magician.
- Mix the dry ingredients: In a bowl, whisk flour, baking soda, and salt.
- Cream butter and sugar: In a larger bowl, beat butter and brown sugar until fluffy. Add eggs one at a time, then mix in vanilla.
- Make the dough: Add dry ingredients to the butter mixture and mix just until combined. Stir in oats until you have a thick, slightly sticky dough.
- Press the base layer: Reserve about 1/3 of the dough for topping. Press the remaining dough evenly into the bottom of the pan. (Tip: slightly damp hands make this easier.)
- Make the chocolate filling: In a saucepan over low heat, melt condensed milk, chocolate chips, butter, and salt, stirring frequently until smooth and glossy. Remove from heat and stir in vanilla (and nuts, if using).
- Assemble: Spread chocolate filling evenly over the base layer. Crumble the reserved dough over the top. Don’t worry about full coveragelittle gaps are part of the charm.
- Bake: Bake 25–30 minutes, or until the top looks set and lightly golden. The center will still be softgood. Overbaking is how you turn joy into regret.
- Cool completely: Let the pan cool at room temp, then chill for 1–2 hours for the cleanest slices. Lift out using the parchment, cut into bars, and try not to “accidentally” eat the corner pieces first.
Pro Tips for Bars That Cut Clean and Taste Even Better
1) Don’t rush the cooling step
Warm revel bars are delicious, but they’re also structurally chaotic. Cooling lets the fudge layer set and the oat layers firm up so you get tidy squares instead of “abstract chocolate art.”
2) Keep the chocolate melt gentle
Low heat is your friend. High heat can scorch chocolate or cause the mixture to thicken too fast. If you’re using the microwave, do short bursts (15–20 seconds) and stir often.
3) Salt is not optional (emotionally)
A little salt in the filling keeps the sweetness balanced and makes the chocolate taste more intense. If you love that salty-sweet bakery vibe, finish with a tiny sprinkle of flaky salt after baking.
4) Use parchment for stress-free removal
Revel bars are rich and sticky by design. Lining the pan saves you from scraping out bars with a spoon like it’s 2 a.m. and you’ve “just accepted your fate.”
Fun Variations (Choose Your Adventure)
Peanut butter chocolate revel bars
Stir 1/2 cup peanut butter into the warm filling, or drizzle melted peanut butter over the filling before topping with dough. You’ll get that classic PB-chocolate combo with extra creaminess.
Caramel swirl
Swirl caramel sauce (or caramel bits melted with a splash of cream) into the chocolate layer for a gooey, candy-bar feel.
Espresso “grown-up chocolate”
Add 1–2 teaspoons instant espresso powder to the filling. It won’t taste like coffee; it’ll taste like your chocolate just got promoted.
Mint chip
Use mint chocolate chips or add 1/4 teaspoon peppermint extract to the filling (go easypeppermint is powerful).
Gluten-free option
Swap in a reliable 1:1 gluten-free baking flour and certified gluten-free oats. Expect a slightly more tender crumble, but still very snackable.
Dairy-free idea
Use dairy-free butter and dairy-free chocolate chips. Some bakers use sweetened condensed coconut milk for a similar thick-and-creamy filling texture.
Serving Ideas (AKA, How to Make People Think You’re a Genius)
- Warm & melty: Microwave a bar for 8–12 seconds and top with vanilla ice cream.
- Cookie tray star: Cut smaller squares for dessert platterspeople can “just try one” (famous last words).
- Lunchbox-friendly: Wrap individually after chilling so they stay neat and don’t smudge chocolate on everything they touch.
- Holiday upgrade: Sprinkle crushed candy canes on top during the last 5 minutes of baking.
Storage & Freezing
Room temperature
Store in an airtight container for 3–4 days. Place parchment between layers to keep them from sticking together like best friends who refuse to separate.
Refrigerator
For a firmer, fudgier bite, refrigerate up to a week. Let bars sit at room temp for 10 minutes before serving if you prefer softer texture.
Freezer
Freeze up to 2–3 months. Wrap bars individually, then store in a freezer bag. Thaw at room temp or microwave briefly. This is one of those desserts that makes future-you feel very supported.
Troubleshooting: Common Revel Bar Problems (And Easy Fixes)
“My top layer looks dry.”
Most likely: slightly overbaked. Next time, pull the pan when the top is set and lightly golden. Revel bars continue to firm as they cool.
“My filling seems too runny.”
Warm filling is supposed to be fluid before baking. If it still feels loose after cooling, chill the bars longer. Also double-check you used sweetened condensed milk, not evaporated milk.
“My bars crumble when I cut them.”
They may still be warm, or the bars may need more time to set. Chill for an hour, use a sharp knife, and wipe the blade between cuts for clean edges.
“The edges got too dark.”
Try using a light-colored metal pan (dark pans brown faster) or reduce bake time slightly. You can also tent loosely with foil near the end.
FAQ
Why are they called “revel” bars?
The short version: the name is part tradition, part mystery. Revel bars show up in lots of American community cookbooks, family recipe boxes, and Midwest-style potluck spreads, and the name stuck. Whether “revel” refers to the celebratory vibe or simply a classic recipe title passed along for decades, the result is the same: people get excited when they see them.
Can I use old-fashioned oats instead of quick oats?
Yes. Quick oats give a slightly smoother bite; old-fashioned oats feel heartier. If you love texture, go old-fashioned. If you want a tighter cookie layer, go quickor blend them.
Do I have to add nuts?
Nope. Nuts add crunch and contrast, but revel bars are still excellent without them. If you want crunch without nuts, try toasted sunflower seeds or crushed pretzels (sprinkled on top).
What’s the best chocolate for the filling?
Semisweet is the classic “balanced” choice. Milk chocolate makes a sweeter, softer center. Dark chocolate adds a deeper, more intense flavor. You can also mix chips (like half semisweet, half dark) for a custom result.
Conclusion
Chocolate Revel Bars are the kind of old-school, crowd-pleasing dessert that feels both nostalgic and timeless. They’re easy enough for a weeknight bake, special enough for holidays, and sturdy enough for road trips, bake sales, and “I brought dessert!” moments. Follow the simple formulachewy oat layers + silky chocolate center + patience while they cooland you’ll have a pan of bars that gets rave reviews every single time.
Kitchen “Experiences” & Real-World Revel Bar Notes (Extra)
Let’s talk about what actually happens when you make revel bars in a real kitchenwhere someone is asking you a question mid-measurement, the butter is softer than you planned, and the chocolate chips are mysteriously low because somebody “sampled” them. The good news: revel bars are built for real life.
First, there’s the dough moment. The oatmeal dough is thick, and it’s supposed to be. A lot of bakers have the same thought: “Did I add too much flour?” Usually, no. Once the oats go in, the dough becomes hearty and a little stickylike oatmeal cookie dough wearing a winter coat. If it feels overly soft, chilling the dough for 10–15 minutes can make pressing it into the pan easier. But if you’re in a hurry, a simple trick is lightly dampening your hands before you press the base layer. Suddenly, the dough stops clinging like it’s auditioning for a clingy-romantic-comedy role.
Then comes the chocolate filling, which is the part that makes your kitchen smell like you should charge admission. When you melt sweetened condensed milk with chocolate and butter, it turns glossy fast. In many home kitchens, the biggest “experience” here is learning to keep the heat low and your stirring steady. If you crank the heat, chocolate can thicken too quickly or scorch at the bottom, and nobody wants a surprise smoky note. The payoff for gentle heat is a filling that spreads smoothly and sets with that signature fudgy texture.
Another very real thing: the top crumble. People often worry because the reserved dough doesn’t “cover” the filling like a perfect blanket. That’s normal. Revel bars look best when the top is scattered in crumblessome peeking chocolate here, some oat crumble there. Those little gaps become the gorgeous “stained-glass” effect when you slice them, and it’s basically free aesthetic points with zero extra effort.
Now for the hardest part: waiting. Fresh-from-the-oven revel bars are soft and gooey, and cutting them too early is a rite of passage (and also a mess). In real kitchens, the compromise is this: let the pan cool until it’s no longer hot, then refrigerate for an hour. You’ll get clean cuts and a filling that feels rich instead of runny. If you’re serving them warm with ice cream, go ahead and cut a couple “ugly-but-delicious” pieces early. Just call them “rustic.” People love rustic.
One more experience that shows up again and again: these bars age well. Day one is chewy and fragrant. Day two? The flavors meld, the fudge sets just a little more, and the whole bar tastes even more cohesive. That’s why revel bars are a smart make-ahead dessert for parties. They’re also the kind of treat that makes you grateful for your freezer. Wrapping individual bars means you can pull out exactly what you needone for a late-night snack, a couple for a lunchbox, or a handful for a “friends dropped by” situation. Suddenly, you’re the person who always has dessert ready, which is a very fun reputation to have.
Finally, revel bars have a special talent for becoming your recipe. Some people add walnuts because that’s how grandma did it. Some swap in dark chocolate because they like a bolder bite. Some sprinkle flaky salt on top because they enjoy watching people take a bite and pause like, “Wait… what is that amazing flavor?” However you riff on them, the core experience stays the same: you bake a pan, you cut a few squares, and suddenly you understand why these bars keep showing up at gatherings year after year. They’re not fussy. They’re not fragile. They’re just really, really good.


