Table of Contents >> Show >> Hide
- What Is Non-Planar Infill, Exactly?
- Why Traditional Infill Has Strength Limits
- How Non-Planar Infill Can Improve 3D Print Strength
- What the Research and Real-World Testing Suggest
- When Non-Planar Infill Makes the Most Sense
- When It Probably Will Not Help Much
- Non-Planar Infill vs. Other Ways to Strengthen Prints
- Practical Tips Before You Try Non-Planar Infill
- The Verdict: Could Non-Planar Infill Improve the Strength of Your 3D Prints?
- Hands-On Experience: What This Feels Like in Real Printing
- Conclusion
If you have ever snapped a 3D printed bracket in half and muttered something unprintable at your printer, you already know the dirty little secret of FDM and FFF printing: parts are often strongest where the nozzle lays down a line and weakest where one layer has to trust another layer not to peel away like a cheap sticker. Traditional infill works in flat, stacked slices, which is efficient, predictable, and easy for slicers to generate. It is also one reason many prints have that classic “pretty strong until they suddenly aren’t” personality.
That is where non-planar infill starts to get interesting. Instead of keeping every internal path trapped inside a perfectly flat layer, non-planar infill changes the Z height during an infill pass. In plain English, the printer stops drawing perfectly level internal lines and starts creating internal paths that curve, wave, or climb. That small shift can change how stress moves through a part, reduce the number of clean failure planes, and potentially improve strength in areas where ordinary layer-by-layer printing is vulnerable.
So, could non-planar infill improve the strength of your 3D prints? Yes, it absolutely can. But before we crown it the superhero of print settings and force gyroid to hand over its cape, there is an important catch: non-planar infill is not a magic trick. It helps most when it works with the load path of the part, the material, the walls, and the print orientation. In many cases, stronger perimeters, better orientation, and cleaner layer bonding still matter more than fancy internal geometry.
This article breaks down what non-planar infill is, why it can improve 3D print strength, where it falls short, and when it is actually worth your time. If you are chasing tougher functional parts instead of just cool slicer screenshots, you are in the right place.
What Is Non-Planar Infill, Exactly?
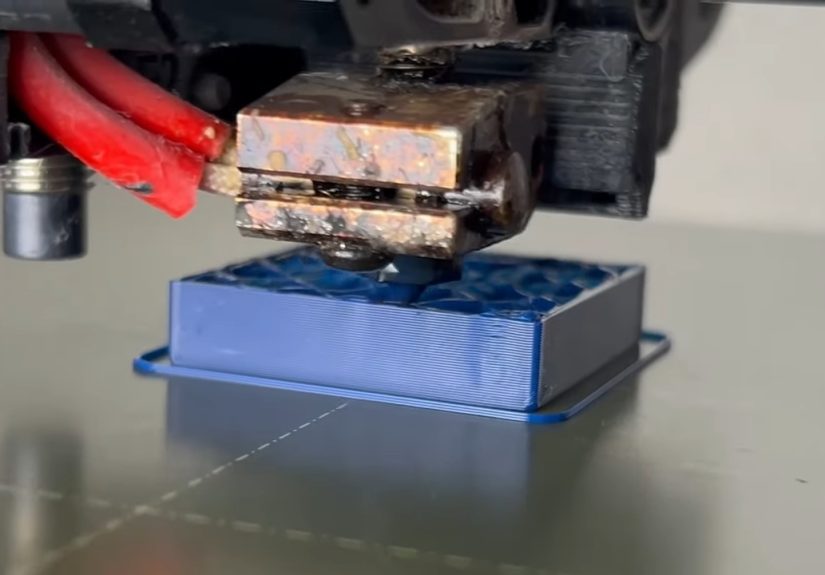
Standard infill is planar. Every line of internal structure sits on a flat layer, then the next layer stacks on top of it. Most slicers are built around this logic because it keeps toolpaths simple and reduces the chance of the nozzle dragging across already-printed features. It is neat. It is organized. It is also very two-dimensional in spirit.
Non-planar infill breaks that rule. Instead of creating internal lines that stay at one fixed height, it allows the toolpath to move up and down while printing infill. Think of it like replacing a stack of flat sheets with a woven or undulating internal skeleton. The path can be sinusoidal, arched, or otherwise curved depending on the method used.
The idea matters because flat layers create obvious fracture planes. If stress concentrates along those interfaces, cracks can travel through a part with surprising efficiency. A non-planar path disrupts that clean separation. Rather than having every bond line line up like a row of dominoes waiting for a shove, the internal structure can stagger those weak points and spread stress across more complex geometry.
Why Traditional Infill Has Strength Limits
To understand why non-planar infill matters, it helps to remember how most FDM parts fail. A printed part is not a uniform chunk of plastic. It is a bundle of extruded roads bonded together. Those roads can be quite strong along their length, but the bond between layers is usually weaker than the material itself. That is why print orientation has such a huge effect on part strength.
If you print a hook standing upright, the load may try to peel layers apart. Print the same hook on its side and the filament lines may better resist tension. This is one of the oldest lessons in desktop 3D printing, and it still matters more than many users want to admit. In other words, before you go hunting for futuristic infill, make sure your part is not simply printed in the worst possible direction.
Traditional infill has additional limitations:
- It often creates repetitive internal stress paths.
- It may not align with the real forces a part sees in use.
- It can leave weak shear planes between flat layers.
- It may add material without meaningfully improving the part’s critical failure mode.
That last point is a big one. Many people respond to weak parts by cranking infill from 20% to 80% and hoping the printer channeles pure determination into the plastic. Sometimes that helps, but often the bigger gain comes from thicker walls, more perimeters, or better load-oriented design. If the outer shell is doing most of the work, packing the inside with more flat geometry may not solve the real problem.
How Non-Planar Infill Can Improve 3D Print Strength
1. It breaks up clean layer-to-layer failure planes
The most obvious advantage of non-planar infill is that it stops every internal bond from lining up on perfectly flat levels. When a part bends, twists, or takes a hit, stress has a harder time traveling along a simple horizontal seam. That can improve resistance to shearing and delamination, especially in prints that would normally fail between layers.
2. It may better follow the shape of the part
Curved internal paths can better match curved external geometry. That matters because flat infill inside a curved part is a little like putting square shelving inside a rounded backpack. It technically fits, but not elegantly. Non-planar paths can distribute support more naturally under domes, shells, and sloped surfaces, which may improve both stiffness and load transfer.
3. It can support the top surface more efficiently
One reason some researchers and experimental slicer developers are excited about non-planar methods is that they can create support where it is needed without copying the same internal pattern from bottom to top. That can improve top-layer support in curved regions while using material more strategically.
4. It may improve Z-direction performance
In ordinary printing, the Z axis is often the weak spot. A well-designed non-planar infill can tie neighboring regions together in a way that resists classic layer separation. That does not make the Z axis magically equal to the XY plane, but it can narrow the gap. For certain mechanical samples and test geometries, that is exactly where the benefit shows up.
5. It can reduce “all the weakness in one place” design behavior
Traditional slicing tends to repeat the same logic throughout the part. Repetition is great for manufacturing speed and not-so-great for localized failure. Non-planar infill introduces variation that can keep forces from concentrating along identical internal boundaries. Less “snap on one seam,” more “load spreads across the structure.” That is the dream, anyway.
What the Research and Real-World Testing Suggest
The current evidence is promising but not one-size-fits-all. Experimental work on non-planar extrusion and stress-aligned toolpaths has shown that non-planar strategies can improve fracture toughness and certain strength metrics compared with conventional planar methods. More recent studies on non-planar FDM have also reported gains in both mechanical performance and surface quality, particularly in the Z direction and on challenging geometries.
That said, the exact improvement depends on what is being measured. Tensile strength, bending resistance, shear behavior, fracture toughness, and top-surface quality do not always improve by the same amount. A print that performs better in bending may not dominate in every other category. Real-life parts are messy like that. They refuse to behave like marketing slogans.
In practice, the takeaway is not “non-planar infill makes everything stronger.” The smarter takeaway is this: non-planar infill can improve strength when it interrupts weak layer planes and aligns internal structure more intelligently with the way the part is actually loaded.
When Non-Planar Infill Makes the Most Sense
Non-planar infill is most useful when your part fails because of interlayer weakness, internal shear, or poorly supported curved geometry. It makes especially good sense for these types of prints:
- Brackets and mounts that experience bending loads.
- Curved shells where standard flat infill does not match the shape well.
- Protective housings that need better impact distribution without going fully solid.
- Functional prototypes where strength-to-weight ratio matters.
- Parts with known crack lines from previous print failures.
For example, imagine a drone accessory mount that keeps cracking where the body transitions into a curved arm. Standard infill may stack weak planes right through the stress zone. A non-planar internal path could help bridge that transition more naturally, reducing the chance that the crack follows an easy layer boundary. That does not guarantee success, but it is a smarter starting point than simply doubling infill and praying to the spool gods.
When It Probably Will Not Help Much
There are also plenty of cases where non-planar infill is not the best lever to pull.
If your walls are too thin
Many functional prints fail in the shell long before infill becomes the main story. If your part has only two skinny perimeters and you are asking it to survive torque, impact, or repeated flexing, changing infill alone is unlikely to save it. More walls, better wall thickness, and better bonding usually provide a more direct benefit.
If your print orientation is bad
Print orientation still rules the kingdom. If the part is positioned so the load peels layers apart, non-planar infill may help around the margins, but the core weakness remains. A smarter orientation often delivers more strength for free than a more complicated infill strategy.
If your material bonding is poor
Under-extrusion, low nozzle temperature, too much part cooling, wet filament, or poor flow calibration can sabotage any advanced slicing method. A wavy toolpath cannot rescue weak, crumbly bonds. Fancy infill on a badly tuned printer is like wearing racing shoes to fix a broken bicycle.
If your slicer or hardware cannot execute it well
Non-planar infill increases the chance of nozzle collisions, inconsistent extrusion on slopes, and motion-control challenges. If your setup cannot handle varying Z during internal paths cleanly, the theoretical strength gain may get eaten by print defects.
Non-Planar Infill vs. Other Ways to Strengthen Prints
If your goal is stronger 3D prints, here is the honest ranking: non-planar infill is exciting, but it belongs in the same toolbox as orientation, perimeters, material choice, nozzle temperature, and part design, not above them.
Increase perimeters first
For many functional parts, more walls beat more infill. The shell often carries the highest stress, especially in tension and bending. Going from two perimeters to four can transform a part far more than pushing infill density from moderate to very high.
Choose an infill pattern that matches the job
Even in ordinary slicing, infill patterns matter. Gyroid, cubic, triangles, and rectilinear can all make sense depending on the load case, speed target, and strength-to-weight goal. Non-planar infill is not a replacement for choosing the right pattern. It is more like an advanced variation for specific needs.
Use better materials
PLA is wonderfully easy to print and wonderfully dramatic when asked to be a structural hero in hot environments. PETG, ABS, ASA, nylon, polycarbonate blends, or reinforced filaments may give you a bigger jump in functional strength than any clever infill path alone.
Redesign the part
Fillets, ribs, thicker stress transitions, smoother geometry changes, and better load paths often outperform slicer tricks. Non-planar infill can support good design, but it should not be a substitute for it.
Practical Tips Before You Try Non-Planar Infill
- Start with a part that already prints reliably in standard mode.
- Use a functional test part, not a decorative vase with delusions of grandeur.
- Compare one variable at a time: same material, same walls, same orientation, different infill strategy.
- Watch nozzle clearance carefully on curved internal paths.
- Avoid assuming higher complexity automatically means better performance.
- Document where failures happen, not just whether the part breaks.
A good test is to print two or three identical parts: one with standard gyroid or cubic infill, one with higher wall count, and one with non-planar infill. Then load them in the direction the real part will see. You may find the non-planar version wins. You may also discover that a plain old extra perimeter quietly crushes the competition while asking for much less drama.
The Verdict: Could Non-Planar Infill Improve the Strength of Your 3D Prints?
Yes, non-planar infill can improve the strength of your 3D prints, especially when the failure mode is tied to flat layer boundaries, weak Z-direction performance, or internal stress paths that standard infill handles poorly. It is a smart and increasingly credible idea, not just a flashy experiment for people who enjoy turning slicers into research projects.
But the key word is could. Non-planar infill is most effective when it complements the rest of the print strategy. If your orientation is wrong, your walls are thin, your filament is damp, and your extrusion is inconsistent, non-planar infill will not swoop in wearing a cape and save the day. It is an advanced strength optimization, not an excuse to ignore the basics.
For makers who love pushing mechanical performance, though, it is absolutely worth watching. As slicing tools improve and more printers handle complex toolpaths gracefully, non-planar infill could become one of the most useful ways to make FDM parts stronger without simply making them heavier. And in desktop fabrication, smarter beats heavier almost every time.
Hands-On Experience: What This Feels Like in Real Printing
In real-world printing, the appeal of non-planar infill usually starts with frustration. You print a functional part that looks fine, feels fine, and even passes the traditional squeeze test. Then it fails exactly where you feared it might: along a layer line, across a stress transition, or right at the spot where flat internal structure seems least helpful. That is often the moment when non-planar infill goes from “interesting internet rabbit hole” to “maybe this is worth a Saturday afternoon.”
The first thing most users notice is that non-planar infill changes the mental model of what is happening inside the part. Standard infill feels predictable. You know it is stacking in repeatable layers. Non-planar infill feels more like internal weaving. When you preview it, the toolpath looks less like a pile of pancakes and more like a structure that is trying to cooperate with the shape of the object. That alone can be encouraging, especially on curved parts where regular infill always looked a little awkward.
On the printer, the experience can be both exciting and slightly nerve-racking. When the nozzle starts varying height within what would normally be a simple infill move, you become very aware of clearance, extrusion consistency, and motion smoothness. This is not the kind of print you casually leave unattended while you go make a sandwich, organize your screws, and accidentally start three other projects. It invites observation. You watch for rubbing, listen for odd motion, and pay close attention to whether the printer is laying material cleanly over those changing internal contours.
When it works, the result can feel surprisingly solid. Parts that previously snapped along neat horizontal breaks may fail less cleanly or survive higher loads before showing visible stress. Curved components can feel more cohesive, almost as if the inner structure is better married to the outer shell. You may not always see a dramatic difference by eye, but you often notice it in the way the part resists flex or in how it fails less predictably under load. In strength testing, “less predictably” can actually be a compliment.
There is also a learning curve. Some experiments will be underwhelming. In some cases, a part with extra perimeters and conventional infill may perform just as well or better, especially if the shell is the main structural player. That can be humbling, but it is useful. It teaches you that non-planar infill is not a universal upgrade. It is a targeted tool. The best results usually come when the geometry, the load direction, and the toolpath all make sense together.
The most practical experience-based lesson is this: test it on parts that have already taught you something. If you have a bracket that always cracks in the same place, that is a perfect candidate. If you have a curved housing that feels flimsy despite high infill, that is another good one. Compare failures, not just appearances. Compare wall count changes, orientation changes, and infill changes separately. That kind of testing reveals whether non-planar infill is solving the right problem or just giving you a cooler preview window.
For many makers, the biggest benefit is not even the final strength number. It is the shift in thinking. Non-planar infill encourages you to stop treating the inside of a print like anonymous filler and start treating it like real structure. That mindset leads to better decisions across the board, from design to slicing to testing. And that alone can make your 3D prints stronger, even before the first wavy internal line ever leaves the nozzle.
Conclusion
Non-planar infill is one of the more exciting ideas in modern desktop 3D printing because it attacks a real weakness of FDM parts: the neat, flat layer boundaries that make failure a little too easy. Used well, it can improve strength, especially in parts that suffer from interlayer shear, curved stress zones, or weak Z-direction behavior. Used blindly, it can become another overcomplicated setting that distracts from the fundamentals.
If you want stronger 3D prints, think in layers of priority: first orientation, then wall thickness, then material and bonding quality, then infill strategy. Once those are dialed in, non-planar infill becomes a very compelling next step. It is not hype, but it is not magic either. It is engineering. Which, admittedly, is often just magic with calipers and more notes.


