Table of Contents >> Show >> Hide
- Project at a Glance
- Why This Deathly Hallows-Inspired Shelf Works (Even If You’re Not a Master Carpenter)
- Tools and Materials
- Design Options (Pick Your Potion)
- Step-by-Step Build: Triangle Shadowbox Shelf
- 1) Choose Your Size and Make a Simple Cut List
- 2) Build the Triangle Frame
- 3) Add the Back Panel for Strength
- 4) Create the Deathly Hallows Elements
- 5) Add Display Ledges (Optional but Highly Recommended)
- 6) Sanding: The Unsexy Step That Makes Everything Look Expensive
- 7) Finish for That “Found in a Forbidden Section” Look
- Mounting and Safety: Make It Solid (Not “Decor That Falls at 2 a.m.”)
- Styling Ideas: Make It Look Like a Curated Wizard Exhibit
- Troubleshooting (Because Wood Has Opinions)
- My Build Diary: 500-ish Words of Real-Life Lessons From Making This Shelf
- Conclusion
- SEO Tags
You know that moment when your fandom collection starts “organizing itself” into random piles on every flat surface?
That’s not clutter. That’s the universe telling you to build a proper display shelfpreferably one that looks like it
could be found behind a secret tapestry in a drafty castle corridor.
In this guide, we’ll build a wall-mounted display shelf inspired by the Deathly Hallows symbol (triangle, circle, and
a vertical line). The goal: a functional shelf that shows off your books, wands, and tiny mystical objects (or, you
know… a Lego set and a scented candle) while still being sturdy enough to survive real life.
Project at a Glance
- Style: Deathly Hallows-inspired geometric shadowbox shelf
- Skill level: Beginner-to-intermediate (with a couple of “you’ve got this” moments)
- Build time: 1 weekend (plus drying time)
- Best for displaying: books, collectibles, small décor, wand replicas, framed art
- Mounting: French cleat recommended for strength and easy leveling
Why This Deathly Hallows-Inspired Shelf Works (Even If You’re Not a Master Carpenter)
The Deathly Hallows symbol is basically a design cheat code: clean geometry that looks intentional and “expensive”
without requiring fancy curves or ornate carving. A triangle creates a bold outline, the circle becomes a focal
element, and the vertical line adds that “this definitely means something mysterious” vibe.
From a practical standpoint, a triangle frame with a back panel behaves like a rigid boxless wobble, less drama.
And if you use a French cleat for mounting, you’ll get a shelf that sits flush and feels secure, which is
especially important if your display includes anything breakable (or emotionally irreplaceable).
Tools and Materials
Wood and Backing
- Frame boards: 1×3 or 1×4 (pine is budget-friendly; poplar paints beautifully)
- Back panel: 1/4-inch plywood (stiffens the whole shelf and makes mounting easier)
- Inner “circle” element: a wooden craft ring, embroidery hoop, or a plywood circle you cut
- Vertical “line” element: 3/8–1/2-inch wood dowel (or a straight strip of wood)
Fasteners and Hardware
- Wood glue
- 1-1/4″ brad nails (or trim screws if you don’t have a nailer)
- French cleat set (metal) or a DIY wood French cleat
- Wall screws suitable for studs (and anchors/toggle bolts if studs aren’t available where you need them)
Finishing Supplies
- Sandpaper (120, 150, 220; optional 320+ between topcoats)
- Wood filler (for nail holes)
- Paint or stain (matte black, deep walnut, or “old library” brown are fan favorites)
- Clear topcoat (water-based for low odor; oil-based for a warmer tone)
Optional “Wizard Upgrade” Add-Ons
- Warm white LED strip (low voltage) for a soft, magical glow
- Rub-on gold wax or metallic paint for antique accents
- Small brass hooks (for hanging keys, time-turner replicas, or jewelry)
Design Options (Pick Your Potion)
Option A: The Triangle Shadowbox (Recommended)
A triangle frame + back panel = simple, sturdy, and very display-friendly. The Hallows symbol is built into the
shelf using a ring and a dowel. This is the plan we’ll walk through step-by-step.
Option B: Floating Shelf + Painted Symbol Behind It
If you prefer a cleaner look, build one chunky floating shelf and paint or stencil the symbol onto the wall or a
backboard behind it. It’s sleek and rental-friendly if you use a removable backboard.
Option C: “Artifacts Gallery” Micro-Shelves
Build several small ledges inside a triangle frame, like a miniature museum exhibit. This is awesome for wand
boxes, pins, and tiny potion bottlesbut it’s slightly more measuring-intensive (aka the land where rulers go to
judge you).
Step-by-Step Build: Triangle Shadowbox Shelf
1) Choose Your Size and Make a Simple Cut List
A great starter size is a triangle about 24 inches tall with a 22–24 inch base.
Big enough to look intentional, small enough to build with basic tools.
- Frame: 3 boards cut with 30° miters on each end (for an equilateral triangle look)
- Back panel: triangle shape cut from 1/4″ plywood to match the frame’s outer profile
- Circle element: 8–12 inch ring (depending on shelf size)
- Line element: dowel cut to reach from near the top point to near the bottom edge
No miter saw? No problem. You can do butt joints with straight cuts. The triangle won’t be perfectly equilateral,
but the “inspired by” part of the title will still be 100% true.
2) Build the Triangle Frame
- Dry-fit your three frame pieces on a flat surface.
- Apply wood glue to each joint.
- Clamp, then nail or screw the joints together.
- Check that it sits flat (rocking = sadness). If it rocks, lightly sand the high joint area.
Pro tip: assemble the triangle on top of a scrap board or workbench you don’t mind getting glue on. Wood glue has
a sense of humor and will bond with anything except the wood pieces you actually want to bond.
3) Add the Back Panel for Strength
- Place the assembled frame on your plywood and trace the outline.
- Cut the triangle with a jigsaw.
- Glue the back panel onto the frame and pin it with brad nails.
This backing turns your shelf into a rigid unit and gives you more surface area for mounting hardware. It’s the
difference between “cute wall décor” and “why is this leaning like it’s exhausted?”
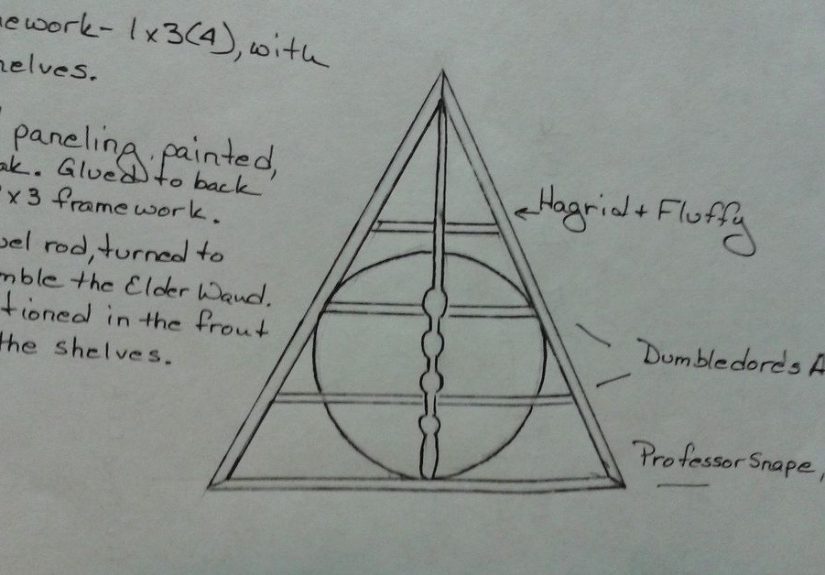
4) Create the Deathly Hallows Elements
This is the fun partwhere the shelf starts looking like a deliberate fandom piece instead of “geometry homework.”
-
Circle: Use a wooden ring, craft hoop, or cut a plywood circle. Mount it centered in the
triangle with small wood blocks behind it (like hidden supports). -
Line: Use a dowel as the vertical line. You can run it through the center of the ring (best
visual payoff) and secure it to the backing with glue and small brackets or blocks.
If you want an extra “artifact display” feature, make the ring functional by turning it into a tiny round shelf:
add a small circular platform on the lower inside edge of the ring. Great for a mini figure or a small candle
(battery-operated is the least dramatic option).
5) Add Display Ledges (Optional but Highly Recommended)
A triangle looks cool on the wall, but a triangle that actually holds things is cooler. Add 1–2 internal ledges:
- Bottom ledge: a straight strip across the base for books or framed art
- Mid ledge: a shorter strip to hold small objects (pins, potion bottles, mini plants)
Keep ledges shallow (2.5–4 inches deep). This prevents your display from becoming a dust-catching storage unit
disguised as décor. Also, shallow shelves encourage tasteful minimalism. You can blame the shelf when someone asks
why you didn’t buy more collectibles.
6) Sanding: The Unsexy Step That Makes Everything Look Expensive
Sand the entire piece starting around 120 or 150 grit, then move up to 220. Round over sharp edges slightly so
the shelf feels finished and “handled by artisans,” not “assembled by panic.”
7) Finish for That “Found in a Forbidden Section” Look
Choose one finishing vibe:
- Matte black + gold rub accents: modern, graphic, and dramatic (in a good way).
- Dark stain + clear coat: classic “old library” moodespecially great with warm lighting.
- Charcoal paint + light distressing: aged edges that feel story-worthy.
Apply thin coats, let them dry properly, and sand lightly between topcoats if needed. Rushing a finish is how you
end up with lint, brush marks, and a shelf that looks like it was cursed by a bored gremlin.
Mounting and Safety: Make It Solid (Not “Decor That Falls at 2 a.m.”)
Display shelves become heavy fast. Books, glass bottles, and “just one more collectible” add up. So mounting is
not the place to freestyle.
Why a French Cleat is the Best Choice
A French cleat is two angled pieces (often 45°) that lock together: one on the wall, one on the shelf. It spreads
weight across a wider area and makes leveling much easier. If you ever need to move the shelf, you can lift it
off without destroying your wall.
Studs vs. Anchors (The Real World Compromise)
Ideally, you drive screws into wall studs. If your studs don’t line up with your perfect shelf placement, use
anchors or toggle bolts rated for the load. Avoid relying on adhesive hooks for shelvesthose are for lightweight
things like keys, not your prized display.
A Practical Weight Example
Let’s say your shelf plus items totals 25 pounds. If you can hit at least one stud with a good screw and use a
properly rated toggle/anchor for the other side, you’ll dramatically reduce the chance of failure. If you can hit
two studs, even better. When in doubt, lighten the display or upgrade the hardware.
Safety bonus: If you have kids, pets, or live somewhere with frequent vibrations, consider adding a discreet
anti-tip screw through the backing into a stud. Invisible insurance is still insurance.
Styling Ideas: Make It Look Like a Curated Wizard Exhibit
A themed shelf can easily go from “magical” to “yard sale table” if everything is the same size and color. Mix
heights, textures, and a little negative space.
Display Combos That Always Look Good
- Stack + accent: a small stack of books + one hero object (like a wand stand)
- Glass + paper: a potion bottle + a rolled “map” or parchment-style note
- Metal + wood: a brass key or clockwork piece + a wooden box
Lighting Without Turning It Into a Science Project
Warm white LED strips (low voltage) tucked along the inside edge can make the shelf glow without shouting “I bought
gamer lights.” Use cable clips or a small channel to keep it neat. If wiring makes you nervous, battery puck
lights are the lazy-genius option.
Troubleshooting (Because Wood Has Opinions)
The triangle looks slightly uneven
Check that your miters are truly 30° and that your boards are the same length. If it’s already assembled, you can
disguise minor asymmetry by centering the ring visually and using styling to draw the eye inward.
The shelf rocks against the wall
Walls aren’t perfectly flat. Add small felt pads at the corners or a thin spacer strip behind the cleat area to
stabilize it.
The finish looks blotchy
Pine can stain unevenly. Use a pre-stain conditioner, or switch to paint for a more predictable finish. You can
also lean into it and call it “ancient patina.”
My Build Diary: 500-ish Words of Real-Life Lessons From Making This Shelf
The first time I built a triangle shelf, I was extremely confident for someone holding a tape measure like it was
an exotic artifact. I cut all three boards, laid them out, and immediately discovered that triangles are not
forgiving. A rectangle will quietly tolerate your “close enough” energy. A triangle will not. A triangle will
publicly embarrass you on your own workbench.
My biggest early mistake was assuming the angles mattered less than the lengths. Wrong. If your miters are even a
hair off, the gap multiplies as the pieces come together. The fix was simple but humbling: I recut the ends using
a stop block and dry-fit the frame before glue. That dry-fit step became my new religion. It’s like a rehearsal
dinner for woodawkward, necessary, and dramatically cheaper than divorce (from your project).
Next came the Deathly Hallows details. The ring looked perfect on its own, but inside the triangle it felt
slightly “floating in space.” So I added tiny hidden blocks behind it, painted them the same color as the backing,
and suddenly the ring looked intentionallike it belonged there, not like it was waiting for a bus. For the
vertical line, I used a dowel and realized dowels love rolling away at the exact moment you set them down. I
learned to keep a clamp nearby and to pre-mark centerlines on the backing panel. If you can draw a straight line
with a ruler, you can make the whole design look crisp. If you can’t… well, distressing is always an option.
Finishing taught me patience the hard way. I tried to rush a topcoat once, and I trapped dust like a time capsule.
Sanding it back was a personal character-building exercise. After that, I started treating finishing like making
good coffee: slow, consistent, and not performed during a chaotic phone call. Light sanding between coats made the
surface feel smoother than it had any right to. The shelf went from “cute DIY” to “did you buy that?”which is
basically the highest compliment you can earn while covered in sawdust.
Mounting was the final boss. I wanted the shelf perfectly centered in a very specific spot, because I am a human
being with opinions. The studs, however, were not in that spot, because studs are also beings with opinions. I
used a French cleat to distribute weight and added a strong fastener into a stud where I could, then used a
properly rated anchor where I couldn’t. The shelf felt rock solidand the best part was the silence afterward.
No creaks. No mysterious wall sounds. Just the calm satisfaction of a display that looks magical and behaves
responsibly, which is basically what adulthood is.
The unexpected joy was styling it. I thought I’d fill every inch, but leaving space made the whole shelf feel more
like an exhibit than storage. One small stack of books, a single standout object, and a soft light was enough to
tell a story. And that’s the real win: you’re not just building a shelfyou’re building a tiny stage for the parts
of your life that make you grin.
Conclusion
A Deathly Hallows-inspired display shelf is one of those rare DIY projects that’s both practical and unapologetically
fun. The geometry gives it instant visual impact, the backing panel keeps it sturdy, and the right mounting method
makes it safe for real-world use. Start simple, build clean, finish patiently, and mount like you actually want to
keep your stuff on the wall. You’ll end up with a piece that looks custom, feels solid, and quietly announces to
guests: “Yes, I have hobbies. Yes, I have a drill.”


