Table of Contents >> Show >> Hide
- Why Make a Driftwood Heart Wreath?
- Materials You’ll Need
- How to Choose the Best Driftwood
- How to Clean Driftwood for Indoor Crafts
- Choosing the Right Heart-Shaped Base
- Step-by-Step Tutorial: DIY Driftwood Heart Wreath
- Design Ideas for Your Driftwood Heart Wreath
- Common Mistakes to Avoid
- Where to Display a DIY Driftwood Heart Wreath
- Care and Maintenance
- Conclusion: A Handmade Heart with Coastal Soul
- Experience Notes: What Making a Driftwood Heart Wreath Teaches You
- SEO Tags
A DIY driftwood heart wreath is the kind of handmade décor that looks like it came from a charming coastal boutique where everything smells faintly of sea salt, linen, and excellent life choices. The best part? You can make it yourself with simple supplies, a little patience, and enough driftwood to make your craft table look like a tiny beach had a dramatic breakup.
This rustic heart wreath blends natural texture, coastal farmhouse style, and Valentine’s Day sweetness without turning your front door into a glitter explosion. It works for February, beach house décor, cottage interiors, wedding decorations, nursery walls, gallery walls, and those awkward little empty spaces in your home that whisper, “Please hang something interesting here.”
In this guide, you’ll learn how to choose driftwood, clean it, build a sturdy heart-shaped base, arrange pieces naturally, glue everything securely, and style the finished wreath so it looks intentionalnot like a pile of sticks lost a bet. Let’s make a heart wreath with character, texture, and just enough rustic charm to make your guests ask, “Wait, you made that?”
Why Make a Driftwood Heart Wreath?
Driftwood is one of those materials that does half the decorating work for you. Every piece has a weathered surface, soft gray-brown color, irregular shape, and organic personality. Unlike store-bought craft sticks, driftwood does not believe in straight lines. That is exactly what makes it beautiful.
A driftwood heart wreath is especially appealing because it balances two design ideas: the romantic shape of a heart and the rugged, natural look of reclaimed wood. It feels handmade without looking messy, sweet without being sugary, and coastal without requiring a giant sign that says “Beach Vibes” in distressed turquoise letters.
This project is also flexible. You can make a small heart wreath for a shelf, a medium wreath for an interior door, or a larger statement piece for a covered porch. Add shells for a beachy look, jute twine for farmhouse charm, faux greenery for softness, or leave it bare for minimalist coastal décor.
Materials You’ll Need
Before you begin, gather your supplies. The project is simple, but having everything ready saves you from the classic crafter’s sprint: running around the house with glue on your fingers while searching for scissors.
Basic Supplies
- Clean, dry driftwood pieces in assorted lengths
- Cardboard, plywood, chipboard, or a pre-made heart wreath form
- Pencil or marker
- Scissors or a craft knife for cardboard
- Jigsaw or coping saw if using plywood
- Hot glue gun and glue sticks
- Wood glue or strong craft adhesive for extra durability
- Jute twine, ribbon, or wire for hanging
- Sandpaper or a sanding sponge
- Small brush for cleaning dust from crevices
- Optional clear matte sealer
Optional Decorative Add-Ons
- Mini seashells
- Faux air plants or faux succulents
- Preserved moss
- Small white beads or pearls
- Lace ribbon
- Small wooden letters
- Battery-operated fairy lights
For a natural, timeless look, keep decorations minimal. Driftwood is already interesting. It does not need to wear a feather boa unless that is truly your visionand if it is, craft boldly.
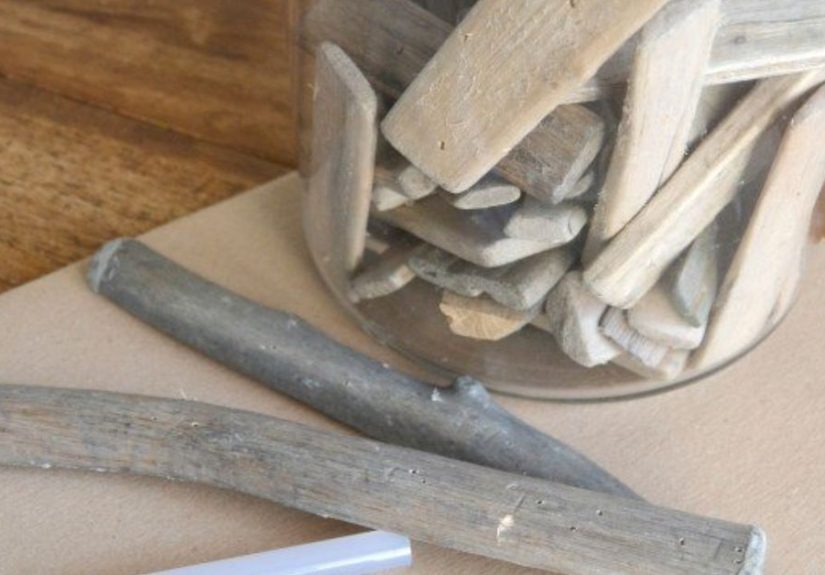
How to Choose the Best Driftwood
The best driftwood for a heart wreath is dry, lightweight, and varied in shape. Look for pieces that are roughly pencil-thick to thumb-thick, with a mix of straight, curved, short, and slightly crooked pieces. The crooked ones are often the stars of the show. They fill awkward gaps and add movement to the heart shape.
If you collect driftwood outdoors, check local rules first. Many beaches, parks, protected shorelines, and natural areas limit or prohibit removing driftwood because it can provide habitat, stabilize shorelines, or be part of protected natural resources. When in doubt, purchase craft driftwood online or from a craft supplier. Your wreath should say “coastal chic,” not “accidental park violation.”
Avoid driftwood that feels damp, smells musty, crumbles easily, or has visible insects. Also avoid painted, treated, or suspiciously oily wood. If a piece looks like it once belonged to a questionable construction project, let it continue its mysterious journey without you.
How to Clean Driftwood for Indoor Crafts
Cleaning driftwood is not glamorous, but it matters. Natural wood can carry sand, salt, dirt, tiny debris, and sometimes small hitchhikers who did not RSVP to your craft night.
Step 1: Brush Off Loose Debris
Use a stiff brush to remove sand, dirt, and loose bark. Work outside if possible. Driftwood dust has a way of spreading like craft confetti, except less festive.
Step 2: Rinse and Scrub
Rinse the pieces with fresh water and gently scrub them. If the wood is very salty or sandy, soak it in clean water for a few hours, changing the water once or twice. This helps remove residue that may affect glue adhesion later.
Step 3: Dry Completely
Let the driftwood dry fully in the sun or in a warm, well-ventilated area. Do not rush this part. Damp wood can weaken glue, encourage odors, and make the finished wreath less durable. Depending on the thickness of the pieces, drying can take a day or longer.
Step 4: Sand Sharp Edges
Use fine-grit sandpaper to smooth rough or splintery spots. Do not over-sand. The goal is to remove sharp edges, not erase the beautiful weathered texture that made you choose driftwood in the first place.
Choosing the Right Heart-Shaped Base
Your base is the hidden structure that keeps the wreath from collapsing into a dramatic pile of beach sticks. Cardboard works well for lightweight indoor wreaths. Plywood is sturdier for larger pieces or covered outdoor areas. A wire heart frame can also work, but it may require more layering to hide the structure.
Cardboard Base
Cardboard is inexpensive, easy to cut, and perfect for beginners. Use thick corrugated cardboard or double up two layers for strength. Paint the cardboard tan, gray, or brown before gluing so any tiny gaps blend into the driftwood.
Plywood Base
Plywood makes the wreath stronger and longer-lasting. It is a good choice if you want a larger wreath or plan to hang it on a covered porch. If cutting wood is involved, use proper eye protection and adult help when needed. A craft project is not improved by turning it into a minor household incident.
Pre-Made Heart Form
A pre-made heart wreath form is the easiest option. Grapevine hearts, chipboard hearts, and wooden heart blanks are commonly available at craft stores. These forms save time and give you a clean shape to follow.
Step-by-Step Tutorial: DIY Driftwood Heart Wreath
Now for the fun part: turning humble driftwood into a heart-shaped wreath that looks relaxed, romantic, and surprisingly expensive.
Step 1: Draw the Heart Shape
Draw a large heart on your cardboard or plywood. Then draw a smaller heart inside it to create a wreath frame. The frame should be wide enough to support several layers of driftwood, usually about two to four inches thick depending on the size of your wreath.
Cut out the outer heart first, then cut out the center. If the heart looks slightly uneven, do not panic. Driftwood is wonderfully forgiving. It covers imperfections like a cozy sweater covers the fact that you ate pancakes for dinner.
Step 2: Paint the Base
Paint the base in a color close to your driftwood: soft gray, tan, warm brown, or off-white. This prevents the base from peeking through once the wood is glued down. Let the paint dry completely before moving on.
Step 3: Sort the Driftwood
Sort your driftwood by size. Put longer pieces in one pile, medium pieces in another, and tiny filler pieces in a third. The tiny pieces are more important than they look. They are the craft-world equivalent of finishing touches, problem solvers, and tiny wooden superheroes.
Step 4: Dry Fit the Design
Before gluing, arrange the driftwood on the heart base. Start with the longest pieces and follow the curve of the heart. Place some pieces horizontally, some diagonally, and some slightly overlapping. The wreath will look more natural if the pieces do not all march in the same direction like a very serious stick parade.
Pay attention to the top dip of the heart and the bottom point. These areas define the shape, so use smaller pieces to keep the outline clear. Step back occasionally and check the silhouette. If it still reads as a heart from a few feet away, you are on the right path.
Step 5: Glue the First Layer
Once you like the layout, glue the first layer of driftwood to the base. Hot glue gives quick hold, while wood glue or strong craft adhesive adds long-term strength. A smart method is to tack each piece with hot glue, then add a small amount of stronger adhesive where the wood contacts the base.
Work in sections so you do not lose your layout. If you are worried about forgetting the arrangement, take a quick photo before gluing. Your phone can be a craft assistant, minus the judgment.
Step 6: Add the Second Layer
The second layer gives the wreath depth and hides the base. Use shorter driftwood pieces to bridge gaps, soften edges, and build texture. Overlap pieces naturally. Think of it like styling hair, except the hair is wood and the goal is rustic elegance rather than volume at the roots.
Keep checking the heart shape as you layer. Too much wood at the top can flatten the curves. Too much wood at the bottom can turn the heart into a rustic potato. A charming potato, perhaps, but still not the assignment.
Step 7: Fill Small Gaps
Use tiny driftwood pieces to cover visible cardboard or plywood. You can also tuck in small shells, pebbles, faux moss, or mini air plants if you want a more decorated look. For a clean coastal farmhouse wreath, plain driftwood with jute twine is often enough.
Step 8: Add a Hanger
Flip the wreath over and attach jute twine, ribbon, or hanging wire to the back. Hot glue may work for a lightweight wreath, but a stronger adhesive or staple-style attachment is better for heavier pieces. Let the hanger cure fully before putting weight on it.
Step 9: Seal the Wreath
A clear matte sealer can help protect the wood and reduce dust. Choose matte if you want the natural sun-bleached look. Glossy finishes can be pretty, but they may make the wood look less beach-weathered and more “recently laminated by an enthusiastic raccoon.”
Design Ideas for Your Driftwood Heart Wreath
Once you know the basic method, you can customize the wreath to match your home style or the season.
Coastal Minimalist
Use only pale driftwood and a simple white cotton ribbon. This version works beautifully with white walls, linen curtains, rattan baskets, and other soft neutral décor.
Valentine’s Day Rustic
Add a small blush pink bow, a few wooden beads, or one tiny heart charm. Keep the accents light so the wreath still feels natural and grown-up.
Beach Cottage Style
Tuck in mini shells, sea glass-style beads, or faux sea grass. This style is perfect for bathrooms, sunrooms, lake houses, and beach-inspired bedrooms.
Boho Natural
Add macramé cord, dried grasses, or a small tassel. The heart shape keeps it sweet, while the texture gives it an artsy handmade feel.
Wedding or Bridal Shower Décor
Use a driftwood heart wreath as a ceremony backdrop accent, guest book table decoration, or photo display prop. Add cream ribbon and small faux flowers for a romantic but earthy look.
Common Mistakes to Avoid
Even an easy DIY driftwood wreath has a few sneaky traps. Luckily, they are simple to avoid.
Using Damp Wood
Damp driftwood can cause glue failure and unpleasant smells. Always dry it completely before crafting.
Skipping the Dry Layout
Gluing without planning often leads to awkward gaps or a heart shape that slowly turns into an abstract emotional statement. Arrange first, glue second.
Making the Wreath Too Heavy
Driftwood is usually light, but layers add up. If your wreath feels heavy, use a plywood base and strong hanging hardware.
Overdecorating
Driftwood already has natural beauty. Too many extras can make the wreath look cluttered. Choose one accent style and let the wood breathe.
Hanging It in Harsh Weather
A driftwood wreath can handle a covered porch better than direct rain, strong sun, or heavy humidity. For outdoor use, seal it well and protect it from constant exposure.
Where to Display a DIY Driftwood Heart Wreath
This wreath is more versatile than it first appears. Hang it on an interior door, above a mantel, in an entryway, over a bed, on a gallery wall, or above a console table. It also looks lovely layered over a mirror or propped on a shelf with candles and small vases.
For Valentine’s Day, pair it with soft pink flowers and white ceramics. For summer, style it with shells, blue glass, and woven baskets. For everyday décor, keep it simple with neutral accents. The heart shape brings warmth, while the driftwood keeps it relaxed and natural.
Care and Maintenance
To keep your wreath looking fresh, dust it gently with a soft brush or microfiber cloth. Avoid soaking it or spraying it heavily with cleaner. If a piece loosens, reattach it with hot glue and a touch of stronger adhesive.
If the wreath hangs outdoors in a covered area, inspect it occasionally. Temperature changes and humidity can weaken glue over time. A quick seasonal check keeps your wreath from making a sudden and undignified leap from the door.
Conclusion: A Handmade Heart with Coastal Soul
A DIY driftwood heart wreath is a beautiful reminder that simple materials can become something special with a little creativity. You do not need fancy tools or expensive supplies. You need a sturdy base, clean driftwood, reliable glue, and the willingness to let imperfect pieces create a perfectly charming result.
This project is ideal for anyone who loves coastal décor, rustic crafts, natural textures, or handmade Valentine’s decorations that do not look like they were attacked by a glitter cannon. The finished wreath feels warm, personal, and quietly elegant. It has that lovely handmade quality that says, “Yes, I made this,” without also saying, “Please ignore the glue strings.”
Whether you hang it for Valentine’s Day, use it in a beach cottage, or keep it up all year, this driftwood heart wreath brings natural beauty and a touch of seaside romance into your home.
Experience Notes: What Making a Driftwood Heart Wreath Teaches You
One of the nicest things about making a driftwood heart wreath is that the project slows you down in a good way. It is not the kind of craft where every piece snaps into place with factory-perfect precision. Driftwood has knots, bends, splits, worn ends, pale streaks, and odd little angles. At first, that can feel inconvenient. Then you realize those irregularities are exactly what make the finished wreath interesting.
The first lesson is patience. Dry-fitting the pieces takes longer than expected, but it is worth every minute. You may place one stick, move it, rotate it, replace it, and then bring it back five minutes later like a contestant returning to a reality show. That is normal. The best layout usually happens after you stop forcing symmetry and start following the natural curves of the wood.
The second lesson is balance. A heart wreath needs a clear shape, but driftwood wants to be wild. The trick is to define the outline first, especially the top curves and bottom point, then build texture inside that shape. If the wreath starts looking too chunky on one side, add a few pieces to the opposite side. If the center opening gets too crowded, remove a piece or two. Editing is part of crafting, even when the material is basically fancy sticks.
The third lesson is that imperfections often become the best details. A curved piece can make the top of the heart look softer. A rough piece can add contrast against smoother wood. A tiny broken piece can hide a gap better than any perfectly shaped one. This is why driftwood crafts feel different from many store-bought decorations. They do not look identical, and they are not supposed to.
Another useful experience is learning how much glue is enough. Too little glue makes the wreath fragile. Too much glue creates shiny blobs that peek out like craft project confessions. The best approach is to glue where pieces touch the base and where pieces overlap, then press gently until the bond sets. After the wreath is finished, lifting it carefully and checking for loose spots helps prevent surprises later.
Styling the finished wreath is also part of the fun. On a white wall, it looks soft and coastal. On a dark door, the pale wood stands out dramatically. With a linen ribbon, it feels romantic. With jute twine, it leans farmhouse. With shells, it becomes beach cottage décor. The same wreath can shift moods depending on where and how you hang it.
Most of all, making a driftwood heart wreath teaches you to appreciate natural materials. Every piece of wood looks like it has traveled through weather, water, and time before landing in your hands. Turning those pieces into a heart feels meaningful without being overly sentimental. It is a small project, yes, but it has a quiet charm. And when someone compliments it, you get the excellent satisfaction of saying, “Thanks, I made it,” while pretending you were calm and organized the entire time.
Note: Before collecting driftwood from any beach, lake, riverbank, park, or protected area, check local rules and respect posted guidance. For a worry-free project, store-bought craft driftwood is a convenient and responsible option.


