Table of Contents >> Show >> Hide
- Why Mattresses Get Funky (and Why You’re Not Imagining It)
- Before You Deodorize: A 5-Minute Prep That Makes It Work Better
- The DIY Mattress Deodorizer Recipe (Pick Your Level of Extra)
- How to Use Your DIY Mattress Deodorizer (Step-by-Step)
- Odor-Specific Fixes (Because “Smelly” Is Not One Smell)
- Common Questions (So You Don’t Accidentally Create a Bigger Problem)
- Keep Your Mattress Fresher Longer (Prevention = Less Work)
- Real-World Experiences: What People Learn After They Try a DIY Mattress Deodorizer (Extra )
- Conclusion
Your mattress is basically the “quiet coworker” of your bedroom: it shows up every night, does its job,
and never complains. Unfortunately, it also absorbs sweat, skin oils, humidity, and the occasional
mystery smell that makes you sniff-test your own pillow like a suspicious detective.
The good news: you don’t need a pricey spray that smells like “Tropical Linen Volcano Breeze” to fix it.
A smart DIY mattress deodorizer can neutralize odors, freshen the surface, and help your bed feel cleaner
between deep cleanswithout soaking the mattress or turning your bedroom into a chemical fog machine.
Why Mattresses Get Funky (and Why You’re Not Imagining It)
Odors come from moisture + oils + time
Mattresses collect a little of everything: perspiration, body oils, dead skin cells, crumbs (no judgment),
and whatever the air carries insmoke, cooking smells, pet dander, pollen. Add humidity and time, and odors
don’t just “appear,” they build.
Allergens can make “stale” smell worse
Dust mites and their allergens concentrate in bedding and mattresses, which is one reason allergy symptoms
can feel worse at night or in the morning. That doesn’t mean your mattress is “dirty” in a moral sense
it means it’s a fabric-and-foam sponge living in a human habitat. The fix is routine maintenance:
wash bedding regularly, keep humidity in check, and use protective covers if allergies are a thing in your house.
Before You Deodorize: A 5-Minute Prep That Makes It Work Better
DIY deodorizer works best when you’re not sprinkling it on top of yesterday’s snack dust. Do this first:
- Strip the bed: sheets, pillows, comforter, mattress protectoreverything.
- Launder bedding: follow care labels; hot washing is often recommended for allergen control when fabrics allow.
- Vacuum the mattress: use an upholstery attachment and slow passes to pull up debris.
- Check for stains: treat spots before you deodorize so smells don’t “set up shop” under powder.
- Boost airflow: open windows (if weather/air quality allow) or run a fan to help moisture move out.
The DIY Mattress Deodorizer Recipe (Pick Your Level of Extra)
Option A: The Classic (Fast, Cheap, Works)
This is the simple, reliable approach: plain baking soda as a dry deodorizer. It’s widely recommended
for absorbing moisture and neutralizing odors on mattress surfaces.
- 1/2 to 1 cup baking soda (for a standard mattress surface, adjust as needed)
- Fine-mesh strainer or sifter (optional, but it helps distribute evenly)
Option B: The Oil-Absorbing Upgrade (Great for “Body-Odor” Beds)
If your mattress smell is more “gym bag adjacent” than “one-time spill,” add a little cornstarch.
It can help absorb oils while baking soda handles odor.
- 1/2 cup baking soda
- 1/2 cup cornstarch
Option C: The Spot-Specific Helper (For Stains That Bring Friends)
For localized stink (yellow sweat spots, small spills), you can use a targeted stain approach firstthen deodorize.
Keep it gentle and use as little liquid as possible. A commonly suggested approach is mild soap + water
for general stains, or vinegar-based spot treatment for odor spots, followed by baking soda once the area is only slightly damp.
Important: Always spot-test any liquid solution on a hidden area and avoid soaking foam.
A mattress should never feel “wet inside.”
How to Use Your DIY Mattress Deodorizer (Step-by-Step)
-
Vacuum first (yes, again)
Even if you vacuumed during prep, do a quick pass to lift lint and dust so powder can reach the fabric surface. -
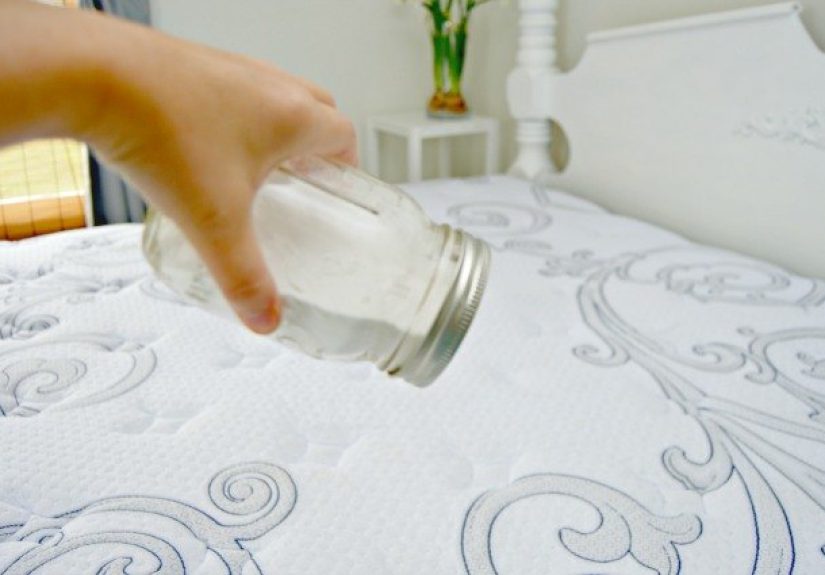
Dust the surface lightly
Use a sifter/strainer for an even layer. You’re not frosting a cake. A thin, consistent coat beats a baking-soda blizzard. -
Let it sit
Minimum: 20–30 minutes if you need a quick refresh. Better: a few hours. Best (if you can):
overnight for deeper deodorizingespecially in humid areas. -
Vacuum slowly and thoroughly
Use slow passes in overlapping rows. If you used a lot of powder, wipe the surface lightly with a dry cloth first,
then vacuum to reduce the load on your machine. -
Air it out
Leave the mattress uncovered for 30–60 minutes if possible. Fan + airflow helps carry away lingering odor molecules and moisture.
Odor-Specific Fixes (Because “Smelly” Is Not One Smell)
1) Sweat and “stale bedding” odor
Use Option B (baking soda + cornstarch) and let it sit for a few hours. Then:
- Wash sheets weekly (more often if you sweat heavily or have allergies).
- Use a washable mattress protector to stop oils and sweat from reaching the mattress fabric.
- Rotate the mattress per manufacturer guidance to reduce “body impressions” and odor hotspots.
2) Urine odor (kids, pets, “why is the dog proud?”)
Speed matters. If it’s fresh:
- Blot with clean towels (don’t rubpress).
- Mist lightly with cold water to dilute, blot again.
- Spot treat with a light vinegar solution (commonly recommended), blot.
- For pet accidents, use an enzyme cleaner per label directions (enzymes target odor compounds).
- Deodorize: cover the area with baking soda once it’s only slightly damp, let sit, vacuum.
- Dry fully: fan + airflow. If the smell persists, the liquid may have soaked deeper than the surface.
If urine reached the interior layers repeatedly, you may be fighting a “below the surface” problem. At that point,
professional cleaningor replacementcan be the more honest solution.
3) Musty / mildew smell
Musty odors usually mean moisture is hanging around too long. Deodorizer helps, but prevention is the real win:
- Control humidity: aim for roughly 30–50% if possible; keep it below ~60% to discourage mold growth.
- Increase airflow: don’t trap the mattress under heavy bedding all day; let it breathe.
- Don’t soak-clean a mattress. Light misting is okay; saturation is not.
If you see visible mold or smell persistent mildew despite drying, consider professional evaluationmold is not a DIY trophy.
4) Smoke, cooking, or “mystery perfume” odors
These odors can cling to fabrics. Do Option A (or B if oily) and give it timeovernight is ideal.
Then wash all bedding, curtains near the bed, and consider a HEPA air purifier if indoor odors are frequent.
Common Questions (So You Don’t Accidentally Create a Bigger Problem)
How often should I deodorize my mattress?
A good rhythm: light deodorize monthly or whenever the mattress starts smelling “lived in,” plus a
deeper clean every 6 months (or seasonally). If you have allergies, pets, or heavy sweating,
you may benefit from a more frequent schedule.
Is baking soda safe for every mattress type?
Generally, baking soda used as a dry deodorizer is considered low-risk for most mattresses.
The bigger risk comes from too much liquid (which can get trapped in foam) or
aggressive scrubbing that damages fabric. When in doubt, check your mattress care instructions.
Can this ruin my vacuum?
It canif you use a heavy layer of very fine powder and vacuum it up like it’s a beach cleanup operation.
Fine particles can clog filters and reduce suction. Use a light dusting, consider wiping up excess first,
and empty/clean your vacuum after.
Should I add essential oils?
Optionaland not for everyone. Essential oils can irritate sensitive skin/airways and may not be pet-safe in certain cases.
If you choose to use them, keep it minimal (a few drops mixed into dry powder), and skip them entirely if anyone in the home
has asthma, fragrance sensitivity, or you’re unsure about pet exposure.
Keep Your Mattress Fresher Longer (Prevention = Less Work)
- Use a washable protector: it blocks sweat, oils, and spills from reaching the mattress.
- Consider allergen encasements: especially helpful for dust mite control.
- Wash bedding weekly: sheets and pillowcases are odor’s favorite hiding place.
- Manage humidity: use AC or a dehumidifier in humid climates; keep airflow moving.
- Let the bed “air out”: pull back the covers in the morning for 15–30 minutes.
- Snack elsewhere: your mattress should not know what nachos smell like.
Real-World Experiences: What People Learn After They Try a DIY Mattress Deodorizer (Extra )
People tend to discover mattress odors in a few classic moments: the day they change sheets in bright daylight,
the week a humid spell hits, or the first time a friend sleeps over and politely says, “Your guest room is cozy!”
(Translation: they love you enough to lie to your face.) Here are common experiences and what they teach.
Experience #1: The “I used way too much baking soda” lesson.
A lot of first-timers assume more powder equals more freshness, so they dump on a thick layer and vacuum it up later.
The mattress smells betterbut the vacuum starts sounding like it’s chewing gravel. The takeaway is simple:
a thin, even dusting works because it makes contact with the fabric surface. If you can write your name in the powder,
you’ve gone past “deodorize” and into “DIY snowstorm.” People who switch to a sifter or strainer usually get the same results
with a fraction of the product.
Experience #2: The “odor came back” surprise.
Someone deodorizes, feels victorious, then notices the smell returns a week later. That’s usually not failureit’s feedback.
It often means the smell source wasn’t the mattress surface; it was the bedding, the protector (or lack of one), or room humidity.
Once people start washing sheets on a consistent schedule and keeping indoor humidity in a healthy range, the deodorizer becomes a
quick touch-up instead of a weekly rescue mission.
Experience #3: The “college dorm / small apartment reality check.”
In tight spaces, everything shares air. Cooking smells, smoke drifting in from outside, and even strong laundry scents can settle into textiles.
People in apartments often find the biggest improvement comes from pairing DIY deodorizer with airflow: cracking a window, running a fan,
and leaving the mattress uncovered for an hour after vacuuming. The deodorizer handles what’s on the mattress; ventilation handles what’s
floating in the room.
Experience #4: The “pet accident panic” that turns into a system.
After one urine incident, many people build a simple protocol: blot fast, use the right cleaner for the right mess, dry thoroughly,
and only then deodorize. The big “aha” is that odor control is a chainskip a step, and you chase the smell later.
Over time, households with kids or pets usually end up adding a waterproof protector (the washable kind) and keeping enzyme cleaner on hand.
Once that system exists, accidents become annoying instead of catastrophic.
Experience #5: The “essential oils didn’t feel like a win” moment.
Some folks love a subtle scent; others realize fragrance is not the same as cleanlinessand sometimes it’s a headache trigger.
A common pivot is to go fragrance-free on the mattress and make the room smell nice elsewhere (fresh sheets, a clean comforter,
or simply better air circulation). The best DIY deodorizer experience is the one where you stop noticing your bed entirely,
because “neutral and clean” doesn’t demand attention.
In the end, the most realistic “success story” isn’t a mattress that smells like a spa. It’s a mattress that smells like…nothing.
That’s the goal: a fresh, neutral sleep surface that’s easy to maintain, kinder to your lungs, and doesn’t require a weekly chemistry experiment.
Conclusion
A DIY mattress deodorizer is one of those rare home hacks that’s actually worth the hypewhen you use it wisely.
Start with a clean surface, use a light dusting, give it time to work, and vacuum thoroughly. Pair it with good habits
(washable protector, regular bedding laundry, humidity control), and you’ll spend less time “fixing” your mattress and more time
enjoying what it was designed for: sleep.