Table of Contents >> Show >> Hide
- Why a Wall Mail Sorter Works (When “A Pile” Doesn’t)
- Pick Your “Mail Sorter Personality”
- Smart Sizing: Build It to Fit Real Mail (Not Imaginary Mail)
- Materials and Tools (Beginner-Friendly, Not “Workshop TV Show”)
- Build Plan: A Simple 3-Slot DIY Wall Mail Sorter
- Mounting It Safely (Because Gravity Is a Hater)
- Make It Look Built-In (Not Like a “Random Thing on the Wall”)
- Upgrades Worth the Extra 15 Minutes
- Common Mistakes (So You Don’t Build a “Mail Launcher”)
- Quick FAQ
- Conclusion
- Experiences People Commonly Have After Building a DIY Wall Mail Sorter
If your mail pile has ever reproduced overnight like it’s auditioning for a nature documentary, you’re not alone. Bills, school flyers, coupon books you never asked for (but apparently legally “deserve”), and mystery envelopes that look important until you open them and it’s… a carpet-cleaning coupon. Again.
A DIY wall mail sorter is the simple, satisfying fix: it gets paper off your counter, gives your keys a home that isn’t “wherever your hand let go,” and turns your entryway into a small command center that quietly whispers, “We have it together.” (Even if you don’t.)
Why a Wall Mail Sorter Works (When “A Pile” Doesn’t)
Paper clutter isn’t a character flawit’s a system problem. When mail lands in the same spot as everything else, it becomes background noise. A wall-mounted mail organizer forces a decision: sort it, file it, pay it, shred it, or put it in the “deal with later” lane (which is… still better than “deal with never”).
- Vertical storage uses empty wall space instead of precious countertop real estate.
- Visible categories reduce “Where did I put that?” stress.
- One landing zone prevents mail from migrating through the house like an invasive species.
- Optional key hooks keep the essentials where you actually need them: on the way out.
Pick Your “Mail Sorter Personality”
There’s no single best designthere’s the design that matches your life. Choose based on what shows up in your mail and how your household behaves (no judgment; I’ve met households).
Option A: Classic Slot Sorter (Best for Daily Mail)
Think 2–4 angled pockets: Inbox, To Pay, To File, and Outgoing. This is the “I want my counters back” model.
Option B: Family Sorter (Best for School Papers)
Give each person a pocket. Kids get a slot for permission slips and artwork; adults get a slot for bills and grown-up paperwork. Everyone winsespecially you.
Option C: Entryway Mail Station (Best for Keys + Sunglasses + Sanity)
Add a small shelf ledge and hooks. Your wall organizer becomes a full entryway system: keys, sunglasses, wallet, dog leash, and yes, mail. It’s basically a personal assistant, minus the attitude.
Smart Sizing: Build It to Fit Real Mail (Not Imaginary Mail)
The secret to a useful wall mail sorter is dimension logic. Most mail is letter-sized paper, often folded, plus envelopes (including standard business envelopes). Your sorter pockets should comfortably hold letter paper without crumpling corners or forcing a “paper origami” moment every day.
Practical Pocket Dimensions (That Don’t Feel Fussy)
- Interior width: 11.5–12 inches (so letter paper fits flat)
- Interior depth (front-to-back): 6–7 inches (enough support without sticking way out)
- Front lip height: 2–3 inches (keeps items in, still easy to grab)
- Back height: 6–8 inches (holds a stack without slumping)
- Slot angle: a slight tilt helps visibility and prevents “paper slide-outs”
Want a compact footprint? A backboard around 10–12 inches tall and 14–18 inches wide is a sweet spot for most entryways. If you’ve got a busy household, go wider, not deeperwide adds capacity without turning your hallway into a bumper-car track.
Materials and Tools (Beginner-Friendly, Not “Workshop TV Show”)
You can build a mail sorter from scrap wood, store-bought pine, plywood, or even reclaimed boards. The goal is straight pieces and solid fastening, not a wood species that requires a pronunciation guide.
Materials
- Wood: 1x boards (pine/oak) or 3/4-inch plywood for the back and sides
- Bottoms/backs (optional): 1/4-inch plywood for lighter pockets
- Fasteners: wood glue + brad nails or screws
- Hanging hardware: keyhole hangers, D-rings, French cleat, or a stout sawtooth hanger
- Hooks (optional): coat hooks or pegs for keys and lanyards
- Finish: stain + clear coat, or paint + protective topcoat
Tools
- Measuring tape, pencil, level
- Drill/driver + bits
- Saw (miter saw, circular saw, or even a hand saw with patience)
- Sander or sanding block (your future self will thank you)
- Clamps (helpful) or “hold it with one hand and regret it later” (not recommended)
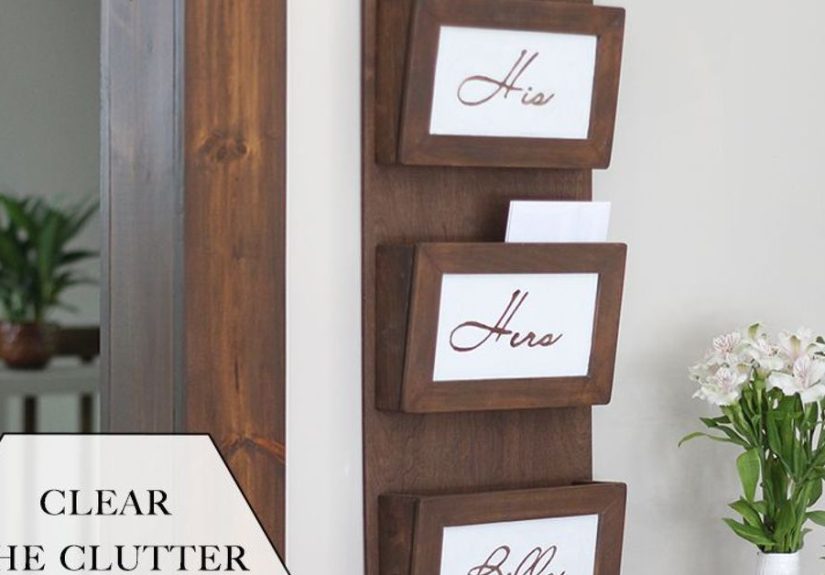
Build Plan: A Simple 3-Slot DIY Wall Mail Sorter
This design gives you three pockets and optional key hooksclean, modern, and customizable. You can swap labels to match your life: “Inbox / To Pay / Outgoing,” or “Mom / Dad / Kid,” or “Important / Probably Important / Definitely Junk.”
Step 1: Decide Your Layout
Before cutting wood, decide what the pockets are for. A sorter works when categories are obvious. If you don’t know where something goes, it will go… to the counter. (That’s the law.)
- 2 pockets: Inbox / To Do (minimalist and effective)
- 3 pockets: Inbox / To Pay / To File (classic)
- 4 pockets: Add Outgoing or “Kids”
Step 2: Cut the Backboard
Cut a backboard sized to your space (example: 10.5–12 inches tall, 15–18 inches wide). This is the “spine” that keeps everything alignedand makes the whole unit easy to mount.
Step 3: Build the Pockets
Each pocket is basically a shallow box with an open top. Cut sides, a bottom, a back, and a front lip. For clean lines, keep the same depth across pockets (around 6–7 inches). For easy grabbing, make the front lip shorter than the back.
Assemble with wood glue, then reinforce with brad nails or screws. If you’re using screws, pre-drill to avoid splitting (especially with pine, which loves to crack at the exact worst moment).
Step 4: Add “Anti-Sag” Support (Optional but Smart)
If you want a sturdy build without heavy lumber, add small triangular braces inside the pockets or use a solid back panel per pocket. This keeps the pocket rigid when it fills with school papers and other things that somehow weigh more than they look.
Step 5: Attach Pockets to the Backboard
Mark pocket placement on the backboard, then attach pockets one at a time. Use a level to keep everything straight. If your pockets drift, your sorter will look “handmade” in the way that means “crooked.” (There’s a difference.)
Step 6: Add a Top Ledge (Optional)
A small shelf at the top is perfect for sunglasses, a wallet, or that one pen that doesn’t disappear immediately. Keep it shallow so you don’t bonk it with your shoulder every time you walk by.
Step 7: Sand Like You Mean It
Sand edges and corners. You’re building something people will grab daily, not a medieval test of toughness. Knock down sharp corners and smooth the front lipsyour knuckles deserve better.
Step 8: Finish Before You “Can’t Reach the Crevices”
If your design has tight corners behind pockets, it’s easier to stain/paint pocket pieces before final assembly. If you’re staining, wipe it evenly and let it cure. If you’re painting, consider a protective topcoat where hands will touch (front lips and shelf).
Mounting It Safely (Because Gravity Is a Hater)
Your mail sorter might not look heavy, but paper stacks add up fast. The safest move is to mount into wall studs. If a stud isn’t available exactly where you want it, use quality drywall anchors rated for the load and follow installation instructions carefully.
Studs vs. Anchors: The Common-Sense Rule
- Best: screws into studs (especially if you add hooks and a shelf)
- Good: toggle-style anchors for heavier loads where studs aren’t available
- Okay: plastic anchors for light-duty versions (no shelf, no heavy hooks)
No Stud Finder? Use Household Tricks
You can often locate studs by finding where drywall screws are (a magnet helps), tapping for a solid sound, or checking near outlets/switches since electrical boxes are typically mounted near studs. When in doubt, confirm with a small test hole where it won’t show.
Make It Look Built-In (Not Like a “Random Thing on the Wall”)
Function matters, but a wall mail organizer lives in a high-traffic spot. If it looks intentional, you’ll actually use it. If it looks like a temporary solution, it will become… a permanent temporary solution.
Finishing Ideas That Age Well
- Modern: matte paint + clean edges + simple hooks
- Farmhouse/rustic: stain + light distressing + black metal hardware
- Scandi: natural wood + clear coat + minimal pegs
- Family command center: add a small cork strip or whiteboard panel beside it
Upgrades Worth the Extra 15 Minutes
A great DIY project becomes a daily tool when it anticipates real-life chaos. These small add-ons have outsized impact.
Labeling That Actually Gets Used
Skip fancy labels if you won’t maintain them. Try short, obvious categories. A label only works if your brain understands it instantly while carrying groceries.
- IN
- PAY
- FILE
- OUT
A “Tiny Shelf” for Daily Carry Items
The top ledge is the MVP: keys can hang, but sunglasses and wallets need a flat landing zone. Keep it shallow and put a small lip on it so items don’t slide off.
Hooks That Match Your Real Key Situation
If you have one keyring, you need one hook. If you have multiple drivers, dog walkers, or teenagers with lanyards that sound like wind chimesadd more hooks than you think you need. Future you will be smug about it.
Common Mistakes (So You Don’t Build a “Mail Launcher”)
Making Pockets Too Shallow
Shallow pockets look sleek, but mail corners curl and fall out. Aim for enough depth that paper stays supported.
Mounting Only to Drywall for a Heavy Build
If you add a shelf and hooks, the unit becomes a leverage machine. Use studs when possible or upgrade anchors to a heavy-duty style.
Overcomplicating the Design
A mail sorter’s job is to reduce decisions, not become a new project you manage. Keep categories simple, keep access easy, and don’t add features you won’t maintain.
Quick FAQ
How many slots do I need?
Start with 3: Inbox, To Pay, To File. If you consistently have outgoing mail, add a fourth. If you have kids, consider one slot per child.
Is plywood okay?
Yes. Good plywood is stable and strong. If you dislike visible edges, add thin trim or edge banding for a cleaner finish.
What’s the best location?
Put it where mail naturally enters your life: near the door, mudroom, or the spot where you drop your keys. If you have to walk across the house to use it, you won’t.
Conclusion
A DIY wall mail sorter is one of those projects that pays you back every day. It’s small enough to build in a weekend (or an ambitious afternoon), but it solves a real, recurring problem: paper clutter that steals time, space, and patience.
Build it to match your routine, mount it securely, and keep the categories simple. Do that, and you’ll stop “handling” mail five times before it finally leaves your counterbecause it won’t live there anymore. Your kitchen will feel calmer, your entryway will look sharper, and you’ll spend less time playing detective with envelopes.
Experiences People Commonly Have After Building a DIY Wall Mail Sorter
Once a wall mail sorter goes up, the first “experience” most people report is a strange silencelike the house is no longer whispering, “Hey, remember that bill?” from a pile on the counter. The sorter doesn’t magically eliminate mail, but it changes how mail behaves. Instead of spreading out, it stacks vertically in designated pockets. That alone makes it feel manageable, because your brain sees categories rather than chaos.
Another common realization: you don’t need more organizing productsyou need fewer decisions. People who succeed with a sorter usually keep labels blunt and obvious. The fancy labels are fun for about two days, and then life gets busy and nobody remembers whether “Action Items” means bills, school forms, or that coupon for pizza you’re emotionally attached to. The best lived experience is when every household member can walk in, drop something into the correct pocket without thinking, and keep moving.
Many DIYers also notice that pocket depth matters more than pocket count. A shallow pocket looks sleek, but it tends to become a mail trampoline: envelopes flip forward, paper corners curl, and you’ll find yourself re-stuffing the same items again and again. A slightly deeper pocket (still compact, just more supportive) creates a calmer daily interaction. You don’t have to “make it fit.” It just… fits. That’s the kind of small win that adds up.
Mounting is where people learn the mostsometimes the hard way. When a sorter includes key hooks, it gets tugged every single day. That repeated pulling force is why so many experienced DIYers prefer mounting into studs whenever possible. If someone mounts a heavy unit with light anchors, the “experience” becomes a slow wobble that grows over time until one day you notice it’s leaning like it’s trying to escape the wall. The fix is usually simple (better anchors or a stud-based mount), but most people would rather not do the “install twice” method.
A surprisingly positive experience is how the sorter becomes a routine trigger. People often pair it with a quick weekly reset: empty the “To File” pocket on Sunday, pay what’s in “To Pay,” and recycle the junk before it turns into a second job. The sorter makes that routine easier because you’re not hunting for papers in three rooms. It’s all in one place, lined up like it’s waiting for you to be productive. (No pressure. Just… waiting.)
Another pattern: once you build one, you start seeing “micro-problems” you can solve with small design tweaks. Some households add a tiny cork strip beside the sorter for reminders. Others add a shallow top ledge for sunglasses or a wallet. People with kids often upgrade to one pocket per child and instantly reduce the daily “Where’s your permission slip?” scavenger hunt. And yesalmost everyone eventually adds one more hook, because there’s always one more set of keys, one more lanyard, or one more dog leash that needs a home.
The best long-term experience is the subtle one: your surfaces stay clear more often, and you feel less behind. Not because you became a new person, but because your system stopped asking you to remember where you put things. The wall mail sorter becomes the default landing zone, and once that habit sticks, you’ll wonder why you tolerated the counter pile for so long. Then you’ll laugh, because you’ll probably still have a “miscellaneous drawer.” We’re organizing, not performing miracles.


