Table of Contents >> Show >> Hide
- Instagram Highlights, explained (and why they matter)
- Before you start: 3 quick checks (30 seconds each)
- How to Add Highlights on Instagram: 7 Easy Steps
- Step 1: Post a Story (or pick the Story you want to save)
- Step 2: Go to your profile and find the Highlights area
- Step 3: Choose “New” to create a Highlight (or select an existing one to add to)
- Step 4: Select the Stories you want included
- Step 4A (fast path): Add from a current Story
- Step 4B (classic path): Add from Story Archive
- Step 5: Name your Highlight (short, clear, and human)
- Step 6: Pick (or change) a cover image
- Step 7: Publish, then maintain (edit, remove, refresh)
- Troubleshooting: when the Highlight button plays hide-and-seek
- Best practices: make Highlights worth tapping
- of Real-World Experiences & Lessons (the kind you can actually use)
- Conclusion
Instagram Stories are like fireworks: bright, fun, and… gone before you can say “wait, I wanted to rewatch that.”
Instagram Highlights fix that. They let you pin your best Stories to your profile so people can binge them laterwithout
stalking your camera roll or scrolling back through ancient posts like an archaeologist.
Whether you’re a creator, a small business, or someone who just wants a tidy profile (because chaos belongs in group chats),
this guide walks you through how to add highlights on Instagram in seven simple stepsplus customization tips,
troubleshooting, and real-world scenarios you can copy.
Instagram Highlights, explained (and why they matter)
Instagram Story Highlights are collections of Stories that live on your profile beyond the usual 24-hour limit.
Think of them as “folders” people can tap to learn who you are, what you do, or what you’re obsessed with this month.
They’re especially useful because many profile visitors decide in seconds whether to follow you, click your link, or keep moving.
Highlights can do the heavy lifting your bio can’t:
- Answer FAQs (hours, pricing, booking, shipping, “yes, we’re dog-friendly”).
- Show proof (testimonials, reviews, before/after, client wins).
- Organize your content (travel, recipes, tutorials, behind-the-scenes).
- Guide new followers with a “Start Here” Highlight.
Before you start: 3 quick checks (30 seconds each)
1) Make sure Story Archive is turned on
Most people add Highlights using their Story Archive (expired Stories saved privately). If your archive isn’t enabled,
older Stories won’t appear when you try to build a Highlight later.
Quick mental checklist: if you can tap Archive on your profile and see old Stories, you’re good. If you can’t, turn it on first
(your app may place it under Privacy/Story or an “Archiving and downloading” area, depending on version).
2) Decide what your Highlights are “about”
Highlights work best when each one has a single job. Pick categories that match what visitors actually look for.
Examples:
- Creators: “Start Here,” “Collabs,” “Tips,” “Gear,” “Q&A.”
- Businesses: “Menu,” “Services,” “Reviews,” “FAQ,” “New,” “Location.”
- Personal: “Trips,” “Pets,” “Friends,” “Fitness,” “Food,” “Wins.”
3) Gather cover images (optional, but makes you look wildly organized)
You can use a frame from a Story as your cover, or choose a clean icon/image from your phone gallery.
Consistent covers make your profile look intentionaleven if your life is held together by iced coffee and reminders.
How to Add Highlights on Instagram: 7 Easy Steps
Step 1: Post a Story (or pick the Story you want to save)
If the Story is currently live, you can add it immediately. If it already expired, you’ll pull it from your Story Archive.
Either way, decide what this Story is “doing” for you (teaching, proving, selling, entertaining) so it lands in the right Highlight.
Example: A bakery posts a Story showing today’s croissant flavors. That belongs in “Menu” or “Daily Specials,” not “Behind the Scenes.”
Step 2: Go to your profile and find the Highlights area
Tap your profile icon, then look under your bio. Depending on your layout, you’ll see existing Highlight circles and a
New circle (or a plus-style option) to create a new Highlight. If you don’t see it, swipe left/right on the Highlight row
or check that you’ve posted Stories before.
Step 3: Choose “New” to create a Highlight (or select an existing one to add to)
Here you have two choices:
- Create a new Highlight: best for a new category like “FAQ” or “Start Here.”
- Add to an existing Highlight: best when the Story matches an existing bucket (like “Reviews” or “Trips”).
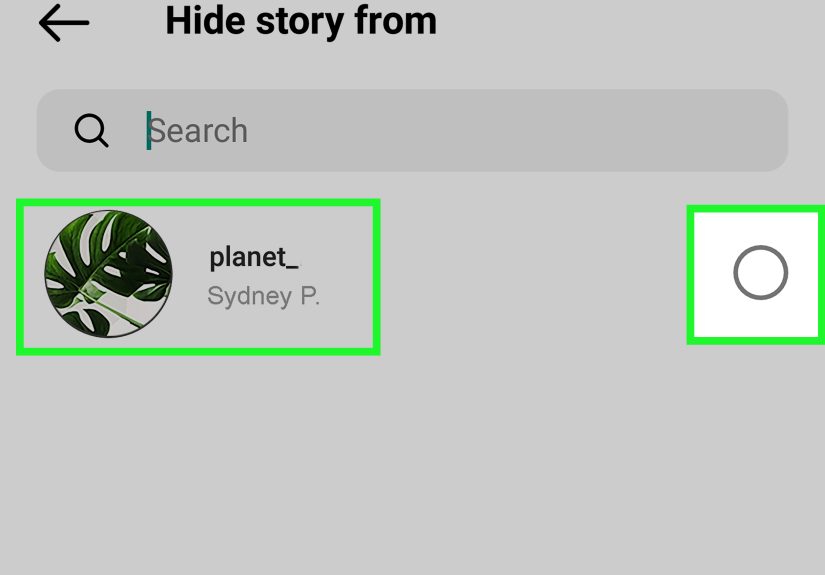
Step 4: Select the Stories you want included
This is where Instagram asks you to pick Storiesusually from your archive. Choose only what supports the Highlight’s purpose.
A Highlight should feel like a mini-playlist, not a junk drawer.
Step 4A (fast path): Add from a current Story
Open your active Story, then tap Highlight (typically near the bottom). Choose an existing Highlight or tap
New to make a fresh one. This is the quickest way to keep something important visible right away.
Step 4B (classic path): Add from Story Archive
From your profile, open your menu and go to Archive. Find the Story you want, open it, and tap the option to add it
to a Highlight (or create a new Highlight). This method is perfect when you’re building Highlights thoughtfullylike organizing a closet,
but with fewer mysterious cables.
Step 5: Name your Highlight (short, clear, and human)
Your title is your label. If it’s vague, people skip it. Keep it short and obvious:
- Good: “FAQ,” “Start Here,” “Prices,” “Tutorials,” “Reviews,” “Trips.”
- Meh: “Stuff,” “Random,” “Vibes,” “Things I like.”
Pro move: Use the words your followers would search for. If people ask “Do you ship?” then “Shipping” beats “Logistics” every time.
Step 6: Pick (or change) a cover image
Instagram will suggest a cover pulled from the Stories you selected, but you can usually edit it and choose a better frameor select a custom image
from your phone gallery if your app version allows it.
Example: For a “Reviews” Highlight, choose a clean screenshot of a 5-star review (or a simple icon), not a blurry video frame of someone’s elbow.
Step 7: Publish, then maintain (edit, remove, refresh)
Once you save, the Highlight appears on your profile. From there, you can long-press (or tap the “More”/three-dots option) to edit:
- Add more Stories to keep it current.
- Remove Stories that feel outdated (old promos, expired events).
- Rename if your category changes.
- Update the cover when you refresh branding.
- Delete a Highlight if it no longer serves a purpose.
Ordering tip: Highlights often shift based on recent updates. If you want a Highlight to appear first, add a new Story to itInstagram tends to
treat that Highlight as “recently active.”
Troubleshooting: when the Highlight button plays hide-and-seek
You don’t see “Highlight” on your Story
- Your Story might not be live anymoreuse Archive instead.
- Your app may be outdatedupdate Instagram and try again.
- Instagram sometimes tests layoutslook for “Add to Highlight,” “Highlight,” or similar wording.
Your old Stories aren’t in Archive
- Story Archive may have been turned off at the time you posted. Turning it on now helps future Stories, not necessarily past ones.
- If you deleted the Story, it may not be available to add to a Highlight.
You can’t find the “New” Highlight circle on your profile
- Swipe across the Highlight rowsometimes it’s hidden off-screen.
- Post at least one Story first (Highlights need Stories to exist).
- If Instagram is testing a different profile layout, check for a dedicated Highlights tab/section.
Best practices: make Highlights worth tapping
1) Build a “Start Here” Highlight for new visitors
Put your most helpful evergreen content up front:
who you are, what you offer, what to do next (follow, DM, book, shop, read).
2) Keep each Highlight tight
More isn’t always better. If a Highlight is 73 slides long, people will bail like it’s a group project meeting.
Aim for the strongest 10–20 slides per category, then rotate and refresh.
3) Use “FAQ” to reduce repetitive DMs
Save yourself time by answering the same questions once, clearly:
pricing ranges, shipping zones, availability, booking steps, contact method, returns policy, or “yes, the cat’s name is Muffin.”
4) Make covers consistent
Consistent covers (icons, colors, or simple text) signal clarity. Even if your content is playful, your navigation should be easy.
5) Refresh Highlights like you’d refresh a storefront window
Retire old promos. Add new wins. Update policies. Swap in better examples. Highlights are living contenttreat them that way.
of Real-World Experiences & Lessons (the kind you can actually use)
People usually learn Highlights the same way they learn how to carry three grocery bags in one hand: by trying, failing, and going,
“Okay, there’s got to be a smarter way.” Here are some common real-world scenarios and what typically works.
Scenario 1: The small business “Where do I start?” problem.
A local hair salon notices new followers DM the same three questions every day: price, location, and how to book. The owner creates three Highlights:
“Prices,” “Find Us,” and “Book.” The trick isn’t just making themit’s keeping them updated. The salon adds one new Story to “Prices” whenever
rates change, and drops expired promos from “Book.” Result: fewer repetitive DMs, more people arriving with the right expectations, and less time spent
typing the same answer 45 times like a polite robot.
Scenario 2: The creator who posts a lot… but nothing sticks.
A fitness creator posts daily workouts, but new visitors can’t tell what their content is “about” because yesterday’s Stories disappear. They build Highlights:
“Beginner,” “Core,” “Equipment-Free,” “Form Tips,” and “Meal Ideas.” The biggest lesson is organization: each Story gets filed into one bucket immediately
(from the active Story screen), so the archive doesn’t become a giant pile of “I’ll organize this later.” Spoiler: later never comes.
Scenario 3: The travel account with too many trips and not enough clarity.
A traveler tries one Highlight per country… and ends up with 46 circles that nobody taps. They switch to what visitors actually want:
“Itineraries,” “Hotels,” “Food,” “Budget,” and “Mistakes.” Then they use the cover images as clear icons (fork for food, map pin for itineraries).
Suddenly the profile feels navigable, and people can find value fasteven if they don’t care about a specific destination.
Scenario 4: The “my highlight covers look terrible” moment.
This happens to almost everyone. A random video frame becomes the cover, featuring a half-blink and a ceiling fan.
The fix is simple: choose a cleaner cover image and keep it consistent. Many people create covers in a design app, save them to their phone,
then update covers during a monthly “profile tidy” routine. It’s not about perfection; it’s about making your profile feel intentional.
Scenario 5: The student club that needs proof fast.
A school club wants new members, so they build Highlights like “Events,” “Join,” “Wins,” and “FAQ.” They add short Story clips from meetings,
photos from events, and quick “what we do” slides. The biggest win is the “Join” Highlight: it shows where to sign up, meeting times, and what to expect.
That removes anxiety for new people and makes joining feel easy. (Bonus: “FAQ” prevents the classic “When do you meet?” question every single week.)
The overall lesson: Highlights aren’t just decoration. They’re a mini navigation system. If you treat them like a helpful menunot a scrapbookyour profile
becomes easier to understand, easier to trust, and easier to follow.
Conclusion
Adding Highlights is one of the simplest ways to make your Instagram profile more useful. Post (or find) the Story, tap into Highlights, create or select
a category, name it clearly, choose a cover, and keep it updated. Do that consistently and you’ll turn “24-hour content” into a permanent profile asset that
keeps working while you sleep, study, or pretend you’re not checking notifications.


