Table of Contents >> Show >> Hide
- Quick Checklist (Read This Before You Peel Anything)
- Tools and Materials You’ll Want Nearby
- Step 1: Prep the Wall (Yes, This Is the “Unsexy” Step)
- Step 2: Calculate How Much Wallpaper You Need (So You Don’t Play “Find That Pattern” Later)
- Step 3: Let the Wallpaper Acclimate (A Small Step That Prevents Big Drama)
- Step 4: Plan Your Layout (Where You Start Matters)
- Step 5: Measure and Pre-Cut Your Panels (Work Smart, Not Mid-Air)
- Step 6: Hang the First Panel (Slow Peeling Wins the Race)
- Step 7: Add the Next Panels (Seams + Pattern Matching)
- Step 8: Trim the Excess (Crisp Edges = Professional Look)
- How to Wallpaper Around Outlets, Switches, and Wall Plates (Safely)
- Troubleshooting: Fix Bubbles, Wrinkles, and Misbehaving Seams
- Where Peel and Stick Wallpaper Works Best (and Where It Gets Moody)
- FAQ: Fast Answers for First-Time Installers
- Real-World Experiences: What People Wish They Knew Sooner (500+ Words)
- Conclusion
Peel and stick wallpaper is basically a giant, stylish sticker for your walls. Which sounds foolproof… until you’re standing on a step stool,
holding a floppy panel the size of a surfboard, trying to line it up straight while your cat judges you from the doorway.
The good news? You can get a smooth, professional-looking finishno paste, no panic, no mysterious wallpaper goo in your hair.
This guide walks you through peel and stick wallpaper installation step by step, including wall prep, measuring, pattern matching,
corners, outlets, seams, and how to fix bubbles when they inevitably try to audition for a role in your accent wall.
Quick Checklist (Read This Before You Peel Anything)
- Confirm your wall is friendly: clean, dry, smooth, and fully cured if freshly painted.
- Acclimate the wallpaper: let rolls/panels sit in the room so temperature/humidity don’t surprise-shrink your seams.
- Plan your start point: a straight first panel matters more than your confidence.
- Use the right tools: a level + smoothing tool will save your sanity.
- Go slow: peel a little backing at a time; smooth as you go.
Tools and Materials You’ll Want Nearby
You don’t need a workshop, but you do need a few basics. Gather these before you start so you’re not
trying to cut wallpaper with kitchen scissors like it’s arts-and-crafts night.
Must-haves
- Peel and stick wallpaper (same dye lot when possible)
- Tape measure
- Level (or laser level if you want to feel fancy)
- Pencil (light marks only)
- Utility knife or craft knife + extra blades
- Metal straightedge or long ruler
- Wallpaper smoothing tool/squeegee (felt edge is a nice bonus)
- Step stool or ladder
- Microfiber cloths
Nice-to-haves
- Seam roller (use gentlyno need to crush your wall)
- Painter’s tape (for temporary positioning and protecting trim)
- Spackle + putty knife + fine sandpaper (for wall repairs)
- Drop cloth (because gravity loves trimming scraps)
Step 1: Prep the Wall (Yes, This Is the “Unsexy” Step)
If peel and stick wallpaper fails, it’s usually not because the wallpaper is “bad.”
It’s because the wall is acting like a dusty frying pan.
Adhesive needs a surface that’s clean, dry, smooth, and firm.
Clean properly
- Remove dust with a dry microfiber cloth.
- Wipe the wall with a damp cloth (use mild soap if needed), then wipe again with clean water.
- Let the wall dry completely. “Mostly dry” is not a real thing in wallpaper world.
Fix bumps and holes
Fill nail holes or dents with spackle, let it dry, then sand smooth. Wipe away sanding dust.
Peel and stick wallpaper is not a magic filterit will highlight lumps like a phone flashlight under your chin.
Check your paint (and your patience)
Many manufacturers recommend waiting several weeks after painting before applying peel and stick wallpaper.
Fresh paint can feel dry but still be curing, which can affect adhesion and removal later. If you’re unsure,
waitfuture you will send present you a thank-you note.
Also, very flat/matte paint can sometimes be trickier for removability than eggshell, satin, or semi-gloss finishes.
If you’re renting or wallpapering temporarily, this matters.
What about textured walls?
Light texture (like subtle orange peel) may work depending on the brand, but heavy knockdown or deep texture often
causes poor adhesion and bubbling because air pockets form behind the paper. Your safest move is to order a sample
and test an inconspicuous area for a few days.
Step 2: Calculate How Much Wallpaper You Need (So You Don’t Play “Find That Pattern” Later)
Measure the height and width of each wall section you plan to cover. Add them up to get total square footage.
Then account for:
- Pattern repeat: larger repeats create more waste because you’ll trim to align the design.
- Extra allowance: it’s smart to buy a bit extra for trimming, mistakes, and future patching.
- Dye lot consistency: ordering later can mean slight color differences.
Pro tip: If you’re doing an accent wall, decide where you want the “hero” part of the pattern to landcentered behind a bed,
aligned with a vanity mirror, or framed around shelves. That planning makes the result look intentional, not accidental.
Step 3: Let the Wallpaper Acclimate (A Small Step That Prevents Big Drama)
Before installation, let your wallpaper sit in the room where it’ll be appliedoften for 24–48 hours depending on the brand.
This helps the material adjust to temperature and humidity so seams are less likely to shift later.
Think of it as letting your wallpaper “get comfortable” before it commits to your wall.
Step 4: Plan Your Layout (Where You Start Matters)
Most people want to start in a corner. Sometimes that works. Sometimes your corner is not actually square, and you end up
with a slow-motion diagonal disaster by panel three. Instead, aim for straight, not “corner.”
Choose your starting line
- If the wall is fairly square: start near a corner but use a guide line.
- If the wall is slightly off: start from a more visible “center” spot and work outward so any wonkiness hides near edges.
- If you’re papering around windows/doors: plan seams so tiny slivers don’t end up in obvious spots.
Make a plumb line (your best friend in this whole process)
Use a level to draw a light vertical line. This is your reference for the first panel.
If the first panel is straight, everything after it becomes dramatically easier.
If the first panel is crooked, the wallpaper will faithfully follow that bad decision forever.
Step 5: Measure and Pre-Cut Your Panels (Work Smart, Not Mid-Air)
Measure wall height and cut your first panel slightly longer than needed (usually 2–3 inches extra) so you can trim
neatly at the ceiling and baseboard. If your wallpaper has a pattern, check the repeat and pre-cut panels so the design
matches from one panel to the next.
Label as you go
Lay panels on the floor in order (Panel 1, Panel 2, etc.). This prevents you from accidentally installing Panel 4 upside down,
which is the wallpaper equivalent of wearing your shirt backward to school.
Step 6: Hang the First Panel (Slow Peeling Wins the Race)
- Position the top: Line up the panel edge with your plumb line. Leave a little extra at the top for trimming.
- Peel a small section of backing: Start with about 6–12 inches (or a couple of feet, depending on what you can manage comfortably).
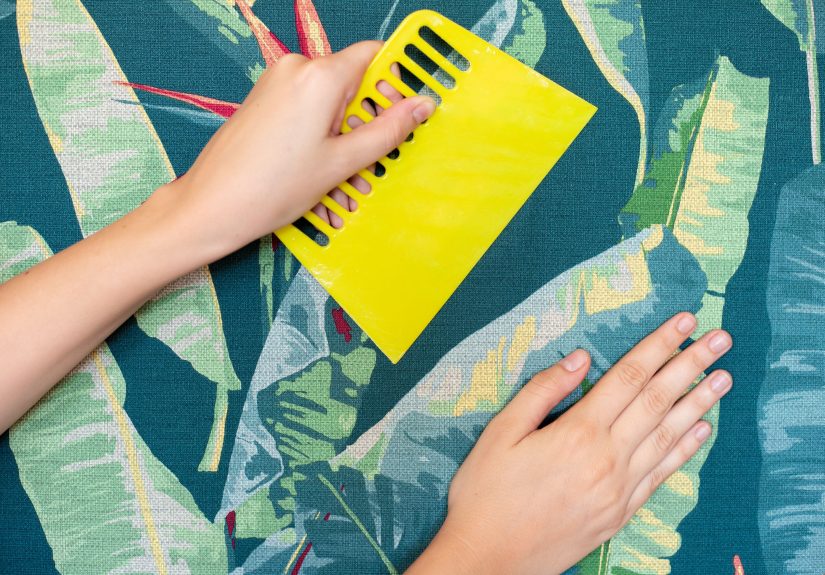
- Stick and smooth: Press the wallpaper to the wall, smoothing from the center outward to push air out.
- Continue downward: Peel more backing gradually while smoothing as you go.
Important: Don’t yank or stretch the wallpaper to “make it fit.”
Stretching can cause patterns to misalign and seams to pull back later.
Aim for gentle handling and consistent smoothing.
How to avoid bubbles while you work
- Keep one hand controlling the paper; use the other hand (or smoothing tool) to press outward.
- Work in smaller sectionsbig peels invite big wrinkles.
- If you trap air, lift the wallpaper back up slightly and re-smooth. Most quality peel-and-stick is repositionable.
Step 7: Add the Next Panels (Seams + Pattern Matching)
This is where peel and stick wallpaper goes from “fun weekend project” to “why do I suddenly hate geometry?”
The trick is consistency.
Butt seam vs. overlap: follow your product
Many peel-and-stick wallpapers are designed for butt seams (edge-to-edge without overlap).
Some guides suggest a slight overlap to prevent gaps. Your best bet is to follow the manufacturer’s instructions
for your specific wallpaper.
Pattern match like a pro
- Dry-align the next panel next to the installed one before removing the backing.
- Match the pattern at eye level first, then check top-to-bottom alignment.
- Stick the top section lightly, confirm the match, then continue downward.
If you notice a tiny gap at a seam, don’t spiral. Sometimes the solution is as simple as gently lifting and repositioning.
Another option is choosing wallpaper whose background color is close to your wall paint so seams are less noticeable.
Step 8: Trim the Excess (Crisp Edges = Professional Look)
Once a panel is fully applied and smoothed, trim excess at the ceiling, baseboards, and corners.
Use a metal straightedge and a sharp blade. Dull blades tear and snag, and nobody wants that.
Ceilings and baseboards
Press the wallpaper firmly into the edge (a smoothing tool helps), then run your straightedge along the line and cut.
Remove the trimmed strip slowly so you don’t tug the wallpaper.
Inside corners
Avoid trying to wrap one wide piece deep into an inside corner if your walls aren’t perfectly square.
A cleaner method is to trim so the wallpaper meets the corner neatly, then start the next panel with a fresh plumb line
on the adjacent wall if needed.
Outside corners
Outside corners get bumped, brushed, and generally bullied by life. For durability, many installers prefer to “turn” the paper
slightly around the corner (just a small amount) and then start the next piece on the adjacent wall.
If the corner is sharp and high-traffic, consider extra careful smoothing and clean cuts.
How to Wallpaper Around Outlets, Switches, and Wall Plates (Safely)
You can get a super clean finish around outlets and switches, but do it carefully:
- Turn off power at the breaker for the outlet/switch you’re working on.
- Remove the cover plate.
- Apply the wallpaper over the opening.
- Cut a small “X” from corner to corner inside the opening, then trim carefully to the edges.
- Reinstall the cover plate once everything is smooth and secure.
The cover plate will hide minor imperfections, so aim for neat and snug, not microscopic perfection.
Troubleshooting: Fix Bubbles, Wrinkles, and Misbehaving Seams
Bubbles while installing
If you see a bubble forming, stop and smooth it out immediately. Lift the wallpaper back slightly and reapply,
smoothing from the center outward.
Bubbles that appear later
In humid areas (or spaces with temperature swings), you may notice bubbling or seam separation over time.
First try re-smoothing firmly. If a small bubble refuses to leave, you can make a tiny pinhole to release trapped air
and smooth again. Keep it minimalthis is wallpaper, not a science fair volcano.
Wrinkles
Wrinkles usually mean too much backing was removed at once, or the wallpaper stretched. Gently peel back to the wrinkle,
re-align, and smooth slowly. If the material creased sharply, replacing that panel may be the cleanest fix.
Seams lifting
- Make sure the wall is clean (dust near trim is a common culprit).
- Press seams with a smoothing tool; use a seam roller lightly if you have one.
- Watch humidity and temperature changessome spaces are simply harder on adhesives.
Where Peel and Stick Wallpaper Works Best (and Where It Gets Moody)
Peel and stick wallpaper is great for:
- Accent walls
- Powder rooms (often easier than full baths)
- Bedrooms, offices, nurseries
- Bookshelf backs, laundry rooms, and other “small win” projects
It can be trickier in:
- High-humidity zones (especially if water hits the wall directly)
- Heavily textured walls
- Walls with fragile paint or poor surface prep
FAQ: Fast Answers for First-Time Installers
Can I install peel and stick wallpaper by myself?
Yesespecially on smaller walls. But for tall walls or large panels, a second person makes alignment and smoothing much easier.
Do I start from the top or bottom?
Most people start at the top so gravity isn’t fighting you. The key is to be consistent and use a plumb line
so the first panel is straight.
Will it damage my wall when I remove it?
Many peel-and-stick wallpapers are designed to be removable, but results vary based on paint type, wall condition,
how long it’s been up, and whether the wall was properly cured before installation. Testing a small area is smart.
Can I reposition it?
Many quality products allow repositioning during installation. Just avoid repeatedly sticking it to itself,
and keep the adhesive clean from dust and lint.
Real-World Experiences: What People Wish They Knew Sooner (500+ Words)
If peel and stick wallpaper had a slogan, it would be: “Easy… after you learn the three things nobody tells you.”
Here are the most common real-life experiences DIYers reportso you can skip the frustrating parts and get straight to the
“wow, I did that” moment.
1) The first panel is everything
People often assume corners are automatically straight. Then they apply Panel 1 perfectly aligned to the corner,
step back, and realize the design is leaning like it just heard a funny joke. That’s why the plumb line changes the game.
Once you commit to a straight guide, you stop “following the wall” and start “leading the wall.” It feels dramatic.
It is dramatic. It also works.
2) You don’t need speedyou need rhythm
A classic beginner move is peeling off a huge chunk of backing because you’re excited (or because you want to be done).
That’s when wrinkles appear, adhesive grabs before you’re ready, and the wallpaper tries to fold onto itself like a sticky burrito.
The smoother experience is to peel small sections, stick, smooth, and repeat. It’s almost like choreographing:
peel a little, press a little, smooth a little. The project takes longer, but the finish looks ten times betterand you don’t
spend that “saved time” fixing bubbles anyway.
3) Pattern matching is a brain teaserplan for it
Even confident DIYers get humbled by pattern repeats. The surprise isn’t that patterns repeatit’s how much extra material you
need to get the pattern to line up neatly at seams. People often think they “messed up cutting” when the real issue is
that the next panel needs to be shifted up or down to align the design. Laying panels out on the floor in order (and labeling them)
is one of those annoyingly simple habits that saves a lot of rework.
4) Texture and dust are the stealth villains
Many first-timers learn the hard way that walls can look clean and still be dustyespecially near baseboards, trim,
and around outlets. Dust weakens adhesion, and then seams start lifting in exactly the places you notice most.
Texture is similar: a lightly textured wall might “seem fine” on day one, but over time, tiny air pockets can encourage bubbles.
That’s why people who test a sample first usually have a smoother overall experience. It’s not overthinkingit’s a preview.
5) Two people isn’t cheatingit’s strategy
DIY culture loves a solo hero moment, but wallpaper rewards teamwork. A second person can hold the roll, keep the panel from
sticking to itself, and help align the pattern at the seam while you smooth. People who try it alone often report they can do it,
but they move slower, they take more breaks, and they use vocabulary that would make a sailor blush (even if they’re normally polite).
If you can recruit a helper for the first few panels, the rest usually feels easier.
6) The “last 10%” is what makes it look professional
The final smoothing pass, careful trimming with a sharp blade, and pressing seams firmly are what separate a decent DIY job from a
“wait… did you hire someone?” result. People often rush the ending because they’re tired. The better experience is to treat the last
panel like the first: slow, steady, and precise. Put on music, swap the blade, and finish strong.
Conclusion
Applying peel and stick wallpaper is absolutely doableeven for first-timersas long as you respect the basics:
prep the wall, acclimate the wallpaper, start with a plumb line, peel gradually, smooth patiently, and trim cleanly.
Do those things and you’ll end up with a crisp accent wall (or full-room makeover) that looks custom, not chaotic.
And if you get a bubble or two? Congratulationsyou’re officially part of the wallpaper club.


