Table of Contents >> Show >> Hide
- 1. Measuring Ingredients the Wrong Way
- 2. Using Ingredients at the Wrong Temperature
- 3. Overmixing or Undermixing the Batter
- 4. Choosing the Wrong Pan or Prepping It Poorly
- 5. Misbehaving Ovens: Wrong Temperature and Door-Gazing
- 6. Overbaking, Underbaking, and Doneness Confusion
- 7. Rushing Cooling and Frosting
- Bonus: What to Do If Your Cake Is Already a Disaster
- Real-Life Baking Lessons: Experiences to Help You Avoid Cake Mistakes
Few things are more heartbreaking than opening the oven and seeing your cake looking like a deflated balloon, a cracked desert, or a lopsided pillow. The good news? Most cake disasters are totally preventable once you know what went wrong. With a little baking science and some simple habits, you can go from “What happened?!” to “Who made this bakery-level masterpiece?”
This guide walks you through seven of the most common cake mistakes home bakers make and exactly how to avoid them. We’ll talk about ingredients, mixing, oven quirks, and even that awkward moment when the frosting slides right off a warm cake. Grab your whisk and let’s fix those flops.
1. Measuring Ingredients the Wrong Way
Why this mistake ruins cakes
Baking is basically food chemistry in an apron. Too much flour and your cake turns dry and dense. Not enough leavening and it won’t rise. Extra sugar can make it collapse in the middle. Many failed cakes trace back to casual “eyeballing” or scooping flour straight from the bag with a cup.
When you scoop flour with the measuring cup, you compress it and can accidentally add 20–30% more than the recipe intends. That’s a fast track to tough, dry crumb instead of soft, tender slices. Mis-measured baking powder or baking soda can cause overflowing, tunneling, or sunken centers.
How to avoid it
- Use the spoon-and-level method. Stir the flour, spoon it into a dry measuring cup, and level it with a straight edge. No packing, no tapping.
- Invest in a kitchen scale if you bake often. Weighing ingredients gives consistent results and makes it easier to follow recipes from pros.
- Measure leaveners carefully. Use proper measuring spoons and level off baking powder, baking soda, and salt. Tiny changes here can mean big changes in the oven.
- Follow the ingredient order. Don’t swap brown sugar for white sugar or cake flour for all-purpose unless the recipe says how.
2. Using Ingredients at the Wrong Temperature
Why cold butter and eggs cause problems
If you’ve ever ended up with curdled batter or a cake that’s gummy in the center and overdone on the edges, temperature might be the culprit. Many cake recipes call for “room-temperature butter and eggs” for a reason. When they’re too cold:
- Butter doesn’t cream properly with sugar, so you get poor aeration and heavy cakes.
- Cold eggs don’t mix smoothly into the butter-sugar mixture and can make it look broken or curdled.
- Cold batter takes longer to heat through, which can leave the center underbaked and edges too brown.
How to avoid it
- Plan ahead. Set butter and eggs out 30–60 minutes before baking. Butter should be cool and slightly soft, not oily or melting.
- Warm eggs gently. Forgot to take them out? Put whole eggs (in the shell) in a bowl of lukewarm water for 10 minutes.
- Know what “room temperature butter” feels like. When you press it, it should yield easily but still hold its shape. If your finger sinks in like it’s sunscreen on a beach day, it’s too soft.
3. Overmixing or Undermixing the Batter
What happens when you mix “wrong”
Mixing is where a lot of cake chaos begins. Once flour hits liquid, gluten starts forming. A little gluten gives the cake structure; too much gives you a rubbery chew. Overmixing whips in excess air and overdevelops gluten, which can cause a tall rise followed by a dramatic collapse or a tough, dry crumb. Undermixing leaves streaks of flour and uneven texture.
How to avoid it
- Cream butter and sugar just until light and fluffy. This step incorporates air, but stop once it looks pale and fluffy. You don’t need to beat it into oblivion.
- Add eggs one at a time. Beat well after each egg so the mixture emulsifies and doesn’t split.
- Mix dry ingredients in a separate bowl. Whisk together flour, leaveners, and salt so they’re evenly distributed before they meet moisture.
- Fold in dry ingredients gently. Use a spatula on low speed (or by hand) and stop as soon as you don’t see streaks of flour. A few small lumps are fine; overmixing is not.
4. Choosing the Wrong Pan or Prepping It Poorly
Pan problems, explained
You followed the recipe exactly, but your cake overflowed, baked unevenly, or refused to leave the pan without leaving half of itself behind. The pan might be to blame.
A pan that’s too small forces batter to rise too high and spill over. Dark metal pans can brown the edges faster than expected. Non-greased or unlined pans are almost guaranteed to tear chunks off the cake when you try to release it.
How to avoid it
- Match the pan size to the recipe. If it calls for two 8-inch rounds, don’t grab 9-inch pans and hope for the best unless you understand how to adjust baking time and fill level.
- Don’t fill pans more than two-thirds full. This gives the cake room to rise without overflowing.
- Grease and line the pan. Brush with butter or oil, dust lightly with flour, and line the bottom with parchment. For Bundt pans, use a baking spray that contains flour and get into every crevice.
- Use light-colored pans for most cakes. They promote even browning. If you use dark pans, reduce oven temperature by about 25°F and start checking doneness earlier.
5. Misbehaving Ovens: Wrong Temperature and Door-Gazing
Why your oven might be lying to you
Many home ovens run hotter or cooler than the dial suggests. That means a recipe that was tested at a true 350°F might be baking in your 385°F oven or limp along at 315°F. Too hot and the cake sets before it has fully risen and can crack or dome aggressively. Too cool and it rises slowly, then collapses in the center as the structure never fully sets.
Then there’s the classic “just a quick peek” problem. Every time you open the oven door, heat escapes. Temperature drops can cause cakes to sink, especially in the first two-thirds of the baking time.
How to avoid it
- Use an oven thermometer. Place it in the center of the oven and adjust your dial until the internal temp hits the target.
- Always preheat fully. Give the oven at least 15–20 minutes to stabilize at the right temperature.
- Resist opening the door. Use the oven light and window to check progress. If you must open it, wait until the cake is mostly set (near the end of the baking time) and be quick.
- Rotate only when necessary. In ovens with hot spots, rotate pans once, about two-thirds of the way through baking, and close the door promptly.
6. Overbaking, Underbaking, and Doneness Confusion
How timing goes wrong
Recipes give a time range, but your oven, pan material, batter temperature, and even oven rack position can shift reality. Relying only on the clock leads to cake that’s either dry and crumbly or gooey and underdone in the middle.
How to tell when your cake is actually done
- Use visual cues. The cake should pull slightly from the sides of the pan, look set in the center, and bounce back when lightly pressed.
- Try the toothpick test. Insert a toothpick or skewer into the center. A few moist crumbs are fine; wet batter means it needs more time.
- Use an instant-read thermometer for precision. Many butter-based cakes are done around 200–210°F in the center.
- Check early. Start checking 5–10 minutes before the earliest time listed in the recipe, especially if your oven tends to run hot.
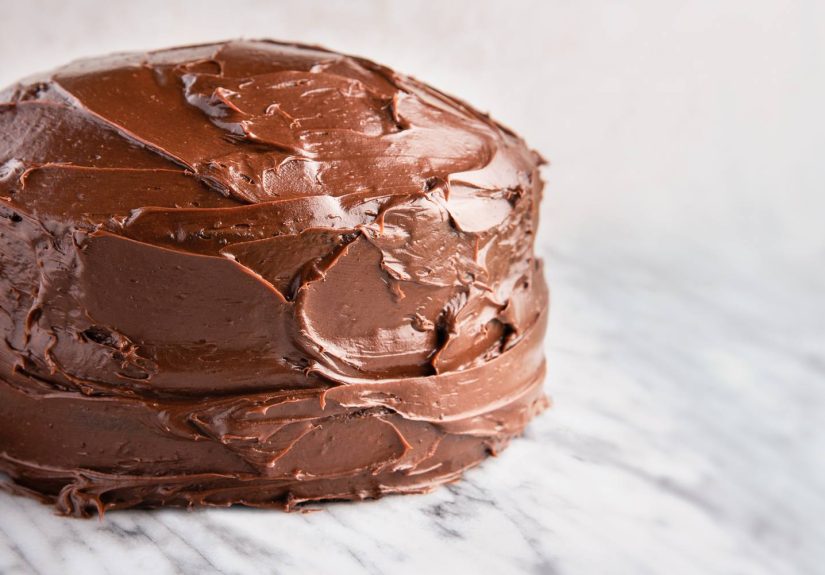
7. Rushing Cooling and Frosting
Why patience matters after baking
You did everything right and the cake looks beautiful. Then you spread frosting on a still-warm layer and it slides off like a landslide in slow motion. Or steam trapped under the frosting makes the crumb soggy.
Warm cake is fragile and releases moisture as it cools. If you frost it too soon, the structure can tear and the frosting will melt or separate. Cutting into it immediately also squashes the crumb and lets steam escape unevenly.
How to avoid it
- Cool in the pan briefly. Let cakes rest in the pan for about 10–15 minutes before turning them out.
- Finish cooling on a wire rack. Air should circulate around the cake so the bottom doesn’t get soggy.
- Wait until completely cool before frosting. The cake should feel room temperature to the touch. For layered cakes, some bakers even chill the layers slightly for cleaner assembly.
- Trim and level. If the cake domed, use a serrated knife or cake leveler to even the top before stacking and frosting.
Bonus: What to Do If Your Cake Is Already a Disaster
Even pros have cake fails. Instead of tossing the whole thing, try these rescue moves:
- Crumbly cake? Turn the pieces into cake pops, trifles, or parfaits layered with whipped cream and fruit.
- Sunken center? Cut out the middle and fill it with fruit, candy, or mousse for a surprise-inside cake.
- Burnt edges? Cool completely, trim off the dark bits, and disguise the rest with frosting or a generous shower of powdered sugar.
- Stuck to the pan? Patch together broken pieces with buttercream, chill, and then frost as usual. No one will know once it’s sliced.
Real-Life Baking Lessons: Experiences to Help You Avoid Cake Mistakes
The best cake wisdom usually comes from the bakes that went spectacularly wrong. Think of this section as a support group for “cakes that tried their best.” Here are some relatable experiences and what they teach us.
The Sunken Birthday Cake
Picture this: you promise a from-scratch birthday cake, cream the butter and sugar like a champ, and pop the pans in the oven. Half an hour later, they look great. Ten minutes after that, the centers have collapsed like tiny sinkholes. What happened?
This scenario often mixes several mistakes. Maybe the oven wasn’t fully preheated, so the cakes took longer to set. Maybe the door was opened repeatedly to “just check,” causing temperature drops. Or the leavening was slightly overmeasured, so the cake rose high and then crashed. The lesson: trust the process. Preheat thoroughly, measure leaveners carefully, and let the oven do its thing without constant interruptions.
The Rubber Cake That Could Double as a Frisbee
Another classic tale: you’re nervous about lumps in the batter, so you keep the mixer running “just a bit longer.” Five minutes later, the batter is silky smooth and glossy. It bakes up looking fine, but the texture is weirdly chewy, almost like a cake-flavored pancake.
This is what too much gluten development looks like. Overmixing after the flour goes in gives you sturdy, bready cakes instead of soft, delicate crumbs. The takeaway? Aim for “combined,” not “perfectly smooth.” Once the dry ingredients disappear, stop. A slightly lumpy batter will usually bake into a lovely, tender cake; an overmixed batter rarely forgives you.
The Frosting Slip-n-Slide
If you’ve ever tried to frost a cake in a hurry before guests arrived, you may have watched your beautifully piped swirls slowly slide down the sides like a melting snowman. Underneath, the cake was probably still warm.
Frosting is part science, part architecture. Buttercream is designed to sit on a cool, stable surface. When the cake is warm, the butter melts, the crumb loosens, and everything starts to move. Many experienced bakers now bake layers a day in advance, wrap them well, and chill or freeze them briefly before assembly. Working with cold cake layers gives cleaner edges, fewer crumbs, and less decorating rage.
The “Forgot the Sugar” Episode
Yes, it happens, usually when multitasking or baking late at night. The cake emerges pale and oddly firm, and one bite reveals the truth: no sugar. Besides sweetness, sugar helps with browning, moisture retention, and tenderness, so leaving it out produces a bland, dry sponge.
There isn’t a magical fix for a sugarless cake, but you can learn two big lessons from the experience: always read through the recipe before you start, and do a quick ingredient checklist as you go. Some bakers physically move ingredients from a “to use” side of the counter to a “used” side so they never lose track.
The Good News: Every Mistake Makes You a Better Baker
Most people who bake consistently have burned, sunken, or shattered a cake at some point. The difference between frustrated beginners and confident bakers is simply this: the confident ones kept going and paid attention to what the cake was trying to tell them.
If your cakes are often dry, you’ll start checking doneness earlier and be gentler with flour measurement. If they sink, you’ll buy an oven thermometer and respect that “don’t open the door” rule. If they stick to the pan, you’ll become best friends with parchment circles. Over time, these small adjustments add up to consistently impressive results.
So the next time a cake turns out less than perfect, resist the urge to call it a failure. Call it a lesson. Take a mental note, grab a fork, and enjoy a slice anyway. The more you bake, the fewer disasters you’ll haveand the more your kitchen will smell like success.


