Table of Contents >> Show >> Hide
- Before You Build: Make 3 Smart Decisions (So Your Herbs Don’t Stage a Protest)
- The Featured Build: A Freestanding Vertical Herb Garden Planter
- Tools and Materials
- Cut List (For a 64" Tall, 26" Wide Planter)
- Step-by-Step: Build the Frame
- Step-by-Step: Build the Planter Boxes
- Finish Options: Leave It Natural or Seal It
- Soil, Planting, and Layout: Set Your Herbs Up for Success
- Watering and Feeding: The Make-or-Break Routine
- Indoor Vertical Herb Planter Tips
- Common Problems (and Fixes That Don’t Involve Panicking)
- Easy Upgrades That Make Your Planter Feel Fancy
- Conclusion: Build It Once, Harvest for Months
If you’ve ever looked at your kitchen counter and thought, “This is less a cooking space and more a
basil parking lot,” you’re ready for a vertical herb garden planter. A vertical planter lets you grow a
bunch of herbs in a small footprinton a patio, balcony, fence, or even a sunny indoor wallwithout
turning your living space into an obstacle course of pots.
The goal of this guide is simple: build a sturdy, good-looking vertical herb garden planter that drains
properly, doesn’t rot after one rainy season, and makes harvesting herbs so easy you’ll start putting
fresh mint in water like you’re starring in a lifestyle ad. We’ll focus on a beginner-friendly, freestanding
design (so you don’t have to drill into your house), plus give quick options for wall-mounted builds.
Before You Build: Make 3 Smart Decisions (So Your Herbs Don’t Stage a Protest)
1) Pick the right spot: light, access, and gravity
Most herbs want bright light. Outdoors, a sunny location is ideal; indoors, aim for the brightest window
area you’ve got. If you can’t provide strong natural light, plan on a grow light so your basil doesn’t
become a pale, dramatic noodle.
Also think about water access. A vertical planter dries faster than in-ground beds because it’s basically
a stack of containers with more air exposure. You want to be able to water it easily and oftenwithout
needing a full hiking pack and emotional support.
2) Decide: freestanding or wall-mounted
- Freestanding: renter-friendly, portable, easy to move for sun, and no wall anchors required.
- Wall-mounted: saves floor space, looks sleek, but must be anchored into studs or solid structure.
3) Plan for drainage (the most unglamorous, most important part)
Herbs hate “wet feet.” Your planter needs drainage holes and a way for extra water to escape without
turning the lower tiers into a swamp. If you’re building indoors, you’ll also need drip trays or a catch
systemunless you’re hoping to grow mold as a bonus crop.
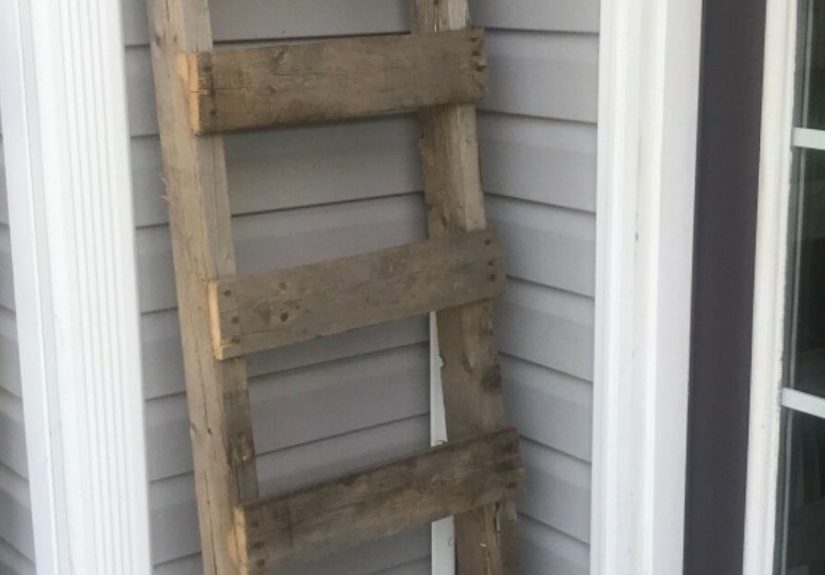
The Featured Build: A Freestanding Vertical Herb Garden Planter
This design is a simple A-frame (or “leaning ladder”) style planter with four removable planter boxes.
You can build it in an afternoon with basic tools. Use rot-resistant wood like cedar for longevity, and
keep the boxes shallow enough for herbs (most don’t need deep soil like tomatoes do).
Finished size (easy to adjust)
- Overall height: about 60–66 inches
- Width: about 24–30 inches
- Number of boxes: 3–5 (we’ll show 4)
- Box size (each): ~24″ long × 6″ wide × 6″ tall
Tools and Materials
Tools
- Measuring tape, pencil, speed square
- Miter saw or circular saw (a handsaw works if you’re patient)
- Drill/driver + bits
- Clamps (helpful, not mandatory)
- Staple gun (for liner)
- Sandpaper or sanding block
- Safety glasses (your eyeballs are not replaceable parts)
Materials
- Wood for frame: cedar 2x2s or 2x4s (2×2 keeps it lighter)
- Wood for boxes: cedar 1x6s (or fence pickets if you want a budget build)
- Exterior-rated screws (1-5/8″ and 2-1/2″ are useful sizes)
- Exterior wood glue (optional)
- Landscape fabric (or breathable liner fabric)
- 1/2″ staples
- Exterior finish (optional): outdoor oil, exterior-grade sealer, or leave cedar unfinished
- Potting mix (not garden soil)
- Herb seedlings or seeds
- Optional: drip trays, caster wheels, hooks, label tags
Cut List (For a 64″ Tall, 26″ Wide Planter)
Don’t stress these numbers like they’re a NASA launch sequence. This is woodworking, not a tax return.
Adjust to your space and the boxes you want to use.
Frame
- 2 × legs: 2x2s at 64″ (front legs)
- 2 × legs: 2x2s at 60″ (rear legs, if making an A-frame)
- 2 × top connectors: 2x2s at 26″
- 2 × bottom braces: 2x2s at 26″
- 4 × shelf cleats (supports for boxes): 2x2s at 24″
- Optional: 1 × back cross brace: 2×2 at ~26–30″ (helps stability)
Planter boxes (make 4)
- Front/back: 8 pieces of 1×6 at 24″
- Sides: 8 pieces of 1×6 at 6″
- Bottom slats: 16–20 pieces of 1×2 or ripped strips at 6″ (or a single 1×6 with drilled drainage holes)
Step-by-Step: Build the Frame
Step 1: Assemble the two side frames
Lay two legs on the ground to form one side of your stand. If you want the “leaning ladder” look,
angle the front legs slightly and keep the rear legs shorter so the frame leans back a bit. The lean helps
prevent tipping and improves sun exposure for lower boxes.
Attach a top connector between the legs. Pre-drill to avoid splitting and use exterior screws. Repeat for
the other side frame. You should now have two matching “side panels.”
Step 2: Connect both sides
Stand the side panels upright and connect them with bottom braces. Use a square to keep things aligned.
If you’re building on an uneven surface, aim for “stable” more than “perfect.” Herbs won’t judge your
angles; they’ll judge your watering schedule.
Step 3: Add shelf cleats (the box supports)
Decide spacing. A simple approach is to place the lowest box around knee height, then space upward
about 10–12 inches per level. Mark the same heights on both sides.
Attach a shelf cleat on each side at every level. These cleats are what the planter boxes sit on.
If you want removable boxes (highly recommended), don’t screw boxes into the cleatsjust let them rest
or use small stops to prevent sliding.
Step 4: Stabilize
Add a back cross brace if the stand has any wobble. If you’re putting this on a windy balcony, consider
adding L-brackets and anchoring the frame to a railing or wall (safely and according to your building rules).
Step-by-Step: Build the Planter Boxes
Step 1: Build a simple rectangle
For each box, connect the 24″ front/back boards to the 6″ side boards. Pre-drill and screw. If you use
glue, keep it minimal and exterior-rated.
Step 2: Add a bottom that drains
You have two good options:
- Slatted bottom: attach strips across the bottom with small gaps between. Great drainage and airflow.
- Solid bottom + holes: use a single board and drill multiple drainage holes. Faster build, still effective.
Step 3: Line the inside
Staple landscape fabric inside the box to keep soil from washing out while still letting water drain.
Don’t wrap it like a waterproof bagwater needs to escape. Trim excess fabric so it doesn’t flap around
like a tiny gardening cape.
Step 4: Sand the rough edges
Quick sanding prevents splinters and helps finishes stick. Your fingers will thank you later, especially during
“I just need a handful of cilantro” moments.
Finish Options: Leave It Natural or Seal It
Cedar can be left unfinished outdoors and will weather to a silvery gray. If you want to keep the color or
add extra protection, choose an outdoor-rated, plant-safe sealer. Avoid heavy interior varnishes for outdoor use;
they can peel, and peeling is not a cute look for a garden.
Soil, Planting, and Layout: Set Your Herbs Up for Success
Use potting mix, not garden soil
Potting mix is lighter and drains better than garden soil, which can compact in containers and suffocate roots.
This matters even more in vertical planters, where water movement and airflow are different at each level.
Pre-moisten before planting
Dry potting mix can repel water at first. Moisten it until it’s evenly damp (not soggy) before filling boxes.
You’re aiming for “crumbly brownie” texture, not “soup.”
Group herbs by water needs
- More water: basil, parsley, cilantro, chives
- Drier side: rosemary, thyme, oregano, sage
- Special case: mint (best in its own pot/box because it spreads like it’s paying rent)
Smart vertical layout (top to bottom)
- Top: drought-tolerant herbs (thyme, rosemary) because top tiers dry fastest.
- Middle: most “standard” herbs (oregano, chives, sage).
- Lower tiers: herbs that like consistent moisture (parsley, cilantro) because runoff may help here.
Watering and Feeding: The Make-or-Break Routine
How often should you water?
Check the soil daily in warm weather. A simple test: if the top inch feels dry, it’s time to water.
Water thoroughly until you see water exiting the drainage (then stopthis is gardening, not a pool fill).
Avoid “sips” (light watering) that train weak roots
Frequent light watering encourages shallow roots and can concentrate salts near the surface. Instead, water
deeply and let excess drain. Your herbs want a steady routine, not random tiny drinks like they’re sampling a flight.
Fertilizer basics
Container herbs use up nutrients faster than in-ground plants. A slow-release fertilizer mixed into the potting mix
can keep growth steady, or you can use a diluted liquid feed periodically. Go easyover-fertilizing can reduce flavor.
Nobody wants basil that tastes like “generic green.”
Indoor Vertical Herb Planter Tips
Protect your wall and floor
- Use drip trays under each box, or a long tray beneath the stand.
- Water over a sink/tub if boxes are removable.
- Consider a waterproof backing panel behind the planter.
Light and airflow matter more indoors
If you don’t get strong daylight, add a grow light. Also keep some airflow around the plants to reduce mildew.
Herbs like a bright, breezy vibethink “sunny windowsill,” not “humid cave.”
Common Problems (and Fixes That Don’t Involve Panicking)
Wilting at noon
Some herbs wilt in intense sun but recover later. If they stay wilted, water deeply and check drainage. If soil is soggy,
you may be overwatering or the box isn’t draining well.
Yellow leaves
Often a sign of too much water or poor drainage. Let soil dry slightly, ensure holes aren’t blocked, and avoid letting
lower tiers sit in collected runoff.
Pests (aphids, spider mites)
Start with a strong spray of water to knock pests off. If needed, use an herb-safe approach like insecticidal soap per label directions.
Check the undersides of leavespests love hiding there like tiny villains in a low-budget movie.
Easy Upgrades That Make Your Planter Feel Fancy
Add wheels
A set of locking casters lets you chase the sun or escape harsh weather. Also great for cleaning behind the planter
without doing yoga against a wall.
Install a simple drip line
A gravity-fed drip system can keep watering consistentespecially helpful if you travel or forget watering
until your basil starts looking like it has opinions about your lifestyle.
Label everything
“I’ll remember which one is thyme.” Famous last words. Labels save time and prevent accidental rosemary-in-the-cilantro-salsa moments.
Conclusion: Build It Once, Harvest for Months
A vertical herb garden planter is one of the best DIY projects for small-space gardeners because it delivers daily value:
fresher cooking, nicer outdoor vibes, and the satisfaction of building something that actually gets used. Keep the build
sturdy, prioritize drainage, use quality potting mix, and water like a responsible plant parent (not like someone who remembers
plants exist only when guests come over).
Real-World Experience: What Actually Happens After You Hang It Up
Here’s the part most tutorials skip: living with a vertical herb garden planter is a tiny lifestyle change. The first week,
people usually overwater because they’re excited. It’s the gardening version of buying a new water bottle and immediately
drinking five gallons. The planter looks amazing, but the lowest tier may stay damp if runoff collects there. The fix is simple:
check each level separately. In many setups, the top boxes dry out first, while the bottom boxes act like they’re holding onto
moisture “just in case.” Once you learn that rhythm, you stop watering everything the same way and your herbs instantly look happier.
In a typical apartment balcony setup, the biggest surprise is wind. A vertical planter catches breezes like a sail, especially if
it’s tall and light. People solve this by adding a cross brace, placing heavier boxes on lower tiers, and securing the stand to a railing.
After that, the garden becomes a “moveable feast”you can roll it into the sun in the morning and tuck it closer to the wall when storms
roll in. That mobility also helps with seasonal adjustments: early spring sun angles change, and being able to shift the planter by a few feet
can be the difference between thriving basil and basil that acts like it’s on strike.
Indoors, the experience is different: it’s less about weather and more about light and mess. People love the look of a living herb wall in a kitchen,
right up until the first watering day when they realize gravity is undefeated. The most successful indoor setups use removable boxes or inserts,
so watering happens in the sink and the planter goes back up clean. A drip tray system also turns “I hope this doesn’t leak” into “I can relax.”
Once that’s handled, indoor herb planters become a habit-builder: grabbing a few sprigs while cooking feels effortless, so herbs get used more often
and wasted less. Many gardeners report they stop buying plastic clamshell herbs because the planter gives them “just enough” on demand.
There’s also a flavor lesson that shows up fast: herbs grown in containers can taste more intense when they’re not over-fertilized.
People often assume faster growth equals better herbs, but a gentle feeding schedule tends to produce better flavor. Another common discovery is
that mint and oregano have big personalities. Mint especiallyput it in a shared box and it may try to take over like it’s auditioning for a superhero movie.
That’s why experienced vertical gardeners isolate mint in its own container (or even its own box) and trim it aggressively.
By month two, the planter becomes part of the routine. You’ll notice which herbs you actually cook with and which ones were more of a “this seems
like the kind of herb I should like” purchase. A lot of people swap out underused plants for favoritesmore basil, more chives, more parsleyand the
vertical planter gets better over time because it evolves with your kitchen habits. The best part? When you hand a friend a clipping of thyme or a handful
of basil and casually say, “Oh, that’s from my vertical herb planter,” you will feel approximately 27% more capable as a human.


