Table of Contents >> Show >> Hide
- ZZ Plant Basics (So You Know What You’re Working With)
- Light: The Sweet Spot (and the “It’ll Survive” Spot)
- Watering: The #1 Way People Accidentally Bully Their ZZ Plant
- Soil and Pot Choice: Drainage Is the Whole Game
- Temperature and Humidity: Easygoing, Not Arctic-Proof
- Fertilizer: Optional, but Useful (Like a Good Mattress)
- Pruning and Cleaning: Make It Look Expensive (Without Buying a New Plant)
- Repotting: When to Do It (and How Not to Panic)
- Propagation: Three Ways to Multiply Your ZZ Plant (Slowly, But Surely)
- Common ZZ Plant Problems (and What Plant Pros Do About Them)
- ZZ Plant Care Checklist (Plant-Pro Simple)
- Experience Notes: What It’s Really Like Living With a ZZ Plant (500+ Words)
- Conclusion: The Plant-Pro Philosophy for ZZ Plant Care
The ZZ plant (Zamioculcas zamiifolia) has a reputation that sounds suspiciously like a dating profile:
“Low-maintenance. Tolerates neglect. Looks great in any lighting.” And honestly? It mostly lives up to the hype.
Plant pros love it because it’s tough, tidy, and surprisingly adaptablethanks to chunky underground rhizomes that
store water like a tiny savings account for dry times.
But “hard to kill” isn’t the same as “impossible to mess up.” Most ZZ plant problems are self-inflicted
(we’ll talk about overwateringyes, again). This guide breaks down what the pros actually do to keep ZZ plants
glossy, upright, and thrivingwithout turning your living room into a greenhouse science experiment.
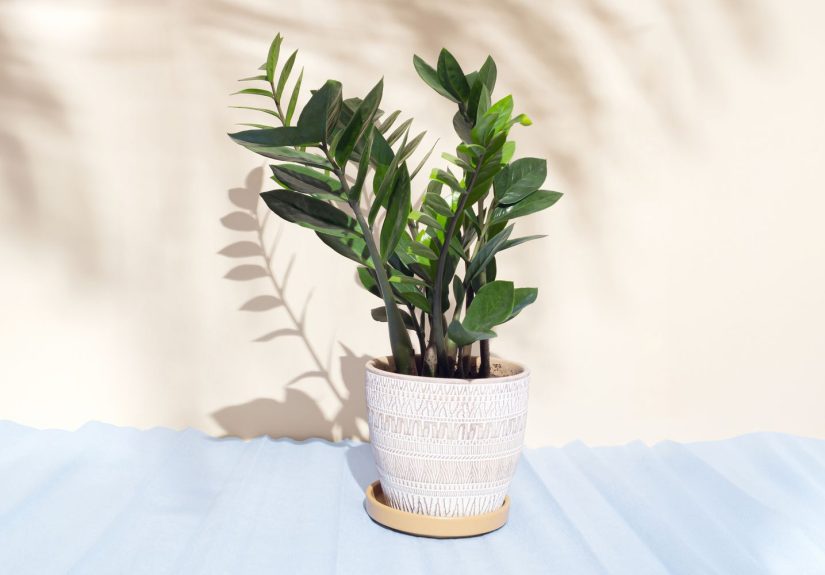
ZZ Plant Basics (So You Know What You’re Working With)
What a ZZ plant wants (in one sentence)
Bright, indirect light if possible; low light if necessary; and water only after the potting mix dries out
most of the wayplus a pot that drains like it’s late for an appointment.
Why it’s so forgiving
- Rhizomes store water, so it can handle missed waterings.
- Waxy, sturdy leaves lose moisture slowly.
- Slow growth means it doesn’t demand constant feeding and fussing.
A quick safety note
ZZ plants contain irritating compounds and are considered toxic if chewed or swallowed by pets or people.
Keep them out of reach of curious nibblers. If you’re sensitive to plant sap, wear gloves when pruning or
repotting.
Light: The Sweet Spot (and the “It’ll Survive” Spot)
Best light for fastest, healthiest growth
Plant pros generally aim for bright, indirect light. Think: near an east-facing window,
or a few feet back from a bright south- or west-facing window with a sheer curtain. In brighter conditions,
ZZ plants grow fuller and produce new stems more reliably.
Can a ZZ plant live in low light?
Yesthis is the famous part. ZZ plants tolerate low light and can even handle fluorescent office lighting.
The trade-off is slower growth and sometimes slightly leggier stems over time.
Direct sun: friend or foe?
Direct, harsh sunlight can scorch leaves. If you see pale patches, crispy edges, or “why does this leaf look
lightly toasted?” vibes, move the plant back from the window.
Pro tip: Rotate the pot a quarter turn every couple of weeks so growth stays even and upright.
Watering: The #1 Way People Accidentally Bully Their ZZ Plant
The golden rule
Water only when the soil is mostly drynot “the top looks dry,” but “several inches down feels
dry.” ZZ plants would rather be slightly thirsty than constantly damp.
How often should you water a ZZ plant?
There’s no universal schedule because homes vary. But as a real-world baseline, many growers end up watering:
- Every 2–3 weeks in brighter light and warmer months (sometimes less).
- Every 3–5+ weeks in winter or in lower light.
If you only remember one thing: when in doubt, wait. A ZZ plant can bounce back from being dry.
It may not bounce back from root rot.
How to water correctly (the “deep drink” method)
- Check moisture 2–3 inches down (finger test or moisture meter).
- Water thoroughly until excess drains out the bottom.
- Empty the saucer or cachepotno “foot baths.”
Signs you’re overwatering
- Yellowing leaves (especially multiple leaves at once)
- Mushy stems near the base
- Soil that stays wet for a week+
- Musty smell from the pot
Signs you’re underwatering
- Wrinkling stems or drooping that improves after watering
- Dry, crispy leaf tips (less common than overwatering issues)
- Potting mix pulling away from the pot edges and becoming hard to re-wet
Soil and Pot Choice: Drainage Is the Whole Game
Best potting mix for ZZ plants
Pros use a well-draining mix that doesn’t stay soggy. A simple formula:
- 2 parts quality indoor potting mix
- 1 part perlite or pumice
- Optional: a handful of orchid bark for extra airflow
Choose the right pot
The best pot is the one with drainage holes. Full stop. Terra-cotta can help the mix dry
faster; plastic holds moisture longer. Either can work if you adjust watering.
Pot size matters (and smaller is often better)
ZZ plants don’t mind being a bit snug. A pot that’s too large holds extra wet soil, which raises the risk of
root rot. When repotting, many pros go up only 1–2 inches in diameter.
Temperature and Humidity: Easygoing, Not Arctic-Proof
Temperature
ZZ plants prefer typical indoor temperaturesgenerally in the warm, comfortable range.
Keep them away from cold drafts, blasts from AC vents, or windowsills that get chilly at night.
Humidity
Average household humidity is fine. You don’t need a humidifier dedicated to your ZZ plant
(save that for fussier tropicals). Just avoid placing it directly over a heater.
Fertilizer: Optional, but Useful (Like a Good Mattress)
How often to fertilize
ZZ plants are light feeders. If you want faster growth and richer color, use a balanced houseplant fertilizer
sparingly during the growing season (spring through early fall). Many pros fertilize only a
few times per year.
How to avoid fertilizer drama
- Dilute to half-strength if you’re nervous (a valid lifestyle).
- Don’t fertilize a dry plantwater first, then feed.
- Skip fertilizer in winter when growth slows.
Pruning and Cleaning: Make It Look Expensive (Without Buying a New Plant)
Pruning
Remove yellowing or damaged stems by cutting them at the soil line with clean shears. ZZ stems don’t branch
from a cut point the way some plants do; pruning is mainly for tidiness and removing stressed growth.
Cleaning leaves
Dust dulls the signature shine and can reduce light absorption. Wipe leaves with a damp microfiber cloth.
Skip heavy leaf-shine products; a simple wipe is usually plenty.
Repotting: When to Do It (and How Not to Panic)
When to repot a ZZ plant
- Roots circling the pot or poking from drainage holes
- The plant dries out unusually fast (and you’re sure it’s not just summer)
- The pot cracks or bulges (yes, ZZ rhizomes can be that strong)
How to repot like a plant pro
- Choose a pot with drainage holes, only slightly larger than the current one.
- Slide the plant out gently; loosen the outer roots a bit.
- Inspect for rot (black, mushy roots) and trim anything unhealthy.
- Replant in fresh, well-draining mix. Keep the crown at the same depth.
- Water lightly, then wait until the mix dries again before the next watering.
Pro-level patience: ZZ plants may pause after repotting. A short “I’m processing my feelings”
phase is normal.
Propagation: Three Ways to Multiply Your ZZ Plant (Slowly, But Surely)
1) Division (fastest and most reliable)
If your ZZ is mature and has multiple clumps, division is the quickest way. During repotting, gently separate
the rhizomes so each new section has roots and at least one healthy stem. Pot each division in fresh mix and
water sparingly at first.
2) Stem cuttings (water or soil)
Cut a healthy stem at the base. You can root it in water (change water regularly) or place it in a chunky,
lightly moist mix. Expect roots and rhizome formation to take months, not days. ZZ plants do not rushever.
3) Leaf cuttings (the slowest option, but oddly satisfying)
Individual leaves can root and form tiny rhizomes, but it can take several months before you see meaningful
progress. If you enjoy long-term projects, this is your hobby.
Propagation reality check: If you need a “new plant by next Tuesday,” choose a different plant
(or a different Tuesday).
Common ZZ Plant Problems (and What Plant Pros Do About Them)
Yellow leaves
The most common cause is overwatering. Let the mix dry fully, improve drainage, and consider
switching to a chunkier soil. If the plant is severely affected, unpot it and check for rot.
Stems falling over
This can happen from low light (stretching) or inconsistent watering. Move the plant to brighter indirect light,
rotate the pot, and water only when mostly dry. You can also stake temporarily, but better light usually fixes
the underlying issue.
Brown tips or crispy edges
Often caused by inconsistent watering, very dry air near heating, or mineral/salt buildup in the soil.
Flush the pot occasionally (water thoroughly to rinse salts) and keep the plant away from heat vents.
Root rot
If stems are mushy and the mix smells sour, act quickly:
- Remove the plant from the pot and discard soggy soil.
- Trim rotten roots/rhizomes with clean tools.
- Let healthy parts dry briefly (surface-dry, not shrivel).
- Repot in fresh, fast-draining mix and reduce watering.
Pests
ZZ plants aren’t pest magnets, but they can still get mealybugs or scale. Wipe leaves, isolate the plant,
and treat with insecticidal soap or horticultural oil as needed. Consistent inspection beats surprise
infestations.
ZZ Plant Care Checklist (Plant-Pro Simple)
- Light: Bright indirect best; low light tolerated.
- Water: Only when mostly dry; drain excess.
- Soil: Chunky, well-draining mix; no swampy pots.
- Pot: Drainage holes required.
- Fertilizer: Optional; light feeding in spring/summer.
- Maintenance: Wipe leaves, rotate pot, prune yellow stems.
- Repot: When crowded or pot deforms; size up slightly.
Experience Notes: What It’s Really Like Living With a ZZ Plant (500+ Words)
If you ask plant pros why they recommend ZZ plants so often, you’ll hear the same theme: this plant is a
confidence-builder. It’s the houseplant equivalent of a friend who doesn’t mind if you’re five minutes late,
forgot to text back, and showed up wearing mismatched socks. Many indoor gardeners start with a ZZ plant
because it survives the learning curvethose early months when you’re still figuring out that “loving plants”
is not the same thing as “watering them constantly.”
One of the most common experiences people report is the “nothing is happening” phase. You bring
home a ZZ plant, place it in a nice spot, and then… it just sits there, looking glossy and smug. Weeks pass.
You water (probably too soon). Still nothing. Then, months later, a new shoot appears like a green periscope,
and suddenly you’re convinced you’re a botanical genius. Plant pros smile at this because it’s normal: ZZ plants
are slow growers, and they often push new stems in bursts rather than steadily.
Another very real, very relatable moment is the first time you realize the pot is heavier than it should
be. A ZZ in a decorative cachepot looks greatuntil water collects at the bottom. Many plant parents
learn (the hard way) that a ZZ plant will not send a polite calendar invite before it starts rotting. Instead,
it quietly declines, leaf by leaf, until you notice yellowing and think, “Maybe it needs more water!”
(No. It did not need more water.) Pros often recommend the “lift test”: after watering, feel how heavy the pot
is; as it dries, it gets noticeably lighter. That physical cue becomes a surprisingly accurate schedule, and it
helps people stop watering based on vibes.
There’s also the lighting lesson. ZZ plants tolerate low light, so people tuck them into dim corners where other
plants would sulk. The ZZ survives, which is impressive, but it may grow slowly or lean toward the nearest
light source. Many owners eventually move it a bit closer to a windowstill out of direct sunand notice the
plant becomes sturdier and more upright. The experience here is subtle but important: “low light tolerant” isn’t
the same as “low light thriving.” Plant pros love ZZ plants for offices and apartments because the plant can
handle the situation, but they also know it performs best when it gets a little more brightness.
Propagation is its own emotional journey. People try leaf cuttings expecting quick results, then discover ZZ
propagation is essentially a long-term relationship. The leaves might look the same for months while tiny
rhizomes form under the surface. Pros recommend taking photos and labeling dates because progress is so slow
it’s easy to assume nothing is happening. Then one day, you’ll see a small shoot and feel absurdly proudlike
you personally invented photosynthesis.
Finally, many plant owners learn to appreciate the ZZ plant’s aesthetic superpower: it makes a room look more
polished. Clean, glossy foliage reads as “intentional decor,” even if your actual routine is “occasionally wipe
dust and hope for the best.” The best part? That’s basically the pro routine toojust with better drainage and
fewer panic waterings.
Conclusion: The Plant-Pro Philosophy for ZZ Plant Care
Great ZZ plant care is less about doing more and more about doing the right things at the right time:
give it well-draining soil, avoid direct sun, and water only after the mix dries. If you nail those basics,
your ZZ plant can stay glossy and upright for yearsquietly thriving while you take credit.