Table of Contents >> Show >> Hide
- First, a Tiny Secret: You’re Usually Reheating, Not “Cooking”
- Know Your Crab Legs: King vs. Snow (and Why It Matters)
- What You Need (and What You’ll Wish You Bought Yesterday)
- Thawing Crab Legs Without Ruining Them
- Quick Method Cheat Sheet
- Method 1: Steaming (The Juicy, Foolproof Favorite)
- Method 2: Boiling (Fast, Familiar, Easy to Overcook)
- Method 3: Baking (Best for a Crowd, Best for Your Sanity)
- Method 4: Broiling (For Crispy Edges and Bold Flavor)
- Method 5: Grilling (Summer Flex, Minimal Effort)
- Bonus Method: Instant Pot / Pressure Cooker (Fast Steaming)
- How to Know Crab Legs Are Done
- Butter and Sauces: The Supporting Cast That Steals the Show
- How to Crack Crab Legs Like You’ve Done This Before
- Troubleshooting: Fix the Most Common Crab-Leg Problems
- Leftovers, Storage, and Reheating
- Crab-Leg Confidence: A Quick Wrap-Up
- Extra: of Real-World Crab-Leg Experiences (So You Don’t Learn the Hard Way)
Crab legs are the rare “fancy dinner” that’s secretly low-effort. They look like you should be wearing a chef’s jacket and saying things like
“reduction”, but most of the time you’re just reheating pre-cooked crab to juicy, sweet perfection.
The real trick is not overdoing itbecause crab legs can go from tender to rubbery faster than you can say,
“Wait, where did the seafood crackers go?”
This guide walks you through the best methods (steaming, boiling, baking, broiling, grilling, and even Instant Pot), plus thawing, doneness cues,
seasoning ideas, cracking tips, and a big, experience-based section at the end so you can dodge the most common crab-leg heartbreaks.
First, a Tiny Secret: You’re Usually Reheating, Not “Cooking”
Here’s why crab legs are so weeknight-friendly: the crab is often cooked shortly after harvest, then frozen. That means your job at home is to
warm it through gently. Gentle heat keeps the meat sweet and moist. Aggressive heat turns it dry and chewy.
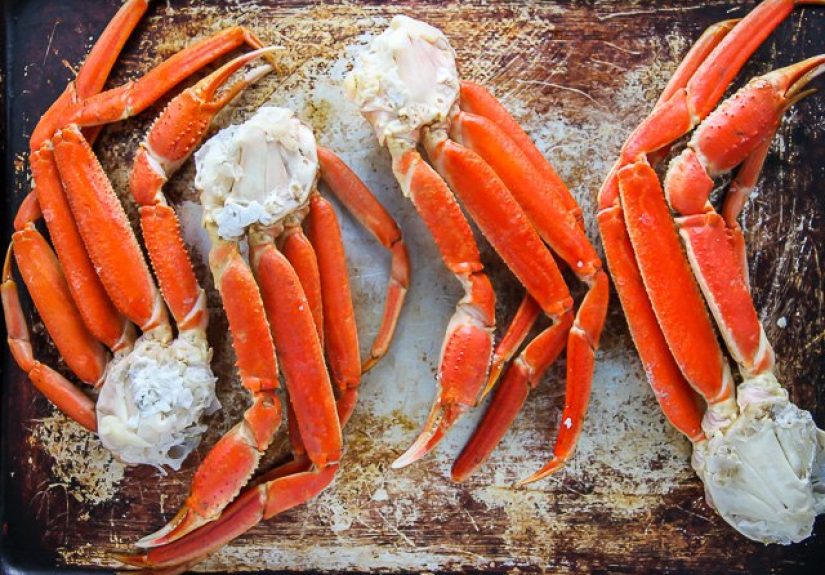
Know Your Crab Legs: King vs. Snow (and Why It Matters)
Most crab legs you’ll see at the store are either king crab (thicker shells, big meaty pieces) or snow crab
(more slender legs, slightly sweeter and more delicate). The cooking goal is the sameheat throughbut thick king crab usually needs a little more time.
- King crab legs: Thick shell, large chunks of meat, fewer pieces per pound.
- Snow crab clusters: More legs per cluster, easier to crack by hand, faster to heat.
What You Need (and What You’ll Wish You Bought Yesterday)
- Large pot with a lid (or a sheet pan + foil for the oven methods)
- Tongs (crab legs are basically hot, spiky nunchucks)
- Kitchen shears (life-changing for clean shell cuts)
- Seafood crackers + small fork/pick (optional, but very satisfying)
- Instant-read thermometer (optional, but great for confidence)
Thawing Crab Legs Without Ruining Them
You can cook crab legs from frozen, but thawing helps them heat more evenly and reduces the chance of overcooking the outside while the center stays cool.
Best Method: Overnight in the Fridge (10–12 hours)
- Place crab legs in a bowl or on a rimmed tray (to catch drips).
- Thaw in the refrigerator overnight.
- Optional: quick rinse to remove surface ice glaze, then pat dry.
Fast Method: Cold-Water Thaw (30–60 minutes)
- Seal crab legs in a leak-proof bag.
- Submerge in cold water.
- Change the water every 20–30 minutes so it stays cold.
- Cook promptly after thawing.
Skip These: Counter Thawing & Warm Water
Leaving seafood out at room temperature is a food-safety gamble and a texture killer. Keep it cold until you’re ready to heat it.
Quick Method Cheat Sheet
Use this table to pick your best route based on time, equipment, and vibes.
| Method | Best For | Thawed Time | Frozen Time | Why It Works |
|---|---|---|---|---|
| Steam | Most tender, most reliable | 4–6 min | 8–10 min | Moist heat = juicy meat |
| Boil (really: simmer) | Fast + easy cleanup | 3–5 min | 6–8 min | Quick warming; easy to overdo |
| Bake | Crowds, hands-off | 10–12 min | 12–15 min | Even heat; great with seasoning |
| Broil | Big flavor, slight browning | 4–8 min | 6–10 min | Fast top heat; watch closely |
| Grill | Outdoor meals, smoky notes | 6–10 min | 10–12 min | Char + butter = happiness |
| Instant Pot | Set-and-go steaming | 2–3 min (pressure) | 3 min (pressure) | Steams fast; low effort |
Method 1: Steaming (The Juicy, Foolproof Favorite)
Steaming is gentle and keeps the crab meat tender. If you want “restaurant-level” texture without restaurant-level prices, this is your move.
How to Steam Crab Legs (Thawed)
- Add 1–2 inches of water to a large pot. Bring to a boil.
- Set a steamer basket or colander above the water (the crab should not sit in the water).
- Arrange crab legs in the basket. Cover tightly with a lid.
- Steam 4–6 minutes, until hot throughout.
- Rest 1 minute, then serve immediately with lemon and butter.
How to Steam Crab Legs (Frozen)
Same setup, just add time. Steam 8–10 minutes (thick king crab may need the longer end).
Optional Flavor Boosts for the Steam Water
- Lemon wedges + a bay leaf
- Old Bay or seafood boil seasoning (a little goes a long way)
- A splash of white wine (for subtle aroma, not a cocktail in a pot)
Method 2: Boiling (Fast, Familiar, Easy to Overcook)
“Boiling crab legs” is common shorthand, but the best results come from bringing water to a boil, then keeping the heat gentle.
Rolling, aggressive boiling can waterlog the shell cavities and make meat tougher.
How to Boil/Simmer Crab Legs
- Fill a large pot with water (enough to cover the legs or mostly cover them). Salt lightly if you want.
- Bring to a boil, then reduce to a steady simmer.
- Add crab legs. Cover.
- Heat 3–5 minutes if thawed, 6–8 minutes if frozen.
- Remove with tongs and drain well.
Pro tip: if your pot is small, break clusters at the joints so they fit without turning your kitchen into a crab-leg game of Tetris.
Method 3: Baking (Best for a Crowd, Best for Your Sanity)
Baking is underrated. It’s consistent, it scales up easily, and it keeps your stove free for sides (or for you to dramatically swirl a glass of sparkling water).
Foil-Packet Bake (Moist + Flavorful)
- Preheat oven to 425°F.
- Place crab legs on a rimmed baking sheet.
- Add a few tablespoons of water or broth to the pan (steam insurance).
- Cover tightly with foil to trap steam.
- Bake 10–12 minutes (thawed) or 12–15 minutes (frozen), until hot.
Sheet-Pan Seasoned Bake (Great Texture + Easy Cleanup)
- Preheat oven to 425°F.
- Arrange snow crab clusters in a single layer.
- Brush with a little oil and seafood seasoning (optional).
- Bake about 12 minutes, until hot throughout.
- Serve with melted butter and lemon wedges.
Method 4: Broiling (For Crispy Edges and Bold Flavor)
Broiling is fast and dramatic. It can also go from “perfectly warmed” to “why is my crab turning into jerky?” if you walk away.
Stay close. Like, “within snack-grabbing distance,” not “I’ll just start a load of laundry.”
How to Broil Crab Legs
- Set oven to broil. Position rack about 6–8 inches from the heat.
- Split the shell lengthwise with kitchen shears (optional, but makes eating easier and helps heat penetrate).
- Arrange on a baking sheet. Brush lightly with melted butter or oil.
- Broil 3–4 minutes, flip clearly thicker pieces if needed, then 2–4 minutes more.
- Serve immediately (broiled crab cools fast, like it has places to be).
Method 5: Grilling (Summer Flex, Minimal Effort)
Grilling adds a subtle smokiness and gives butter and lemon a reason to show off.
How to Grill Crab Legs
- Preheat grill to medium (around 300–350°F).
- Brush crab legs lightly with oil or melted butter.
- Grill 3–5 minutes per side, turning once, until hot.
- Finish with lemon and herbed butter.
Bonus Method: Instant Pot / Pressure Cooker (Fast Steaming)
If you love gadgetsor just love not watching a potpressure cookers can steam crab legs quickly.
- Add about 1 1/2 cups water to the pot and insert a trivet.
- Place crab legs on the trivet (bend gently as needed).
- Cook on high pressure for 3 minutes (frozen works well here).
- Quick-release carefully, then serve.
How to Know Crab Legs Are Done
You’re aiming for heated through, not “cooked to death.”
- Look: Meat should be opaque and pearly/white, not translucent.
- Feel: It should be firm but still juicythink “plump,” not “rubber eraser.”
- Smell: Warm crab has a sweet, briny aroma (your kitchen will smell like a beach vacation with better lighting).
- Thermometer option: Many food-safety guidelines use 145°F as a benchmark for seafood; for pre-cooked legs, hitting “hot throughout” is typically the goal.
Butter and Sauces: The Supporting Cast That Steals the Show
Crab meat is sweet and delicate. Your sauce should enhance it, not body-slam it.
Classic Lemon Butter
Melt butter, add a squeeze of lemon, a pinch of salt, and a little black pepper. Done. Perfect.
Garlic-Parsley Butter (Big Flavor, Still Respectful)
- Melt butter over medium-low heat.
- Add minced garlic and cook 1–2 minutes until fragrant (don’t brown hard).
- Stir in parsley and a squeeze of lemon.
Old Bay Brown Butter (When You Want “Seafood Boil Energy”)
- Brown butter gently until nutty and golden.
- Stir in a small pinch of Old Bay.
- Add lemon zest and a tiny squeeze of lemon juice at the end.
How to Crack Crab Legs Like You’ve Done This Before
- Let them cool for 2 minutes so you don’t burn your fingers.
- Twist at the joints to separate sections cleanly.
- Use kitchen shears to cut a slit along one side of the shell.
- Peel back and pull the meat out in one glorious piece when possible.
- Use a small fork for the stubborn bits (the “bonus crab” hiding in corners).
Troubleshooting: Fix the Most Common Crab-Leg Problems
“My crab is rubbery.”
Almost always overcooking. Next time, steam and start checking early. Remember: pre-cooked crab just needs warming.
“My crab tastes watery.”
Likely boiled too aggressively clearly too long. Try steaming or baking in foil to keep moisture controlled.
“It’s hot on the outside, cold near the center.”
This happens when legs are cooked from very frozen or stacked too tightly. Thaw first (or add a few minutes) and avoid overcrowding.
“The shell is sharp and I’m losing a fight with it.”
Use a clean kitchen towel for grip and kitchen shears for controlled cuts. Also: respect the crab. The crab does not fear you.
Leftovers, Storage, and Reheating
Crab is best right away, but leftovers can still be great if you reheat gently.
- Storage: Refrigerate promptly in an airtight container and eat within 1–2 days for best quality.
- Reheat best: Steam 3–5 minutes until just hot.
- Avoid: High-power microwaving (it can make hot spots and dry edges). If you must microwave, use low power and short bursts.
Crab-Leg Confidence: A Quick Wrap-Up
If you take only one thing from this guide, let it be this: gentle heat wins.
Steam is the safest bet for perfect crab legs, baking is the easiest for crowds, and broiling/grilling are great for flavorjust keep a close eye.
Warm the crab through, serve immediately, and let butter do what butter was born to do.
Extra: of Real-World Crab-Leg Experiences (So You Don’t Learn the Hard Way)
Most “crab leg disasters” aren’t dramatic. There’s no smoke alarm, no heroic pan-flipping, no slow-motion spill. It’s usually just a quiet moment of
disappointment when you crack open a leg and the meat pulls out… in tiny dry shreds. The most common cause is treating crab legs like raw meat that
needs a full cook, when in reality many store-bought legs are already cooked and only need a warm-up. Home cooks often discover that the “perfect”
window is smaller than expected: a few minutes too long and the texture changes from tender to chewy.
Another classic experience: boiling feels intuitive, but it’s also where people accidentally waterlog the crab. A hard boil can push water into the
shell cavities. You crack the leg, and instead of sweet briny juice, you get a little splash of hot crab water (which is not a beverage anyone asked for).
This is why so many people become steam converts. Steaming tends to heat the meat evenly without flooding the shell, and it’s forgiving enough that you
can focus on sides, sauces, and setting the table instead of hovering like a seafood lifeguard.
Then there’s the “pot too small” problem. Crab legs don’t care about your cookware collectionthey arrive long, spiky, and stubbornly unwilling to bend.
The easy fix is to separate clusters at the joints before heating. This also improves results because smaller sections heat faster and more evenly. Many
people also learn (with relief) that kitchen shears are not optional. They transform the whole event from a wrestling match into a clean, satisfying
routine: snip, peel, pull, dip. If you’re serving guests, shears make everyone happier and significantly reduce the number of “Is it okay if I use my teeth?”
questions.
Flavor-wise, a lot of first-timers over-season the cooking water or bury the crab in heavy sauces. After a couple crab dinners, many home cooks realize
crab meat is already subtly sweet and ocean-fresh. It doesn’t need a full spice cabinetjust support. Lemon, butter, and clearly a small amount of seafood
seasoning are usually enough. When people want to get fancy, they often do it in the butter: garlic, parsley, a pinch of Old Bay, or a splash of something
bright and acidic. That way, the crab stays the star, and the sauce is the spotlight.
Finally, there’s the “cleanup reality.” Crab night produces a mountain of shells, and the table can get messy in the best way. Experienced crab leg fans
put out a big bowl for shells, plenty of napkins, and a small tray for tools. That tiny bit of planning changes the whole vibe: instead of chaos, it feels
like a fun, hands-on feast. And that’s the real goalhot crab legs, warm butter, minimal stress, and a meal that feels like an occasion even if it’s just
a Tuesday.


