Table of Contents >> Show >> Hide
- Before You Cut: Identify the Plastic and Set Yourself Up for Success
- Method 1: Score-and-Snap (Best for Straight Cuts in Thin Sheet Plastic)
- Method 2: Scissors, Tin Snips, and Shears (Best for Thin, Flexible Plastic)
- Method 3: Jigsaw or Fine-Tooth Hand Saw (Best for Curves and Medium Thickness)
- Method 4: Circular Saw or Table Saw (Best for Long, Straight Cuts in Thick Plastic)
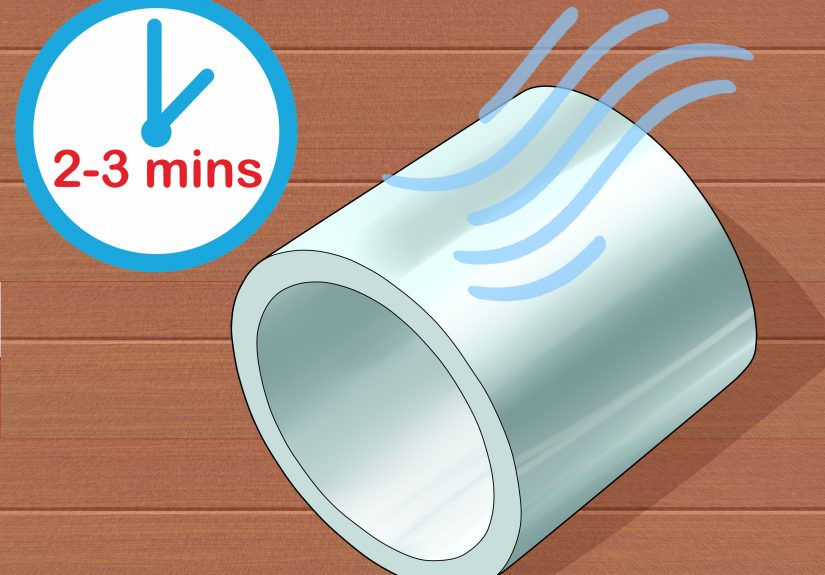
- Method 5: PVC/CPVC/ABS Pipe Cutter + Deburr (Best for Plumbing Plastic)
- Troubleshooting: Why Your Plastic Cut Looks Like a Melty Crime Scene
- Finishing Touches: Make the Edge Smooth (and Your Project Look Expensive)
- Conclusion
- Extra: of Real-World Experience Cutting Plastic (So You Don’t Learn the Hard Way)
Plastic is everywhereprotecting, insulating, organizing, and occasionally mocking you when you try to cut it. One minute you’re confidently measuring for a clean DIY install, and the next you’re holding a wavy edge that looks like it was chewed by a polite raccoon.
The good news: learning how to cut plastic cleanly isn’t about having a garage full of expensive tools. It’s about matching the right method to the right plastic, controlling heat, and setting up your cut so the material doesn’t crack, chip, or melt into modern art (unless you’re into that).
Before You Cut: Identify the Plastic and Set Yourself Up for Success
1) Know what you’re cutting (plastic isn’t one thing)
“Plastic” can mean everything from a flimsy clamshell package to a thick polycarbonate panel. Different plastics behave differently under blades and saw teeth. Here are the usual suspects you’ll meet in real life:
- Acrylic / Plexiglass (PMMA): Clear, rigid, prone to chipping or cracking if you rush.
- Polycarbonate (often sold as Lexan): Tougher than acrylic, more impact-resistant, still sensitive to heat.
- PVC / CPVC / ABS pipe: Rigid plumbing plasticseasy to cut, but you must deburr for clean fits.
- HDPE (cutting boards, utility panels): Cuts easily, can “fuzz” or melt if blades get hot.
- PETG, vinyl, thin sheet plastics: Often flexible; snips/scissors can be perfect.
2) A quick setup checklist (the secret sauce)
Clean cuts come from boring prep. Yes, boring. Also yes, effective.
- Mark clearly: Use a fine marker, grease pencil, or painter’s tape (tape also helps reduce chipping).
- Support the work: Vibration is the enemy. Clamp sheets and support long cuts so plastic doesn’t flex.
- Keep protective film on: If your sheet came with film, leave it on until finishing.
- Wear eye protection: Chips and shards are fast and dramaticlike tiny plastic paparazzi.
- Control heat: Fast RPM + slow feed = melting. Slow RPM + steady feed = cleaner cuts.
- Ventilation matters: Especially if sanding or heat-cuttingplastic dust and fumes are not a hobby.
Method 1: Score-and-Snap (Best for Straight Cuts in Thin Sheet Plastic)
If you’re cutting acrylic sheet, thin polycarbonate, or other rigid sheet plastics in a straight line, the score-and-snap method is the cleanest “minimal tools” option. It’s also strangely satisfyinglike snapping a glow stick, but productive.
What you’ll need
- Acrylic scoring knife or a sharp utility knife
- Metal straightedge (a level works great)
- Clamps (helpful) and a sturdy table edge
- Painter’s tape (optional, but helpful)
How to do it (without cracking the sheet)
- Measure and mark: Mark your cut line. If you’re nervous, put painter’s tape on the line and mark on tape.
- Clamp the straightedge: Lock it down. Your hand is not a clamp. Your hand is a hand.
- Score in multiple passes: Don’t try to cut through in one go. Use firm, consistent pressure and make repeated passes until you have a deep groove.
- Flip and score again (optional): For slightly thicker material, scoring both sides helps the break stay true.
- Snap cleanly: Align the scored line with the edge of your table, clamp the “keep” side, and apply quick downward pressure to the offcut.
- Smooth the edge: Use sandpaper (start around 120–220, finish 400+) or a plastic-safe file.
Best for: straight cuts on thinner acrylic/plexiglass, thin rigid plastics, quick trimming.
Avoid when: you need curves, internal cutouts, or the plastic is thick enough that snapping becomes unpredictable.
Method 2: Scissors, Tin Snips, and Shears (Best for Thin, Flexible Plastic)
When people search “how to cut plastic,” they often mean stuff like packaging plastic, thin PETG, vinyl, plastic laminate, or hobby sheets. For these, power tools are overkilllike using a chainsaw to slice cake.
Pick the right cutter
- Heavy-duty scissors: Great for flexible sheet plastics and thin packaging.
- Aviation/tin snips: Better control for tougher thin plastic sheet; excellent for long cuts.
- Shears: Helpful for thicker flexible plastics where scissors struggle.
Technique that prevents ugly “stress whitening”
- Cut in long, smooth strokes: Short bites create jagged edges and whitening on some plastics.
- Support the sheet: If the plastic flops while you cut, the edge will wander.
- For tight curves: Make relief cuts (small cuts perpendicular to the curve) so the waste can peel away cleanly.
- Don’t force brittle plastics: Acrylic and brittle styrene can crack with snipsuse Method 1 or 3 instead.
Best for: thin plastic sheet, vinyl, PETG craft sheets, packaging, flexible plastics.
Pro tip: If your plastic is cold and brittle, letting it warm to room temperature can reduce cracking.
Method 3: Jigsaw or Fine-Tooth Hand Saw (Best for Curves and Medium Thickness)
For curved shapes, cutouts, or anything beyond a straight line, a jigsaw is one of the most practical plastic cutting tools you can use. The trick is to prevent chipping (especially on acrylic) and avoid melting.
What you’ll need
- Jigsaw with a fine-tooth blade labeled for plastic (or a fine-tooth metal-cutting blade)
- Painter’s tape (reduces chipping and gives you a visible cut line)
- Clamps, plus a sacrificial backing board or foam support
- Drill (for starter holes if doing interior cutouts)
How to cut plastic with a jigsaw without making a mess
- Tape the cut line: Tape helps reduce surface chipping and makes your mark easier to see.
- Support the sheet fully: Sheets vibrate. Vibration causes chatter. Chatter causes chipped edges and regret.
- Use steady feed pressure: Don’t shove the blade. Let it cut.
- Manage speed: Too fast can melt plastic; too slow can snag. Aim for controlled speed and steady motion.
- For cutouts: Drill a starter hole, then insert the jigsaw blade and follow your line.
Best for: curved cuts in acrylic/plexiglass, polycarbonate, and many rigid sheet plastics.
Common mistake: Cutting near an unsupported edgethis invites cracking, especially on acrylic.
Method 4: Circular Saw or Table Saw (Best for Long, Straight Cuts in Thick Plastic)
If you’re cutting larger panelslike acrylic shelves, polycarbonate storm window panels, or HDPE boardsa circular saw or table saw gives the straightest line with the least drama. This is where “clean cut” becomes a blade-and-technique conversation.
Blade choice matters (a lot)
- Use a fine-tooth blade: More teeth generally means less chipping on acrylic and polycarbonate.
- Plastic-specific or “no-melt” blades: Designed to reduce heat buildup and edge chipping.
- Carbide tips help: They stay sharp longer and cut cleaner across many plastics.
How to make a saw cut look “store-bought”
- Keep the protective film on: It reduces scratching and helps prevent surface scuffs.
- Use painter’s tape on the cut line: Especially on acrylic to reduce chipping.
- Support the sheet: Use outfeed support so the panel doesn’t pinch the blade.
- Feed steadily: Too slow = melted edge. Too fast = chipped edge. A steady feed rate is the sweet spot.
- Finish the edge: Sand lightly or use a scraper to remove saw marks.
Best for: thick acrylic, polycarbonate, HDPE boards, long straight cuts.
Safety note: If you’re not confident with full-size sheet goods, cut the panel down with a track guide or have a store cut it close to size first, then do final trimming at home.
Method 5: PVC/CPVC/ABS Pipe Cutter + Deburr (Best for Plumbing Plastic)
Cutting plastic pipe is easy. Cutting plastic pipe correctlyso it seats well, glues well, and doesn’t chew up sealsis the skill. Whether you’re learning how to cut PVC pipe for a repair or building something fun like a custom rack, this method keeps your joints clean and reliable.
Tools that work
- Ratcheting PVC cutter: Fast, clean, and square on smaller diameters.
- Hacksaw/miter saw: Better for larger diameters (and for cutting multiple pieces consistently).
- Deburring tool or file: Removes burrs and sharp edges after cutting.
- Chamfer tool or sandpaper: Creates a slight bevel to help assembly.
Step-by-step
- Measure and mark: Use a square if you have onestraight cuts matter for good seating.
- Cut the pipe: Use a ratcheting cutter for small pipe; a saw for larger pipe. Aim for a clean, square cut.
- Deburr inside and outside: Remove shards and rough edges so fittings seat properly.
- Chamfer the outer edge: A light bevel reduces scraping and helps assembly, especially with tight fittings.
- Clean the debris: Wipe away plastic dust and fragments before joining.
Best for: PVC, CPVC, ABS pipe and rigid plumbing plastics.
Why it matters: Burrs can interfere with fit and sealing, and they can scrape glue/primer where you need it most.
Troubleshooting: Why Your Plastic Cut Looks Like a Melty Crime Scene
Problem: The edge is melted and gummy
- Cause: Blade friction + high speed + slow feed.
- Fix: Lower speed (especially on rotary tools), use a sharper blade, and keep a steady feed rate.
Problem: Chipping on acrylic/plexiglass
- Cause: Vibration, coarse blade, or forcing the cut.
- Fix: Tape the line, clamp and support the sheet, use a fine-tooth blade, and slow down.
Problem: Cracking while scoring/snapping
- Cause: Shallow score line, uneven pressure, or snapping without support.
- Fix: Add more score passes, clamp the keep side, and snap with confident (not hesitant) pressure.
Finishing Touches: Make the Edge Smooth (and Your Project Look Expensive)
After you cut, a quick edge cleanup can transform “DIY” into “Did you buy that?”
- Sandpaper progression: Start around 120–220 grit for rough edges, then 400+ for smoother finishes.
- Deburring tools: Great for pipe and some sheet plasticsfast, controlled, and clean.
- Scraper or file: Removes small burrs without over-sanding the face.
- Heat polishing (advanced): Acrylic can be flame-polished, but it’s easy to overdopractice on scrap first.
Conclusion
Cutting plastic cleanly is less about brute force and more about strategy: choose the right method, support the material, and manage heat. If you remember just one thing, make it this: plastic is happiest when you cut it calmly, steadily, and with a sharp toolkind of like a housecat, but with fewer opinions.
Use score-and-snap for straight cuts in thin sheets, scissors/snips for flexible plastics, jigsaws for curves, saws for thick panels, and proper pipe tools (plus deburring) for PVC and friends. Your edges will be cleaner, your parts will fit better, and your project will look like you absolutely knew what you were doing the whole time.
Extra: of Real-World Experience Cutting Plastic (So You Don’t Learn the Hard Way)
I once made acrylic window inserts to help with winter drafts. The plan was simple: measure, cut, pop them into place, enjoy cozy victory. The reality was also simple: I rushed the first cut, the acrylic chattered, and the edge came out looking like a tiny mountain range. The insert still fittechnicallybut it also looked like it had survived a minor bear encounter.
Here’s what fixed it: support and patience. The second sheet got clamped properly on a flat surface, with painter’s tape over the cut line and a straightedge locked down. I used the score and snap method and treated it like peeling a labelsteady pressure, multiple passes, no drama. When I snapped it, I held the “keep” side down firmly and broke the waste side with a quick, confident motion. Suddenly the edge was straight enough that I felt like I should sign it.
Another lesson came from cutting PVC for a small garage rack. I used a saw, admired my pile of perfectly cut pieces, and started assembling. The joints felt “gritty,” like sand was hiding in the fittings. That’s when I learned the unglamorous truth: burrs matter. A few seconds with a deburring tool and a light chamfer made everything slide together smoothly. The rack went from “why won’t you fit?!” to “oh, that’s satisfying” immediately. If you’re using push-to-connect fittings, clean pipe ends are even more important.
Then there’s the classic mistake: melting plastic with a rotary tool. The first time I used a cutoff wheel on plastic, I ran it fast, moved slowly, and created a warm, gooey edge that re-solidified into little blobs. It was like I accidentally invented “plastic lava lamp,” except it didn’t sparkle and nobody was impressed. The fix was counterintuitive: slower tool speed, lighter pressure, and a more continuous motion so heat didn’t build up in one spot. After that, the cut line was cleanerand the cleanup was a quick sand instead of a full archaeological excavation.
My biggest “wish I’d known” tip is to practice on scrap first. Plastic is cheap compared to your time, and one test cut tells you everything: whether the blade chips, whether the tool melts the edge, whether the sheet vibrates, and whether your marking method is easy to follow. When you’re cutting acrylic, even tiny improvementstape on the line, better support underneath, a sharper bladeshow up immediately in the edge.
So if your next project involves plexiglass, polycarbonate, HDPE, or PVC, don’t overthink it. Pick one of the five methods above, set up your cut like you mean it, and keep the speed/heat under control. Your plastic will behaveand you’ll keep your “victory lap” intact for the final install.


