Table of Contents >> Show >> Hide
- What Is a Reusable Vacuum Cleaner Bag?
- Before You Start: Check Whether Your Vacuum Is a Good Candidate
- Materials You Will Need
- Step 1: Remove and Study the Original Bag
- Step 2: Create a Pattern
- Step 3: Choose the Right Fabric Layering
- Step 4: Cut the Fabric Panels
- Step 5: Reinforce the Intake Hole
- Step 6: Sew the Bag
- Step 7: Add the Emptying Closure
- Step 8: Test the Fit Before Vacuuming
- Step 9: Check Suction and Airflow
- Step 10: Empty and Clean the Bag Safely
- Common Mistakes to Avoid
- Pros and Cons of a DIY Reusable Vacuum Cleaner Bag
- Smart Upgrades for Better Performance
- My Real-World Experience: What I Learned Making a Reusable Vacuum Bag
- Conclusion
Vacuum cleaner bags are one of those household items that quietly drain your wallet while pretending to be innocent. You buy a pack, use them, toss them, repeat forever. It is not exactly a dramatic villain origin story, but after the fifth trip to the store for replacement bags, you may start looking at your vacuum like it owes you rent.
The good news: if you have a bagged vacuum that uses a simple paper or cloth dust bag, you may be able to make your own reusable vacuum cleaner bag at home. With the right fabric, a secure collar, a strong closure, and careful testing, a DIY reusable vacuum bag can help reduce waste, save money, and keep your machine running for everyday dry household cleaning.
The important fine print: this project is not for every vacuum or every mess. If your vacuum uses sealed HEPA bags, allergy-rated filtration, robot dock bags, or manufacturer-specific bags that are part of the machine’s filtration system, a homemade replacement may reduce performance, release fine dust, void a warranty, or make your vacuum work harder than it should. Also, never use a homemade bag for hazardous dust such as asbestos, lead paint dust, silica, drywall dust, mold cleanup, fireplace ash, or anything toxic. For those jobs, use the manufacturer-approved bag and filter system or a certified HEPA vacuum.
For ordinary dirt, crumbs, pet hair, lint, and the mysterious confetti of daily life, though? A reusable bag can be a smart little DIY win. Let’s walk through how to make one without turning your laundry room into a dust volcano.
What Is a Reusable Vacuum Cleaner Bag?
A reusable vacuum cleaner bag is a washable or emptyable dust collection bag designed to replace disposable paper bags in compatible vacuums. Instead of throwing the bag away when it fills, you unzip it, empty the debris, clean it as needed, and use it again.
Most disposable vacuum bags do two jobs. First, they hold dirt and debris. Second, they allow air to pass through while trapping dust. That airflow is the key. If the bag fabric is too loose, fine dust can blow through. If it is too dense, airflow drops and the vacuum may lose suction or overheat. The goal is to create a bag that breathes enough for the motor while filtering enough to keep dust inside.
Before You Start: Check Whether Your Vacuum Is a Good Candidate
Not every bagged vacuum is a friendly candidate for a DIY reusable bag. Some modern bagged vacuums rely on precisely engineered multilayer filter bags, automatic sealing collars, and airtight housings. Replacing those with homemade fabric may compromise the system.
A DIY reusable bag may work well for:
- Older upright vacuums with simple paper bags
- Canister vacuums with basic bag compartments
- Shop vacs used for ordinary dry debris
- Vacuums that already accept cloth or reusable bags
- Machines where the bag is mainly a debris collector, not the only fine-dust filter
Skip the DIY bag if:
- Your vacuum manual says to use only manufacturer-approved bags
- The vacuum has a sealed HEPA filtration system
- Someone in your home has asthma, severe allergies, or dust sensitivity
- You are cleaning fine renovation dust, lead, mold, asbestos, silica, ash, or chemical residue
- Your vacuum is under warranty and the manufacturer warns against non-approved bags
- Your vacuum uses disposable bags inside a self-emptying robot dock
In other words, this is a clever household hack, not a medical-grade filtration upgrade. Treat it like a practical sustainability project, not a superhero cape for your vacuum.
Materials You Will Need
The best reusable vacuum bag starts with sturdy, breathable materials. You want fabric that can hold debris, survive repeated emptying, and allow airflow. Lightweight woven cotton can work for simple vacuums, but it may let too much fine dust pass through. Nonwoven fabric from a heavy reusable shopping bag can be better because it has a denser structure. For a stronger bag, use two layers: an inner dust-catching layer and an outer support layer.
Basic supply list:
- One old disposable vacuum bag that fits your vacuum
- Lightweight canvas, tightly woven cotton, or nonwoven polypropylene fabric
- Optional inner layer: muslin, microfiber cloth, or thin nonwoven filter fabric
- Heavy-duty zipper, hook-and-loop tape, or a fold-and-clip closure
- Cardboard, plastic, rubber, or vinyl for the intake collar
- Scissors or rotary cutter
- Measuring tape or ruler
- Sewing machine or hand-sewing needle
- Strong polyester thread
- Pins or clips
- Fabric marker or pencil
- Optional: washable gasket foam or rubber sheet for sealing around the hose port
If possible, reuse the cardboard or plastic mounting plate from a disposable bag. That plate is already shaped to fit your vacuum’s hose inlet, which saves you from the glamorous hobby of guessing where suction holes belong.
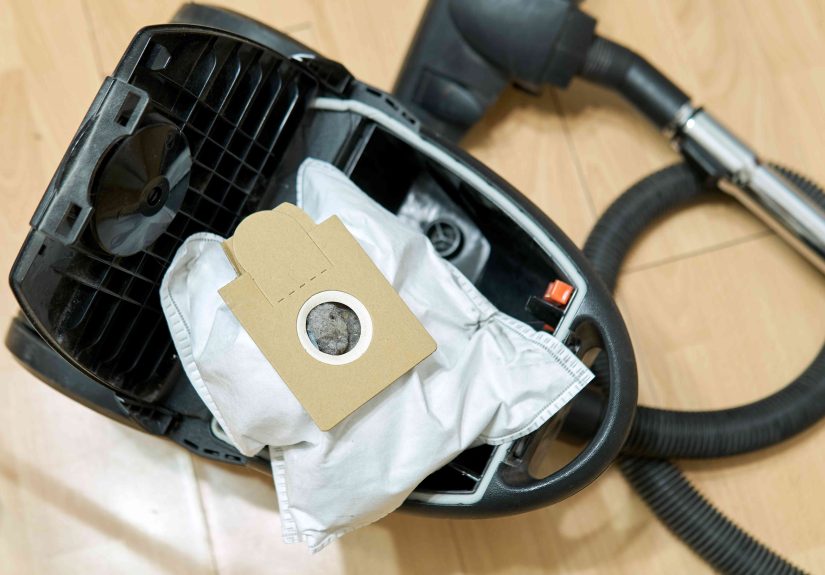
Step 1: Remove and Study the Original Bag
Start with a clean, empty disposable bag that fits your vacuum. Do not use a bag packed with old dust unless you enjoy sneezing in Morse code. Lay it flat on a table and study how it is constructed.
Look for the following details:
- The overall length and width of the bag
- Where the intake hole sits
- How the cardboard or plastic collar attaches
- How much room the bag has to expand inside the vacuum chamber
- Where seams are located
- Whether the bag has gussets, pleats, or folded sides
Do not make your reusable bag much larger than the original. A bag that is too big can bunch up, block airflow, or press against moving parts. A bag that is too small will fill quickly and reduce suction. Aim to copy the original size closely, adding about half an inch of seam allowance on each side.
Step 2: Create a Pattern
Open the old bag carefully along the seams, or trace around it without cutting it apart if it is your last one. Place the bag on paper, cardboard, newspaper, or directly on the fabric. Mark the outline, the intake hole, and the seam allowance.
For a simple flat bag, you will need two matching fabric panels. For a boxier bag with more capacity, you can add side gussets. Beginners should start with a flat rectangular design because it is easier to sew, easier to seal, and less likely to misbehave inside the vacuum.
Simple pattern formula:
- Measure the original bag length
- Measure the original bag width
- Add 1 inch to length and width for seam allowance
- Mark the hose hole in the same location as the original
- Add a zipper or closure along the bottom or back edge
The intake hole placement is the most important part. If it is off-center, too big, or poorly sealed, dust can escape into the vacuum compartment. That is the opposite of cleaning. That is just relocating dirt with electricity.
Step 3: Choose the Right Fabric Layering
A good reusable vacuum cleaner bag needs to balance filtration and airflow. One layer of thin cotton may breathe well but release fine dust. A very dense fabric may trap more dust but choke the vacuum. The sweet spot is usually a two-layer design.
Recommended fabric combinations:
- Everyday option: tightly woven cotton outer layer with muslin inner layer
- Durable option: lightweight canvas outer layer with nonwoven polypropylene inner layer
- Budget option: fabric from a sturdy reusable shopping bag doubled into two layers
- Easy-empty option: smooth inner lining with a cotton or canvas outer layer
Avoid stretchy T-shirt fabric unless you are making a very temporary test bag. It can sag, deform, and leak dust at the seams. Avoid heavy denim, upholstery fabric, or anything coated in plastic that blocks airflow. The vacuum motor needs to breathe. Think “dust-catching fabric,” not “tiny sleeping bag for a brick.”
Step 4: Cut the Fabric Panels
Cut two main panels from your outer fabric and two matching panels from your inner fabric if you are using a lining. Keep the grain of the fabric consistent so the bag hangs evenly. Mark the intake hole on one front panel only.
If you are adding a zipper, decide where it will go before sewing the bag closed. The easiest placement is along the bottom edge or back side of the bag. A bottom zipper lets debris fall out easily, but it must be strong and well sealed. A back zipper is less likely to sit in the dirtiest area but may be slightly harder to empty.
Use a heavy-duty zipper, not a delicate dress zipper. Your vacuum bag will not be attending a wedding. It will be holding crumbs, hair, grit, and the occasional tiny plastic piece you were absolutely sure you did not vacuum up.
Step 5: Reinforce the Intake Hole
The intake hole is where the vacuum hose pushes dirt into the bag. It needs to be strong, sealed, and aligned. Cut the hole slightly smaller than the original opening, then enlarge it carefully. It is better to trim twice than to cut one giant crater and spend the afternoon regretting your confidence.
Place the original cardboard or plastic collar over the hole and check the fit. If the old collar is reusable, attach it to your fabric with stitching, adhesive, small rivets, or a combination of methods. If the collar is flimsy, trace it onto thin plastic, vinyl, rubber, or sturdy cardboard and make a new one.
For a better seal:
- Add a rubber or foam gasket around the intake hole
- Use two collar pieces, one inside and one outside, like a sandwich
- Sew around the collar several times
- Seal stitch holes with flexible fabric glue if needed
- Make sure the collar slides into the vacuum exactly like the original bag
This collar does more than hold the bag in place. It prevents dust from leaking into the vacuum body. A poor seal can coat the inside of the machine with debris and clog the motor filter.
Step 6: Sew the Bag
Place the fabric layers together with the right sides facing inward. If you are using an inner lining, treat the outer and inner layers as one piece or sew the lining as a separate bag and join it at the opening. Use a straight stitch followed by a zigzag stitch along the seam allowance for extra strength.
Sew around the sides and top, leaving the zipper area open. Reinforce the corners because dust and debris tend to collect there. After sewing the main shape, turn the bag right side out and inspect every seam. Hold it up to a bright light. If you see gaps big enough to make you suspicious, sew again.
Seam tips:
- Use polyester thread because it is stronger than cotton thread
- Backstitch at the beginning and end of every seam
- Double-stitch high-stress areas near the collar and zipper
- Trim loose threads so they do not get pulled into the vacuum
- Avoid bulky seams that could interfere with the bag compartment
If sewing is not your favorite hobby, this project may still be possible by hand. Use small, tight stitches and reinforce every edge. The bag does not have to win a county fair ribbon, but it does need to stay closed when the vacuum roars to life.
Step 7: Add the Emptying Closure
The whole point of a reusable vacuum bag is that you can empty it. A closure is what separates a reusable bag from a dusty panic envelope.
Best closure options:
- Zipper: most convenient and secure when sewn properly
- Hook-and-loop tape: easy to install but may collect lint and leak fine dust
- Fold-and-clip closure: simple for shop vac bags but less polished
- Roll-top closure: useful if you have extra fabric length and strong clips
A zipper is usually the best choice for household vacuums. Sew it into the bottom or back edge, then add a small fabric flap over the zipper on the inside to help reduce dust leakage. If you use hook-and-loop tape, choose a wide strip and sew it down completely. Adhesive-backed tape alone can peel off when exposed to dust and vibration.
Step 8: Test the Fit Before Vacuuming
Before you clean the whole house with your new creation, install the bag in the vacuum and close the compartment. It should fit without crumpling, stretching, or blocking the lid. The collar should sit firmly against the hose inlet. The bag should have enough room to expand as air fills it.
Turn the vacuum on for five to ten seconds with no debris pickup. Listen for unusual whistling, rattling, or strained motor sounds. If the vacuum sounds blocked or the bag collapses strangely, turn it off immediately and check the airflow.
Next, vacuum a small amount of visible debris, such as crumbs or dry rice, on a hard floor. Open the vacuum compartment and inspect for leaks around the collar, seams, and zipper. If you see dust outside the bag, fix the leak before continuing.
Step 9: Check Suction and Airflow
A reusable vacuum bag can change airflow, so do a simple suction test. Vacuum a small rug, then compare the pickup with a manufacturer-approved disposable bag if you still have one. The reusable bag does not have to feel identical, but it should not make the vacuum weak, hot, or noisy.
After five minutes of use, turn off the vacuum and touch the outside of the machine near the motor housing. Warm is normal. Hot, strained, or smelling like overheated plastic is not. Restricted airflow can make the motor work harder. If that happens, your fabric may be too dense, the bag may be too small, or the closure may be blocking airflow.
Empty the bag when it is about half to two-thirds full. Waiting until it is packed tight can reduce suction and stress the motor. Reusable bags often need more frequent emptying than disposable high-capacity bags, especially when collecting pet hair or fine dust.
Step 10: Empty and Clean the Bag Safely
Empty your reusable vacuum cleaner bag outdoors whenever possible. Wear a dust mask if you are sensitive to dust, and avoid shaking the bag violently. The dramatic “flour cloud” effect is funny only in cartoons.
Open the zipper or closure over a trash can, gently turn the bag inside out, and tap out debris. Use a soft brush to loosen dust from the lining. If the bag is washable, wash it by hand in cool or lukewarm water with mild detergent, then air dry completely. Never reinstall a damp bag. Moisture inside a vacuum can encourage odors, clumping, mildew, or electrical problems.
Cleaning routine:
- Empty after each major cleaning session
- Brush out the lining every few uses
- Wash only when the fabric looks clogged or smells stale
- Air dry for at least 24 hours or until fully dry
- Inspect seams, zipper, and collar before reinstalling
Common Mistakes to Avoid
Using fabric that is too thick
Thick fabric may seem durable, but it can block airflow. Your vacuum depends on air movement to lift dirt and cool the motor. If suction drops sharply, switch to a more breathable material or reduce the number of layers.
Skipping the gasket
The collar area is the most common leak point. A thin rubber or foam gasket can help the bag seal against the vacuum intake. Without it, dust may escape before it even reaches the bag.
Making the bag too large
A huge bag may sound convenient, but if it bunches inside the compartment, it can block airflow or prevent the lid from closing. Copy the original bag size closely.
Using it for fine construction dust
Drywall dust, concrete dust, ash, and sanding dust can clog fabric quickly and may pass through homemade materials. Use approved disposable bags and proper filters for those messes.
Forgetting the motor filter
Even with a good bag, your vacuum’s pre-motor and exhaust filters still matter. Check and replace or clean them according to the manual. A reusable bag is not a free pass to ignore the rest of the machine.
Pros and Cons of a DIY Reusable Vacuum Cleaner Bag
Pros
- Saves money over time
- Reduces disposable bag waste
- Can be made from repurposed fabric
- Useful when replacement bags are hard to find
- Customizable for older or discontinued vacuum models
Cons
- May not filter fine particles as well as factory bags
- Can reduce suction if fabric is too dense
- Requires careful emptying and cleaning
- May void the vacuum warranty
- Not suitable for allergy, HEPA, hazardous dust, or professional cleanup needs
Smart Upgrades for Better Performance
Once your basic reusable vacuum bag works, you can improve it. Add a second removable inner liner so the outer bag stays cleaner. Sew a fabric flap over the zipper to reduce dust leakage. Add a small label that says “dry debris only” so nobody in the house uses it for fireplace ash or glitter from a craft project. Glitter, of course, is not dirt. Glitter is a life sentence.
You can also make two bags and rotate them. That way, one can dry completely after washing while the other is ready to use. If you vacuum often, especially with pets, having a spare reusable bag is worth the small extra effort.
My Real-World Experience: What I Learned Making a Reusable Vacuum Bag
The first time I tried making a reusable vacuum cleaner bag, I approached it with the confidence of a person who had watched exactly enough tutorials to be dangerous. I had an old bagged vacuum, one disposable bag left, a pile of fabric scraps, and the kind of optimism usually seen right before someone says, “How hard can it be?”
The answer: not hard, but surprisingly precise. The biggest lesson was that the collar matters more than the bag shape. My first version looked respectable. The seams were straight enough, the zipper worked, and the fabric felt sturdy. Then I installed it and heard a faint hiss around the intake. That tiny leak was enough to dust the inside of the vacuum compartment. Not a disaster, but definitely a reminder that suction will find every shortcut available.
For the second version, I reused the original cardboard collar and added a thin rubber gasket cut from an old jar-opening grip. That made a huge difference. The bag seated more firmly, and dust stayed where it belonged. I also learned that a zipper flap is not optional if you want cleaner emptying. Without the flap, fine dust gathered along the zipper teeth. With the flap, the zipper stayed cleaner and the bag felt more secure.
Fabric choice was another experiment. A single layer of cotton was too dusty. It picked up crumbs and pet hair well, but after a few minutes, the inside of the vacuum had a faint powdery coating. A canvas outer layer with a lightweight nonwoven lining performed much better. It still allowed airflow, but it trapped more visible dust. I would not call it HEPA-grade, because it is not, but for ordinary dry household debris it was much more practical.
The emptying process also taught me humility. The first time I unzipped the bag indoors, I created a small dust puff that floated upward like it had somewhere important to be. Now I empty the bag outside, low inside a trash can, and I turn it inside out slowly. A soft brush helps clean the corners without sending debris airborne. If the bag smells musty, I wash it by hand and let it dry for a full day. Reinstalling it even slightly damp is a terrible idea unless you want your vacuum to smell like a basement with ambition.
Another practical tip: do not wait until the bag is full. Disposable bags can often pack debris more evenly, but fabric reusable bags lose airflow faster when they are overloaded. I empty mine when it reaches about half full. It takes one minute and keeps suction more consistent. Pet hair is especially sneaky because it looks fluffy, but it can mat against the fabric and reduce airflow.
The best part of the project was not just saving money. It was keeping an older vacuum useful. Replacement bags for discontinued models can be annoying to find, and making a reusable version gave the machine a second life. That said, I still keep manufacturer-approved bags on hand for deep cleaning, fine dust, or any job where filtration matters more than frugality. The reusable bag is my everyday crumb-and-hair collector, not my “clean up mysterious powder” solution.
If I were making one again from scratch, I would make two at once, reinforce the collar heavily, and choose a zipper longer than I think I need. A larger opening makes emptying far easier. I would also write the vacuum model and “dry household debris only” on the bag with a fabric marker. Future-you deserves clear instructions, especially when present-you is feeling crafty.
Conclusion
Learning how to DIY your own reusable vacuum cleaner bag is a satisfying project for anyone who likes saving money, reducing waste, and giving older appliances a longer life. The basic idea is simple: copy the original bag shape, choose breathable but dust-catching fabric, reinforce the intake collar, add a secure emptying closure, and test carefully before regular use.
The key is knowing the limits. A homemade reusable vacuum bag is great for everyday dry debris in compatible machines. It is not a substitute for certified HEPA bags, sealed filtration systems, or hazardous dust collection. When air quality, health, warranty protection, or fine-particle safety matters, use the manufacturer-approved option.
Done correctly, this DIY project can turn a throwaway supply into a reusable household tool. Your vacuum keeps cleaning, your trash can sees fewer paper bags, and your wallet gets a tiny vacation. Not bad for a piece of fabric, a zipper, and a little stubborn creativity.


