Table of Contents >> Show >> Hide
- Why Turn Old Wine Corks into Coasters and Trivets?
- Supplies You’ll Need
- Step 1: Prep and Soften Your Corks
- Step 2: Cut the Corks to Size
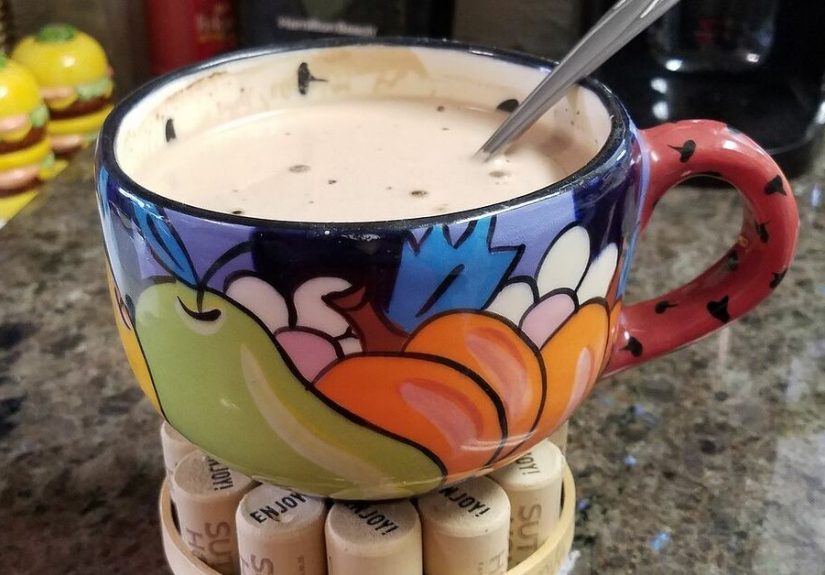
- Step 3: Plan Your Coaster and Trivet Layout
- Step 4: Glue Your Wine Cork Coaster
- Step 5: Build a Sturdy Wine Cork Trivet
- Step 6: Finishing Touches and Creative Variations
- Care, Cleaning, and Common Questions
- Real-Life Tips & Experiences with Wine Cork Coasters and Trivets
- 1. Your First Coaster Is a Practice RunAnd That’s Okay
- 2. Sort Corks Before You Start Gluing
- 3. Respect the Glue Gun (It’s Hotter Than It Looks)
- 4. Don’t Aim for PerfectionAim for “Looks Great on the Table”
- 5. Wine Cork Coasters Make Surprisingly Good Gifts
- 6. Expect to Want More Corks
- 7. Enjoy the Story in Every Piece
If you’ve been “recycling” bottles of wine for years and tossing the corks into a jar,
congrats: you’ve been accidentally collecting premium DIY supplies. Instead of letting
those corks gather dust on a shelf, you can turn them into charming, heat-resistant
wine cork coasters and trivets that actually protect your table and show off
your good taste in beverages.
This step-by-step guide walks you through how to make a cork coaster and a matching
trivet out of old wine corks, using basic tools and a little patience. We’ll cover how
to prep and cut corks safely, different layout designs, how to build a sturdy base,
plus some pro tips and real-life experiences to help you avoid the “why is there hot
glue on my elbow?” phase of crafting.
Why Turn Old Wine Corks into Coasters and Trivets?
Before we grab the glue gun, it’s worth appreciating why wine cork crafts are such a
favorite among DIYers:
- Heat-resistant and protective: Natural cork handles heat well, making it an excellent material for trivets and coasters.
- Eco-friendly upcycle: You’re keeping corks out of the trash and turning them into something useful and giftable.
- Surprisingly stylish: The printed logos, dates, and winery names give each project a one-of-a-kind, rustic look.
- Budget-friendly: Most of the cost was already “paid” on wine night. You just need a few inexpensive backing materials and glue.
Whether you’re crafting for your own kitchen or making handmade gifts, wine cork
coasters and trivets are the kind of project that looks fancy but feels very doable.
Supplies You’ll Need
Basic Materials for Cork Coasters
- Wine corks (natural cork works best)
- Sharp knife or utility knife
- Cutting mat or thick cutting board
- Hot glue gun and glue sticks (low- or dual-temp is ideal)
- Cork sheet, thin wood, or thick cardboard for backing
- Ruler or measuring tape
- Fine-grit sandpaper (optional, for smoothing edges)
- Felt pads or felt sheet (optional, to protect furniture)
Extra Materials for a Larger Trivet
- More wine corks (a trivet typically needs 25–40+ corks, depending on size)
- Sturdier backing such as plywood, MDF, or a cork tile
- Stronger adhesive if you’re attaching to wood (hot glue still works, but you can also use a good craft or wood glue)
- Stain or clear sealer (optional, for the wooden base)
- Felt sheet or furniture pads for the underside
If your cork stash is low, you can ask friends, check with local restaurants, or buy
bulk “used” or new corks online. Just make sure they are real cork, not plastic
look-alikes, if you plan to use them under hot dishes.
Step 1: Prep and Soften Your Corks
Cutting dry cork is like sawing through a stale baguetteit’s possible, but you’re
going to get crumbs everywhere and your cuts may be jagged. Softening the cork first
makes cutting cleaner and safer.
-
Clean the corks: Quickly rinse them in warm water to remove dust or
sticky residue. Let them dry on a towel. -
Soften the corks: Bring a pot of water to a gentle boil. Place the
corks in the water (or in a steamer basket above it) for about 10 minutes. This
softens the cork and makes it less likely to crumble when cut. -
Cool slightly: Drain and let the corks cool until they’re comfortable
to touchstill slightly warm is perfect for cutting.
Don’t skip the softening step, especially if your cork collection includes some very
old, dry pieces. Your fingers (and your cutting board) will thank you.
Step 2: Cut the Corks to Size
For coasters and trivets, most makers either:
- Cut corks in half lengthwise to show off the rounded side, or
- Cut corks into thirds or slices to create a blocky or mosaic-style surface.
There’s no wrong answerjust be consistent within each project so your coaster or
trivet sits flat.
-
Secure your cutting area: Place a cutting mat or thick cutting board
on a stable surface. No wobbly TV trays, please. -
Hold the cork firmly: Stand it on its side or lay it flat, whichever
feels more secure to you. -
Use a sharp knife: With a slow, sawing motion, slice the cork in
half or into thirds. Let the knife do the workdon’t force it. -
Trim for consistency: If a few pieces are noticeably taller, shave
off a little from the bottom so everything ends up roughly the same height.
If you’re nervous about cutting, start with a few corks you don’t care about as much
(maybe the ones from the “cheap but drinkable” bottles) until you get the hang of it.
Step 3: Plan Your Coaster and Trivet Layout
Before you heat up the glue gun, do a dry run and lay out your design. This saves you
from the heartbreak of realizing, halfway through gluing, that your coaster is turning
into a rhombus.
Coaster Layout Ideas
-
Rectangle or square: Arrange cut corks into even rowsclassic,
simple, and easy to scale. -
Honeycomb / staggered rows: Offset each row slightly so the corks
nestle into each other, creating a more organic pattern. -
Round coasters: Start from a center piece and build outward in
circles for a softer look.
Trivet Layout Ideas
-
Grid pattern: Line up full or half corks tightly for a sturdy,
flat surface big enough for pots and casseroles. -
Framed trivet: Glue corks inside a shallow wooden frame or onto a
piece of plywood with a simple border for extra strength and style. -
Clamp-style trivet: Arrange corks in a circle and secure them inside
a metal hose clamp for a cool, industrial vibe.
Once you’re happy with the arrangement, snap a quick reference photo with your phone
before moving anything. That way, if a curious cat “rearranges” your pattern, you can
rebuild it easily.
Step 4: Glue Your Wine Cork Coaster
Now for the fun, slightly sticky part: turning your layout into a solid, usable
coaster.
Hot Glue Gun Safety First
- Use a low- or dual-temperature glue gun if possible.
- Keep the gun upright on its stand when not in use.
- Place scrap cardboard or paper under the nozzle to catch drips.
- Keep fingers away from fresh glueit’s still hotter than your coffee mug.
Assembling the Coaster
-
Prepare the backing: Cut a square or circle of cork sheet, thick
cardboard, or thin wood slightly larger than your planned cork layout. -
Glue corks to each other: Start with a center row. Add a bead of hot
glue along the side of one cork piece and press another against it for a few
seconds. Repeat until you have a full row. -
Build the pattern: Add rows on either side of the first row, gluing
corks along their sides until your coaster shape is complete. -
Attach to the backing: Flip the cork “tile” over. Add glue to the
bottom of each piece and press it onto your backing. Work in sections so the glue
doesn’t cool before you set it down. -
Trim the edges: Once the glue is cool, trim any excess backing with
a craft knife for a clean edge.
If you like, you can stick felt pads on the underside corners or add a full felt layer
to keep the coaster from scratching delicate tabletops.
Step 5: Build a Sturdy Wine Cork Trivet
A trivet is basically a coaster’s big siblingsame idea, more real estate, and a
slightly stronger base to handle heat and weight.
Choosing the Right Base
For a trivet, skip flimsy cardboard and go for something solid:
- Plywood: A 8–10 inch square or circle works well.
- Cork tile: A thicker cork board or tile is easy to cut and naturally non-slip.
- Wooden tray or frame: Glue corks directly inside for a “shadow box” style trivet.
Assembling the Trivet
-
Cut and sand the base: If using wood, cut your base to size and
lightly sand the edges. You can stain or seal it before adding corks if you want a
more finished look. -
Add an underside layer: Glue felt or cork sheet to the underside of
the base so it won’t scratch your table. -
Dry-fit your cork layout: Arrange full or half corks on top until
you’re happy with the design and coverage. -
Glue corks in place: Working in small sections, apply hot glue or a
strong craft/wood glue to the base and press each cork down firmly. -
Check for wobbles: Once dry, set a pot or pan (cool or barely warm)
on top to make sure your trivet is flat. Trim or sand any outlier corks if needed.
With a sturdy base and tightly packed corks, your trivet should be able to handle hot
dishes, Dutch ovens, and casserole pans like a champ.
Step 6: Finishing Touches and Creative Variations
Once the glue is dry and everything feels solid, you can add a little flair:
-
Highlight winery logos: Place printed ends of corks face-up so
labels and artwork create a collage. -
Add color: Lightly stain or paint the cut ends of corks for a
patterned effect. Soft whites, blacks, or metallics can look very modern. -
Seal the surface: For easier cleaning, you can use a clear,
heat-resistant sealer. Apply lightlyyou don’t want to saturate the cork. -
Create sets: Make a matching set of four coasters and one trivet as
a housewarming or holiday gift.
Don’t overthink it. Part of the charm of cork crafts is that every piece looks a
little different. You’re going for “handmade and cozy,” not “laser-cut perfection.”
Care, Cleaning, and Common Questions
How Do I Clean Wine Cork Coasters and Trivets?
Cork doesn’t love being soaked, so skip the dishwasher. Instead:
- Wipe with a slightly damp cloth and mild soap if needed.
- Spot clean stains gentlyavoid harsh scrubbing that can rough up the cork.
- Let air dry completely before storing.
Can I Use Synthetic Corks?
Synthetic corks may not handle heat as well and can sometimes warp or discolor near
very hot items. For trivets in particular, natural cork is more reliable. You can still
use synthetic corks decoratively, but stick to cooler uses (like coasters for cold
drinks) if you’re not sure how they’ll respond to heat.
Will Hot Pots Damage the Glue?
A good-quality hot glue or craft adhesive is usually fine for typical kitchen use.
Avoid setting something straight from a 500°F oven directly on the trivetuse a
cooling rack for a minute first if you’re worried. If you know you’ll use the trivet
with very heavy or very hot cookware, upgrading to a stronger construction adhesive
under the corks and onto a solid wooden base can give extra security.
What If My Coaster or Trivet Isn’t Perfectly Flat?
Minor wobble is a rite of passage in cork crafting. To fix it:
- Check for one or two corks that are a little taller and sand them down gently.
- Add small felt pads to the underside corners to stabilize the piece.
Real-Life Tips & Experiences with Wine Cork Coasters and Trivets
Once you’ve made a few wine cork projects, you start collecting little bits of wisdom
that rarely make it into the neat step-by-step instructions. Think of this section as
the friendly chat you’d have with another DIYer over coffee (or, more on brand,
another glass of wine).
1. Your First Coaster Is a Practice RunAnd That’s Okay
Almost everyone’s first cork coaster has “personality.” The cuts aren’t perfectly
even, the rows lean a bit, and there’s probably a glob of glue somewhere it shouldn’t
be. Don’t toss it. Use that first piece as your personal coaster while you perfect
your technique on later ones. By the time you get to coaster number three or four,
you’ll be cutting straighter lines, using less glue, and choosing a layout you really
love.
2. Sort Corks Before You Start Gluing
A surprisingly helpful trick: sort your corks into piles before you begin.
Put longer corks together, shorter corks together, and maybe even separate out the
ones with logos you especially like. This makes it much easier to:
- Keep your coaster or trivet height consistent.
- Create intentional patterns (e.g., alternating branded ends and plain ends).
- Save your favorite corks for the most visible spots.
It feels a little obsessive in the moment, but it saves you from digging through a
big random pile later.
3. Respect the Glue Gun (It’s Hotter Than It Looks)
If you’re new to hot glue, it’s easy to underestimate how quickly it can burn skin.
Many seasoned crafters have a little scar on a fingertip from “just adjusting this one
piece really fast.” A few easy habits help a lot:
- Keep a bowl of cool water or an ice pack nearby when you’re learning.
- Use silicone finger caps or inexpensive craft gloves if you tend to be clumsy.
- Work in small sections so you’re not rushing to place corks before the glue sets.
Once you get used to your glue gun’s temperature and timing, the process feels much
more relaxed and controlled.
4. Don’t Aim for PerfectionAim for “Looks Great on the Table”
Cork is a natural material, and natural materials have quirks. A few tiny gaps, a
slightly darker cork, a logo that’s a little off-centerthese are all part of the
charm. When the coaster is under a mug or the trivet is under a steaming casserole,
no one is going to analyze the layout with a ruler. The project should make you smile
when you set it on the table, not stress you out.
5. Wine Cork Coasters Make Surprisingly Good Gifts
If you have friends who love wine, hosting, or handmade décor, cork coasters and
trivets are gift gold. Bundle a small set of coasters with a bottle of wine, or pair a
trivet with a pretty kitchen towel. You can even customize:
- Use corks from a couple’s favorite wineries for an anniversary gift.
- Arrange corks to form an initial or simple shape in the center.
- Add a handwritten tag explaining that the piece was upcycled from real corks.
It’s thoughtful, sustainable, and much more personal than a last-minute candle.
6. Expect to Want More Corks
One side effect of starting cork projects: suddenly, every cork matters. Friends will
start handing you their corks, and restaurant servers might be amused (or impressed)
when you ask if they have any extras they’re tossing. Keep a clearly labeled jar just
for “future projects,” and note which designs you want to try next: larger trivets,
cork trays, or even cork wall art.
7. Enjoy the Story in Every Piece
The best part about wine cork coasters and trivets is that they’re more than just
functional. Each cork came from a dinner, a celebration, a quiet Friday night, or a
vacation. When you glue them together into something you use every day, you’re
literally building a piece of décor out of memories. That’s pretty special for a craft
made from things most people throw away.
So go aheadempty that cork jar, grab your glue gun, and turn your wine habit into a
handmade, heat-resistant work of art for your home.
SEO JSON


