Table of Contents >> Show >> Hide
- What You Can Realistically Make at Home
- How Magnetism Works in Simple Terms
- Method 1: Make a Temporary Magnet by Induction
- Method 2: Magnetize a Nail or Needle by Stroking
- Method 3: Build a Simple Electromagnet
- How to Make Your DIY Magnet Stronger
- Easy Ways to Test Your Magnet
- Common DIY Magnet Problems and Fixes
- Can a Homemade Magnet Become Permanent?
- What Can Make a Magnet Lose Strength?
- Real-Life Uses for the Same Science
- Experiences and Lessons from Trying DIY Magnet Methods at Home
- Conclusion
- SEO Tags
Magnets have a way of making ordinary objects feel suspiciously magical. One second a nail is just a nail. The next second it is picking up paper clips like it suddenly got promoted to superhero. The good news is that you can make a magnet at home with simple materials and a little patience. The slightly less dramatic news is that your homemade version probably will not rival a factory-made rare-earth magnet. Still, for learning, experimenting, and showing off at the kitchen table, DIY magnet methods are absolutely worth trying.
If you have ever wondered how to make a magnet, how to magnetize a nail, or how an electromagnet works, this guide walks you through the science and the practical steps. You will learn three easy home methods, how to test your results, how to make a stronger magnet, and what mistakes can turn your future magnetic masterpiece into a very confident-looking paperweight.
What You Can Realistically Make at Home
Before diving in, it helps to set expectations. At home, you can usually make a temporary magnet, a weak permanent magnet, or a simple electromagnet. That is more than enough for science projects, learning about magnetic fields, or amusing yourself by stealing paper clips from across the desk.
Most home methods work best with ferromagnetic materials, especially iron and steel. In plain English, these are materials whose tiny magnetic regions can line up in the same direction. When enough of those regions line up, the object acts like a magnet. That is why a steel nail, sewing needle, or paper clip can become magnetic, while a wooden pencil remains stubbornly committed to being a pencil.
The strongest homemade option for most people is usually an electromagnet, because electricity creates a magnetic field on demand. A stroked nail can work too, but it is usually weaker and may lose strength over time. So yes, you can make a magnet at home. No, it will probably not rip the fridge door off its hinges. We all need goals.
How Magnetism Works in Simple Terms
Everyday magnetism comes down to alignment. Inside certain metals, especially iron, nickel, cobalt, and some alloys, there are tiny magnetic regions often described as domains. In a regular piece of metal, these domains point in different directions, so the magnetic effects cancel out. When you magnetize the object, more of those domains line up in the same direction, and the object starts acting like a magnet.
That alignment can happen in different ways. You can induce magnetism by placing iron near a magnet. You can stroke a steel object repeatedly with a magnet to encourage alignment. Or you can wrap wire around an iron core and run current through it to create an electromagnet. Different route, same destination: a stronger, more organized magnetic field.
Method 1: Make a Temporary Magnet by Induction
What you need
A strong permanent magnet and a small iron or steel object, such as a paper clip, nail, or screw.
How to do it
Hold the iron or steel object against the magnet, or place it very close to one pole of the magnet. In many cases, the object will become magnetized temporarily while it is touching or near the magnet. You can test it by seeing whether it can pick up another paper clip or small metal item.
What is happening
The nearby magnet nudges the magnetic domains in the iron or steel into alignment. This turns the object into a temporary magnet. Once the magnet is removed, soft iron loses much of that magnetism quickly, while steel may hold onto a bit more of it.
Best use for this method
This is the easiest way to demonstrate magnetism to kids or to understand the idea of induced magnetism. It is fast, simple, and requires no wiring. The drawback is strength. It is the magnetic equivalent of a pop quiz: quick, useful, and gone before you know it.
Method 2: Magnetize a Nail or Needle by Stroking
What you need
A steel nail or sewing needle, plus one permanent magnet. A stronger magnet usually gives better results.
How to do it
Place the nail or needle on a flat surface. Choose one pole of the magnet and stroke it along the metal object from one end to the other in one direction only. Lift the magnet after each stroke instead of rubbing it back and forth. Repeat this motion 30 to 50 times.
After several strokes, test the nail or needle by trying to pick up paper clips, staples, or iron filings. If the object is small and light, you may notice the effect quickly. If not, keep going. Magnetism is often more marathon than magic trick.
Why one direction matters
Stroking in one direction helps encourage more of the magnetic domains to line up consistently. Rubbing back and forth can partially undo your own work, which is a little like making your bed and immediately cannonballing onto it.
What to expect
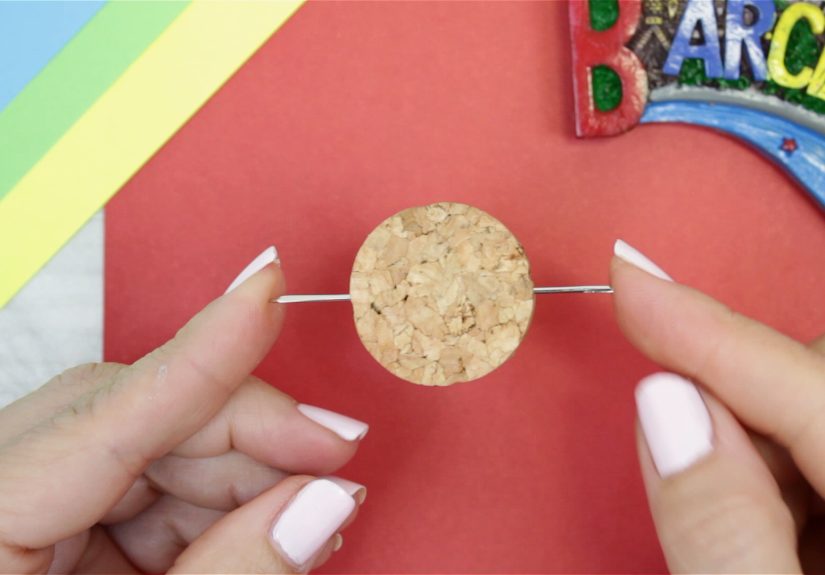
This method can create a weak magnet, especially in steel. It may last for a while or fade gradually. If you want a fun extension, float a magnetized needle on a small piece of cork in water and see whether it roughly aligns north-south like a simple compass.
Method 3: Build a Simple Electromagnet
What you need
An iron nail, insulated copper wire or magnet wire, a low-voltage battery such as a D-cell or AA battery, and a few paper clips for testing. You may also need sandpaper to remove insulation from the ends of the wire.
How to do it
Wrap the insulated wire tightly around the nail, leaving a few inches free on both ends. Keep the coils close together and neat. More turns usually mean a stronger electromagnet. Strip the insulation from the wire ends if needed, then connect one end to the positive battery terminal and the other end to the negative terminal.
Once the circuit is complete, the nail should become magnetic. Touch the end of the nail to paper clips and see whether they stick. Disconnect the battery when you are done testing. The magnetism will mostly disappear when the current stops, which is exactly what makes this an electromagnet.
Why this method works so well
Electric current flowing through a wire creates a magnetic field. Wrapping the wire into a coil concentrates that field. Adding an iron nail as the core boosts the effect because iron responds strongly to magnetization. In short, the coil does the inviting and the iron core brings extra muscle.
Low-voltage safety tips
Use only batteries for beginner home experiments. Do not connect the wire to a wall outlet, extension cord, or any household mains electricity source. Disconnect the battery between tests because the wire can heat up. If a child is doing the project, adult supervision is smart. Science is fun. Burned fingers are not.
How to Make Your DIY Magnet Stronger
If your first attempt works but feels underwhelming, that is normal. Homemade magnets usually need a little tuning. Here are the factors that matter most.
Use the right core material
Iron and steel work much better than wood, plastic, or air. If you are building an electromagnet, an iron nail is a classic choice because it is easy to find and responds well to the magnetic field created by the coil.
Add more wire turns
For an electromagnet, more turns around the nail usually increase strength. Tighter, closely packed coils also help. Loose wrapping might still work, but neat coils generally perform better.
Increase current carefully
More current can strengthen an electromagnet, but this should be done cautiously and only with simple battery-powered setups. More current can also mean more heat, so do not leave the circuit connected for long periods.
Choose steel for a stroked magnet
If you are using the stroking method, steel often holds magnetism better than softer iron. That is why a sewing needle can sometimes make a better simple compass than a flimsy paper clip.
Easy Ways to Test Your Magnet
You do not need laboratory equipment to see whether your project worked. Try these simple tests:
Paper clip test: See how many paper clips the magnet can lift. This is the classic and still undefeated method.
Compass test: Bring the magnet near a compass and watch for needle movement. This is especially useful for an electromagnet.
Chain test: Pick up one paper clip and see whether a second clip hangs from it. That shows the first clip has become temporarily magnetized too.
Distance test: Check how close the magnet needs to be before it pulls metal toward it. Greater range usually means a stronger magnetic field.
Common DIY Magnet Problems and Fixes
The electromagnet does nothing
Make sure the wire ends are stripped enough to expose bare copper. If insulation is still covering the ends, electricity cannot flow. Also check that the battery is good and the connections are secure.
The magnet is too weak
Use more turns of wire, wrap the coils more tightly, or switch to a better iron or steel core. If you used stainless steel, that may be the problem because many stainless steels are not strongly magnetic.
The stroked nail loses magnetism fast
That is common. Try a steel needle instead, use more strokes, and keep the strokes all in one direction. Home-stroked magnets are usually modest in strength and may fade.
The wire gets warm
Disconnect the battery between short tests. A warm wire is a clue that current is flowing, but too much heating means you should give the setup a break.
Can a Homemade Magnet Become Permanent?
Sometimes, but not usually in a dramatic way. A steel object magnetized by stroking may keep some magnetism and behave like a weak permanent magnet. An iron-core electromagnet, on the other hand, usually loses most of its magnetism when the current stops, especially if the core is soft iron.
Strong commercial permanent magnets are made with carefully selected materials and powerful industrial processes. That is why your refrigerator magnet arrives ready for business while your homemade nail magnet may need encouragement, applause, and another 20 strokes.
What Can Make a Magnet Lose Strength?
Heat, repeated impact, and poor storage can all weaken magnetism. A magnet that gets very hot may lose the orderly alignment of its domains. Dropping or hammering a magnet can also scramble that alignment. So if you worked hard to magnetize a needle, maybe do not celebrate by launching it off the table.
Real-Life Uses for the Same Science
The same principles behind your home experiment show up all over modern life. Electromagnets help power doorbells, speakers, motors, relays, MRI machines, and sorting equipment in recycling systems. Temporary magnetism explains why metal items can briefly behave like magnets when exposed to a strong field. Even the humble compass relies on magnetic alignment.
That is what makes this topic so satisfying. You are not just building a clever little experiment. You are recreating the basic science behind some of the most useful devices in everyday life.
Experiences and Lessons from Trying DIY Magnet Methods at Home
One of the most interesting things about learning how to make a magnet at home is that the experience rarely goes exactly as expected. Many people begin with the dramatic assumption that a nail plus a magnet equals instant superhero powers. Then the nail lifts one lonely paper clip, drops it, and everyone stares at it like it has betrayed the family. Oddly enough, that moment is part of the fun. It teaches you that magnetism is real science, not stage magic.
A common first experience is trying the stroking method with whatever metal object happens to be nearby. Sometimes it works. Sometimes it does not, because the object is made of the wrong material or is only weakly magnetic. That disappointment usually turns into a better question: why did one piece of metal work and another fail? Once people realize that iron and steel behave differently from plastic, aluminum, or some types of stainless steel, the experiment becomes more interesting. It shifts from random tinkering to actual observation.
The electromagnet method often feels more exciting because the result is immediate. Wrap wire around a nail, connect it to a battery, and suddenly the nail can grab paper clips like it means business. The first time that happens, it feels wonderfully unfair, as if plain wire and a battery had no right to become that useful. This method also gives quick feedback. If nothing happens, you learn to troubleshoot: strip the wire better, tighten the coils, check the battery, and try again. It is a small lesson in patience and problem-solving wrapped in copper.
Another memorable part of the experience is seeing how small changes matter. Add more turns to the wire and the magnet gets stronger. Switch to a better iron nail and performance improves. Leave the battery connected too long and the wire gets warm, which is a practical reminder that electricity deserves respect. These are the kinds of hands-on lessons that stick because you discover them yourself instead of just reading about them.
For families, classrooms, or weekend hobby projects, DIY magnets are especially rewarding because they mix curiosity with visible results. Kids get to see an invisible force become obvious. Adults get the rare pleasure of saying, “I built that,” even if “that” is technically a nail with ambition. The project is affordable, memorable, and easy to repeat with variations. In many cases, the best outcome is not the strongest magnet. It is the moment someone starts asking bigger questions about motors, generators, compasses, and how so much of modern life quietly depends on magnetism.
Conclusion
If you want to know how to make a magnet, the best answer is that you have options. You can create a temporary magnet by induction, magnetize a steel object by stroking it in one direction, or build a simple electromagnet with wire, a nail, and a battery. Each method teaches a different part of the same big idea: magnetism becomes useful when tiny magnetic regions line up or when electric current creates a magnetic field.
For the easiest success, try the electromagnet first. For the simplest no-wire demo, use the induction method. For a classic homemade science trick, magnetize a needle and turn it into a tiny compass. None of these methods requires fancy equipment, but all of them make the invisible feel real. That is the kind of science experiment that sticks with you, much like a paper clip to a working nail magnet.


