Table of Contents >> Show >> Hide
- What Is a Piston in Minecraft?
- Minecraft Piston Recipe: Required Materials
- How to Get Each Piston Ingredient
- How to Make a Piston in Minecraft Step by Step
- Piston Crafting Grid Layout
- How to Use a Piston After Crafting It
- What Can Pistons Push?
- Regular Piston vs. Sticky Piston
- Best Beginner Uses for Pistons
- Common Mistakes When Crafting or Using Pistons
- Java Edition vs. Bedrock Edition Piston Notes
- Pro Tips for Better Piston Builds
- Example: Simple Piston Door for Beginners
- How to Make a Sticky Piston
- Survival Strategy: When Should You Craft Pistons?
- Experience Notes: What I Learned Building with Pistons
- Conclusion
If Minecraft had a “welcome to redstone engineering” button, it would probably be a piston. This humble block pushes things, opens secret doors, powers automatic farms, and makes players stare at redstone dust like they are decoding an ancient alien language. The good news? Learning how to make a piston in Minecraft is much easier than understanding why your first hidden door works perfectly once, then refuses to cooperate like a moody cat.
In this step-by-step guide, you will learn the exact Minecraft piston recipe, where to find every ingredient, how to place the materials in the crafting grid, and how to use your new piston without accidentally building a machine that looks like spaghetti with sparks. Whether you play Java Edition or Bedrock Edition, the basic piston recipe is the same: wood planks, cobblestone, one iron ingot, and one redstone dust.
By the end, you will know how to craft a piston, activate it, upgrade it into a sticky piston, and use it in practical builds such as doors, farms, traps, elevators, and block pushers. Grab your pickaxe, warm up your crafting table, and let’s turn simple blocks into moving parts.
What Is a Piston in Minecraft?
A piston is a redstone-powered block that pushes blocks, items, and entities in the direction it faces. When it receives a redstone signal, the wooden face extends outward. When the signal turns off, the piston retracts. A regular piston pushes blocks forward but does not pull them back. For pulling blocks, you need a sticky piston, which is made by combining a piston with a slimeball.
Pistons are used in all kinds of Minecraft builds. Beginners often use them for simple doors or hidden entrances. More advanced players use them in sugar cane farms, bamboo farms, flying machines, item sorters, piston elevators, block swappers, and dramatic base entrances that make friends say, “Wait, how did you do that?” That question is the unofficial reward for learning redstone.
Minecraft Piston Recipe: Required Materials
To craft one piston in Minecraft, you need the following items:
- 3 wood planks of any type
- 4 cobblestone
- 1 iron ingot
- 1 redstone dust
- 1 crafting table
The recipe works with oak planks, spruce planks, birch planks, jungle planks, acacia planks, dark oak planks, mangrove planks, cherry planks, bamboo planks, crimson planks, warped planks, and other valid plank types. You do not need all three planks to be the same color, although using matching planks is emotionally satisfying for players who organize chests with military precision.
How to Get Each Piston Ingredient
1. Get Wood Planks
Wood is usually the easiest material to collect. Punch or chop a tree, collect logs, and place the logs in your 2×2 inventory crafting grid or a crafting table to turn them into planks. For one piston, you only need three planks, but it is smart to gather extra wood because Minecraft has a mysterious way of making “just one quick project” become a full base renovation.
2. Mine Cobblestone
Cobblestone is obtained by mining regular stone with a pickaxe. You need four pieces of cobblestone for one piston. If you are starting a new survival world, make a wooden pickaxe, mine a little stone, upgrade to a stone pickaxe, and collect more cobblestone while pretending you are not about to spend three hours underground.
3. Smelt Iron Ore into an Iron Ingot
To get an iron ingot, mine iron ore or raw iron, then smelt it in a furnace using fuel such as coal, charcoal, or wood. One piston requires one iron ingot. Iron is common enough that most players can find it early, especially in caves and underground tunnels. Bring torches, food, and common sense. The cave will still try to ambush you, but at least you will look prepared.
4. Collect Redstone Dust
Redstone dust is mined from redstone ore, which is usually found deeper underground. You will need an iron pickaxe or better to mine redstone ore successfully. One redstone dust is enough for one piston, but collect more if you plan to build doors, farms, or circuits. Redstone dust is the “wire” of Minecraft, and once you start using it, you will suddenly want stacks of the stuff.
How to Make a Piston in Minecraft Step by Step
Step 1: Open the Crafting Table
Place your crafting table on the ground and right-click it on PC, tap it on mobile, or use the appropriate controller button on console. You need the full 3×3 crafting grid. The smaller 2×2 inventory crafting grid will not work for a piston because the recipe needs all three rows.
Step 2: Place 3 Wood Planks in the Top Row
Put one wood plank in each slot of the top row. This forms the wooden face of the piston. Any plank type works, so do not panic if you are holding spruce instead of oak. Minecraft is surprisingly flexible here, unlike villagers, who are emotionally attached to terrible trade prices.
Step 3: Place Cobblestone on Both Sides of the Middle Row
In the middle row, place cobblestone in the left slot and cobblestone in the right slot. Leave the center slot open for the iron ingot. The cobblestone acts like the piston’s sturdy frame.
Step 4: Put the Iron Ingot in the Center
Place one iron ingot in the exact center of the crafting grid. This is the mechanical heart of the piston. Without it, you have a sad pile of wood and stone that refuses to move anything.
Step 5: Fill the Bottom Corners with Cobblestone
Place cobblestone in the bottom-left slot and the bottom-right slot. At this point, you should have four cobblestone total: two on the sides of the middle row and two on the sides of the bottom row.
Step 6: Place Redstone Dust in the Bottom Middle Slot
Finally, place one redstone dust in the bottom-middle slot. The piston should appear in the result box. Move it into your inventory, and congratulations: you have crafted a piston. Your journey toward overcomplicated automatic doors has officially begun.
Piston Crafting Grid Layout
Here is the piston recipe in a simple text layout:
This layout is important. Minecraft crafting recipes are often shape-based, and the piston recipe must be placed in the correct pattern. If your piston does not appear, double-check that the iron ingot is in the center and the redstone dust is directly below it.
How to Use a Piston After Crafting It
Once you have a piston, place it where you want it to push. A piston faces the direction you are looking when you place it, so stand carefully. If it points the wrong way, break it and place it again. Do not worry; everyone has placed a piston backward. It is practically a redstone graduation requirement.
To activate a piston, give it a redstone signal. Common power sources include:
- Lever
- Button
- Pressure plate
- Redstone torch
- Redstone block
- Observer
- Redstone dust connected to a powered source
A lever is the easiest option for beginners. Place a lever next to the piston or connect it with redstone dust. Flip the lever on, and the piston extends. Flip it off, and the piston retracts.
What Can Pistons Push?
Pistons can push many solid blocks, including dirt, stone, wood planks, sand, gravel, concrete, wool, and many decorative blocks. A piston can push up to 12 blocks in a straight line. If you try to push more than that, the piston will not extend.
Some blocks cannot be moved by pistons. Examples include obsidian, bedrock, crying obsidian, enchanting tables, end portal frames, and many blocks with special storage or interface behavior. This is why piston builds often require testing. A design that looks perfect in your head may fail because one block politely refuses to participate.
Regular Piston vs. Sticky Piston
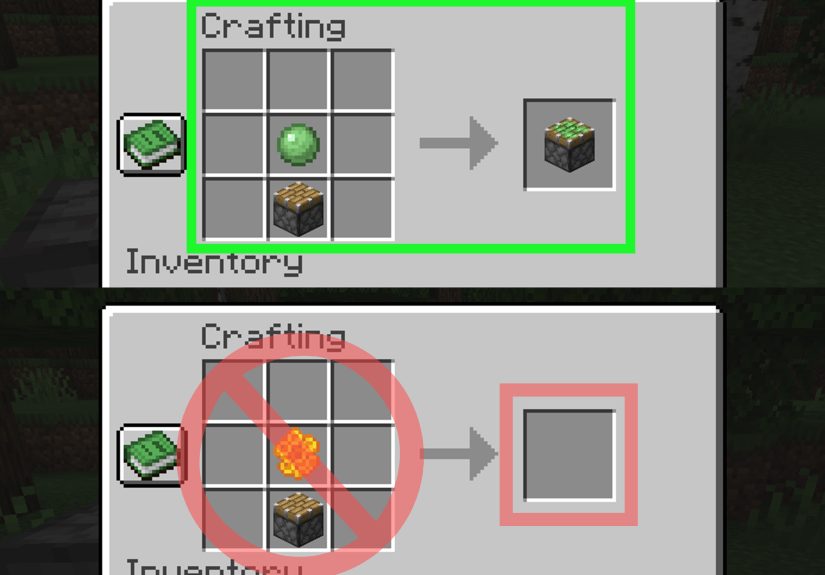
A regular piston pushes blocks forward but leaves them there when it retracts. A sticky piston pushes blocks forward and pulls one attached block back when it retracts. To make a sticky piston, place a slimeball above a piston in a crafting grid. That is it. One slimeball plus one piston equals one sticky piston.
Sticky pistons are essential for hidden doors, retractable stairs, secret storage rooms, and compact redstone builds. If a regular piston is a shove, a sticky piston is a shove followed by “actually, come back here.”
Best Beginner Uses for Pistons
Simple Hidden Door
One of the most popular piston projects is a hidden door. Place sticky pistons behind wall blocks, connect them to a lever or button, and hide the wiring behind the wall. When powered, the pistons move the wall blocks and reveal an entrance. It is perfect for secret bases, treasure rooms, or dramatic exits from a dirt hut that has no business being that fancy.
Automatic Sugar Cane Farm
Pistons are commonly used in sugar cane farms. A piston can break the upper part of sugar cane when activated, while water streams or hoppers collect the drops. Add observers, and the farm can detect when sugar cane grows tall enough to harvest. This is one of the best early redstone builds because sugar cane is useful for paper, books, maps, and trading.
Bamboo Farm
Bamboo grows quickly, making it a great fuel source and crafting material. Pistons can break bamboo when it reaches a certain height. Pair pistons with observers and collection systems to create a steady bamboo supply.
Block Swapper
A block swapper uses pistons to switch one visible block with another. Players use this for decorative walls, lighting systems, secret crafting stations, or base designs that change appearance at the press of a button.
Drawbridge or Gate
Pistons can create moving gates, small drawbridges, and defensive entrances. In survival multiplayer, a piston-powered gate adds both style and function. It will not stop every visitor, but it does make your base feel much more official.
Common Mistakes When Crafting or Using Pistons
Using the Wrong Crafting Grid
The piston recipe requires a crafting table. If you try to make it in your inventory’s 2×2 grid, nothing will happen. Minecraft is not ignoring you; it simply needs more squares.
Putting the Iron and Redstone in the Wrong Slots
The iron ingot must go in the center, and the redstone dust must go directly underneath it. If these two items are swapped, the recipe will not work.
Trying to Push Too Many Blocks
A piston can push up to 12 blocks. If your line of blocks is too long, shorten it or redesign the mechanism.
Expecting a Regular Piston to Pull Blocks Back
Regular pistons only push. If you want the block to return, use a sticky piston. This single difference explains about half of all beginner piston confusion.
Forgetting Java and Bedrock Differences
The crafting recipe is the same in Java Edition and Bedrock Edition, but redstone behavior can differ between versions. Some piston circuits that work in Java may not work in Bedrock, and the reverse can also happen. When following a tutorial, check which edition the creator is using before copying the build block for block.
Java Edition vs. Bedrock Edition Piston Notes
For simple crafting and basic activation, pistons work similarly in Java and Bedrock. Place the piston, power it with redstone, and it extends. However, complex redstone can behave differently. Java Edition has special piston powering behavior often called quasi-connectivity, which can confuse new players because a piston may activate from a power source that does not appear directly connected. Bedrock Edition handles some redstone connections and timings differently.
The practical advice is simple: if you are a beginner, start with direct power. Put a lever next to a piston. Then try redstone dust. Then try repeaters. Learn the clean, obvious version first before diving into compact circuits that look like they were designed by a caffeinated engineer at 3 a.m.
Pro Tips for Better Piston Builds
- Test piston mechanisms in Creative Mode before building them in Survival.
- Use repeaters when your signal needs to travel farther or arrive later.
- Label your redstone test area with signs if you are experimenting with multiple designs.
- Leave extra space behind walls for wiring, especially when building hidden doors.
- Use sticky pistons for moving door blocks back into place.
- Remember that some blocks cannot be pushed.
- Build one small module first, then expand it after it works.
Redstone is easiest when you treat it like a puzzle instead of a magic spell. Signals travel, components react, and pistons move. Once you understand the basic cause and effect, bigger builds become much less intimidating.
Example: Simple Piston Door for Beginners
Here is a quick beginner-friendly piston door idea. Place two sticky pistons vertically on one side and two sticky pistons vertically on the other side, facing inward. Attach blocks to their sticky faces. Connect both sides with redstone dust and power them with a lever. When the lever is on, the pistons push the blocks together to close the doorway. When the lever is off, the blocks retract and open the passage.
This design can be improved later with pressure plates, buttons, repeaters, and hidden wiring. But as a first project, it teaches the most important piston lesson: movement plus timing equals redstone magic. Also, it gives you a door that feels much cooler than a normal wooden door, which zombies keep treating like a polite suggestion.
How to Make a Sticky Piston
Once you have a regular piston, making a sticky piston is easy. You need:
- 1 piston
- 1 slimeball
Open a crafting table or your inventory crafting grid, place the slimeball above the piston, and collect the sticky piston. Slimeballs usually come from slimes, which spawn in swamp biomes and slime chunks. In some worlds, finding slimes feels easy. In others, it feels like the slimes held a meeting and agreed to move out before you arrived.
Sticky pistons are worth the effort. They are the backbone of many compact redstone builds and are especially useful for secret entrances. If you plan to build anything more advanced than a basic pushing mechanism, collect slimeballs whenever you can.
Survival Strategy: When Should You Craft Pistons?
You do not need pistons on your first Minecraft night. Your first priorities are shelter, tools, food, and not being surprised by a creeper auditioning for a demolition job. After you have iron tools and access to redstone, pistons become extremely useful.
Craft your first piston when you want to automate farming, hide a room, build a redstone door, or experiment with moving blocks. If you are playing survival, make several pistons at once. Since each piston needs redstone and iron, batch crafting saves time. A stack of cobblestone, several logs, a few iron ingots, and a handful of redstone dust can turn into a nice supply of pistons for future builds.
Experience Notes: What I Learned Building with Pistons
The first real lesson of piston building is that the recipe is the easy part. The adventure begins when you place the piston and realize it faces the wrong direction. Then you break it, place it again, power it, and discover your redstone line is one block short. Then you fix that and learn the piston is trying to push an immovable block. At that moment, Minecraft gently reminds you that engineering is mostly problem-solving with better lighting.
One of the best ways to learn pistons is to build a tiny test area in Creative Mode. Make a flat platform, place a piston, add a lever, and watch what happens. Then put one block in front of it. Then try two blocks. Then try slime blocks, honey blocks, glass, stairs, sand, and redstone blocks. This kind of hands-on testing teaches more than memorizing rules because you can see the behavior immediately.
In Survival Mode, pistons feel more rewarding because every ingredient has a story. The wood came from the forest near your starter base. The cobblestone came from your first mine. The iron came from a cave where you absolutely heard a skeleton before you saw it. The redstone came from deep underground, probably right after you told yourself, “I will only mine for five more minutes.” When those materials become a moving machine, the build feels earned.
A simple sugar cane farm is one of the most satisfying first piston projects. It is practical, easy to expand, and useful throughout the game. Start with one piston facing the second block of sugar cane, place water nearby, and test it manually with a lever. Once that works, add more pistons in a row. Later, you can add observers to make the farm automatic. The project grows naturally with your confidence, which is exactly how redstone should be learned.
Hidden doors are another unforgettable piston experience. The first time a wall slides open, even a basic two-block doorway feels like a secret agent moment. The first time it breaks, it feels like the wall is judging you. That is normal. Most piston doors fail because of timing, wiring placement, or using regular pistons instead of sticky pistons. Fix one issue at a time. Do not tear the whole build apart unless you enjoy turning your base into a redstone crime scene.
The most useful habit is to build slowly. Place one piston. Power it. Add one block. Test again. Add redstone dust. Test again. Add a repeater. Test again. Redstone problems become much easier when you know exactly which step caused the issue. If you build the entire machine first and test it only at the end, troubleshooting becomes a guessing game with extra cobblestone.
Another important experience is learning when not to make a build compact. Advanced players love tiny piston circuits, but beginner-friendly builds need space. Leave room behind walls. Leave room under floors. Leave room to walk around and inspect the wiring. A slightly larger redstone build that works is better than a tiny masterpiece that activates once and then enters witness protection.
Pistons are also a great introduction to Minecraft creativity. They turn buildings into machines. A wall can move. A staircase can appear. A farm can harvest itself. A bridge can rise from the floor. Once you understand the basic piston recipe and a few activation methods, you stop seeing blocks as static decorations and start seeing them as parts of a system. That shift is what makes redstone so addictive.
So, if your first piston build is ugly, loud, oversized, or held together by questionable wiring, congratulations. That is the authentic redstone beginner experience. Keep testing, keep improving, and keep a chest full of spare redstone components nearby. Your future self will thank you, probably while building a secret door that is completely unnecessary and absolutely worth it.
Conclusion
Learning how to make a piston in Minecraft is one of the first big steps into redstone building. The recipe is simple: three wood planks across the top row, cobblestone on both sides, an iron ingot in the center, redstone dust underneath, and cobblestone in the bottom corners. Once crafted, the piston can push blocks, power doors, automate farms, and bring motion to your builds.
Start small. Make one piston, connect it to a lever, and experiment. Then try a sticky piston, a hidden door, or a simple farm. Before long, you will stop asking, “How do I make a piston?” and start asking, “Can I make my entire mountain base open with one button?” The answer is yes. The follow-up answer is: bring more redstone.


