Table of Contents >> Show >> Hide
- When Should You Replace a Smoke Detector?
- Smoke Detector vs. Smoke Alarm: Does the Name Matter?
- Types of Smoke Detectors You May Be Replacing
- Choosing the Right Replacement Smoke Detector
- Tools and Supplies You May Need
- How to Replace a Battery-Powered Smoke Detector
- How to Replace a Hardwired Smoke Detector
- Where Should Smoke Detectors Be Installed?
- Should You Replace All Smoke Detectors at Once?
- Why Your Smoke Detector Keeps Chirping After Replacement
- Common Mistakes to Avoid
- When to Call a Professional
- Maintenance After Replacing Your Smoke Detector
- Real-World Experience: What Replacing Smoke Detectors Actually Feels Like
- Conclusion
Replacing a smoke detector is one of those home maintenance tasks that sits quietly on the to-do list until the ceiling starts chirping at 2:13 a.m. like a tiny battery-powered cricket with unresolved feelings. The good news? In many homes, replacing a smoke detector is a straightforward project. The even better news? Doing it correctly can make your home much safer.
Whether you have a battery-powered alarm, a 10-year sealed smoke detector, a hardwired smoke alarm with battery backup, or a combination smoke and carbon monoxide detector, the basic goal is the same: remove the old unit, choose the right replacement, install it safely, and test it before declaring victory. This guide explains how to replace a smoke detector, when to replace one, what to know about hardwired detectors, and when it is smarter to call an electrician instead of pretending the wire colors are “just suggestions.”
Safety note: Hardwired smoke detectors connect to household electrical wiring. Always turn off power at the breaker before removing or replacing one. If you are unsure about wiring, old electrical boxes, damaged wires, local code, or interconnected alarms, hire a licensed electrician. A working smoke alarm is important, but so is not turning a simple weekend task into a dramatic electrical adventure.
When Should You Replace a Smoke Detector?
Most smoke alarms should be replaced every 10 years from the date of manufacture, not from the day you finally noticed the beige plastic had turned the color of old printer paper. Smoke detectors use internal sensors that become less reliable over time. Even if the test button still makes noise, an aging sensor may not respond as well to real smoke.
Look for the manufacture date on the back or side of the alarm. If the unit is 10 years old or older, replace it. If there is no date, treat it like expired mystery leftovers and replace it. You should also install a new smoke detector if the alarm keeps chirping after a fresh battery, fails a test, has visible damage, was painted over, or has been exposed to heavy dust, moisture, or insects.
Common Signs Your Smoke Detector Needs Replacement
- The alarm is 10 years old or older.
- It does not sound when you press the test button.
- It chirps repeatedly even after battery replacement.
- The plastic is yellowed, cracked, painted, or damaged.
- The alarm gives frequent false alarms in normal conditions.
- The model has been recalled or is no longer supported.
- You are upgrading from standalone alarms to interconnected or smart smoke detectors.
Smoke Detector vs. Smoke Alarm: Does the Name Matter?
People often use “smoke detector” and “smoke alarm” interchangeably. In everyday home maintenance, that is usually fine. Technically, a smoke alarm is a self-contained device that detects smoke and sounds an alarm. A smoke detector may be part of a larger alarm system and may not include its own sounder. For most homeowners replacing a ceiling unit, “smoke alarm” is the more accurate term, but “smoke detector” remains the phrase most people search for online.
For this article, we will use both terms naturally because real humans do not pause during a 3 a.m. chirping incident to debate fire-safety vocabulary.
Types of Smoke Detectors You May Be Replacing
Before you buy a new unit, identify what you currently have. Replacing a smoke detector is much easier when you match the power type, sensor type, and connection style.
Battery-Powered Smoke Detectors
Battery-powered alarms are common in older homes, apartments, hallways, bedrooms, and areas where hardwired units were never installed. Traditional versions use replaceable 9-volt, AA, or AAA batteries. Newer models may use sealed 10-year lithium batteries. These sealed units are designed to be replaced as a complete alarm when they reach end of life.
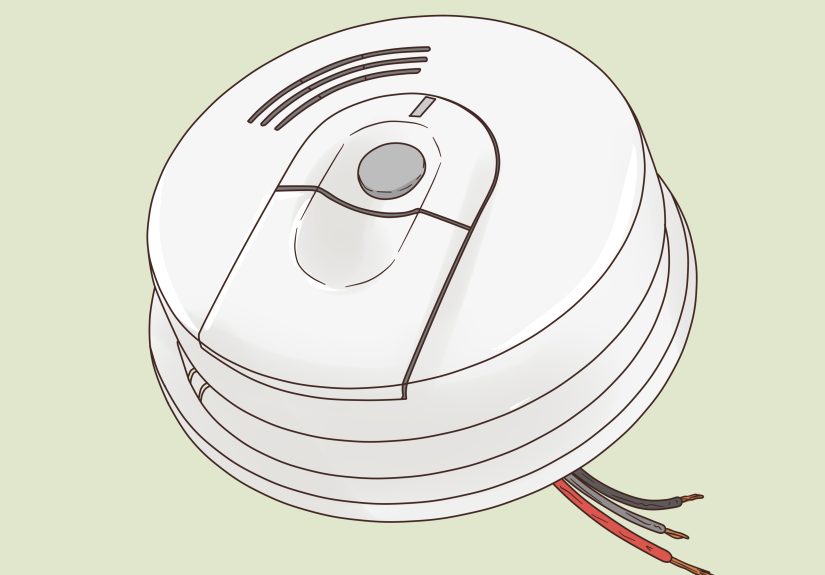
Hardwired Smoke Detectors
Hardwired smoke detectors connect to your home’s electrical system, usually with a backup battery so they continue working during a power outage. Many hardwired alarms are interconnected, meaning when one sounds, the others sound too. This is especially useful in larger homes, finished basements, and homes where bedrooms are spread across different floors.
Combination Smoke and Carbon Monoxide Alarms
A combination smoke and carbon monoxide alarm detects both smoke and CO. These are useful near sleeping areas, on each level of the home, and in homes with fuel-burning appliances, fireplaces, attached garages, or gas heating. When replacing one, choose a replacement that matches both the smoke and carbon monoxide detection needs of that location.
Smart Smoke Detectors
Smart smoke detectors can send phone alerts, integrate with home automation systems, and sometimes identify which room triggered the alarm. They can be convenient, but smart features do not replace proper placement, monthly testing, sensor quality, or routine replacement. In other words, Wi-Fi is nice, but smoke detection is the actual job.
Choosing the Right Replacement Smoke Detector
When shopping for a replacement smoke detector, do not simply grab the cheapest round object in the fire-safety aisle and hope for the best. Check the label, power type, compatibility, and placement needs.
Match the Power Source
If your current unit is battery-powered, you can usually replace it with another battery-powered or sealed 10-year alarm. If your current unit is hardwired, replace it with a compatible hardwired smoke alarm unless local code or a licensed professional advises otherwise.
Hardwired alarms usually include a mounting bracket and a wiring harness. Some brands offer adapter plugs for replacing older models without rewiring, but compatibility varies. Never force a connector. A smoke alarm connector is not a USB cable, and “almost fits” is not a wiring strategy.
Consider Sensor Type
Smoke alarms generally use photoelectric sensors, ionization sensors, or a combination of both. Photoelectric alarms are often better at detecting smoldering fires, such as smoke from a couch or mattress. Ionization alarms may respond faster to flaming fires. Many safety experts recommend having both types of protection in the home, either through dual-sensor alarms or a mix of properly placed alarms.
Check for Interconnection
If your existing smoke detectors are interconnected, your replacement should support interconnection too. Hardwired interconnected units usually include a third wire for communication between alarms. Wireless interconnected alarms can also link together without running new wires. If one alarm in an interconnected system is replaced with an incompatible unit, the system may not work as intended.
Look for Listing and Code Compatibility
Choose alarms that are listed by a recognized testing laboratory and appropriate for residential use. Local smoke alarm rules vary by state, city, housing type, and rental situation. Some areas require sealed 10-year battery alarms in certain replacements. Others require hardwired interconnected alarms during remodels or new construction. When in doubt, check local requirements or ask your fire department or electrician.
Tools and Supplies You May Need
For a basic battery-powered smoke detector replacement, you may need only a step ladder, screwdriver, pencil, drill, anchors, and the new alarm. For a hardwired smoke detector, you may also need a non-contact voltage tester and wire connectors if the wiring harness must be changed.
- New smoke detector or smoke/CO alarm
- Step ladder
- Screwdriver
- Drill and bits, if new mounting holes are needed
- Wall anchors, if included or required
- Non-contact voltage tester for hardwired alarms
- Wire connectors, if replacing a hardwired harness
- Fresh backup battery, if required
- Permanent marker to write the installation date
How to Replace a Battery-Powered Smoke Detector
Battery-powered smoke detectors are the easiest to replace. Still, read the manufacturer’s instructions before installing the new alarm. Each model has its own bracket, battery door, activation switch, and test sequence.
Step 1: Remove the Old Alarm
Twist the smoke detector counterclockwise or slide it off the mounting bracket, depending on the model. If it resists, look for a locking tab. Some alarms have tamper-resistant pins, especially in rentals or public housing. Do not yank it off the ceiling like you are starting a lawn mower.
Step 2: Remove the Old Mounting Bracket
If the new alarm uses a different bracket, unscrew the old bracket from the ceiling or wall. Keep the screws nearby only if they fit the new bracket properly. Most new alarms include their own hardware.
Step 3: Install the New Bracket
Hold the new bracket in place, mark the screw holes, drill pilot holes if needed, and secure it with screws. If you are installing into drywall and not a ceiling joist, use proper anchors.
Step 4: Activate the Battery
Install the battery or pull the activation tab on a sealed 10-year model. Some sealed alarms must be twisted onto the bracket before they activate. Read the instructions so you do not spend 12 minutes arguing with a plastic circle.
Step 5: Attach and Test the Alarm
Twist or snap the alarm onto the bracket. Press and hold the test button until it sounds. The alarm should be loud enough to annoy everyone in the house, which is exactly the point.
How to Replace a Hardwired Smoke Detector
Replacing a hardwired smoke detector is often simple when the new unit is compatible with the existing wiring and bracket. However, it involves household electrical power, so slow down and follow safety steps carefully.
Step 1: Turn Off Power at the Breaker
Find the circuit breaker that powers the smoke alarm circuit and turn it off. Do not rely only on a wall switch, because smoke alarms are usually not controlled by ordinary switches. After turning off the breaker, use a non-contact voltage tester at the alarm wiring to confirm that power is off.
Step 2: Remove the Old Alarm From the Bracket
Most hardwired smoke alarms twist counterclockwise off the mounting plate. Some have a locking pin or tab. Once the alarm is loose, gently pull it down far enough to access the wiring harness.
Step 3: Disconnect the Wiring Harness
Hardwired alarms usually have a quick-connect plug on the back. Squeeze the connector tabs and pull the plug straight out. Do not pull on the wires themselves. If the connector does not match the new alarm, you may need to replace the harness using the connector supplied with the new unit.
Step 4: Replace the Mounting Bracket
If the new smoke detector uses a different bracket, remove the old one and install the new bracket onto the electrical box. Make sure the wires remain accessible through the center opening.
Step 5: Connect the New Harness if Needed
If the new alarm requires a new wiring harness, follow the manufacturer’s wiring diagram exactly. Typical hardwired smoke alarms use black for hot, white for neutral, and red or orange for interconnect, but you should never assume wire colors are correct in an older home. If anything looks confusing, damaged, loose, aluminum, scorched, or overcrowded, stop and call an electrician.
Step 6: Attach the New Smoke Detector
Plug the harness into the new alarm until it clicks. Install the backup battery if the model requires one. Twist the alarm onto the bracket until it locks securely in place.
Step 7: Restore Power and Test
Turn the breaker back on. Many hardwired alarms show a steady green light or similar power indicator. Press the test button and confirm the alarm sounds. If your alarms are interconnected, test that the other alarms sound as well. Warn people in the home first unless your hobby is creating indoor panic.
Where Should Smoke Detectors Be Installed?
Replacement is a perfect time to check whether your home has enough smoke detectors. Many safety organizations recommend smoke alarms inside each bedroom, outside sleeping areas, and on every level of the home, including the basement. Larger homes may need more alarms so smoke is detected quickly wherever a fire starts.
Mount smoke alarms high on walls or ceilings because smoke rises. Avoid placing them too close to bathrooms, air vents, ceiling fans, windows, or cooking appliances, since steam, drafts, and normal cooking smoke can cause nuisance alarms. Many manufacturers recommend placing smoke alarms at least 10 feet from cooking appliances when possible.
Should You Replace All Smoke Detectors at Once?
If one alarm has reached 10 years old, there is a good chance the others were installed around the same time. Replacing all smoke detectors together can make maintenance easier and improve compatibility, especially in a hardwired interconnected system.
Replacing all units at once also gives you a clean schedule. Write the installation month and year on each alarm or keep a digital home maintenance record. Ten years from now, future you will appreciate not having to remove every alarm just to read tiny stamped numbers on the back.
Why Your Smoke Detector Keeps Chirping After Replacement
A new alarm should not chirp continuously. If it does, check the basics first. Make sure the battery is installed correctly, the battery door is fully closed, the alarm is locked onto the bracket, and the pull tab has been removed. For hardwired alarms, confirm the power is restored at the breaker and the harness is fully seated.
Sometimes the chirp is coming from a different alarm nearby. Sound can bounce around hallways in a deeply annoying acoustic magic trick. Check every alarm in the area, including carbon monoxide detectors, security system sensors, and alarms in closets or nearby rooms.
Common Mistakes to Avoid
- Replacing only the battery in an expired alarm: A fresh battery does not restore an old sensor.
- Ignoring the manufacture date: The 10-year clock starts when the alarm was made, not when you noticed it.
- Mixing incompatible hardwired alarms: Interconnected systems need compatible units.
- Working on live wiring: Always shut off the breaker and verify power is off.
- Painting over alarms: Paint can block smoke entry and ruin the sensor.
- Installing too close to the kitchen: Poor placement leads to nuisance alarms and battery removal.
- Forgetting to test: Installation is not complete until the alarm sounds during a test.
When to Call a Professional
Call a licensed electrician if you are installing a new hardwired alarm where none existed before, replacing old or damaged wiring, dealing with an alarm tied into a security or fire panel, upgrading an interconnected system, or seeing anything unusual in the electrical box. You should also call a professional if local code requires it or if you simply do not feel comfortable working around wiring.
There is no shame in hiring help. The goal is a smoke alarm system that works when needed, not a heroic story about how you almost learned electrical theory the hard way.
Maintenance After Replacing Your Smoke Detector
Once your new smoke detector is installed, keep it in good shape. Test smoke alarms monthly using the test button. Replace backup batteries according to the manufacturer’s instructions. Clean alarms gently with a vacuum brush attachment or soft cloth to remove dust. Never disable an alarm because of cooking smoke; move the alarm to a better location if nuisance alarms continue.
Also create and practice a home fire escape plan. A working smoke alarm gives you warning, but your family still needs to know what to do next. Plan two ways out of each room when possible, choose an outdoor meeting place, and make sure everyone understands that getting outside comes before saving belongings.
Real-World Experience: What Replacing Smoke Detectors Actually Feels Like
The first lesson from replacing smoke detectors is that the job always seems smaller before the ladder comes out. You look up, see a small white disc on the ceiling, and think, “How hard could this be?” Then you discover the old alarm has a locking pin, the bracket is painted to the ceiling, and the date stamp requires the eyesight of an eagle with reading glasses. Still, once you slow down, the process becomes manageable.
In many homes, the easiest replacements are battery-powered alarms in bedrooms and hallways. The old unit twists off, the bracket comes down with two screws, and the new bracket goes up in the same spot. The biggest surprise is often how yellow and dusty the old detector looks next to the new one. That color change is not just cosmetic. It is a small reminder that the unit has been sitting above your hallway for years, breathing in dust, cooking vapor, humidity, and the occasional spider with big real estate dreams.
Hardwired smoke detectors require more patience. The most important experience-based advice is to label things before removing everything. If you are replacing several alarms, open one box at a time, keep each new alarm with its own bracket and instructions, and take a quick phone photo of the old setup before disconnecting anything. That photo is not a substitute for electrical knowledge, but it can help you avoid mixing parts from three different boxes and wondering why the “simple project” now looks like a garage sale for plastic rings.
Another practical lesson: replace alarms during the day, not late at night when a chirp has already destroyed everyone’s mood. Emergency battery swaps are one thing, but full detector replacement is easier when stores are open, the house is awake, and you can safely turn off a breaker without someone yelling that the Wi-Fi disappeared. If your alarms are interconnected, warn everyone before testing. Interconnected alarms are excellent for safety, but the test sound can travel through the house like a tiny marching band of chaos.
People also underestimate the value of buying the right replacement the first time. Matching the brand or checking for compatible adapter plugs can save time. However, compatibility should never be guessed. If the old connector does not fit the new alarm, do not shave plastic, bend pins, or perform “creative engineering.” Use the supplied harness correctly or bring in a professional. Smoke detectors are safety devices, not craft supplies.
Finally, replacing smoke detectors is a good moment to upgrade your whole safety routine. Add alarms where coverage is weak. Put a reminder on your calendar to test them monthly. Write the replacement date in a home maintenance note. Teach everyone what the alarm sounds like and where to meet outside. The project may start with one annoying chirp, but it can end with a safer, better-organized home. That is a pretty good return on a Saturday afternoon and a few trips up the ladder.
Conclusion
Learning how to replace a smoke detector is one of the most useful home safety skills you can have. Battery-powered alarms are usually simple to swap, while hardwired smoke detectors require careful power shutoff, voltage checking, and proper connector handling. The most important rules are clear: replace smoke alarms every 10 years, choose the right type for the location, test after installation, and call a qualified professional when wiring is uncertain.
A smoke detector is small, inexpensive, and easy to ignore, but it performs one of the biggest jobs in your home. Treat it like the safety device it is. Replace old units before they fail, keep the system tested, and give your household the early warning it needs when every second matters.


