Table of Contents >> Show >> Hide
- Why taking your turkey’s temperature matters (and why guessing doesn’t)
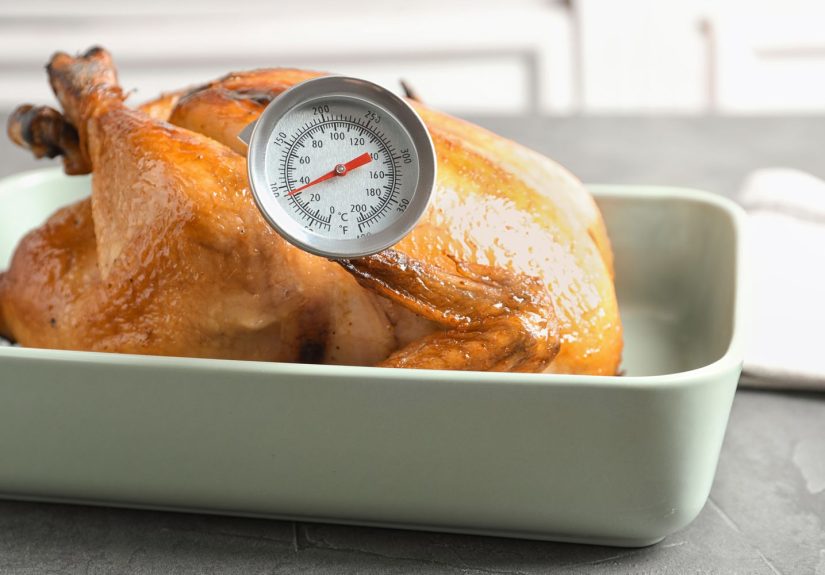
- Tools you’ll need (no, you don’t need a culinary degree)
- Where to take a turkey’s temperature (the “three-spot” rule)
- Step-by-step: How to take a turkey’s temperature correctly
- Target temperature: What number should the thermometer show?
- Common “where do I stick it?” scenarios (with plain-English answers)
- Video guide: A simple “how-to” turkey temperature demo (60–90 seconds)
- Thermometer technique tips that make a big difference
- Adjustments for different turkey-cooking methods
- After you temp it: resting, carving, and quick leftover safety
- Frequently asked questions
- Extra: of real-world “this is what it feels like” experiences (so you’re not surprised)
- Conclusion
If turkey were a mystery novel, the meat thermometer is the detective who shows up, flips on the flashlight, and says,
“Okay everyonenobody move until we see the evidence.” Because timing charts, “golden brown” skin, and a pop-up button
with commitment issues? They’re not evidence. Temperature is.
In this guide, you’ll learn exactly where to take a turkey’s temperature, how to do it without hitting bone (aka the
thermometry equivalent of stepping on a LEGO), and what number you’re aiming for. You’ll also get a simple
video-style demo plan you can followor film yourselfso you can go from “Is it done?” to “It’s done and it’s juicy.”
Why taking your turkey’s temperature matters (and why guessing doesn’t)
Turkey has two goals in life: be delicious and not make anyone regret Thanksgiving. Cooking to a safe internal temperature
is what makes both goals possible. Color can fool you. Juices can fool you. Even the turkey can fool you (it’s crafty like that).
But a thermometer gives you a clear, repeatable answer.
Bonus: using a thermometer isn’t just about safetyit’s about texture. Pulling the bird at the right moment keeps the breast
from drying out and helps the dark meat get tender instead of “chewy but festive.”
Tools you’ll need (no, you don’t need a culinary degree)
1) Instant-read digital thermometer
This is the MVP for most home cooks. You insert it, wait a few seconds, and get a reading. It’s ideal for checking multiple
spots quickly near the end of cooking.
2) Leave-in probe thermometer (wired or wireless)
You park the probe in the turkey while it roasts and watch the temperature climb without opening the oven every 10 minutes
like a nervous raccoon checking the trash can. Great for consistent resultsespecially on big birds.
3) Optional but smart: a quick accuracy check
If your thermometer has been living in a kitchen drawer with loose rubber bands and mystery takeout menus, it’s worth
checking accuracy. Many thermometers can be tested with an ice-water method (32°F) or boiling-water method (around 212°F at sea level).
You don’t need perfectionyou just want to know your tool isn’t lying to you.
Where to take a turkey’s temperature (the “three-spot” rule)
For a whole turkey, the safest and most reliable approach is to check the temperature in multiple locations. Why?
Because turkeys are not a single uniform hunk of meat. Breast meat and dark meat cook differently, and the shape of the bird
creates hot spots and cool spots.
The 3 key places to check on a whole turkey
- Thickest part of the breast (usually on the side, near the center, not right at the surface)
- Innermost part of the thigh (near where the thigh meets the body, not near the drumstick end)
- Innermost part of the wing (near the joint close to the body)
Important: in every location, aim for the thickest part of the meat while avoiding bone. Touching bone can
give you a misleading reading because bone heats differently than muscle.
If the turkey is stuffed
You’ll also check the center of the stuffing. Stuffing is denser, heats more slowly, and needs its own moment in the spotlight.
(Yes, it is a side dish with main-character energy.)
Step-by-step: How to take a turkey’s temperature correctly
-
Start with smart food safety. Wash hands and keep raw turkey juices off counters, utensils, and other foods.
Also: skip rinsing the turkey. Washing raw poultry can spread germs around your kitchen (splashes are sneaky). -
Know when to start checking. Begin temperature checks about 30 minutes before you think the turkey might be done,
especially if it’s your first time with that oven, that pan, or that turkey size. If you’re using a leave-in probe, start watching
closely once the turkey gets within 15°F of your target. -
Open the oven and work efficiently. Heat escapes fast. Have your thermometer ready so you’re not doing a kitchen scavenger hunt
while your oven performs a dramatic temperature drop. -
Check the breast first. Insert the thermometer into the thickest area of the breast meat.
Go in from the side if that feels easier, and aim the tip toward the center mass of the breast.
Avoid the breastbone and avoid going too shallow. -
Check the thigh next. Insert into the innermost part of the thigh (near where it meets the body).
This area tends to lag behind or run ahead depending on your roasting setup, so it’s a key truth-teller.
Again: avoid bone. -
Check the wing (yes, really). The innermost part of the wing near the body can be a cooler spot on some birds,
especially if the wing is tucked. A quick check here reduces the odds of a “surprise underdone” situation. -
If stuffed, check the stuffing. Insert the thermometer into the center of the stuffing (not touching the cavity walls).
This is non-negotiable for safety if you cooked stuffing inside the bird. -
Interpret readings like a calm scientist. If one area is below target, the turkey isn’t fully done.
Keep cooking and recheck in 10–15 minutes. If the breast is done but the thigh is lagging, you can tent the breast with foil
(to slow browning) while the darker meat finishes. -
Stop cooking at the right time. Once the turkey has reached your target temperature in the required spots,
pull it from the oven. More time = drier breast. You can always cook more, but you can’t uncook a turkey. -
Rest the turkey. Let the turkey rest before carving. Resting helps juices redistribute and can slightly raise internal temperature.
If the turkey is stuffed, resting also helps, but you’ll still remove stuffing safely after the rest period.
Target temperature: What number should the thermometer show?
For food safety, the widely accepted target for turkey is 165°F in the appropriate thickest/innermost spots.
This includes the breast, the thigh, andif applicablethe stuffing.
You may see some cooking brands or legacy guides recommend higher finished temperatures for certain parts (especially dark meat).
Dark meat can be more tender at higher temperatures, but 165°F is the key safety benchmark. If you want dark meat that’s
fall-apart tender, consider methods that help it cook a bit longer without punishing the breast (more on that in a moment).
Common “where do I stick it?” scenarios (with plain-English answers)
Scenario A: “I keep hitting bone in the breast.”
Try inserting from the side rather than straight down from the top. Aim the tip toward the center of the breast muscle,
and keep the probe surrounded by meat on all sides. If the tip is too close to bone or the cavity, the reading can swing.
Scenario B: “My breast says 165°F, but my thigh says 155°F.”
Keep cooking. If the breast is already where you want it, loosely tent the breast area with foil to protect it while the thigh catches up.
Recheck the thigh after 10–15 minutes.
Scenario C: “The thermometer reads 175°F… and my soul left my body.”
Deep breath. Your turkey won’t be inediblebut the breast may be drier than you hoped. Add gravy, serve with moisture-boosting sides,
and next time pull the turkey right when it hits target. Temperature control is a skill, not a personality trait.
Scenario D: “Can I trust the pop-up thermometer?”
Treat pop-up timers like a weather forecast: useful as a rough clue, but not the final word. Use a real thermometer for the decision.
Video guide: A simple “how-to” turkey temperature demo (60–90 seconds)
Want a quick video version for your blog or social feed? Here’s a clean, practical shot list you can film with your phone.
(No fancy editing requiredunless your turkey insists on special effects.)
Shot list + voiceover script
-
0–5 seconds: Close-up of a thermometer + roasted turkey in the background.
Voiceover: “The only reliable way to know a turkey is done? A thermometerbecause guessing is not a food safety plan.” -
5–20 seconds: Show the breast location. Insert thermometer from the side, avoiding bone.
Voiceover: “Check the thickest part of the breast. Keep the tip surrounded by meatdon’t hit the breastbone.” -
20–35 seconds: Show thigh location near the body joint.
Voiceover: “Next, the innermost thigh where it meets the body. Again: avoid bone for an accurate reading.” -
35–45 seconds: Quick wing check near the body joint.
Voiceover: “Then the innermost wingsmall area, big confidence boost.” -
45–60 seconds: If stuffed, show thermometer in the center of stuffing.
Voiceover: “If you stuffed the turkey, check the center of the stuffing too. It needs to be at the safe temperature as well.” -
60–75 seconds: Show a reading on screen and the turkey resting on the counter.
Voiceover: “When your turkey reaches the target temperature in the required spots, pull it and let it rest before carving.” -
75–90 seconds: Quick carve shot + juicy slice.
Voiceover: “Now carve, serve, and enjoy the rare magic of a turkey that’s both safe and actually juicy.”
Thermometer technique tips that make a big difference
- Insert deep enough. The sensor is usually near the tip (check your model), so it must be in the center of the thickest meat.
- Avoid fat pockets and the cavity. Fat can heat differently, and the cavity can skew readings.
- Take more than one reading in each area. If you get a weird number, pull back slightly and reinsert.
- Don’t leave the oven door open. Check quickly, close, and give the turkey time to rebound.
- Write it down if you’re hosting. Sounds sillyuntil three people ask “Is it done?” and you can answer with confidence instead of vibes.
Adjustments for different turkey-cooking methods
Roasting (classic whole bird)
Use the three-spot check (breast, thigh, wing). If you’ve got a leave-in probe, place it in the deepest breast meat for steady tracking
and verify other spots with an instant-read near the end.
Spatchcocked turkey (butterflied)
Spatchcocking helps the turkey cook more evenly and faster because the bird lays flatter. You’ll still check the thickest breast and thigh,
but you may find the temperatures align more closely than with a traditional whole roast.
Turkey parts (breasts, thighs, drumsticks)
Check the thickest part of each piece, avoiding bone. Parts can cook faster and allow you to pull white and dark meat at their best texture moments
without forcing the whole bird to compromise.
Smoking or grilling
The same internal temperature targets apply. With long cooks, a leave-in probe thermometer is especially helpful so you’re not constantly lifting lids
and feeding your turkey extra gusts of cold air.
After you temp it: resting, carving, and quick leftover safety
Once the turkey hits the target temperature in the right spots, let it rest before carving. Resting helps the meat stay juicy and makes carving easier.
If the turkey was stuffed, follow safe handling: let it rest, then remove the stuffing and serve it hot.
When dinner is over, refrigerate leftovers promptly. If you reheat turkey later, heat it thoroughly (a thermometer helps here too).
Frequently asked questions
Do I really need to check three places?
It’s strongly recommended. A turkey can be “done” in one spot and underdone in another, especially near joints and thicker areas.
Checking multiple places is how you avoid carving into the bird and discovering a surprise plot twist.
What if my turkey is done but the skin isn’t brown enough?
Prioritize internal temperature. If you want extra browning, you can briefly increase heat at the end only if the turkey isn’t already at the target temp.
If it’s already done, browning longer usually means drying.
How long should I rest the turkey?
A good rule is at least 20–30 minutes for a whole turkey. This also helps if you cooked stuffing inside, since resting can make carving and safe removal easier.
Extra: of real-world “this is what it feels like” experiences (so you’re not surprised)
The first time you take a turkey’s temperature, it can feel oddly high-stakeslike you’re defusing a holiday-shaped bomb with a thermometer instead of wire cutters.
That’s normal. Turkeys are big, expensive, and usually surrounded by people who are suddenly very interested in time. The good news: once you’ve done it once,
you’ll wonder why you ever trusted cooking charts like they were ancient prophecy.
One of the most common experiences home cooks report is the “bone fake-out.” You insert the thermometer, see a number that looks suspiciously done,
and celebrate for about three secondsuntil you realize the tip was touching bone. You recheck two inches over and the turkey is suddenly 12 degrees colder.
It’s not the turkey gaslighting you (probably). It’s just physics. This is why taking two readings in the same area is such a confidence booster:
you learn what “stable and believable” looks like.
Another classic moment is realizing the turkey is not one temperatureit’s a whole neighborhood of temperatures. The breast might be cruising at the target,
while the thigh is still catching up. This is where calm problem-solving beats panic. A loose foil tent over the breast can protect it, and a short return to the oven
finishes the darker meat. Experienced cooks often say the biggest mental shift is accepting that “done” is a set of readings, not a single number.
You may also notice the “two-degree stand-off” during the last stretch: the thermometer creeps up, then seems to stall right before the finish line.
That’s common, especially with large birds. It’s not brokenit’s just a slow, steady climb as heat moves inward. The best move here is patience, not higher heat.
Cranking the oven can over-brown the outside while the inside is still catching up.
Many cooks also describe the surprisingly satisfying moment of pulling the turkey at the right time. Instead of “I hope it’s done,” you have an actual number.
That confidence changes everythingcarving feels easier, hosting feels lighter, and you stop opening the oven door every seven minutes like you’re checking
if the turkey teleported away. The thermometer becomes the quiet hero of the meal.
Finally, there’s the “resting revelation.” People are often tempted to carve immediately because the kitchen smells amazing and hungry humans are circling.
But once you’ve tasted the difference resting makesjuicier slices, less liquid flooding the cutting boardyou’ll start guarding that rest time like it’s
the last seat on the couch. If you want one habit that reliably improves turkey, it’s this: temp it correctly, then let it rest.
Conclusion
Taking a turkey’s temperature isn’t complicatedit’s just specific. Use a reliable thermometer, check the breast, thigh, and wing (plus stuffing if the bird is stuffed),
and cook to the safe target temperature. Add a rest before carving, and you’ll get turkey that’s both safe and actually worth bragging about.
Your future selfand your gravywill thank you.


