Table of Contents >> Show >> Hide
- Main keyword
- Related (LSI) keywords you’ll naturally bump into
- Before you start: what you’ll need
- Know your machine in 30 seconds
- Step-by-step: Using a pasta machine (11 steps)
- Step 1: Clamp it down like you mean it
- Step 2: Prep the dough (and give it a nap)
- Step 3: Cut into portions (small dough is happy dough)
- Step 4: Flatten into a “starter ticket” for the rollers
- Step 5: Run it through the widest setting (a few times)
- Step 6: Fold to build strength (aka dough origami)
- Step 7: Repeat roll + fold until smooth
- Step 8: Start thinning gradually (one notch at a time)
- Step 9: Choose your final thickness (don’t chase “paper thin” blindly)
- Step 10: Let sheets rest briefly (yes, even pasta needs a breather)
- Step 11: Cut the pasta (machine cutter or by hand)
- Thickness cheat sheet (practical, not preachy)
- Troubleshooting (the pasta machine therapy corner)
- Cooking fresh pasta (so your victory doesn’t turn to mush)
- Cleaning & care (aka how to not ruin your machine)
- Safety notes (because pasta machines don’t care about your fingers)
- 500+ words of real-world “experience” (the part nobody tells you)
- Conclusion
A pasta machine is basically a tiny treadmill for dough: you feed it a lump, it comes out calmer, smoother, and mysteriously more photogenic.
If you’ve ever watched fresh pasta being rolled into silky sheets and thought, “Sure, but my kitchen is held together by vibes,” good news:
pasta machines are made for real-life counters and real-life attention spans.
This guide walks you through 11 practical steps for using a pasta machine (hand-crank, electric, or stand-mixer roller),
with “picture cues” you can visualize as you goso you’ll know what “right” looks like, not just what it’s called.
We’ll also cover dough troubleshooting, thickness choices, cutting tips, and how to clean the thing without angering the Rust Gods.
Main keyword
how to use a pasta machine
Related (LSI) keywords you’ll naturally bump into
- pasta roller settings
- fresh pasta dough
- sheeting pasta
- fettuccine and spaghetti cutter
- semolina flour for dusting
- how to clean a pasta machine
- homemade noodles with a pasta maker
Before you start: what you’ll need
- Pasta machine (manual clamp-on, electric, or stand-mixer roller attachment)
- Dough (egg-based or semolina-water dougheither works, just handle differently)
- Bench scraper (to move dough without turning your fingers into glue)
- Flour for dusting (all-purpose + a little semolina is a common combo)
- Clean kitchen towel or plastic wrap (to keep dough from drying out)
- Tray or sheet pan dusted with flour/semolina (parking spot for finished pasta)
- Optional: drying rack, sharp knife/pizza wheel, and a friend who cranks while you feed
Know your machine in 30 seconds
Most pasta machines have two main jobs: rolling (making sheets) and cutting (turning sheets into noodles).
The rollers have thickness settingsusually numbered. On many machines, the widest/thickest setting is the lowest number,
and the thinnest setting is the highest number. If your dial’s numbering is the opposite, your machine isn’t “wrong,” it’s just being dramatic
follow the manual and the dough’s behavior.
The key idea: you don’t jump to thin sheets immediately. You laminate and smooth first, then thin gradually.
That’s how you get even sheets that don’t tear, stick, or resemble a modern art installation.
Step-by-step: Using a pasta machine (11 steps)
-
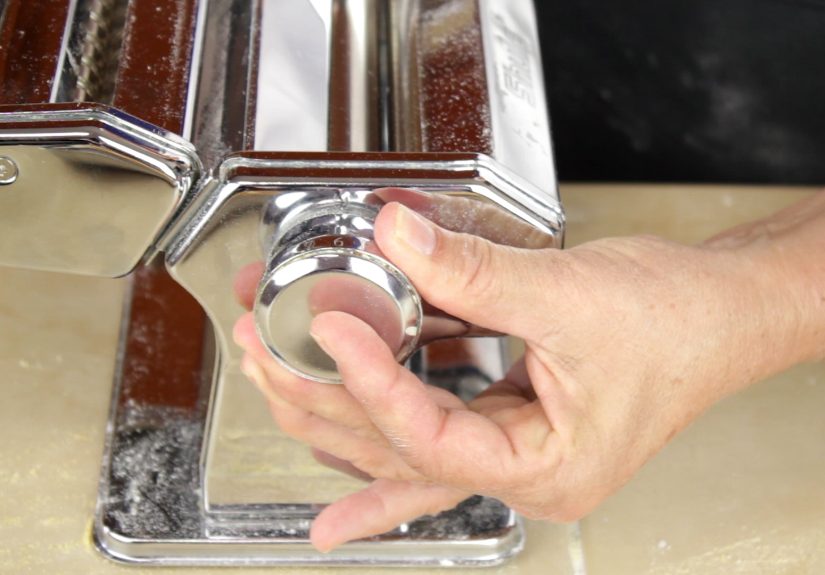
Step 1: Clamp it down like you mean it
Secure the machine to a sturdy counter or table using the clamp. If it wobbles now,
it will definitely wobble laterright when you’re holding a sheet of dough the size of a throw blanket.Picture cue: The machine should sit flat, clamp tight, and not twist when you tug the handle.
-
Step 2: Prep the dough (and give it a nap)
Use a smooth, elastic dough that’s not sticky. After kneading, rest it (often about 30 minutes) so the gluten relaxes
and the dough rolls without fighting back. Keep it covered so it doesn’t form a dry “skin.”Picture cue: Dough should look matte and smooth, like a firm ball of play doughnot shaggy, not wet.
Example: For a classic egg dough, many home recipes land around flour + eggs + a pinch of salt, adding a little water only if needed.
-
Step 3: Cut into portions (small dough is happy dough)
Divide the rested dough into 4–8 pieces, depending on batch size. Work with one piece at a time and keep the others covered.
Smaller portions roll more evenly and won’t dry out before you finish.Picture cue: Portions should be palm-sized, easy to flatten, and not cracking at the edges.
-
Step 4: Flatten into a “starter ticket” for the rollers
Flatten one portion with your hand or a rolling pin so it can catch in the rollers.
Aim for a thick oval/rectanglethin enough to enter the widest setting, thick enough to stay together.Picture cue: A squat oval about the thickness of a thick cookieflexible, not brittle.
-
Step 5: Run it through the widest setting (a few times)
Set rollers to the widest/thickest setting. Feed dough through while turning the handle steadily (or running the motor).
Run it through again once or twice until the sheet looks smoother and more uniform.Picture cue: First pass looks rough and uneven; after a couple passes, it looks more satiny and consistent.
Pro tip: If it sticks, dust lightly with flourthink “makeup powder,” not “snowstorm.”
-
Step 6: Fold to build strength (aka dough origami)
Fold the sheet into thirds like a letter (or fold ends toward the center, then fold again) to square it up.
This helps even out thickness and strengthens the sheet so it can go thinner without tearing.Picture cue: Folded dough looks like a neat rectangle with clean edges, not a crumpled scarf.
-
Step 7: Repeat roll + fold until smooth
Roll the folded dough through the widest setting again. Repeat the roll-and-fold cycle until the dough feels elastic and looks smooth.
This is where beginners “accidentally” make professional-looking pastaby doing the boring part on purpose.Picture cue: The sheet becomes evenly colored, with fewer streaks and no crumbly patches.
-
Step 8: Start thinning gradually (one notch at a time)
Once smooth, begin decreasing thickness one setting at a time. Run the sheet through each setting.
If the sheet gets too long to manage, cut it in half and continue with shorter pieces.Picture cue: Sheet stretches longer as it thins; it should drape smoothly without tearing under its own weight.
-
Step 9: Choose your final thickness (don’t chase “paper thin” blindly)
Different pasta shapes like different thicknesses. Lasagna sheets are often thicker; fettuccine/linguine medium-thin;
stuffed pasta thin enough to fold cleanly without bulky seams.Picture cue: For many noodles, you can see a faint shadow of your hand through the sheet, but it still feels sturdy.
Example: Many cooks aim around the ballpark of 1/8″ to 1/16″ for rolled pasta sheets, adjusting by recipe and shape.
-
Step 10: Let sheets rest briefly (yes, even pasta needs a breather)
If your sheet feels very soft or sticky, rest it a few minutes before cutting. A short rest can make cutting cleaner
and reduce sticking in the cutter.Picture cue: The surface looks slightly drier and less tacky, but the sheet remains flexible (not brittle).
-
Step 11: Cut the pasta (machine cutter or by hand)
Attach the cutter (spaghetti, fettuccine, etc.) if your machine has one. Dust the sheet lightly, then feed it through the cutter.
Catch noodles as they fall and lay them on a floured/semolina-dusted tray or hang on a rack.No cutter? Roll the sheet loosely, slice with a sharp knife, then unfurl into strands like you’re revealing a surprisingly delicious magic trick.
Picture cue: Cut noodles separate easily and don’t clump into one mega-noodle blob (unless you under-dusted).
Thickness cheat sheet (practical, not preachy)
Machines vary, so treat this as a starting point:
- Lasagna: slightly thicker sheets so they don’t vanish under sauce (but still thin enough to cook quickly)
- Fettuccine/linguine: medium-thin sheets for a tender bite
- Ravioli/tortellini: thinner sheets so seams don’t feel like chewing a padded envelope
- Delicate shapes: thinner, but only if your dough is strong and smooth
Troubleshooting (the pasta machine therapy corner)
If the dough cracks or looks dry
Dough may be too dry or under-kneaded. Let it rest longer, and if needed, work in tiny amounts of water (drops at a time).
Dry dough tends to split at the edges and looks chalky.
If the dough sticks to rollers
It’s likely too wet or too warm, or you’re not dusting enough. Add a light dusting of flour to the sheet and/or the work surface.
Also make sure your dough has rested; a rested dough is less clingy.
If the sheet tears halfway through thinning
Usually the dough needs more “conditioning” on the widest setting (roll + fold a few more times) before going thin.
Think of it like stretching before a sprint: optional in theory, mandatory in reality.
If noodles clump after cutting
Dust more (lightly but consistently) and give strands space. Toss gently with semolina or flour on a tray,
or hang on a rack. If it’s very humid, you may need to cook sooner rather than later.
If the cutter jams
Too much flour can pack into cutters, but too little flour makes dough stickfun! The sweet spot is light dusting plus a brief rest for the sheet.
If jammed, stop, clear gently, and don’t force it like you’re starting a lawnmower from 1993.
Cooking fresh pasta (so your victory doesn’t turn to mush)
Fresh pasta cooks fastoften in just a few minutesso don’t walk away to “quickly check one thing” on your phone
unless you enjoy eating soft ribbons of regret. Boil in well-salted water, stir in the first 30 seconds, and start tasting early.
Simple rule: Pull it when it’s tender but still has structure. Transfer to sauce with a splash of pasta water for gloss and cling.
Cleaning & care (aka how to not ruin your machine)
Many traditional pasta machines and cutters are designed to be cleaned dry.
Let residue dry, then use a brush, soft toothbrush, or dry cloth to remove bits of flour and dough.
If your manual specifically says “no water,” believe it. Rust is not a seasoning.
- Do: brush out crevices, wipe exterior with a dry cloth, and let parts fully air-dry.
- Don’t: soak, run through the dishwasher, or flood the rollers with water “just a little.”
- Helpful habit: keep a small pastry brush or clean paintbrush in your kitchen drawer labeled “NOT FOR WALLS.”
Safety notes (because pasta machines don’t care about your fingers)
- Keep fingers, sleeves, jewelry, and long hair away from rollers and cutters.
- Crank steadilyfast cranking doesn’t make you “more Italian,” it makes dough more chaotic.
- If using a stand mixer attachment, use the recommended speed and don’t force dough through.
- Clamp tightly; a slipping machine is a jump scare with carbs.
500+ words of real-world “experience” (the part nobody tells you)
Here’s what tends to happen the first few times someone uses a pasta machineeven if they followed a recipe,
watched a video, and felt emotionally prepared. First, there’s the confidence phase:
the machine is clamped, the dough looks fine, and you’re already imagining yourself casually saying,
“Oh this? Just some quick homemade fettuccine,” like it’s the same effort as making toast.
Then comes the reality phase: the first pass through the rollers often looks ugly.
The sheet can come out ragged, with torn edges and a surface that screams “I was assembled during a minor earthquake.”
This is normal. Plenty of experienced home cooks will tell you the dough only starts behaving after you roll it a few times
on the widest setting and fold it. That “extra” step is where the dough turns from crumbly to cooperative.
People who skip it usually end up adding too much flour to compensate, which makes the dough drier, which makes it crack,
which leads to more flour, which is how you accidentally build a tiny desert around your machine.
Another common moment: someone rolls a sheet beautifully… and then makes it too big to manage.
The dough drapes over hands, sticks to itself, and tries to become one giant lasagna flag.
The fix is surprisingly simplecut the sheet in half and keep going with shorter pieces.
Many kitchens learn this lesson at the exact moment a sheet slides off the counter like a dramatic fainting goat.
Next, there’s the “why is it sticking?” mystery. Usually it’s one of three things:
(1) dough is a bit too wet, (2) dough didn’t rest long enough, or (3) the sheet needs a light dusting.
The “experience” part is learning what “light dusting” means. It’s not a blizzard. It’s more like setting powder:
enough to prevent sticking, not enough to gum up your cutter and turn your noodles into a fuzzy, flour-coated rope.
Cutting is its own mini-adventure. People often expect strands to fall like neat haircut clippings.
Instead, the noodles can cling together unless you toss them with a little semolina or flour and give them space.
Humid kitchens make this more dramaticfresh pasta loves moisture the way a sponge loves a spill.
A short rest for the sheet before cutting can help, and so can cooking the pasta soon after cutting,
rather than letting it sit and merge into a single pasta ecosystem.
Finally, there’s cleaningwhere many people learn that pasta machines are not “rinse-and-go” tools.
The most common successful approach is: let bits dry, brush them out, wipe down with a dry cloth, and store.
Once you do this a few times, the routine becomes oddly satisfying, like sweeping the stage after a great performance.
And the best part? The next time you clamp the machine down, you’ll do it with quiet confidence
because you’ve already survived the flour storm, the floppy sheet, and the sticky cutter… and dinner was still amazing.
Conclusion
Using a pasta machine is less about secret Italian magic and more about three repeatable habits:
rest the dough, smooth it on the widest setting, and thin it gradually.
Once you get those right, you can confidently roll sheets for lasagna, cut noodles for weeknight dinners,
and even tackle stuffed pasta without turning your kitchen into a stress-themed cooking show.


