Table of Contents >> Show >> Hide
- What “Glass Glitter” Really Means (and Why It Looks So Expensive)
- Before We Sparkle: A Quick Safety Reality Check
- Option A: The “Real Deal” (Using Craft-Grade Glass Glitter Safely)
- Option B: Make Your Own Faux Glass Glitter (Safe, Budget-Friendly, Shockingly Pretty)
- 5 Christmas Projects That Look Like You Bought Them at a Fancy Boutique
- Pro Tips: More Shine, Less Mess
- Eco Notes: Sparkle Without the Microplastic Hangover
- FAQ: Quick Answers for Crafters on a Mission
- Real-World Craft Room Notes (Extra Experiences to Make This Article Longer)
- Conclusion
There are two kinds of holiday sparkle: the kind that makes your ornaments look like heirlooms, and the kind that
makes your vacuum look like it just joined a disco band. “Glass glitter” lives confidently in the first category
it’s the crisp, icy, high-shine shimmer you see on vintage-style stars, bottle-brush trees, and old-school holiday
décor that somehow looks classy and festive at the same time.
But let’s clear up one important misconception right away: true glass glitter (the classic “German glass glitter”
look) is manufactured from glass and treated for maximum reflection. That’s not the kind of thing most people
should try to replicate by grinding glass at home. The good news? You can still get the same Christmas-morning
sparkle by making safe, “glass-like” glitter alternativesplus you can use craft-grade glass glitter responsibly
when you want the real deal.
This guide shows you both: how to create a convincing faux glass glitter you can make at your kitchen table, and
how to use authentic glass glitter safely for show-stopping holiday projects. Your tree gets the glow-up. Your lungs
and sanity keep their dignity. Everyone wins.
What “Glass Glitter” Really Means (and Why It Looks So Expensive)
When crafters say “glass glitter,” they’re usually chasing a specific vibe: bright, reflective flakes that catch
light like tiny mirrors. Compared to standard plastic glitter (which can look flat or “crafty” up close), glass-style
sparkle tends to:
- Reflect light in sharper flashes (more twinkle, less shimmer smear).
- Read as “vintage” because it resembles the finish on older ornaments and decorations.
- Add textureeven a thin layer feels dimensional.
In practice, you’ll see three “families” of glass-glitter looks in Christmas crafting:
- Authentic glass glitter (purchased craft-grade): real glass flakes, often silvered/coated for high reflectivity.
- Faux glass glitter (DIY): salt, sugar, or mineral-based sparkle that mimics the shine without the hazards of ground glass dust.
- Eco-forward sparkle: biodegradable cellulose glitter or responsibly sourced mineral shimmer used in a way that still feels festive.
Before We Sparkle: A Quick Safety Reality Check
If you’ve seen tutorials suggesting you crush glass ornaments into glitter: that can create sharp fragments and
fine dust that irritates eyes, skin, and lungs. Even when the intent is purely decorative, the material is still
glassmeaning it’s not forgiving if it gets airborne or into curious little hands (or paws).
So here’s the rule of thumb for responsible holiday crafting:
-
Don’t make fine glass glitter at home. No grinding, sanding, blending, or “pulverizing.”
If it can become dust, it can become a problem. -
If you want real glass glitter, buy craft-grade glass glitter. Use it like you’d use any specialty material:
carefully, intentionally, and away from kids/pets. - If you want a DIY version, make faux glass glitter. You’ll still get the frosty sparkleminus the risk.
With that out of the way, let’s talk sparkle strategies.
Option A: The “Real Deal” (Using Craft-Grade Glass Glitter Safely)
Craft-grade glass glitter is the fastest path to that vintage, high-end finish. The trick is using it in a way that
keeps it on your projectnot floating around your home like festive lung confetti.
Pick the Right Grit: Fine vs. Chunky
Glass glitter comes in different sizes (often called grit or grain). Your choice changes the look dramatically:
- Fine: smoother, more even coverage; best for paper crafts, small ornaments, and detailed pieces.
- Medium: classic “vintage ornament” texture; great for stars, cones, and dimensional décor.
- Coarse: bold, icy sparkle; best when you want the texture to be part of the design.
Set Up a “Glitter Containment Zone”
You don’t need a clean room. You just need a system:
- Work over a tray, baking sheet, or a large piece of folded paper (so you can funnel the excess back into a jar).
- Keep a damp paper towel nearby for quick pick-ups (dry sweeping can kick particles into the air).
- Wear eye protection if you’re working with loose flakes, and wash hands after crafting.
- Keep pets and kids out of the craft zone until cleanup is done.
How to Apply Glass Glitter Without the “Forever Shed”
The secret isn’t more glitterit’s better adhesion and a clean seal.
-
Base coat (optional but smart): Paint your surface a color that matches your glitter. This helps coverage look richer
and hides any thin spots. -
Adhesive layer: Brush on a thin, even coat of clear-drying craft glue or decoupage medium.
Avoid thick puddlesthey dry lumpy and can dull the sparkle. - Glitter like you mean it: Sprinkle (don’t “dump”) glitter over the surface. Rotate the piece to catch edges.
- Tap and rest: Tap off loose glitter back into your tray. Let it dry fully on a protected surface.
-
Seal (when appropriate): For décor that will be handled, lightly seal with a compatible clear coat.
Test firstsome sealers can slightly reduce reflectivity or shift the tone.
This method gives you the heirloom look with minimal falloutbecause your goal is a glittered ornament, not a glittered lifestyle.
Option B: Make Your Own Faux Glass Glitter (Safe, Budget-Friendly, Shockingly Pretty)
Faux glass glitter is the craft world’s best-kept open secret. It won’t cut glass like glass (because it’s not glass),
but it can absolutely mimic that frosty, crystalline sparkleespecially on Christmas décor viewed at normal human
distance (also known as “not pressed against it with a magnifying glass, like a raccoon evaluating your life choices”).
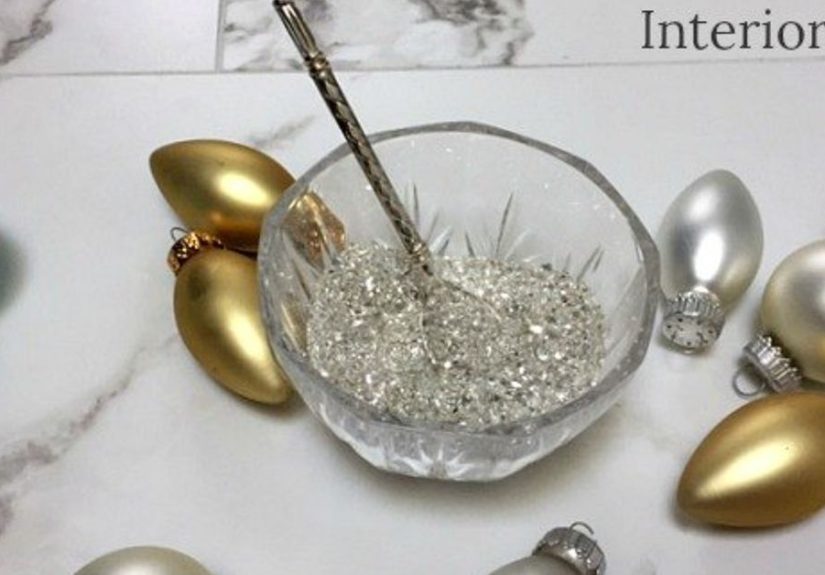
Recipe 1: “Sparkle Salt” (The Classic Glass-Glitter Lookalike)
This is the easiest, most convincing DIY substitute. It reads like icy glitter on ornaments, pinecones, wreaths,
and tabletop décor.
You’ll need:
- Coarse salt (kosher salt works great) or sanding salt
- Acrylic paint (metallic silver, pearl white, champagne, or icy blue)
- Optional: a pinch of pearlescent pigment or mica powder for extra flash
- Wax paper or parchment + a baking sheet
Steps:
- Pour salt into a bowl (start with 1 cup so it’s easy to mix).
- Add a small amount of paint (think “drizzle,” not “flood”). Stir until evenly coated.
- If using pigment, add a tiny pinch and stir again.
- Spread the salt thinly on parchment and let it dry completely (stir once halfway through).
- Store in a labeled jar. Congratulationsyou just made sparkle in bulk.
Where it shines: snow-dusted pinecones, wreath accents, ornament caps, faux gingerbread houses,
and anything you want to look “frosted and fancy.”
Recipe 2: Sugar Crystal Glitter (Best for Sealed or Indoor-Only Projects)
Sugar has a natural crystal sparkle that looks incredibly “glass-like” under warm holiday lights. The tradeoff:
sugar can attract moisture and (in some climates) curious pests, so use it on projects that will be sealed or displayed
where it stays dry.
You’ll need:
- White sugar (or large-grain decorating sugar for extra sparkle)
- Optional: edible luster dust or pearlescent powder (a little goes a long way)
- Optional: a light mist of clear sealer for durability (test first)
How to use it:
- Brush glue onto the surface.
- Roll or sprinkle sugar over the glue.
- Let dry fully. Seal only if your project can handle it and you’re sure the sealer won’t melt the look.
Where it shines: faux candy ornaments, gingerbread-style décor, and “snowy” village scenes that stay indoors.
Recipe 3: Epsom Salt “Snow Glitter” (Frosted Glass Vibes on Jars and Ornaments)
Epsom salt creates that iconic “frosted window” texture. Add a touch of shimmer (or mix it with your sparkle salt),
and you get a snowy finish that looks like it came straight from a holiday magazine spread.
You’ll need:
- Epsom salt
- Decoupage medium or craft glue
- Optional: a tiny amount of fine glitter or pearlescent pigment (use sparingly)
Best uses:
- Snowy mason jar luminaries
- Frosted ornament exteriors
- Mini village bases (snowy terrain)
5 Christmas Projects That Look Like You Bought Them at a Fancy Boutique
1) Vintage-Style Glitter Star Tree Topper (Cardboard + Sparkle = Magic)
Cut a star from sturdy chipboard or thick cardstock, paint it, glue it, glitter it, and then repeat on the other side.
Use a matching base color under your glitter for richer coverage. If you want extra dimension, do two coats: glitter,
dry, then a thin second glue layer and another dusting of sparkle.
2) Snowy Mason Jar Luminaries
Brush glue or decoupage medium on the outside of a jar, then roll it in Epsom salt (or a blend of Epsom salt and sparkle salt).
Tap off excess, let dry, and place an LED candle inside. It’s cozy, it’s bright, and it doesn’t require you to own a soldering iron.
3) “Glass Glitter” Ornament Makeover
Want ornaments that look vintage without paying vintage prices? Paint plain ornaments (or paper mâché shapes) in a metallic base,
then add your sparkle of choice. Finish with ribbon, a velvet bow, or a tiny sprig of faux greenery.
4) Bottle-Brush Tree Glow-Up
Brush glue lightly onto the tips of a bottle-brush tree and sprinkle sparkle salt. Keep it subtlethis looks best like
a dusting of frost, not a snowstorm. Add mini beads or tiny “ornaments” for a charming village vibe.
5) Glitter Snow Globe Jars
For a classic snow-globe effect, use glitter flakes and a little glycerin in water so the sparkle falls slowly.
This is a great place for biodegradable glitter or larger flakes rather than ultra-fine powders.
Pro Tips: More Shine, Less Mess
- Match your base coat to your glitter color for fuller coverage with less product.
- Go thin on glue; thick glue dries cloudy and can dull the sparkle.
- Work in layers for depth: light coat, dry, second light coat.
- Contain the excess with a tray and a funnel system (folded paper works).
- Clean up dampa slightly damp paper towel grabs stray sparkle better than dry sweeping.
Eco Notes: Sparkle Without the Microplastic Hangover
Traditional glitter is often plastic-based and can contribute to microplastic pollution. If you’re crafting for the holidays
(and also trying to be a decent citizen of Planet Earth), consider:
- Faux glass glitter (salt, Epsom salt, sugar) for décor projects.
- Biodegradable cellulose glitter for projects where you want the classic glitter look with less long-term impact.
- Using sparkle strategicallya dusting in the right place reads more “designer” than a full glitter blanket.
FAQ: Quick Answers for Crafters on a Mission
Is glass glitter biodegradable?
Glass is not a plastic, and it doesn’t behave like microplastic. But “biodegradable” is complicated as a wordglass doesn’t
biodegrade like food scraps; it breaks down physically over time. Practically speaking: it’s not plastic glitter, but it’s
still a material you should keep out of waterways and off the ground where pets and wildlife might encounter it.
Can kids use glass glitter?
It’s best treated as an adult crafting material. If you’re crafting with kids, choose faux glass glitter (sparkle salt, Epsom salt)
or a kid-safe glitter product, and keep the craft area well managed.
Do I have to seal my glitter?
If the item will be touched, handled, or shipped as a gift, sealing helps. If it’s a decorative piece that sits on a shelf
and nobody pokes it (a rare but beautiful dream), you may skip sealing to preserve maximum sparkle.
Real-World Craft Room Notes (Extra Experiences to Make This Article Longer)
If you’ve ever finished a glitter project and then noticed your elbow sparkling a week later, welcome to the club. One of the
most consistent “glass glitter” experiences crafters share is learning that sparkle behaves less like a supply and more like a
lifestyle choice. That’s why the biggest game-changer isn’t a specific brand of glitterit’s building a workflow that keeps
your materials on the project and off your socks.
Many holiday crafters start with the same optimistic plan: “I’ll just do a quick glitter coat on a few ornaments.” Two hours later,
there’s a glitter jar open, a glue bottle stuck to the table, and the dog is walking by looking like it got hired as Santa’s
personal stunt double. The fix is surprisingly simple: a tray, a funnel, and a “no wandering” rule. When people commit to working
over a tray (even a baking sheet), they usually report two immediate benefits: they recover most of the sparkle for reuse, and
cleanup takes minutes instead of a full “why is my house twinkling?” investigation.
Another common experience: the first attempt often looks “patchy,” and the instinct is to add more glitter. But patchiness is usually
a glue problem, not a glitter shortage. Crafters who switch to a thin, even adhesive layerand who paint a matching base coat first
tend to get better coverage with less product. It’s the same principle as painting a wall: prep does the heavy lifting, not the final coat.
A champagne base under champagne sparkle salt? Suddenly your ornament looks like it came from an upscale boutique, not your kitchen table
next to a bag of tortilla chips.
People also learn quickly that “ultra-fine” sparkle is the fastest way to achieve a magical look and the fastest way to create a floating
dust situation. For many home crafters, the sweet spot is a medium grain: it catches light beautifully, it’s easier to control, and it’s less
likely to become airborne. This is especially true for faux blends like sparkle salt or Epsom snowthose textures naturally cling to glue and
settle fast, which makes them feel more cooperative than traditional loose glitter.
Then there’s the “seal or not to seal” debateholiday crafting’s version of pineapple on pizza. Some crafters swear by sealing everything so
nothing sheds, especially if items will be wrapped or gifted. Others skip sealing because they want maximum reflectivity. The practical middle
ground: seal pieces that will be handled (ornament gift sets, wreaths, tabletop décor that gets moved), and leave purely decorative pieces unsealed
if they’ll sit safely out of reach. And when people do seal, the most repeated advice is: test first. Some sealers slightly tone down the sparkle,
and nobody wants to learn that after they’ve already committed to twelve ornaments and a tree topper.
Finally, a reality check experience: the “best” glass glitter project is the one that fits your household. If you have toddlers, pets, or a
small workspace, faux glass glitter is often the MVP. It delivers the icy Christmas look with fewer worries. Many crafters report they still get
compliments like “Where did you buy that?” even when the secret ingredient is… salt. And honestly, that might be the most holiday-appropriate
twist of all: a little kitchen magic that makes everything look more special than it should.
Conclusion
If you want the vintage, high-end sparkle of glass glitter without the hazards and hassle, you have optionsand they’re genuinely fun.
Use craft-grade glass glitter when you want maximum brilliance (with smart containment and cleanup), and make faux glass glitter when you want
a safer, budget-friendly sparkle that still looks like Christmas morning in ornament form.
In other words: you can absolutely make your own “glass glitter” lookwithout turning your crafting session into a tiny, festive
OSHA training video.


