Table of Contents >> Show >> Hide
- Orchid Reality Check: What They Are (And Why Your Care Has to Be Different)
- Choose the Right Orchid for Your Home (So Blooming Is Easier)
- Light: The Bloom Switch You Can Actually Control
- Watering Orchids: “Soak and Drain” Beats “Splash and Hope”
- Temperature and Airflow: Comfortable for You, Great for Orchids
- Pot, Potting Mix, and Drainage: Orchids Want Air, Not Dirt
- Fertilizer: Feed for Growth, Not for Instant Gratification
- Repotting: The “Prevent Root Rot” Move That Also Helps Blooming
- After the Flowers Fade: How to Encourage a Re-Bloom
- Common Orchid Problems (And What They’re Actually Trying to Tell You)
- A Simple Orchid Care Routine for Blooms
- Real-World Experiences: What Orchid Care Looks Like at Home (500+ Words)
- The “My orchid has roots everywhere” phase
- The “I watered more because the house is dry… and now it’s worse” surprise
- The “It bloomed for three months, then did absolutely nothing” era
- The “My spike turned browndid I fail?” moment
- The “I moved it once and all the buds dropped” heartbreak
- The “I finally got a rebloom!” victory lap
- Conclusion: Blooming Orchids Are a System, Not a Secret
Orchids have an unfair reputation. People talk about them like they’re a high-maintenance celebrity who only drinks imported water and needs a personal assistant to mist their leaves on schedule. In reality, most “grocery store orchids” (especially the popular Phalaenopsis, aka moth orchid) want something refreshingly basic: bright-but-not-blazing light, a good soak at the right time, plenty of airflow around their roots, and a potting mix that doesn’t behave like wet cement.
If your goal is blossomsrepeat blossomsthis guide will help you set up a care routine that actually fits real life. We’ll cover light, watering, humidity, feeding, repotting, and the “after bloom” decisions that decide whether your orchid comes back with flowers or just stares at you with leaves for months like, “We need to talk.”
Orchid Reality Check: What They Are (And Why Your Care Has to Be Different)
Many of the orchids sold as houseplants are epiphytes in nature. That means they often grow on trees or rocky surfaces in the wild, with roots exposed to air and periodic drenching rainsnot buried in soil like a tomato plant. That one fact explains most orchid care: their roots need oxygen, their potting mix must drain fast, and “watering a little every day” is basically the plot of a root-rot horror movie.
Choose the Right Orchid for Your Home (So Blooming Is Easier)
If you want reliable indoor blooms, start with an orchid that matches typical home conditions. The easiest wins often come from orchids that tolerate lower indoor light and steady temperatures.
Best beginner picks for indoor blossoms
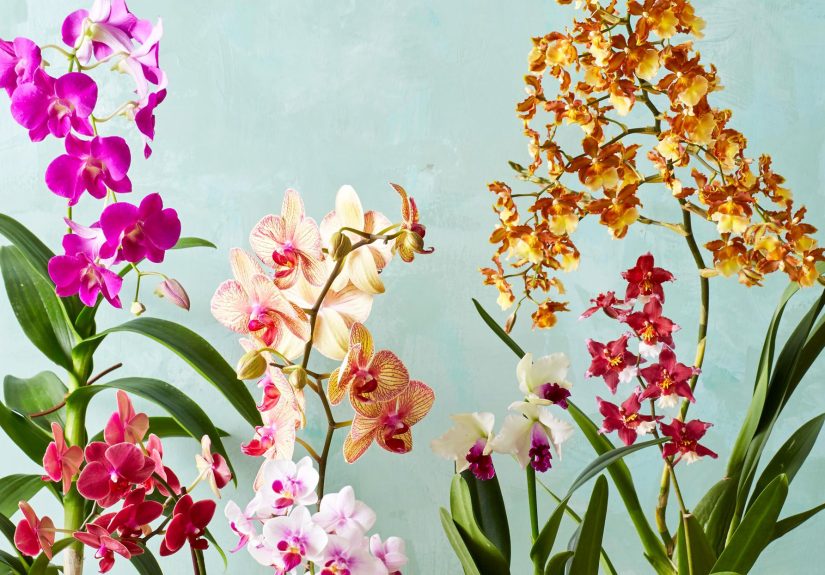
- Phalaenopsis (moth orchid): Low-to-medium light, happy in normal home temps, and famous for long-lasting flower spikes. If you only buy one kind, make it this one.
- Paphiopedilum (slipper orchid): Often does well in lower light and can be a great “windowsill orchid” if humidity isn’t bone-dry.
- Oncidium (dancing lady) & some Dendrobiums: Can bloom beautifully indoors, but they’re a bit more particular about light and watering rhythm.
Translation: If your home is “bright-ish” but not tropical-sunroom bright, a Phalaenopsis is the safest bet for consistent flowering.
Light: The Bloom Switch You Can Actually Control
Orchids don’t bloom because they feel appreciated (though compliments never hurt). They bloom because they get enough light to power growth. Too little light = healthy leaves, no flowers. Too much direct sun = scorched leaves, stress, and dropped buds.
The sweet spot: bright, indirect light
- Great placement: Near an east window (gentle morning sun) or a bright room with filtered light.
- Proceed with caution: South/west windows can work if the light is softened with a sheer curtain.
- Bonus option: A full-spectrum grow light if your home is dimespecially in winter.
Leaf-color “cheat codes” for dialing in light
- Dark green leaves: Often means not enough light (great for “survival,” not great for blooming).
- Yellow-green/olive green: Often ideal for many Phalaenopsisenough light to bloom without burning.
- Red/purple tinge or crispy patches: Too much light, especially direct sun.
If you’ve been waiting for blooms for months, don’t immediately buy fancy fertilizer. First, nudge the light brightercarefully. Light is usually the missing ingredient.
Watering Orchids: “Soak and Drain” Beats “Splash and Hope”
Improper watering is the most common reason indoor orchids decline. The goal isn’t constant moistureit’s a thorough watering followed by time for the potting mix to dry slightly and roots to breathe.
When to water (hint: the calendar doesn’t know your orchid)
- Check the roots: Many orchids show roots that look silvery/white when dry and greener after watering.
- Lift the pot: A dry pot feels surprisingly light; a recently watered pot feels heavier.
- Touch the mix: If the top is dry but the center is still damp, wait. Orchids hate “always wet” more than “slightly dry.”
In many homes, Phalaenopsis watering may land around once a week, but your actual schedule depends on pot size, bark vs. moss, temperature, airflow, and humidity. The plant’s signals matter more than the day of the week.
How to water without inviting rot
- Take the orchid to the sink.
- Run lukewarm water through the potting mix thoroughly.
- Let it drain completely. No “standing water” in the cachepot, saucer, or decorative outer container.
- Keep water out of the crown (the center where leaves meet). Water sitting there can lead to crown rotaka “sudden orchid tragedy.”
One more thing: orchids are not ice cube trays. If you’ve seen “water with ice cubes” advice, know that many orchid experts prefer room-temperature water and thorough drainage instead of chilling roots and partially watering in slow motion.
Humidity: enough to keep blooms happy (not enough to grow weird science experiments)
Many common indoor orchids thrive with moderate-to-high humidity, but typical homesespecially with heating or ACrun dry. Aim for at least 40–60% if possible, and don’t panic if you can’t hit rainforest levels.
- Pebble tray: Set the pot on pebbles above a shallow water line (the pot should not sit in water).
- Humidifier: The most effective way to raise humidity in a room.
- Group plants: Creates a slightly more humid microclimate.
Misting can feel productive, but in many homes it doesn’t move the needle much on humidity. Think “supporting actor,” not “main character.”
Temperature and Airflow: Comfortable for You, Great for Orchids
Most popular indoor orchids enjoy the same general temperatures humans dowarm days, slightly cooler nights, and no dramatic drafts. Avoid placing orchids directly next to heaters, air conditioners, or drafty doors where temperature swings can cause bud drop.
Why airflow matters
Orchids like humid air, but stagnant humid air can encourage fungal and bacterial issues. Gentle air movement helps leaves dry and keeps the “microclimate” around the plant healthier. You don’t need a wind tunneljust don’t trap your orchid in a damp corner with zero circulation.
Pot, Potting Mix, and Drainage: Orchids Want Air, Not Dirt
If you remember one rule, make it this: regular potting soil is not orchid media for common epiphytic orchids. Soil holds too much water and suffocates roots.
What to use instead
- Bark-based orchid mix: A classic choice that provides airflow and fast drainage.
- Sphagnum moss: Holds more moisture; great in dry homes but easier to overwater if you’re heavy-handed.
- Blends: Bark + perlite + charcoal (and sometimes a little moss) for balance.
Best pot setup for home blooms
- Drainage holes: Non-negotiable.
- Clear plastic pots: Not required, but incredibly helpfulyou can actually see roots and moisture levels.
- Decorative outer pot (cachepot): Fine if you remove the inner pot to water and let it drain fully before putting it back.
Fertilizer: Feed for Growth, Not for Instant Gratification
Fertilizer won’t force flowers overnight, but consistent, gentle feeding supports healthy leaves and rootswhich support blooming later. A common expert approach is “weakly, weekly”: dilute fertilizer used more often rather than a strong dose once in a while.
Simple feeding plan that avoids root burn
- Use a balanced orchid fertilizer (many growers use balanced formulas like 20-20-20, diluted).
- Feed during active growth (often spring/summer; many orchids slow down in winter).
- Flush monthly with plain water to wash away fertilizer salts that can build up in the pot.
If your orchid’s leaves look okay but root tips are damaged or leaf tips brown, consider fertilizer concentration and salt buildup. Underfeeding is usually safer than overfeeding.
Repotting: The “Prevent Root Rot” Move That Also Helps Blooming
Repotting isn’t about giving orchids more “room” like a fern. It’s about replacing broken-down media that holds too much water and suffocates roots. Fresh mix restores airflowone of the biggest factors in long-term health and future flower spikes.
When to repot
- The potting mix looks broken down, mushy, or stays wet too long.
- Roots are overcrowded, climbing out, or the plant is unstable.
- You see salt crust or persistent sour smells from the media.
Timing matters
Many orchid guides recommend repotting after blooming, when new growth (and ideally new roots) beginsrather than during peak bloom. Repotting a blooming orchid can shorten flower life because the plant has to redirect energy to recovery.
Quick repot checklist
- Use clean, sharp tools (sterilize between plants).
- Remove old mix gently; don’t tear healthy roots.
- Trim dead roots (brown, hollow, mushy). Keep firm roots.
- Replant in fresh orchid mix and a pot with excellent drainage.
After the Flowers Fade: How to Encourage a Re-Bloom
When your last orchid bloom drops, it’s tempting to assume the show is over forever. Not true. The “after bloom” phase is when you set up the next performance.
Phalaenopsis spike options (choose your strategy)
- Option A: Keep the spike (if it’s green): Some growers let a green spike remain because it can photosynthesize and may rebloom from a node under the right conditions.
- Option B: Cut the spike back to a node: Cutting above a lower node can sometimes trigger branching and quicker reblooming, though results vary.
- Option C: Cut the spike to the base: If the spike is brownor if you want the plant to restcutting it down can encourage the orchid to focus on roots and leaves, then produce a new spike later.
The “best” method depends on your orchid’s size, health, and how patient you are. A vigorous, well-rooted plant may handle a node cut well. A smaller or stressed plant may do better with a full reset and a new spike next season.
The secret sauce for repeat blooms: steady care + a gentle seasonal cue
Many orchids initiate spikes when day length shifts and nights are slightly cooler (not coldjust cooler). In a home, that can mean keeping the plant away from heat vents and letting nighttime temperatures drop a bit naturally in fall, while still maintaining bright, indirect light.
Common Orchid Problems (And What They’re Actually Trying to Tell You)
1) Bud blast (buds drop before opening)
- Often caused by: Drafts, sudden temperature changes, very low humidity, moving the plant repeatedly, or ethylene exposure (near ripening fruit).
- Fix: Stabilize placement, raise humidity moderately, keep away from vents and fruit bowls.
2) Wrinkled leaves
- Often caused by: Dehydration (not enough water) or damaged roots (can’t absorb water).
- Fix: Inspect roots. If roots are compromised, repot into fresh airy media and adjust watering.
3) Root rot
- Often caused by: Overwatering, poor drainage, broken-down media, or the pot sitting in water.
- Fix: Repot, remove dead roots, reduce watering frequency, increase airflow.
4) No rebloom (healthy plant, no spikes)
- Often caused by: Not enough light or no seasonal cue.
- Fix: Increase bright indirect light and aim for a slight nighttime temperature drop in fallwithout drafts.
A Simple Orchid Care Routine for Blooms
Here’s a realistic routine that keeps you consistent without turning you into a full-time orchid butler:
- Weekly: Check roots/pot weight; water thoroughly only when needed. Rotate plant slightly for even light (not every day).
- Every 1–2 weeks (during active growth): Feed diluted orchid fertilizer.
- Monthly: Flush the pot with plain water to reduce fertilizer salt buildup.
- Seasonally: Adjust watering down in slower-growth periods; increase light support in winter if your home is dim.
- Every 1–2 years (or as needed): Repot when media breaks down or roots outgrow the pot.
Real-World Experiences: What Orchid Care Looks Like at Home (500+ Words)
Orchid care gets much easier once you recognize the patterns people commonly experience in real homesnot greenhouses. Here are a few “you’ll know it when you see it” moments that orchid owners often report, plus what they usually mean.
The “My orchid has roots everywhere” phase
New growers sometimes panic when aerial roots wander outside the pot like tiny green tentacles. But aerial roots are normal for many orchids. In fact, they can be a helpful moisture gauge: those roots often look silvery when dry and greener after watering. A common experience is noticing that the plant seems “fine” even when the potting mix looks dry on top, because those exposed roots are doing their job in the air. The practical lesson: don’t cut aerial roots just because they’re showing off. If they’re firm, leave them. If they’re shriveled and papery, you may be running very dry indoors.
The “I watered more because the house is dry… and now it’s worse” surprise
Winter air feels dry, so many people instinctively water more often. Then the orchid declines. This is a classic home-orchid experience because indoor heating lowers humidity but can also slow the plant’s water use, especially if light levels drop in winter. So the environment feels dry to you, but the orchid’s potting mix stays wet longer than you think. The fix many people find works best isn’t extra wateringit’s humidity support (a humidifier or pebble tray) and careful watering timing. It’s one of those moments where orchids teach you a gentle life lesson: more effort isn’t always better effort.
The “It bloomed for three months, then did absolutely nothing” era
After the first set of flowers, orchids often enter a quiet stage where they focus on leaves and roots. This can feel like the plant is “stuck,” especially if you expected constant blooms. A common experience is staring at the orchid every morning like it owes you rent. In reality, this is when the orchid rebuilds energy. Owners who get the best repeat blooms usually shift their mindset during this phase: they stop trying to force flowers and instead focus on consistent light, correct watering, and gentle feeding. Over time, they notice small winsnew root tips, a fresh leafbefore they ever see a spike. Those wins matter. Strong roots are the foundation for flower spikes later.
The “My spike turned browndid I fail?” moment
Spikes don’t last forever. Many people experience a green spike that eventually yellows and turns brown. That doesn’t mean you failed. It’s often just the plant finishing that growth cycle. The decision point is what comes next: some growers cut the spike back to the base and focus on building the plant up for a bigger bloom display later. Others, if the spike is still green, trim above a node to see if they can coax a secondary bloom. The real-life takeaway is that you can pick a strategy based on your plant’s health and your patience level, and you’re still “doing it right.”
The “I moved it once and all the buds dropped” heartbreak
Buds can be sensitive to sudden change. People often learn this the hard way: a blooming orchid gets moved from a bright window to a dining table for a party, then gets moved again near a vent, and suddenly buds drop. What experienced growers tend to do is treat a budding orchid like a creature of habit: stable location, stable temps, stable light. Once you’ve lived through bud drop once, you become incredibly loyal to the idea of “don’t mess with success.”
The “I finally got a rebloom!” victory lap
When a home orchid reblooms, it usually wasn’t one magical trickit was a season of small correct choices. People often realize the biggest difference-maker was light. Maybe they moved it six inches closer to a window (still avoiding direct sun), or they added a grow light in winter. Maybe they stopped watering on a schedule and started watering based on the roots and pot weight. Those tiny improvements add up. A rebloom is the orchid’s way of saying, “Okay, you get me now.”
Conclusion: Blooming Orchids Are a System, Not a Secret
The best orchid care for blossoms isn’t complicatedit’s consistent. Give your orchid bright, indirect light; water thoroughly but only when it’s ready; keep roots airy in a fast-draining mix; support humidity without turning the pot into a swamp; feed gently during growth; and repot when the media breaks down. Do that, and blooming becomes less of a lottery and more of an expected seasonal event.
And if your orchid still acts mysterious sometimes? Congratulations. You’re now an orchid personwelcome to the club. We have roots. So many roots.


