Table of Contents >> Show >> Hide
- Why Light Switches Deserve a Glow-Up
- The Viral 5-Minute Frame Hack
- Picking the Perfect Frame for Your Decor Style
- More Lightning-Fast Ways to Turn Light Switches into Statement Pieces
- Where This 5-Minute Upgrade Has the Biggest Impact
- Common Mistakes (and How to Avoid Them)
- Real-Life Experiences with 5-Minute Light Switch Glow-Ups
- Final Thoughts: Big Style from a Tiny Upgrade
If you’ve ever stared at your freshly painted walls and thought, “Something’s still… meh,” there’s a good chance the culprit is right under your noseand your finger. Plain white light switch covers are the wall equivalent of tube socks with a tuxedo. Functional? Yes. Fabulous? Absolutely not.
The good news: you don’t need a weekend makeover or a designer budget to fix it. With a 5-minute decor upgradeusing simple picture frames or other quick tricksyou can turn boring light switches into tiny statement pieces that look intentional, stylish, and a little bit fancy. Consider this your permission slip to be extra… in the best way.
Why Light Switches Deserve a Glow-Up
The Power of Small Details
In interior design, the small stuff is rarely small. Light switches and wall plates sit at eye level, right where your hand goes every single day. If they’re dingy, mismatched, or cheap-looking, they quietly downgrade the entire room. When they’re polished and coordinated, they act like jewelry for your wallstiny accents that pull the whole look together.
Designers often talk about “visual interruptions.” A sleek wall, beautiful trim, or patterned wallpaper can all be visually chopped up by a bright white plastic plate in the middle of everything. Upgrade that one element, and suddenly the whole wall feels more thoughtful and cohesive.
Why This Upgrade Is Perfect for Renters and Busy Homeowners
Most of us don’t have time to rearrange furniture on a random Tuesday, but we do have five spare minutes and a screwdriver. That’s why a quick switch-plate upgrade is such a win:
- Fast: One switch takes just a few minutes.
- Affordable: Frames, tape, or new plates cost far less than new lighting or furniture.
- Reversible: Ideal for rentersyou can put the original covers back when you move out.
- High impact: The change is small in size but big in “wow, did you do something in here?” energy.
The Viral 5-Minute Frame Hack
The star of this glow-up is delightfully simple: you use a small photo frame to turn your existing light switch into a miniature piece of wall art.
What You’ll Need
- One standard 3.5-by-5-inch photo frame (for most single-gang light switches)
- Your existing light switch and cover plate
- A screwdriver
- Level (optional, but helpful if you’re picky)
- A tiny bit of wall-friendly adhesive or mounting strips (optional, depending on the frame)
You can use thrift-store frames for a vintage look, clean modern frames for a minimalist vibe, or ornate frames for full-on statement drama. The frame becomes a border around your switch, instantly making it look intentional instead of accidental.
Step-by-Step: From Boring to “Did You Hire a Designer?”
- Turn off the power (strongly recommended): Flip the breaker for that room off, especially if you’ll be removing the plate screws. You won’t be touching wiring, but better safe than zapped.
- Remove the glass and backing from the frame: You only want the frame itself, not the glass, not the stand, not the backing.
- Test the fit: Hold the empty frame up to the wall around the switch. Most 3.5-by-5 frames fit snugly around a standard single switch plate. Make sure the switch can move freely and the plate isn’t blocked.
- Loosen the switch plate screws slightly: Don’t remove them completelyjust loosen them enough to slip the frame behind the plate edges if your frame is shallow enough.
- Place the frame: Either:
- Slide the frame between the wall and the switch plate (for thin frames), or
- Center the frame on the wall and secure it with small adhesive strips, letting the switch plate sit inside the frame’s opening.
- Tighten the screws and straighten the frame: Use a level or eyeball it. Adjust until everything looks centered and aligned.
- Turn the power back on: Flip the breaker back and test the switch.
That’s it. No paint fumes, no power tools, no drywall dustjust a five-minute boost that instantly makes your switch look “custom” instead of “contractor-grade.”
Safety Notes (Because Electricity Is Spicy)
- Always avoid touching wiring inside the box. This upgrade should only involve the cover plate, not the internal components.
- If the plate feels loose or the wiring looks questionable, call an electrician before you go full DIY hero.
- Use frames that are lightweight so they don’t stress the wall or plate.
Picking the Perfect Frame for Your Decor Style
Modern and Minimal
If you love clean lines and neutral tones, go for thin, flat-front frames in black, white, or soft wood finishes. Pair them with matte or screwless switch plates for a sleek, almost gallery-like look. This works especially well in hallways, offices, or living rooms with contemporary furniture.
Vintage, Cottage, and Eclectic
For cozy, collected spaces, thrifted frames are your best friend. Look for distressed wood, carved details, or pastel paint. A slightly ornate frame around a simple toggle switch instantly adds charm, especially in bedrooms, reading nooks, or powder rooms. If your home leans cottagecore or vintage, this upgrade feels like it’s always belonged there.
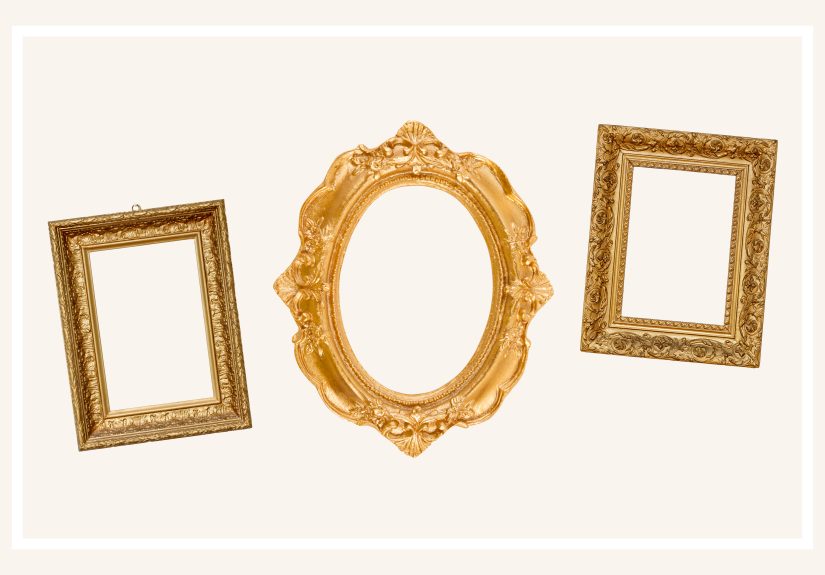
Glam and Bold
Love a little drama? Try metallic framesantique brass, gold, or even glossy black with bevels. These look amazing against deep wall colors like navy, charcoal, or emerald green. Your light switch suddenly becomes a tiny, shiny piece of wall jewelry.
Kids’ Rooms and Playful Spaces
In kids’ rooms, playrooms, or creative studios, you can lean into fun shapes and colors. Think bright frames, patterned edges, or even themed frames (stars, animals, clouds). Just keep the materials durable and easy to wipe downsticky hands are a design wildcard.
More Lightning-Fast Ways to Turn Light Switches into Statement Pieces
The frame hack is the star of the show, but once you’re in “switch makeover” mode, it’s hard to stop. Here are other five-minute upgrades that can layer beautifully with or without a frame.
1. Painted Switch Plates
A coat of paint can make standard plates nearly disappear or tie them directly into your decor. You can:
- Paint plates the exact wall color so they blend in seamlessly.
- Match them to trim or cabinetry for a tailored look.
- Add subtle patterns or stripes if you’re feeling artsy.
Just remove the plates first, clean them, lightly sand if glossy, and use a suitable primer and paint. Let everything dry fully before reinstallingyou don’t want fingerprints immortalized in your new finish.
2. Washi Tape and Decorative Tape
If you prefer no-mess, low-commitment DIY, washi tape is basically magic. Wrap strips around the plate, trim the edges and switch opening with a craft knife, and you’ve got a custom pattern in minutes. It’s especially great for renters and kids’ rooms, because it peels off cleanly when you’re ready for a new look.
3. Peel-and-Stick Wallpaper Accents
Already using peel-and-stick wallpaper? Take a small offcut and cover the switch plate so it perfectly matches your feature wall. When the plate “disappears” into the wallpaper, adding a slim frame around it creates a professional, designer-level finish.
4. Upgraded Metal Plates
If you’re ready to replace the actual plates, swap plastic for metalespecially in high-visibility areas like entryways, dining rooms, or kitchens. Options like brushed brass, matte black, or stainless steel can instantly elevate the space. Pair a slim brass plate with a coordinating brass frame and your light switch goes from “utility” to “wow” in under ten minutes.
5. Screwless Plates for a Clean, Contemporary Look
Screwless wall plates hide the mounting hardware, giving you a smooth, uninterrupted surface. They work particularly well in modern interiors and open-concept spaces where every wall is on display.
Where This 5-Minute Upgrade Has the Biggest Impact
- Entryways: Your light switch is often the first thing you touch when you walk in. Framing it makes the whole foyer feel more styled.
- Hallways: Long hallways can feel bland. A series of framed switches adds rhythm and personality without clutter.
- Powder Rooms: Small spaces love big personality. A single ornate frame around a switch can echo your mirror or faucet finish.
- Home Office: A minimalist frame around your switch keeps the space polished and professional.
- Bedrooms: Matching frames on bedside switches and artwork help everything feel intentional and cohesive.
Common Mistakes (and How to Avoid Them)
- Oversized frames: If the frame is too large, it can compete with nearby art or wall decor. Choose something that enhances, not overwhelms.
- Frames that block the switch: Make sure the toggle or rocker moves freely and you can still unscrew the cover when needed.
- Ignoring alignment: A crooked frame will drive you nuts. Take an extra 30 seconds to straighten it.
- Clashing finishes: Try to echo one or two finishes already in the roomlike your door handles, faucets, or curtain rodsso the switch feels like part of the family.
Real-Life Experiences with 5-Minute Light Switch Glow-Ups
Once you’ve upgraded one light switch, something funny happens: you start noticing every other switch in your home. People who try this quick decor trick often find themselves doing “light switch walks,” wandering from room to room with a screwdriver in one hand and a small pile of frames in the other.
Imagine this: your living room is finally styledthrow pillows fluffed, art hung, plants thriving. Then you notice the switch plate by the door, slightly yellowed and full of tiny scuffs. After adding a slim black frame around a fresh, white plate, the whole wall instantly feels sharper. It’s the same furniture, same paint, same artbut your brain registers the space as more polished because every little detail has been considered.
In a small apartment kitchen, one renter upgraded just two switches: one by the entrance and one above the counter. She used inexpensive thrifted brass frames she found in a bargain bin. The total cost was under $10, but visitors kept asking, “Wait, did you redo the kitchen?” All she’d changed were those tiny focal points near eye levelproof that perceived value isn’t always tied to price.
Another homeowner used this hack to solve a decorating dilemma in a gallery wall. The main light switch sat awkwardly off-center amid framed art. Instead of trying to hide it, she embraced it: she added a small frame around the switch, then spaced the other art pieces so the switch became part of the composition. Suddenly, the previously “in the way” switch looked like a quirky, intentional element.
Parents love this upgrade in kids’ rooms too. One family turned their child’s light switch into a tiny “portal” by framing it with a bright blue frame and adding star decals around it. Bedtime suddenly became a bit more fun“Hit the star portal to turn off the lights!” It’s an easy way to make everyday routines feel a little more special without installing anything complicated or expensive.
And then there’s the renter who treated this as a stealth decor move. Her lease limited painting and wall mounting, but it said nothing about switch plates. She carefully stored the original covers in a labeled bag, then installed pretty frames and new plates that matched her hardware. When she moved out, she swapped everything back in under an hour and took her frames with her. Her new place was instantly familiar because she could reinstall those little “signature” details on day one.
Across all these stories, one theme keeps popping up: once people tweak this tiny detail, they feel more connected to their space. It’s not just about the lookit’s the feeling of, “I customized this. I made this mine.” For a five-minute project, that’s a pretty impressive return.
Final Thoughts: Big Style from a Tiny Upgrade
If you’re craving a decor refresh but don’t have the budget or energy for a full makeover, start small. Framing your light switchesor upgrading the plates with paint, metal, or patternis one of those satisfying projects that delivers instant gratification.
In just a few minutes, you can turn a purely functional necessity into a conversation-worthy detail that quietly elevates your home. It’s renter-friendly, budget-conscious, and endlessly customizable. The next time you flick on a light, you might actually smile at the switchand that’s the kind of everyday joy great design is supposed to bring.


