Table of Contents >> Show >> Hide
- What Makes an All-American Burger “Classic”?
- Ingredients for the Classic All American Burger
- The Classic Recipe: Step-by-Step (Grill or Skillet)
- Step 1: Choose beef that actually wants to be a burger
- Step 2: Form patties gently (don’t “knead” your burger)
- Step 3: Preheat like you mean it
- Step 4: Season at the last second
- Step 5: Cook with one flip, and resist the urge to press
- Step 6: Toast the buns (yes, it matters)
- Step 7: Build the burger so it doesn’t slip into chaos
- Doneness, Temperature, and the “But I Like Medium” Conversation
- Classic Burger Problems (and How to Fix Them)
- Two “Classic-Adjacent” Variations That Still Feel All-American
- Serving Ideas That Make It Feel Like a Real Cookout
- Final Thoughts: Keep It Simple, Keep It Hot, Keep It Honest
- Experience Section (About ): The All-American Burger, as Lived
There are two kinds of burgers in this world: the ones that need a paragraph-long menu description (with “artisan” sprinkled in like confetti),
and the ones that show up, do their job, and make everyone at the table suddenly stop talking. The All American burger lives in the second camp.
It’s not complicated. It’s not trying to win an innovation award. It’s just a juicy beef patty, properly seasoned, cooked with confidence, tucked
into a toasted bun, and topped with the greatest hits: cheese (optional but emotionally mandatory), lettuce, tomato, onion, pickles, and whatever
condiment combo makes you feel like summer.
This guide is built from widely used best practices across reputable U.S. cooking and food-safety sources, plus the kind of hard-earned backyard
experience you only get after sacrificing a few dry patties to the grill gods. You’ll get a classic burger recipe, the “why” behind each step,
and a set of fixes for the most common burger heartbreaks (crumbly patties, swollen centers, gray sadness, and the dreaded “I pressed all the juice out”).
What Makes an All-American Burger “Classic”?
A classic American burger doesn’t rely on a long ingredient list. The star is beefusually ground chuck with enough fat to stay juicy. The seasoning
is simple (salt and pepper), applied at the right time. The cooking method is hot and direct (grill or cast iron). And the build is balanced: a toasted
bun for structure, a melty layer for comfort, and crisp toppings to cut through richness.
If you’ve ever bitten into a burger and thought, “This tastes like… beef, but in the best way,” that’s the classic. It’s the culinary equivalent of
a white T-shirt that fits perfectly. Not flashy. Just correct.
Ingredients for the Classic All American Burger
For 4 burgers
- 1 1/2 pounds ground beef (ideal: 80/20 chuck for juiciness)
- Kosher salt (about 3/4 to 1 teaspoon total, to taste)
- Freshly ground black pepper
- 4 hamburger buns (sesame seed, potato, or soft “burger-style” buns)
- 1 tablespoon neutral oil (for skillet or to lightly oil grates)
- 4 slices cheese (American, cheddar, or your favorite melt-friendly option)
Classic toppings (choose your team)
- Iceberg or romaine lettuce
- Tomato slices (salt them lightly if you want them to taste like tomatoes, not water balloons)
- Thin-sliced onion (white, yellow, or red)
- Dill pickle chips
Condiments
- Ketchup
- Yellow mustard
- Mayonnaise
Optional but highly encouraged: a quick “classic burger sauce”
- 1/3 cup mayo
- 1 tablespoon ketchup
- 1 teaspoon mustard
- 1 tablespoon finely chopped pickles or relish
- Pinch of pepper (and a tiny pinch of garlic powder if you’re feeling bold)
The Classic Recipe: Step-by-Step (Grill or Skillet)
Step 1: Choose beef that actually wants to be a burger
Burgers need fat. Fat equals flavor, tenderness, and juiciness. A common sweet spot is 80% lean / 20% fat (often labeled 80/20).
Leaner blends can cook up dry, especially on high heat. If you can, buy freshly ground chuckor ask the butcher to grind itbecause freshness helps
texture and flavor shine.
Step 2: Form patties gently (don’t “knead” your burger)
Treat the meat like it’s fragilebecause it is. Overworking ground beef can make burgers tight and bouncy instead of tender. Here’s the move:
divide the beef into 4 equal portions (about 6 ounces each), then form each into a patty that’s about 3/4 to 1 inch thick.
Make the patty slightly wider than the bun (it will shrink as it cooks).
Now add the famous burger “dimple”: press a shallow indentation in the center with your thumb. This helps reduce puffing so you don’t end up with
a burger shaped like a meatball wearing a flat hat.
Step 3: Preheat like you mean it
Whether you’re grilling or using a cast-iron skillet, the secret weapon is a properly hot surface. You want strong heat to create browningthe kind
that smells like summer and makes neighbors suddenly “just happen to be outside.”
- Grill: Preheat to high (you want the grates hot). Clean grates, then lightly oil them.
- Skillet: Use cast iron if possible. Heat over medium-high until very hot (a drop of water should sizzle aggressively).
Step 4: Season at the last second
Salt is essentialbut timing matters. Season the outside of the patties with kosher salt and pepper right before cooking.
Salting too early can pull moisture to the surface and can change texture if mixed into the meat. Keep it simple: salt + pepper on the outside,
then straight to heat.
Step 5: Cook with one flip, and resist the urge to press
Place patties on the hot grill or skillet. Then do something brave: leave them alone. This helps develop a crust.
- Cook first side: 3–4 minutes (until browned and releasing easily).
- Flip once: Cook another 2–4 minutes, depending on thickness and heat.
- Add cheese: In the last 1–2 minutes, add a slice of cheese. If grilling, close the lid briefly to melt.
- Rest briefly: 2–3 minutes on a plate so juices settle instead of flooding your bun.
And about pressing the patty with a spatula: if you want a juicy burger, don’t do it. Pressing is basically wringing out flavor like a sponge.
If you want sizzling sounds, heat the pan more; don’t punish the meat.
Step 6: Toast the buns (yes, it matters)
Toasting is not a fancy step. It’s structural engineering. A lightly toasted bun resists sogginess and adds flavor. Toast cut sides on the grill or in a
skillet for 30–60 seconds. Optional upgrade: brush with a little butter first.
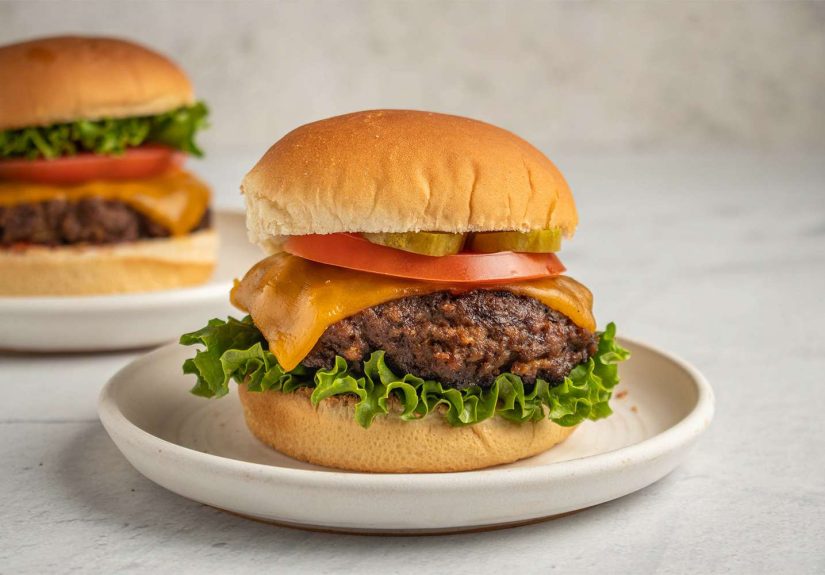
Step 7: Build the burger so it doesn’t slip into chaos
A smart build keeps the burger stable and every bite balanced:
- Bottom bun
- Condiment (mayo or sauce acts like “bun glue”)
- Lettuce (creates a little moisture barrier)
- Burger patty + cheese
- Onion, tomato, pickles
- Ketchup/mustard (or sauce)
- Top bun
Doneness, Temperature, and the “But I Like Medium” Conversation
Here’s the practical reality: ground beef has different food-safety considerations than a whole steak because surface bacteria can be mixed throughout
during grinding. The safest approach is to cook ground beef to 160°F measured with a food thermometer.
If you choose to cook burgers to a lower temperature, do it only if you trust the sourcing and handling (and understand the risk). The easiest way to stay
consistent (and avoid the “it looks done?” guessing game) is to use an instant-read thermometer inserted into the side of the patty.
Classic Burger Problems (and How to Fix Them)
Problem: “My burgers are dry.”
- Use a higher-fat blend (80/20 is a classic for a reason).
- Don’t overcook; monitor temperature.
- Don’t press the patty while cooking.
- Don’t overwork the meat when forming patties.
Problem: “My patties puff up in the middle.”
- Make a shallow dimple in the center before cooking.
- Flip once and avoid pressing (pressing can push the center up).
Problem: “My burgers fall apart on the grill.”
- Keep patties cold until cooking time.
- Make sure the grill is preheated and the grates are clean/oiled.
- Flip only when the first side is well browned and releases easily.
- Avoid adding lots of wet mix-ins (save that for meatloaf).
Problem: “My burgers taste bland.”
- Salt properly right before cooking (don’t be timid).
- Toast the buns.
- Add acidity (pickles, mustard) to balance richness.
- Use sharper toppings: dill pickles, sliced onion, or a tangy sauce.
Two “Classic-Adjacent” Variations That Still Feel All-American
1) The Classic Cheeseburger
The move: add American cheese at the end for maximum melt. It’s not fancy, but it’s deeply correct. If cheddar is your thing, go for itjust know cheddar
can split if overheated, so melt it gently.
2) The Diner-Style Stovetop Burger
No grill? No problem. Use cast iron, go hot, and get that crust. If you want a thinner “diner vibe,” make 4-ounce patties and cook a little faster.
Add a splash of water and cover briefly at the end to melt cheese quickly (the steam helps).
Serving Ideas That Make It Feel Like a Real Cookout
- Fries: classic, waffle, or oven-bakedno judgment, only salt.
- Potato salad: the creamy kind with a little mustard bite.
- Coleslaw: crunchy and bright to cut the richness.
- Pickles on the side: because one pickle is never enough.
Final Thoughts: Keep It Simple, Keep It Hot, Keep It Honest
The classic All American burger isn’t about tricks. It’s about fundamentals: good beef, gentle handling, strong heat, smart seasoning, and a bun that’s
toasted like it has a job. Nail those, and you don’t need a secret ingredient. The secret is that you didn’t mess it up.
Experience Section (About ): The All-American Burger, as Lived
My most “All American burger” moment wasn’t in a restaurant with a reclaimed-wood sign that says EAT. It was in a backyard where the folding chairs
didn’t match, the cooler lid squeaked, and someone’s speaker was playing the same summer playlist it plays every year like it’s legally obligated.
Burgers were on the menu because burgers are always on the menu when you want everyone to be happy at the same time.
The first lesson I learned the hard way: the grill doesn’t care about your confidence. I once formed patties like I was kneading bread doughserious effort,
very “I am contributing.” The result tasted fine, but the texture was weirdly springy, like the burger was trying to bounce back from my life choices.
After that, I started forming patties the gentle way: divide, shape, dimple, done. It felt almost too easy, which is usually how you know it’s right.
Second lesson: people talk about burger toppings like they’re choosing a personality. You’ve got your ketchup loyalists, mustard purists, mayo fans,
and the brave souls who do all three and refuse to apologize. Over time I noticed the best burgers weren’t the ones with the tallest towers of toppings;
they were the ones with balance. Pickles (or a little mustard) bring acidity. Lettuce adds crunch. Tomato adds freshness if it’s actually a good tomato.
And onionsraw or grilledmake everything taste more “burger-ish,” which is not scientific, but is definitely true in practice.
Then there’s the bun situation. I used to think buns were just… bread with a purpose. But the day I started toasting them was the day my burgers stopped
collapsing into a juicy, delicious mess halfway through. A toasted bun holds up. It doesn’t get soggy immediately. It tastes better. It also makes the whole
burger feel intentional, like you planned this and weren’t just improvising with whatever was left in the pantry (even if you absolutely were).
One summer, a friend brought a thermometer to a cookout and we all acted like they were being dramaticuntil we realized how consistent everything became.
No more slicing patties open and losing juices. No more “Is this pink okay?” debates. Just a quick check, a short rest, and burgers that came off the heat
juicy and reliable. The funniest part is that it didn’t make the cookout feel overly technical. It made it calmer. People could actually relax, because the
burger outcome wasn’t a mystery plot twist.
The best compliment I ever heard about a burger wasn’t “this is gourmet.” It was “this tastes like summer.” That’s what the classic All American burger is:
simple, familiar, and weirdly powerful. It’s a food that turns a random evening into an event, even if the “event” is just you, a hot pan, and the comforting
knowledge that ketchup exists.


