Table of Contents >> Show >> Hide
- Why Hydrofoils Are So Appealing in the First Place
- Why 3D Printing a Hydrofoil Sounds Easier Than It Is
- Choosing the Right Material Without Starting a Filament Soap Opera
- What Actually Goes Wrong When You Try to Print a Hydrofoil
- How to Be Smarter Than Your First Instinct
- The 500-Word Experience Section: Trying And Mostly Failing
- Final Verdict
There are few maker projects more seductive than a 3D printed hydrofoil. On paper, it sounds glorious: download or design a sleek underwater wing, hit print, bolt it to something reckless, and immediately begin gliding over the water like a budget America’s Cup team. In reality, the project usually goes sideways long before the “flying over water” part. Sometimes it goes sideways on the printer. Sometimes it goes sideways in the CAD file. Sometimes it goes sideways in the lake, where your heroic prototype discovers the exciting physics of flex, drag, and humiliation.
Still, the idea refuses to die because it makes perfect sense in theory. Hydrofoils reduce drag by lifting a hull or board upward as speed increases. Less hull in the water means less resistance, more efficiency, and a smoother ride. That is why hydrofoils show up everywhere from racing sailboats and electric ferries to e-foils and performance boating. So yes, the dream is real. The problem is that 3D printing a hydrofoil at hobby scale means trying to combine marine hydrodynamics, material science, structural engineering, waterproofing, and your own questionable patience into one single project.
This is where things get fun. Also expensive. Also wet.
Why Hydrofoils Are So Appealing in the First Place
A hydrofoil is basically an underwater wing. As it moves through water, it creates lift. Once enough lift is generated, the hull or board rises, reducing the amount of surface dragging through the water. That lower drag is the magic trick. The same basic principle helps fast ferries run more efficiently, racing sailboats hit absurd speeds, and foiling boards feel like they are ignoring normal human transportation laws.
For a builder, hydrofoils are irresistible because they look like exactly the kind of shape 3D printing should excel at: smooth curves, customized geometry, odd internal structures, and rapid iteration. If one foil shape is too thick, too thin, too short, or too ambitious, you can tweak the design and print another. In theory, that makes 3D printing the ultimate experimental tool.
And to be fair, it is a great prototyping tool. The trouble starts when people confuse “great for prototyping” with “automatically great for surviving repeated loads in water while moving at speed.” Those are not the same sentence. Not even close.
Why 3D Printing a Hydrofoil Sounds Easier Than It Is
The first problem is that hydrofoils are picky. They care about angle of attack, surface smoothness, stiffness, balance, mounting geometry, and speed. Even small errors in shape or alignment can turn a graceful lifting surface into a very expensive underwater brake. A foil does not just need to make lift. It needs to make lift efficiently, predictably, and without flexing like a cooked noodle.
The second problem is that most consumer 3D printing is done with FDM, which builds parts layer by layer. That is wonderful for fast iteration, but it also means the part is mechanically weaker between layers than within a layer. For decorative objects, that is fine. For a hydrofoil root, mast connection, bracket, or wing section that will be pushed hard by water, it is not fine. It is the engineering equivalent of building a staircase out of crackers and hoping the ocean is in a forgiving mood.
Layer Lines Are Tiny, But Their Ego Is Enormous
One of the biggest enemies of a printed hydrofoil is the humble layer line. A foil wants a smooth surface because drag loves roughness. If the wing is rough, blunt, or poorly finished, water flow becomes less cooperative. That hurts efficiency and can change the behavior of the foil more than beginners expect. In other words, your printer may produce something that looks aerodynamic from three feet away and hydrodynamically ridiculous from three inches away.
That means sanding, sealing, filling, coating, and smoothing are not optional beauty treatments. They are performance steps. If you skip them, your hydrofoil may still move through water, but so does a brick.
Watertight Is Not a Default Setting
Another common surprise is that “plastic” does not automatically mean “watertight.” FDM prints often contain microscopic gaps between extruded lines and layers. That is manageable for many projects, but for marine parts, water finds weaknesses with the determination of a tax auditor. A part that seems fine on the bench can start absorbing water, leaking, or weakening once it sees real use.
This is why sealing matters. Epoxy coatings, careful post-processing, solvent smoothing where appropriate, and thoughtful wall thickness can make a huge difference. If you are testing anything near electronics, bearings, foam cores, or metal inserts, sealing becomes even more important. Water is patient. It will wait for your confidence to peak before proving its point.
Choosing the Right Material Without Starting a Filament Soap Opera
If your first idea was PLA, let me gently place a hand on your shoulder. PLA is fantastic for quick prototypes, concept models, and learning what shape definitely does not work. It is not the dream material for a loaded hydrofoil part expected to face repeated stress, heat, sun, water, and impact. Use it for learning, not for trusting.
PETG is often the more realistic hobbyist choice for early functional testing. It offers a decent balance of strength, flexibility, printability, and moisture resistance. It is easier to print than many engineering materials and less dramatic than ABS. For brackets, test parts, housings, and low-risk foil experiments, PETG can be a smart compromise.
Nylon is where things get more serious. It is tougher, more abrasion-resistant, and mechanically more capable for demanding parts. Unfortunately, nylon is also hygroscopic, which is a fancy way of saying it drinks moisture from the air like it is training for a contest. Wet nylon prints worse, behaves worse, and can undermine the whole project before the foil even sees water. So yes, it is strong. It is also needy.
Carbon-fiber-filled nylon sounds like the winner because it is stiff, light, and engineered for structural applications. In many cases, it really is the most promising filament family for high-performance printed components. But it comes with caveats: abrasive fibers, tougher print requirements, careful drying, hardened nozzles, and a tendency for hobbyists to assume “carbon fiber” means “invincible.” It does not. It means “better, if you know what you’re doing.” Two very different lifestyles.
ASA and ABS also have a role, especially for outdoor parts where UV exposure matters. But for underwater, load-bearing hydrofoil pieces, the real conversation usually comes down to PETG for easier testing, nylon for toughness, and carbon-fiber-reinforced nylons for higher stiffness when the printer and operator are up to the job.
What Actually Goes Wrong When You Try to Print a Hydrofoil
Most hydrofoil failures are not dramatic in the movie sense. They are dramatic in the “why does this feel so slow, unstable, and slightly cursed?” sense. Here are the usual culprits.
1. The Foil Never Reaches Lift-Off Speed
Hydrofoils need enough speed to generate enough lift. That sounds obvious, but it is the trap that swallows many DIY projects. A printed foil can be geometrically decent and still fail because the motor, rider, hull, or towing setup simply cannot push the system fast enough. This is why many clever small-scale hydrofoil builds end up acting like extra drag instead of magical lift generators.
2. The Structure Flexes Under Load
Flex is sneaky. A foil that looks rigid in your hand can bend enough under load to change its angle, dump efficiency, or create unstable handling. Sometimes the wing is the weak point. Sometimes it is the mast. Sometimes it is the mount. Sometimes it is the screws tearing into plastic like they are trying to escape. The water does not care where the weakness is. It just cashes the check.
3. The Surface Finish Is Too Rough
Layer lines, support scars, poor seams, or lazy finishing can all add drag. A foil does not have to be mirror-polished to work, but it does need to be smoother than many first prints are. The leading edge especially deserves respect. If that front section is ugly, the rest of the foil spends its day apologizing for it.
4. The Geometry Is Fine, but the Whole Setup Is Wrong
A hydrofoil does not work alone. It is part of a full system: board or hull weight, center of mass, strut height, mounting angle, propulsion, rider input, and water conditions. A decent foil on a bad setup still performs badly. This is the part where many builders realize they did not actually design a hydrofoil system. They designed a nice-looking piece of plastic and gave it a water-related assignment.
How to Be Smarter Than Your First Instinct
The smartest approach is not to 3D print a final, fully loaded hydrofoil and hope for greatness. It is to use 3D printing strategically. Print test foils. Print scale models. Print molds. Print alignment jigs. Print mounting templates. Print fairings. Print prototypes for tow-tank-style testing. Use the printer to accelerate learning, not to replace engineering judgment.
For higher-performance builds, many makers get better results by printing a plug or mold and then creating the real foil in fiberglass or carbon composite. That route preserves the speed of iteration while handing the final structural job to materials that are much happier in a marine load environment. Another strong option is using higher-end processes such as SLA or powder-based systems for parts that need more predictable strength or watertightness, though cost quickly joins the conversation and starts acting important.
In other words, 3D printing is often best used to get you to the hydrofoil, not necessarily to become the hydrofoil in its final form.
The 500-Word Experience Section: Trying And Mostly Failing
My favorite phase of any project like this is the first 48 hours, when confidence is completely unearned but feels wonderful. You sketch a wing. You look at a few foil profiles. You whisper phrases like “laminar flow” and “lift coefficient” as if the printer can hear you and might become more accurate out of respect. Then you hit print and start imagining your future as a minor legend of DIY hydrodynamics.
The first failure is usually polite. The print finishes, but the part looks like it was extruded by a nervous spaghetti machine. The leading edge has a seam. The trailing edge is thicker than your dignity. One corner lifted on the bed, which is not ideal for a part whose entire personality depends on symmetry. Still, optimism survives. You sand it. You squint. You say, “Honestly, that’s probably fine,” which is the international anthem of incoming failure.
Then comes assembly. This is when the project begins revealing its true hobbies. Holes that looked perfectly aligned in CAD turn out to be involved in a long-distance relationship. The bracket fits, except for the part where it doesn’t. You tighten one screw and discover that printed plastic has very strong opinions about clamping force. Something creaks. You pretend not to hear it. This is called engineering denial.
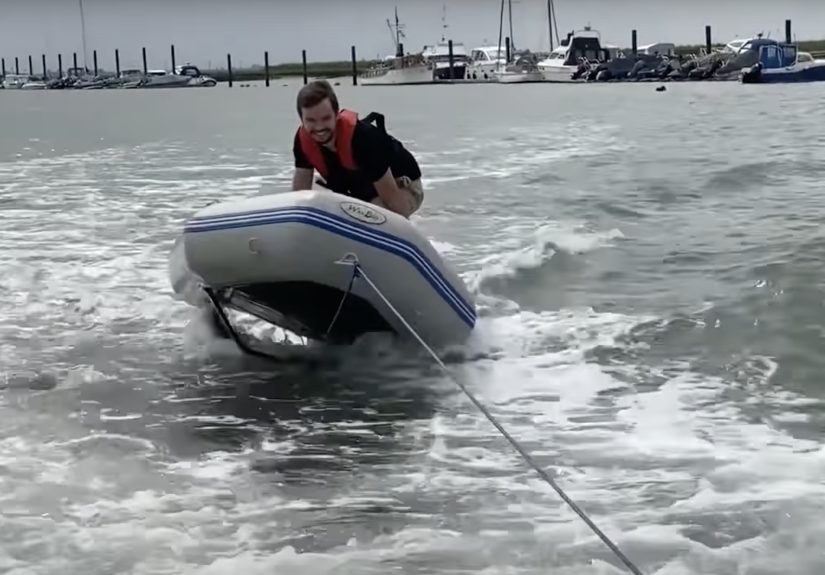
The first water test is magical for about four seconds. The craft moves. The foil is attached. The future seems available. Then one of three things happens. Either nothing lifts, which is the most common result; the nose behaves like it is trying to solve a geometry puzzle with brute force; or the whole setup produces just enough weird upward force to feel promising before immediately becoming unstable. It is not flight. It is an argument with physics.
So you return home and make “small improvements,” which is maker code for redesigning half the system while insisting the original concept was still excellent. You increase thickness in the root. You reinforce the mount. You reduce the angle. You switch from PLA to PETG, then flirt with nylon, then spend an afternoon learning that moisture in filament is not a myth invented by fancy people. The printer now lives in a constant state of production, like a tiny plastic bakery with worse smells and fewer croissants.
Eventually, progress appears. The foil tracks straighter. The structure flexes less. The surface gets smoother because you finally admit sanding is part of the job, not an optional act of virtue. At this point, the project teaches its cruelest lesson: better results do not arrive as a cinematic breakthrough. They arrive as fewer weird noises, slightly improved stability, and one glorious test run that lasts long enough for you to shout something triumphant before the setup returns to chaos.
And honestly, that is why the whole thing is fun. Printing a hydrofoil is rarely a clean success story. It is a chain of almost-worked moments. But every failure is educational in a brutally efficient way. Too much flex? You learn structure. Too much drag? You learn finishing. No lift? You learn speed, balance, and humility. By the time the project is halfway decent, you know far more than when you started, and you have a workbench full of beautiful plastic evidence that learning occurred the hard way.
Final Verdict
So, can you 3D print a hydrofoil? Yes, sort of. You can absolutely prototype one, study one, test one, and even create functional low-risk components with the right design, material, and expectations. But if the dream is a strong, smooth, fully loaded hydrofoil that shrugs off water, stress, and speed using a casual hobby print and a heroic amount of confidence, the answer is usually no.
The better answer is that 3D printing is an excellent hydrofoil development tool. It is superb for iteration, concept validation, molds, jigs, and learning fast. It is less superb when asked to ignore hydrodynamics, mechanical loads, layer adhesion, surface finish, and water intrusion all at once. The sweet spot is knowing where printed plastic helps and where it should hand the baton to better materials or better manufacturing methods.
That may sound less romantic than “I printed a perfect hydrofoil over the weekend,” but it is far more useful. And in the maker world, useful usually wins. Not immediately, of course. First it fails in three new ways. Then it wins.


