Table of Contents >> Show >> Hide
- Tomato Basics: Know What You’re Growing
- Step 1: Plan Your Tomato Timeline
- Step 2: Starting Tomato Seeds Indoors
- Step 3: Potting Up and Building Strong Plants
- Step 4: Hardening Off Without the Drama
- Step 5: Transplanting Tomatoes into the Garden
- Step 6: Everyday Tomato Care (Watering, Feeding, Pruning)
- Step 7: Troubleshooting Common Tomato Problems
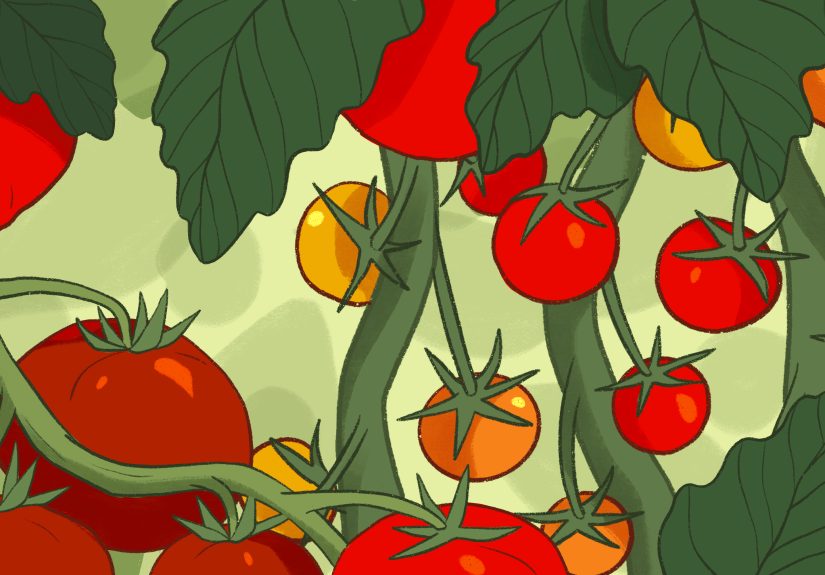
- Step 8: Harvesting Tomatoes at Peak Flavor
- Real-Life Tomato Growing Lessons & Extra Experience
- 1. Don’t start seeds too early (your windowsill is not a jungle)
- 2. Good light fixes a lot of seedling drama
- 3. Watering is a relationship, not a chore
- 4. Mulch is your summer best friend
- 5. Don’t panic when something goes wrong
- 6. Grow at least one “just for fun” variety
- 7. The confidence boost is real
If you’ve ever sliced into a sun-warm tomato straight from the garden, you already know: store-bought tomatoes are just tomato-shaped objects by comparison. Growing tomatoes from seed may sound like a “level 10 gardener” move, but it’s absolutely doableeven if your current houseplant record is… mixed.
This guide walks you through the whole journey, from that tiny seed to the juicy harvest, with plenty of practical tips and a few “learned the hard way” moments so you don’t have to repeat them. We’ll talk timing, seed starting, hardening off, planting, everyday care, troubleshooting, and knowing exactly when to pick your homegrown beauties.
Whether you’re working with a sprawling backyard or a single sunny balcony, you can grow tomatoes from seed like a pro and keep them happy all season long.
Tomato Basics: Know What You’re Growing
Before you grab the seed packets, it helps to understand a few key tomato terms. This makes it easier to choose the right varieties and plan your garden.
Determinate vs. indeterminate
- Determinate tomatoes (often called “bush” tomatoes) grow to a set size and then stop. They tend to set most of their fruit over a relatively short windowgreat if you want a big harvest for canning or sauce.
- Indeterminate tomatoes keep growing and producing all season until frost takes them down. They need steady support (stakes, cages, or trellises) but reward you with ongoing harvests, perfect for fresh eating.
Days to maturity
Most tomato seed packets list a “days to maturity” numberoften 60–85 days from transplanting outdoors to ripe fruit, depending on variety and climate. Short-season types are helpful in cooler areas; long-season beefsteaks need more patience, warmth, and sunshine.
Sun, soil, and temperature
- Sunlight: Tomatoes love full sunaim for at least 6–8 hours of direct light per day.
- Soil: They thrive in rich, well-draining soil with a slightly acidic pH around 6.2–6.8.
- Temperature: Tomatoes are warm-season plants. They hate frost and sulk when nights are cold. Wait until after your last frost and until soil temperatures are consistently above about 60°F before planting outside.
Step 1: Plan Your Tomato Timeline
Timing is half the battle with growing tomatoes from seed. Start too early, and your seedlings become tall, stressed, and leggy indoors. Start too late, and you’re still waiting for ripe fruit while your neighbors are making salsa.
The sweet spot? For most gardeners, that’s starting tomato seeds indoors 6–8 weeks before your local last frost date.
- Look up your USDA Hardiness Zone and average last frost date.
- Count backward 6–8 weeks from that datethat’s your seed-starting window.
- Plan to transplant tomatoes outside a week or two after the last frost, once nights are reliably above the low–mid 50s°F.
If you’re gardening in a hot climate with a long season, you can often sow a bit later and still get plenty of fruit. In cooler regions, that 6–8 week head start is gold.
Step 2: Starting Tomato Seeds Indoors
Gather your supplies
You don’t need a fancy greenhouse to start tomatoes, but a few basic supplies make a big difference:
- Clean seed trays or small pots with drainage holes
- Quality seed-starting mix (light, sterile, and well-draining)
- Tomato seeds (choose a mix of slicers, cherries, and maybe an heirloom or two for fun)
- Clear humidity dome or plastic wrap (optional but helpful for germination)
- Grow lights or a very bright, south-facing window
- Spray bottle or gentle watering can
- Heat mat (optional but speeds germination, especially in cool houses)
Sowing seeds like a pro
- Fill containers with moist seed-starting mix and gently firm the surface.
- Sow tomato seeds about ¼ inch deep. Two seeds per cell or pot is fine; you can thin later.
- Label varieties clearly. Future you will not remember which mystery plant is the ‘Sun Gold’.
- Cover lightly with mix, mist well, and cover trays with a humidity dome or plastic wrap to hold moisture.
Tomato seeds usually germinate in 5–10 days when kept warm (around 70–80°F). Peek daily and remove the cover as soon as seedlings emerge to prevent fungal problems.
Light, water, and first food
Once seedlings pop up, their main needs are light, consistent moisture, and gentle feeding:
- Place seedlings under grow lights for 14–16 hours per day, just a few inches above the leaves. Without strong light, they stretch and become floppy.
- Keep the mix evenly moist but never soggy. Bottom-watering (pouring water into the tray so pots soak it up) encourages strong root growth and avoids splashing stems.
- Once seedlings have their first set of “true leaves,” feed with a diluted, balanced liquid fertilizer about every 1–2 weeks, especially if your mix doesn’t contain nutrients.
If several seeds sprouted in one cell, snip the weaker ones at soil level rather than pulling them out, which can disturb roots.
Step 3: Potting Up and Building Strong Plants
Tomatoes are one of the few vegetables that actually like being planted deep. When seedlings have 2–3 sets of true leaves and start to feel crowded, it’s time to pot them up.
- Choose slightly larger pots (3–4 inches wide).
- Fill with moist potting mix.
- Gently remove each seedling, supporting the stem and root ball.
- Plant deeper than before, covering part of the stem up to the first leaves. Tomato stems grow extra roots along buried sections, making stronger plants.
Continue giving bright light, consistent moisture, and periodic feeding. A small fan on low nearby helps strengthen stems and reduce fungal issues by improving air circulation.
Step 4: Hardening Off Without the Drama
Seedlings grown indoors are like gym members who have only ever used the yoga studiothey’re not ready for a surprise marathon in full sun and wind.
Hardening off means gradually exposing your tomato plants to outdoor conditions so they acclimate instead of collapsing in shock.
About 7–10 days before transplanting outside:
- Day 1–2: Put seedlings outdoors in bright shade or dappled light for 1–2 hours, then bring them back in.
- Day 3–4: Increase outdoor time to 3–4 hours and introduce a bit of gentle morning sun.
- Day 5–7: Gradually extend to most of the day, with more direct sun.
- Day 8–10: If nights are mild (above 50°F), you can leave them out overnight.
If plants ever look wilted, scorched, or wind-whipped, reduce exposure time and ease up. The goal is “toughened up,” not “traumatized.”
Step 5: Transplanting Tomatoes into the Garden
Once the danger of frost is past and your soil has warmed, it’s moving day. Pick a sunny spot with good drainage and room for airflowcrowded, shaded tomatoes are disease magnets.
Soil prep and spacing
- Work in compost or well-rotted manure to improve soil structure and fertility.
- Aim for about 3 feet between plants in rows, with space between rows for walking and airflow.
- Set up supports (cages, stakes, or trellises) at planting time so you don’t damage roots later.
Planting deeply
- Dig a hole deep enough to bury part of the stem, or dig a shallow trench if seedlings are tall and leggy.
- Remove lower leaves so only the top cluster or two remains above soil level.
- Place the plant in the hole or lay it sideways in the trench, gently bending the top upward.
- Backfill with soil, firm gently, and water thoroughly to settle soil around roots.
Finish with a 2–3 inch layer of organic mulch (straw, shredded leaves, or grass clippings that are not treated with herbicides). Mulch conserves moisture, stabilizes soil temperature, and helps reduce weeds.
Step 6: Everyday Tomato Care (Watering, Feeding, Pruning)
Watering and mulching
Tomatoes like consistent moisturenot a roller-coaster of drought and flood. Aim for about 1–2 inches of water per week from rain and irrigation combined.
- Water deeply and less often rather than a little every day.
- Use drip irrigation or a soaker hose whenever possible to keep foliage dry and reduce disease.
- Maintain mulch to lock in moisture and limit swings that can cause blossom-end rot and cracking.
Fertilizing wisely
Overfeeding tomatoesespecially with high-nitrogen fertilizercreates giant leafy plants with very few fruits. The goal is balanced nutrition.
- Work in a slow-release, balanced or slightly phosphorus-tilted fertilizer at planting (something formulated for vegetables or tomatoes).
- Side-dress with compost or a light dose of fertilizer a few weeks after planting and again when the first fruits set, if plants look pale or growth slows.
- Skip constant heavy feeding; more is not better here.
Pruning and support
Most indeterminate tomatoes benefit from pruning and strong support to keep fruit off the ground and improve airflow:
- Use tall stakes, sturdy cages, or string trellises.
- Gently tie stems to supports with soft ties or strips of fabric.
- For indeterminate plants, many gardeners remove some of the “suckers” (new shoots forming in the leaf axils) to direct more energy into fewer, larger clusters of fruit and to open the canopy.
Determinate tomatoes typically need less pruningjust remove damaged leaves and any branches touching the soil.
Step 7: Troubleshooting Common Tomato Problems
Even the best-tended tomatoes run into bumps along the way. The good news: most common issues are fixable with simple adjustments.
Blossom-end rot
Blossom-end rot shows up as a brown, sunken spot at the bottom of the fruit. It’s not a disease you can spray away; it’s usually a calcium and moisture imbalance issue.
- Keep watering consistent; avoid long dry spells followed by heavy soaking.
- Maintain mulch to reduce moisture swings.
- Ensure your soil pH is in a good range and that there’s adequate calcium (soil tests help here).
Leaf spots, blights, and general grossness
Spots, yellowing, or browning leaves can come from various fungal diseases. To reduce problems:
- Water at the base of plants, not overhead.
- Space plants well for airflow and prune lower leaves that touch the soil.
- Rotate where you grow tomatoes and their relatives (peppers, eggplant, potatoes) so they’re not in the same bed every year.
Cracking and catfacing
Sudden growth spurts after heavy rain can cause cracks in ripening fruit. Try to keep watering steady, and harvest ripe fruit promptly. Some heirloom varieties are just more prone to quirky shapes and cracks; they still taste fantastic.
Step 8: Harvesting Tomatoes at Peak Flavor
After weeks of care, this is the fun part. Most tomatoes are ready to harvest when they’ve reached full color, feel slightly soft when gently squeezed, and come off the vine with a light twist.
- Pick early in the day when fruit is cool for best flavor and texture.
- If frost or storms are coming, you can harvest nearly ripe tomatoes and let them finish coloring indoors.
- Never refrigerate tomatoes unless absolutely necessaryit dulls flavor and changes texture.
Depending on your variety and growing conditions, you’ll usually start harvesting 60–85 days after transplanting and continue until cold weather shuts things down.
Real-Life Tomato Growing Lessons & Extra Experience
Textbook advice is great, but real gardens are full of surprises. Here are some experience-based tips that can save you time, stress, and a few tomato plants.
1. Don’t start seeds too early (your windowsill is not a jungle)
Almost every gardener has made the same mistake: starting seeds way too soon out of excitement. It feels productive… until you’re stuck babysitting giant, leggy seedlings for weeks while it’s still too cold outside.
When tomatoes outgrow their containers indoors, they become root-bound, more vulnerable to stress, and harder to harden off. Sticking to that 6–8 week window before last frost really does pay off. If you find yourself tempted to sow in January for a May plantingstep away from the seed packets and plan your garden layout instead.
2. Good light fixes a lot of seedling drama
Many “weak seedling” problems trace back to one thing: not enough light. Tall, pale tomato seedlings leaning toward the window like they’re trying to escape are practically begging for a grow light. Even an affordable LED shop light positioned a few inches above the seedlings can transform them from flimsy to sturdy.
If you absolutely must rely on a window, rotate trays daily and keep them as close to the glass as possible without touching. It’s not perfect, but it’s better than leaving seedlings in dim corners of the house.
3. Watering is a relationship, not a chore
One of the most valuable skills you’ll develop as a tomato grower is learning how the soil looks and feels at different moisture levels. Over time, you’ll start to notice subtle clues: the way dry soil lightens in color, how the pot feels lighter when lifted, or how leaves droop slightly before a drink is needed.
Instead of sticking to a rigid “water every day” rule, let the soil and the plants guide you. Deep, less frequent watering encourages roots to reach down rather than staying shallow and dependent on you. That resilience pays off in hot, dry spells when you can’t be out there with the hose every afternoon.
4. Mulch is your summer best friend
If you only adopt one “advanced” technique, make it mulching. A generous layer of organic mulch keeps weeds down, soil moisture steady, and roots cooler during heat waves. It also helps prevent soil-borne diseases from splashing onto the lower leaves when it rains.
Gardeners who start out skeptical often become mulch evangelists after one season of seeing the difference. Two tomato beds side by sideone mulched, one barequickly show you which plants are less stressed and easier to care for.
5. Don’t panic when something goes wrong
At some point, you’ll walk out to your garden and see something alarming: yellow leaves, spots, a weirdly shaped tomato, or a plant that looks half-eaten. Take a breath.
Most problems have straightforward solutions: remove diseased leaves, adjust watering, improve airflow, pick off pests by hand, or use organic controls if necessary. A single funky leaf does not mean the season is over. Tomatoes are more resilient than they look, and a little problem-solving goes a long way.
6. Grow at least one “just for fun” variety
Sure, it’s smart to plant reliable favorites like classic red slicers. But part of the joy of growing tomatoes from seed is exploring varieties you’ll never see at the grocery storestriped, purple, yellow, heart-shaped, cherry-sized, or giant beefsteaks that barely fit in your hand.
Choosing one or two “fun” varieties each year keeps the garden exciting and gives you something new to brag about when you bring a rainbow of tomatoes to the dinner table or share extras with neighbors.
7. The confidence boost is real
There’s something uniquely satisfying about watching tomatoes go from tiny, unassuming specks in your hand to towering plants loaded with fruit. The process teaches patience, observation, and problem-solvingand it rewards you with salads, sauces, and snacks that taste like summer itself.
Once you’ve grown tomatoes from seed to harvest, other gardening projects feel less intimidating. Suddenly, starting peppers, herbs, or flowers seems totally within reach. That confidence and curiosity are the real long-term harvest.
So grab those seeds, set your calendar, and claim a sunny corner for your future tomato jungle. With thoughtful timing, good light, steady care, and a bit of experimentation, you’ll be pulling sun-ripened tomatoes off the vine and wondering why you ever settled for supermarket fruit.


