Table of Contents >> Show >> Hide
- Why Cut and Paste in Photoshop Feels Different Than Other Apps
- Method 1: Use the Classic Edit Menu (Best for Basic Pixel Selections)
- Method 2: Drag and Drop With the Move Tool (Fastest Workflow)
- Method 3: Use Paste Special (Best for Precision and Pro-Level Composites)
- Keyboard Shortcuts Cheat Sheet for Cut and Paste on Photoshop
- Common Cut-and-Paste Problems in Photoshop (and How to Fix Them)
- Best Use Cases for Each Method
- Experience Notes: What Actually Happens When You Use These Methods in Real Projects
- Conclusion
If you’ve ever copied something in Photoshop and then pasted… absolutely nothing useful, welcome to the club. Photoshop’s cut-and-paste workflow is powerful, but it can also be a little dramatic. Sometimes you’re copying pixels, sometimes you’re copying a whole layer, and sometimes Photoshop politely pastes your content somewhere mysterious and off-screen like it’s playing hide-and-seek.
The good news: once you understand the three simple ways to cut and paste on Photoshop, your workflow gets much faster. In this guide, you’ll learn the classic menu method, the drag-and-drop method with the Move tool, and the Paste Special method for cleaner, more professional results. I’ll also cover shortcuts, common mistakes, and a few real-world examples so you can stop wrestling your layers and get back to creating.
Why Cut and Paste in Photoshop Feels Different Than Other Apps
In a regular text editor, copy and paste is simple: text in, text out. In Photoshop, you’re dealing with pixels, selections, layers, masks, effects, and document sizes. That means the result depends on what is selected and where you paste it.
For example, copying a selection of pixels is different from copying a full layer. Pasting a clipped image into a shape is different from pasting it into the center of a document. And if your source and destination files use different resolutions, the pasted object can look oddly large or tiny. None of this is brokenthis is just Photoshop being Photoshop.
Once you know which method to use for which job, cut and paste becomes one of the fastest editing techniques in your toolkit.
Method 1: Use the Classic Edit Menu (Best for Basic Pixel Selections)
This is the easiest method and the best place to start if you’re learning how to cut and paste in Photoshop. It’s perfect for moving part of an image (like a product, logo, or person) from one place to another.
Step 1: Make a Selection
Before you copy anything, select what you want. You can use tools like the Marquee, Lasso, Object Selection, or Quick Selection tools. If nothing is selected, Photoshop may copy the entire active layer instead of the small area you intended.
Example: If you want to move a coffee mug from one photo into another, select the mug first. Don’t just click and pray. Photoshop rewards specificity.
Step 2: Copy or Cut the Selection
Go to the Edit menu and choose one of these:
- Copy – duplicates the selected pixels
- Cut – removes the selected pixels from the original area and places them on the clipboard
- Copy Merged – copies the visible result from all visible layers in the selected area
This is where many beginners make a smart-but-slightly-chaotic mistake: they use regular Copy when they really need Copy Merged. If your design uses multiple visible layers (like text + shadow + shape), Copy Merged grabs the combined visible result instead of just one layer’s pixels.
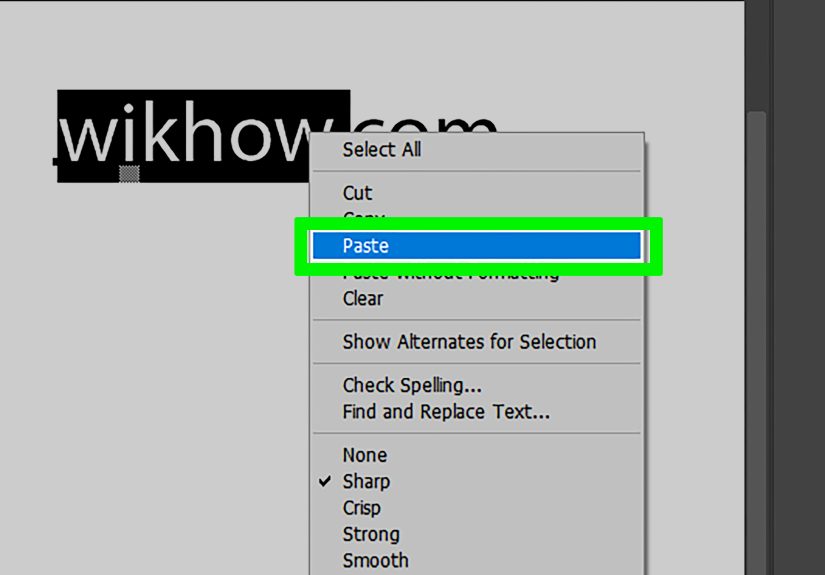
Step 3: Paste Into the Same File or Another File
Open the destination image (or click into another open Photoshop document), then choose Edit > Paste. Photoshop will paste the copied content onto a new layer, which is great because it keeps your original layer intact.
If the pasted content looks too big or too small, don’t panic. This usually happens because the source and destination images have different resolutions. Use Free Transform (Ctrl/Cmd + T) to resize it, or match the image resolution before copying for cleaner results.
When to Use Method 1
- Moving a selected object from one image to another
- Copying a specific area for retouching
- Cutting an element out of a background for a quick composite
- Creating simple layer-based edits without advanced masks
Method 2: Drag and Drop With the Move Tool (Fastest Workflow)
If you want speed, this is your method. Photoshop lets you copy selections (or even entire layers) by dragging with the Move tool. This often feels smoother than the clipboard method and is great when you’re moving elements between open documents.
Option A: Duplicate a Selection or Layer by Dragging
Select the Move tool, then hold Alt (Windows) or Option (Mac) and drag. Photoshop creates a copy as you drag. It’s basically copy-and-paste without the menu clicks.
This trick is especially handy when duplicating icons, shapes, or repeated design elements. Need five stars in a row? Alt/Option-drag one star, then repeat. Congratulations, you now have a workflow and not just vibes.
Option B: Drag Between Two Open Photoshop Documents
With both files open, click the selected content (or active layer) and drag it toward the other document tab. Pause until the second document becomes active, then drop the content onto the canvas.
In many workflows, holding Shift while dragging and dropping helps align the pasted layer more predictably in the destination document. This is a great habit when you’re building templates or swapping graphics in the same position across multiple images.
Why This Method Is Great
- It avoids extra menu clicks
- It can be faster than using the clipboard for repetitive work
- It keeps your momentum when creating collages, banners, or social graphics
- It works beautifully with the Move tool and layer-based editing
Bonus tip: if no pixels are actively selected, dragging can copy the entire active layer instead. That’s super useful when you want the whole layerbut super confusing when you don’t. So always glance at your selection before dragging.
Method 3: Use Paste Special (Best for Precision and Pro-Level Composites)
If Method 1 is “quick and easy,” Method 3 is “clean and precise.” Paste Special gives you control over where and how Photoshop pastes content, especially when working across multiple files or building layered composites.
Paste In Place
Use Edit > Paste Special > Paste In Place when you want the copied content to land in the same relative position as it was in the original document. This is a lifesaver for templates, mockups, and batch graphics.
Example: Let’s say you’re creating six ad sizes with the same logo in the bottom-right corner. Regular Paste may dump the layer into the center. Paste In Place keeps the logo positioned correctly, which means fewer manual adjustments and fewer muttered complaints.
Paste Into (and Paste Outside)
Use Edit > Paste Special > Paste Into when you want to paste content inside a selection. Photoshop automatically creates a layer mask, which gives you a non-destructive result and lets you move the image inside the masked area.
This is one of the easiest ways to put a photo inside a TV screen, billboard, phone frame, or text shape. It’s clean, flexible, and surprisingly satisfying.
Paste Outside works similarly, but places the pasted image around the selected area. It’s less commonly used, but very helpful for creative mask effects.
Copy and Paste Whole Layers
Photoshop also supports copying and pasting selected layers (not just pixels) inside one file or between documents. This preserves masks, vector masks, and layer effects, which is exactly what you want when moving polished design elements.
One important detail: when layers are selected, the Cut command may be unavailable (grayed out). That’s normal. If you need a separate cut-like action for layer content, use Layer Via Cut or delete/move layers directly in the Layers panel depending on your goal.
Keyboard Shortcuts Cheat Sheet for Cut and Paste on Photoshop
If you want to work faster (and look cooler doing it), shortcuts matter. Here are the most useful ones for Photoshop cut and paste shortcuts:
Core Shortcuts
- Copy: Ctrl + C (Windows) / Cmd + C (Mac)
- Cut: Ctrl + X (Windows) / Cmd + X (Mac)
- Paste: Ctrl + V (Windows) / Cmd + V (Mac)
- Paste In Place: Ctrl + Shift + V (Windows) / Cmd + Shift + V (Mac)
- Paste Into: Alt + Shift + Ctrl + V (Windows) / Option + Shift + Cmd + V (Mac)
Layer-Related Time Savers
- Layer Via Copy: Ctrl + J (Windows) / Cmd + J (Mac)
- Layer Via Cut: Shift + Ctrl + J (Windows) / Shift + Cmd + J (Mac)
- Free Transform: Ctrl/Cmd + T
- Duplicate by Dragging: Alt-drag (Windows) / Option-drag (Mac) with Move tool
If shortcuts stop working or you want to customize them, Photoshop has a Keyboard Shortcuts dialog. You can view, edit, and save shortcut sets to improve your workflowespecially useful if you do repetitive production work.
Common Cut-and-Paste Problems in Photoshop (and How to Fix Them)
1) “Why did Photoshop paste my image in the middle?”
That’s regular Paste behavior when copying layers. Use Paste In Place if you want the original positioning preserved relative to the source file.
2) “Why is the pasted object the wrong size?”
Different document resolutions can make pasted content look mismatched. Use Free Transform or match image resolution settings before copying and pasting.
3) “Why is Cut grayed out?”
If you selected whole layers in the Layers panel, Cut can be unavailable. That’s expected behavior. Use layer commands, delete the layer, or use Layer Via Cut when working with selected pixel areas.
4) “Why did I paste the wrong thing?”
You may have copied the wrong layer, or copied only one layer when you needed the visible combination. Try Copy Merged if your final look depends on multiple visible layers.
5) “My shortcuts are weird now.”
Photoshop supports custom shortcut files, so your setup may have changed. Open the Keyboard Shortcuts screen and check which shortcut set is active. If needed, switch back to a default set or load a saved one.
Best Use Cases for Each Method
Use Method 1 (Edit Menu) When…
- You’re new to Photoshop and want a reliable, step-by-step workflow
- You’re copying a precise pixel selection
- You need Copy Merged for visible multi-layer output
Use Method 2 (Drag and Drop) When…
- You’re duplicating objects quickly
- You’re building layouts with repeated elements
- You’re moving content between open files all day long
Use Method 3 (Paste Special) When…
- You need exact alignment between documents
- You’re compositing images and want non-destructive masks
- You’re creating templates, mockups, or production graphics
Experience Notes: What Actually Happens When You Use These Methods in Real Projects
Here’s the part most tutorials skip: the “real life” side of using cut and paste in Photoshop. In actual work, you rarely use just one method. You bounce between all three depending on the project. If I’m building a quick social media graphic, I usually start with the classic Edit menu because it’s simple and foolproof. I select an object, copy it, paste it, and move on. But once the project gets more layeredlogos, shadows, texture overlays, text, adjustment layersthe workflow changes fast.
The biggest time-saver in real projects is learning when not to use regular Paste. For example, if I’m creating multiple banner sizes, regular Paste can make every layer land in the center, which means re-aligning each one again and again. That turns a two-minute task into a twenty-minute chore. Paste In Place fixes that instantly. It sounds like a small feature, but it’s one of those “where have you been all my life?” Photoshop moments.
Another common experience: people assume cut and paste is always destructive. It doesn’t have to be. When you use Paste Into, Photoshop creates a layer mask automatically, and that gives you flexibility. You can reposition the image inside the mask, refine the edges, paint black or white on the mask, and keep your original content safe. That’s a huge upgrade from the beginner habit of erasing pixels and hoping for the best. (We’ve all done it. We’ve all regretted it.)
The Move tool drag method also becomes more powerful the longer you use Photoshop. At first, it feels like a shortcut trick. Later, it becomes second nature. Need a duplicate icon? Alt/Option-drag. Need to move a shape from one layout to another? Drag it over. Need to build a collage? Drag, drop, mask, repeat. The speed gain is real, especially when deadlines are tight and your coffee is no longer helping.
One practical lesson that saves frustration: always watch the Layers panel before copying. Many “Photoshop pasted the wrong thing” problems happen because the wrong layer was active, or because the user copied a selection from one layer while expecting visible content from several layers. If the artwork looks different after pasting, check whether you needed Copy Merged instead of Copy. That one detail solves a lot of mystery behavior.
I’ve also seen plenty of confusion around shortcuts, especially on teams. One person customizes a shortcut set, another person opens the file, and suddenly everyone swears Photoshop is broken. It’s usually not brokenit’s just using a different shortcut configuration. That’s why it helps to know where the Keyboard Shortcuts settings live and how to reset or load a shortcut set. Small knowledge, big sanity boost.
In short, the best Photoshop users aren’t just memorizing commands. They understand which cut-and-paste method fits the job: classic Copy/Paste for quick edits, Move tool drag for speed, and Paste Special for precision. Once you build that habit, Photoshop starts feeling less like a puzzle and more like a creative playground.
Conclusion
Mastering 3 simple ways to cut and paste on Photoshop can dramatically improve your editing speed and make your projects cleaner. Start with the classic Edit menu to learn the basics, use the Move tool drag method when you want speed, and switch to Paste Special when you need accurate placement or a clean masked composite.
The magic is not in memorizing every commandit’s in knowing which method fits the moment. Once you do that, Photoshop stops feeling “complicated” and starts feeling incredibly efficient. And yes, you’ll still occasionally paste something into the wrong document tab. That’s tradition.


